One hairstyle can change your whole wedding mood. The best part is seeing how small choices add up to a big “wow.”
Here are wedding hair transformations that feel real, wearable, and fun to plan. Each idea includes what changes, why it works, and how you can make it yours.
1. Soft Classic Low Bun With a Ribbon Finish
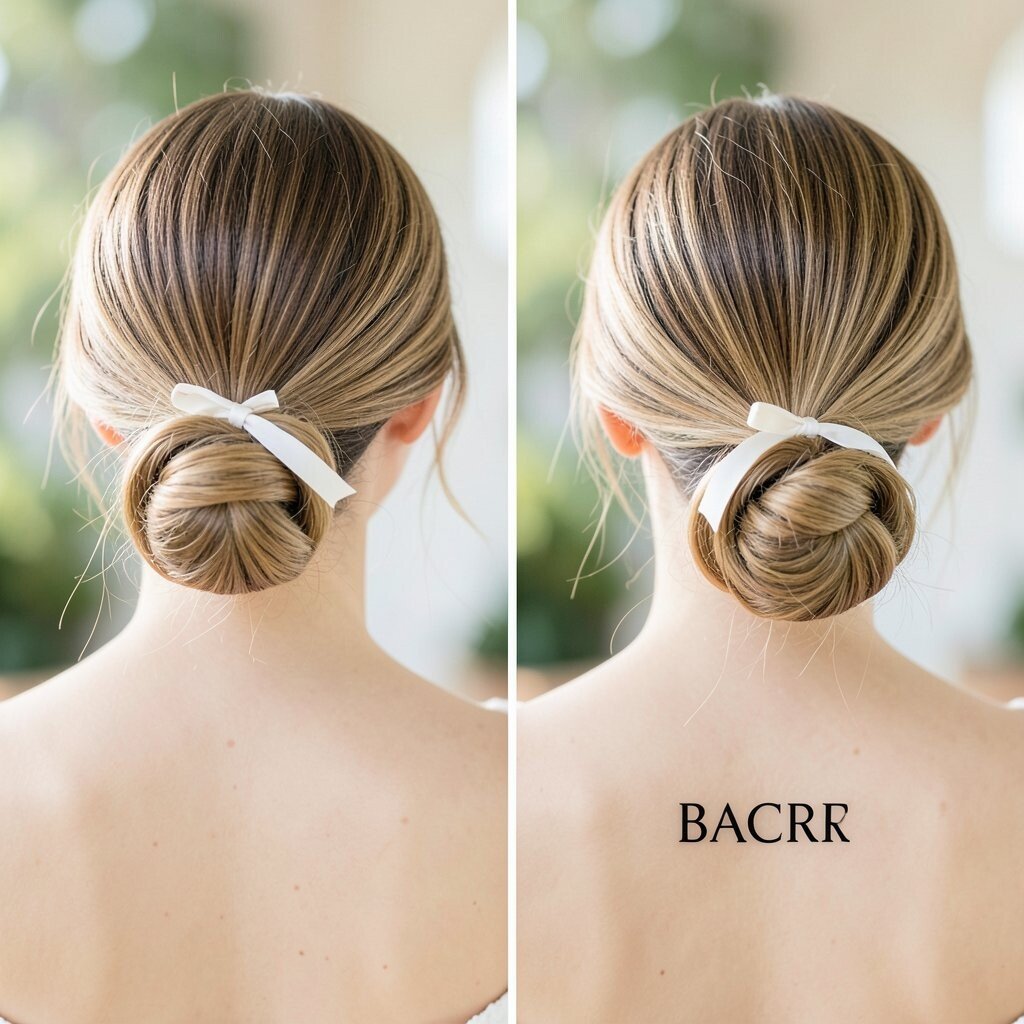
Before, the hair looks a bit flat and uniform, like it’s doing its best to stay in place. After, the same length turns into a smooth low bun with gentle movement and a ribbon that catches the light.
You’ll love how polished it looks from every angle, especially in photos when you want your face to be the focus. It also helps keep flyaways calm, which is a real comfort during outdoor or spring weddings.
To get the look, start with a light smoothing cream on damp hair, then blow-dry in the direction you want the bun to sit. Add soft waves at the ends before gathering, so the bun doesn’t look too tight. Finish with a ribbon or thin satin tie that matches your dress details, like buttons, a sash, or lace trim.
2. Romantic Half-Up Twist With Loose Face-Framing Waves
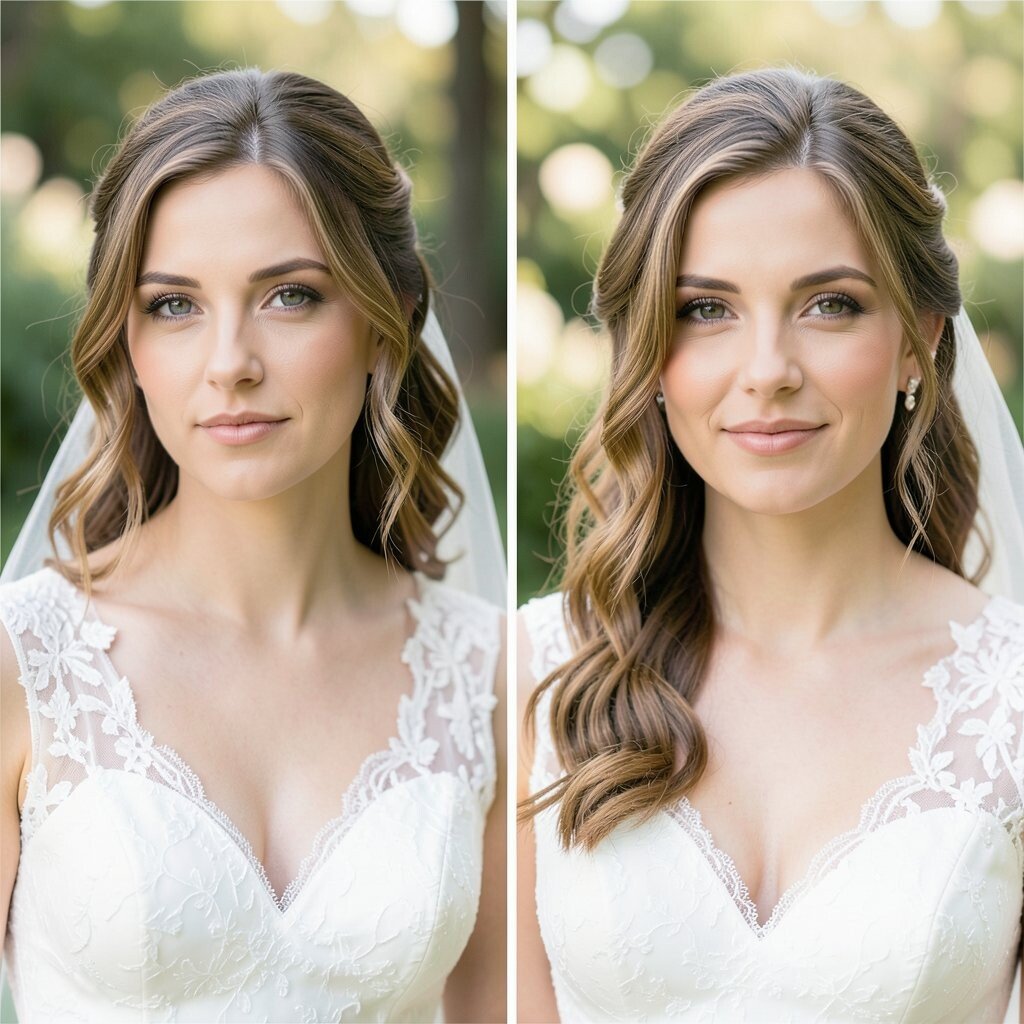
Before, the waves can feel messy, and your hair might fall forward every time you turn your head. After, a half-up twist lifts the crown while the rest stays airy and flowy.
This style gives you the best of both worlds: it keeps hair off your veil or accessories while still showing natural texture. It’s especially flattering for people who want a soft, dreamy vibe rather than a fully pinned-up look.
Try twisting sections starting near the temples, then secure with discreet pins that match your hair color. Use a flexible hold hairspray so the waves move when you walk down the aisle. Personalize it by adding a small pearl barrette or a delicate hair vine where the twist meets the rest of your hair.
If you’re thinking about cost, consider starting with styling at home and reserving a salon visit only for the day-of finishing. Many stylists can adjust a simple half-up plan quickly without needing a full hair trial.
3. Sleek Side-Parted Bob With a Curled End Flip
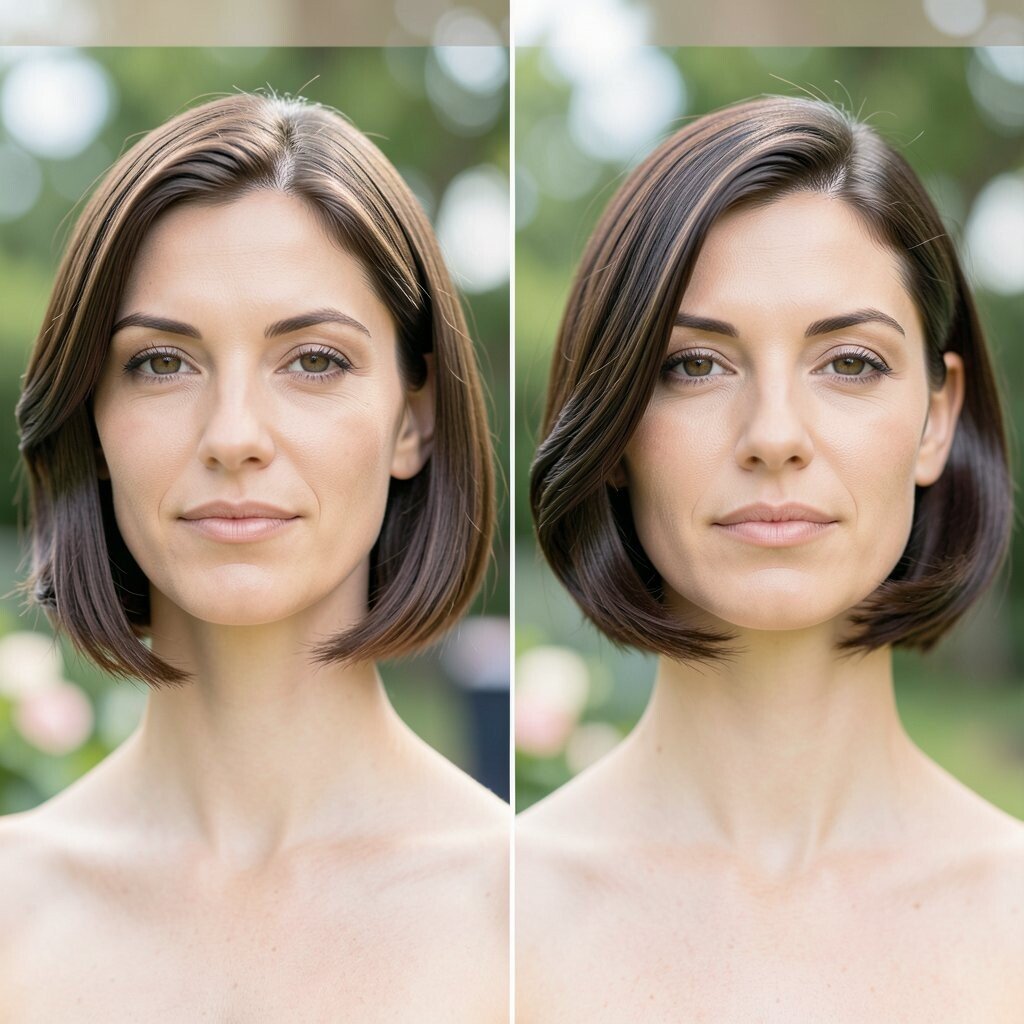
Before, a bob can look sleek but also a little severe, like it’s missing softness around the face. After, a side part and a subtle end flip add shape, bounce, and a bright frame for your smile.
This transformation makes short hair feel special for wedding day without requiring lots of length. You get a clear, elegant silhouette that works beautifully with earrings and a veil that clips securely.
To style it, use a heat protectant, then curl just the very ends away from your face. Keep the roots smooth with a blow-dry and a fine-tooth comb for clean lines. For personalization, pick a curl direction that highlights your cheekbone, and tuck a tiny sparkle pin near the side part.
For cost planning, shorter styles often need fewer products and less time, which can lower overall salon pricing. If you want extra shine, ask for a gloss treatment at least a week before the wedding.
4. Boho Braided Crown With Micro-Texture Layers
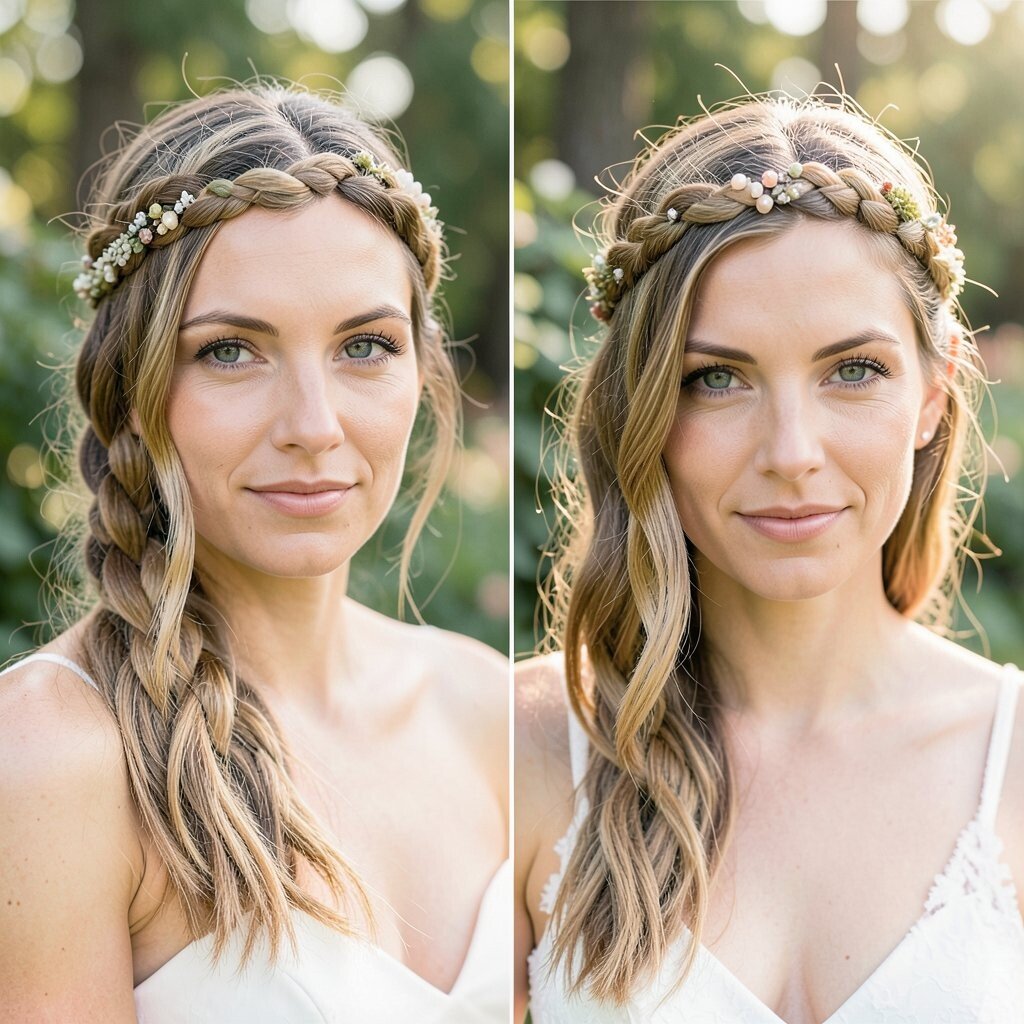
Before, your hair might look thick but heavy, and the braids can disappear into the texture. After, a braided crown is paired with careful layering so every strand looks intentional and airy.
This style feels unique because it blends boho charm with a structured finish. It also helps hold hair in place for photos and dancing, which is great if your wedding has a breezy outdoor moment.
Start by adding a small amount of texturizing spray before braiding, so the crown doesn’t look overly smooth or too flat. Loosely braid and then gently tug at the braid edges for a fuller, softer look. Personalize with a few tiny hair flowers or a strand of ribbon woven into the braid.
5. Vintage Victory Rolls to Classic Glam Finger-Waves
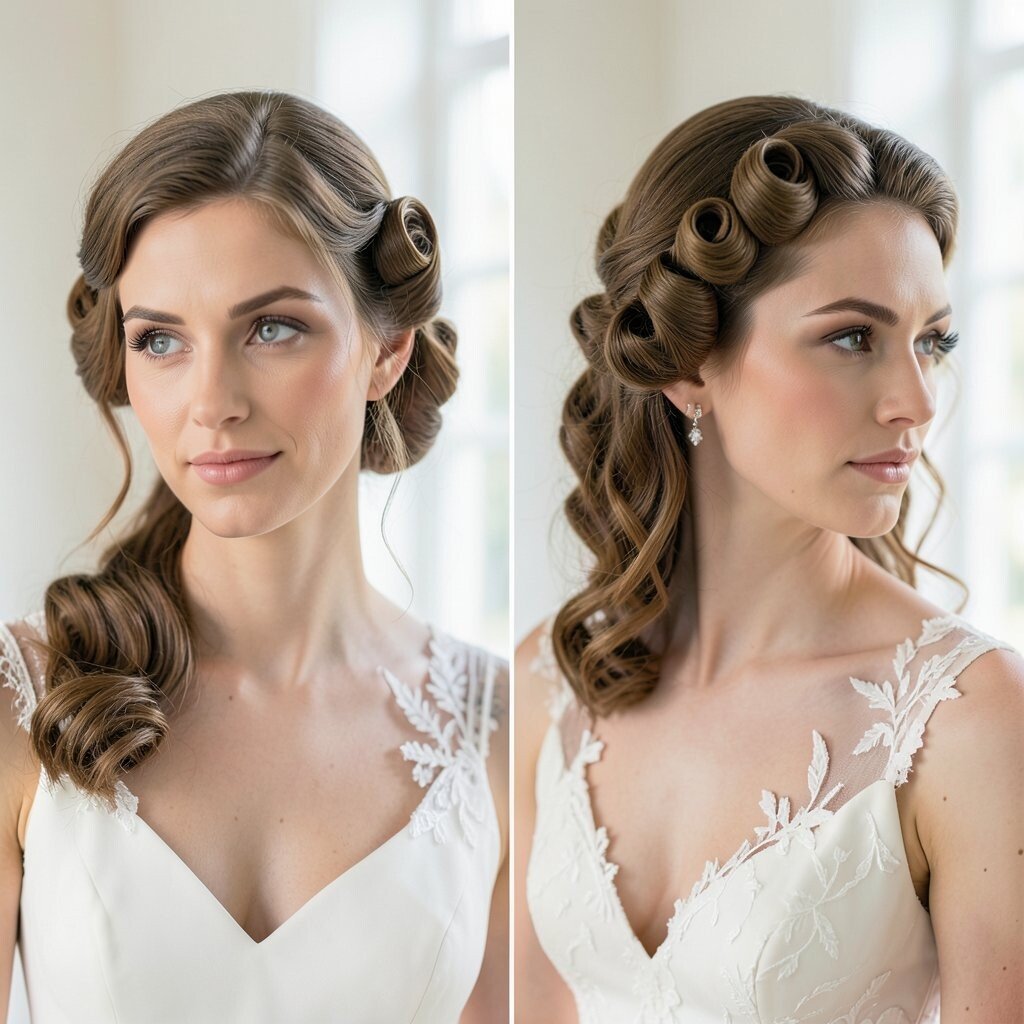
Before, your hair might be too soft and undefined, so it doesn’t hold that “set” look. After, vintage-inspired rolls bring structure, then finger-waves add a bold, elegant finish.
This transformation is a fun way to stand out, especially if your dress has vintage lace, satin, or strong neckline details. It also keeps your hair from touching your face too much while you’re smiling, hugging, and taking portraits.
For practical results, plan to use stronger hold products for a set style, then pin sections carefully while they cool. Add a little shine serum on top so the waves look glossy, not dry. If cost matters, do a trial one time and bring reference photos so the stylist can nail the timing and technique quickly.
6. Classic French Twist With a Hidden Crown Clip
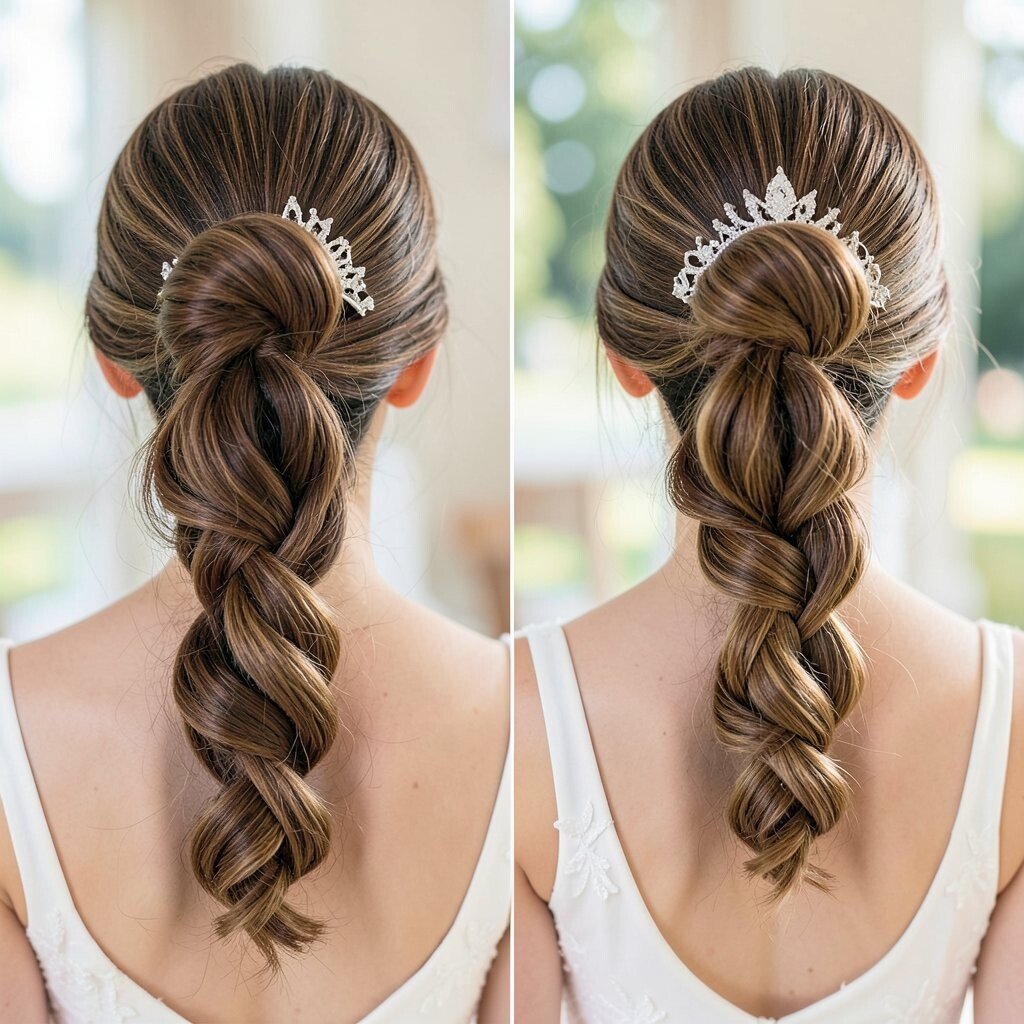
Before, your updo attempts might slip, and the top area may look bumpy in pictures. After, the classic French twist sits smooth, with a hidden crown clip that adds security and a lifted look.
You get instant elegance that feels timeless, and it’s great for formal ceremonies and detailed veils. The best benefit is how steady it stays, even if you feel warm during the reception.
Ask your stylist to leave a tiny amount of volume at the roots before twisting, so the twist doesn’t look tight. Use bobby pins in a crisscross pattern and finish with a light mist of strong-hold spray. Personalize it with a jeweled comb placed slightly off-center for a modern twist on a vintage finish.
7. Twisted Low Ponytail With Satin-Wrapped Elastic
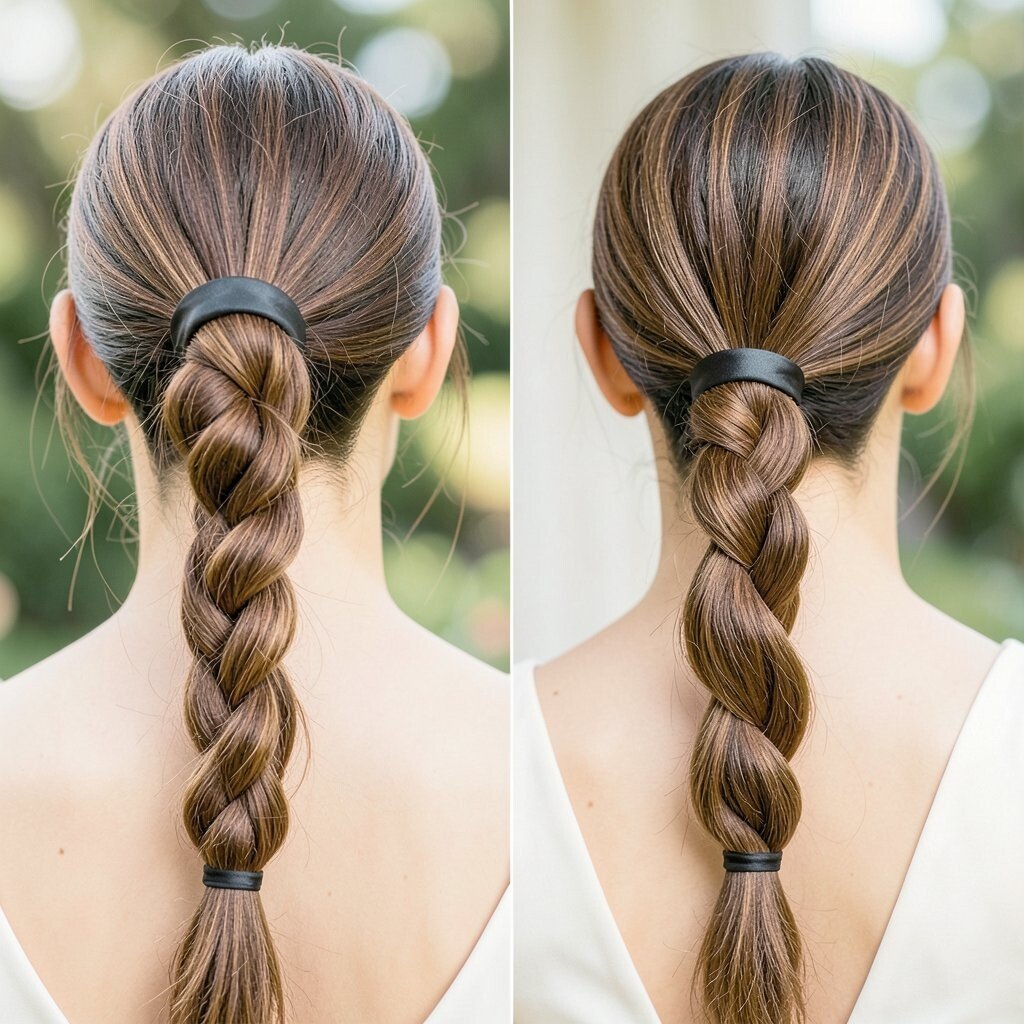
Before, the ponytail can feel plain, like it’s meant for errands rather than wedding day. After, a twisted base and satin-wrapped elastic make it look intentional and luxe.
This transformation is perfect if you want your hair to move, but you still want a clean, picture-ready shape. It also keeps hair from tangling behind you during the ceremony and photos.
To recreate it, create a smooth ponytail at the nape of your neck, then twist two sections before wrapping them around the elastic. Wrap with satin ribbon or a matching fabric tie so it looks like a ribbon detail from your outfit. For personalization, add a small cluster of pearls at the twist base or keep it minimal for a sleek modern look.
8. Bridal Top Knot With Soft Bang-Blend Volume
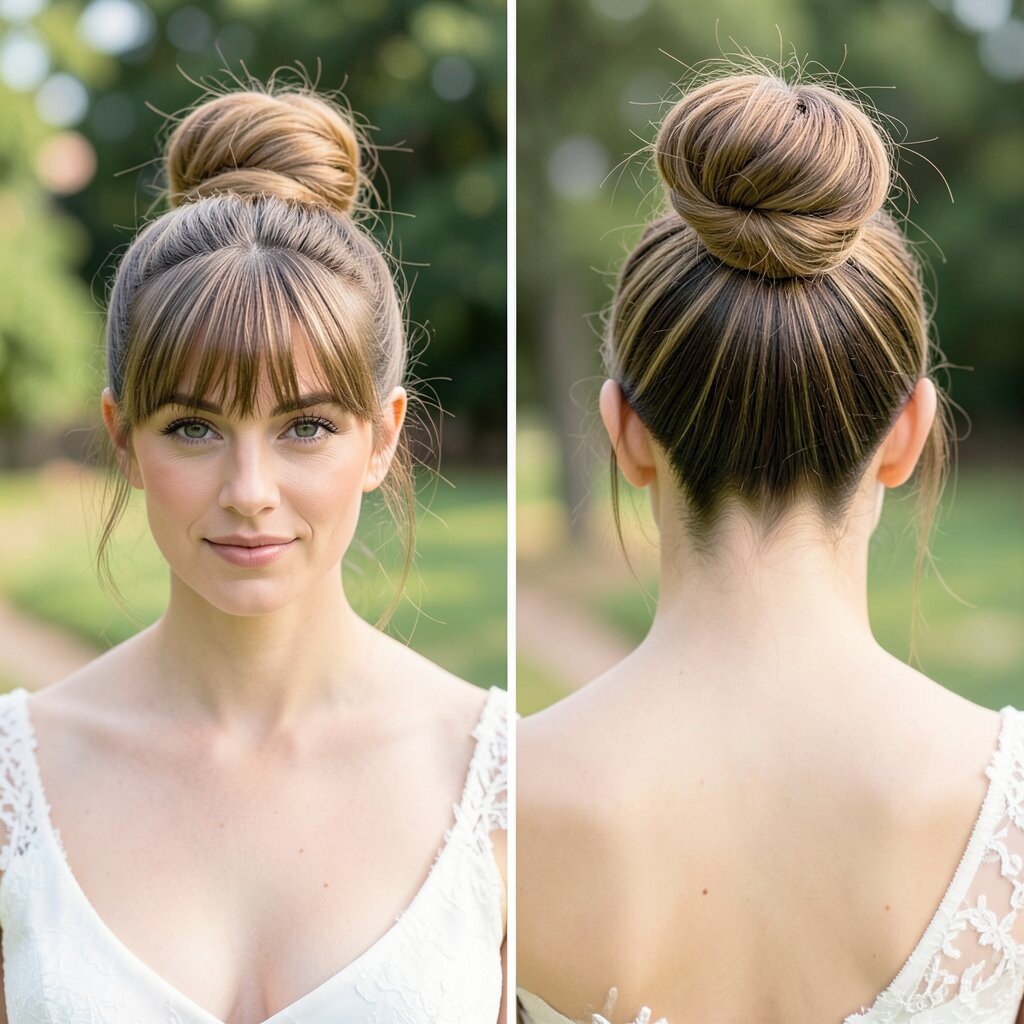
Before, your hair might be flat at the top, especially if you have fine strands. After, a top knot with a bang-blend adds lift, turning your roots into a crown-like silhouette.
This style feels current because it’s neat but not overly strict, and it photographs beautifully with statement earrings. It also keeps hair off your neck, which can be a lifesaver on hot wedding days.
Use a volumizing mousse at the roots, then gather the hair at the crown instead of too high on the head. Create a slightly imperfect bun by leaving a few wispy strands, which makes the look more natural. Personalize by matching the knot’s tightness to your vibe, from airy and romantic to sleek and confident.
If you’re budgeting, consider doing the base bun yourself and hiring a stylist only for the final pinning and smoothing. That approach often saves money while still giving you the polished after result.
9. Loose Curls to Glam Candlelit Waves With Shine Finish
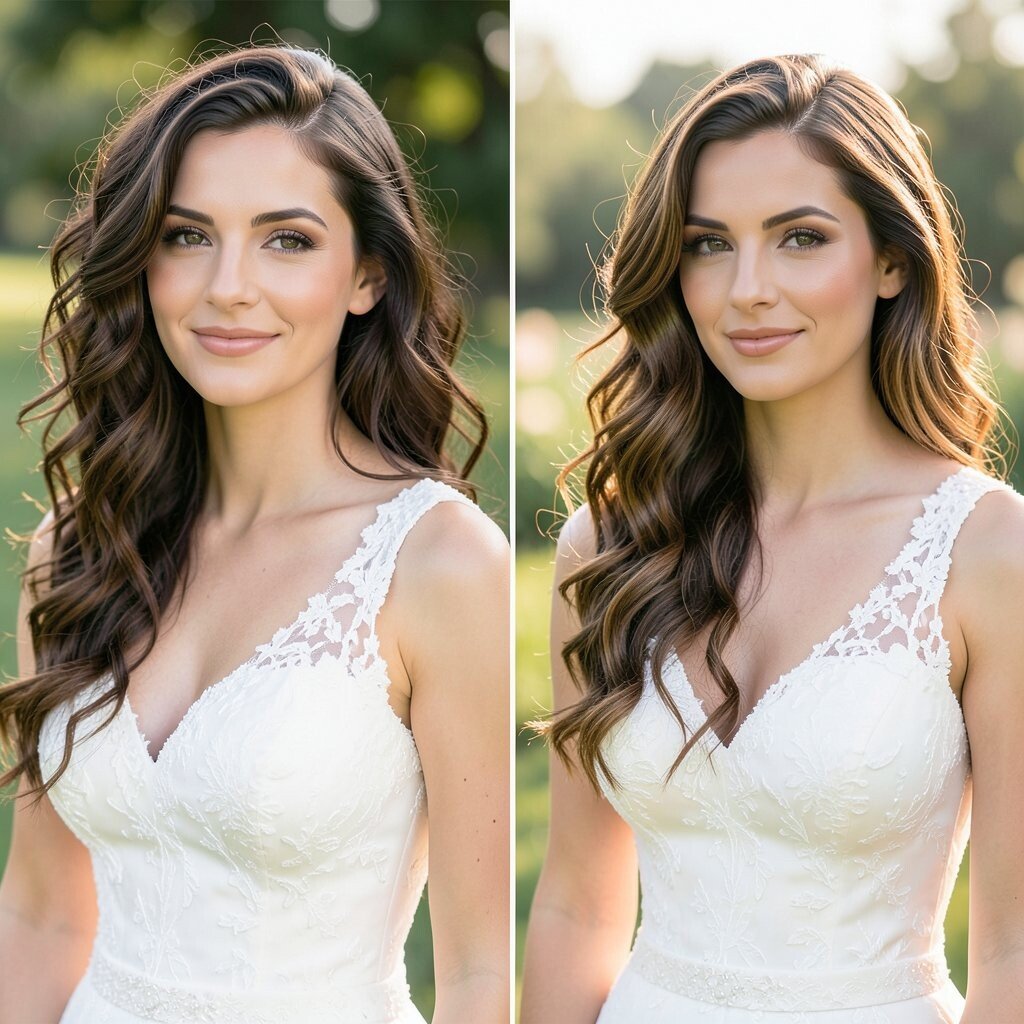
Before, curls can look good at first but quickly lose shape and start to frizz. After, the same hair becomes glam candlelit waves with a shine finish that looks soft but not lifeless.
It’s a great transformation for anyone who wants volume and movement without a full updo. The benefit is that your hair stays expressive through the ceremony, then looks amazing in reception lighting for photos and videos.
To get the look, curl in larger sections, then brush through gently so you form waves instead of tight spirals. Add a shine mist or lightweight oil on the outer layer only, so it doesn’t weigh down your roots. Personalize by tucking one side behind your ear with a sparkly pin that matches your jewelry.
For cost considerations, you can often reduce styling expenses by learning your best curling direction at home before your trial. A quick trial helps you choose the right tool size so you don’t waste time on the wrong curl pattern.
10. Vintage Lace-Overlay Bun With Veil-Ready Placement
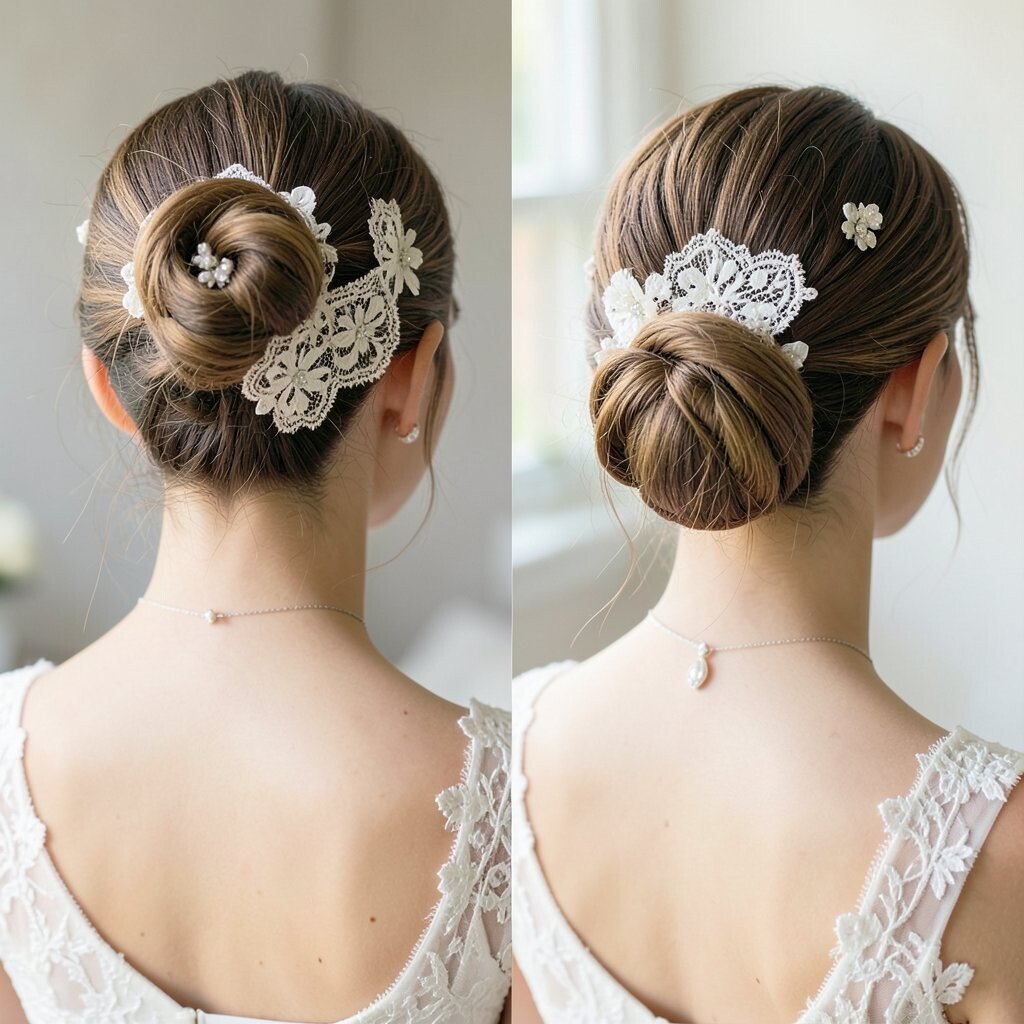
Before, your hair might be pinned back but still shifts under a veil, making you constantly adjust it. After, a lace-overlay bun is placed in a veil-ready position that feels secure and pretty.
This transformation focuses on comfort and steadiness, which is one of the biggest benefits on wedding day. When your hair doesn’t slide, you can relax and enjoy every moment without worrying about your neckline or headpiece.
Choose a bun height that matches where your veil naturally lands, then place the bun support first and decorate second. Use a mesh net if you have fine hair, since it helps the bun hold its shape. For personalization, add a lace-like hair accessory or thread a delicate ribbon through the bun strands.
If you’re cost-conscious, ask your stylist to use your existing veil comb or to repin it for better stability. Small adjustments can be cheaper than building a full custom headpiece look.
11. Sleek Braided Chignon With a Clean Center Part
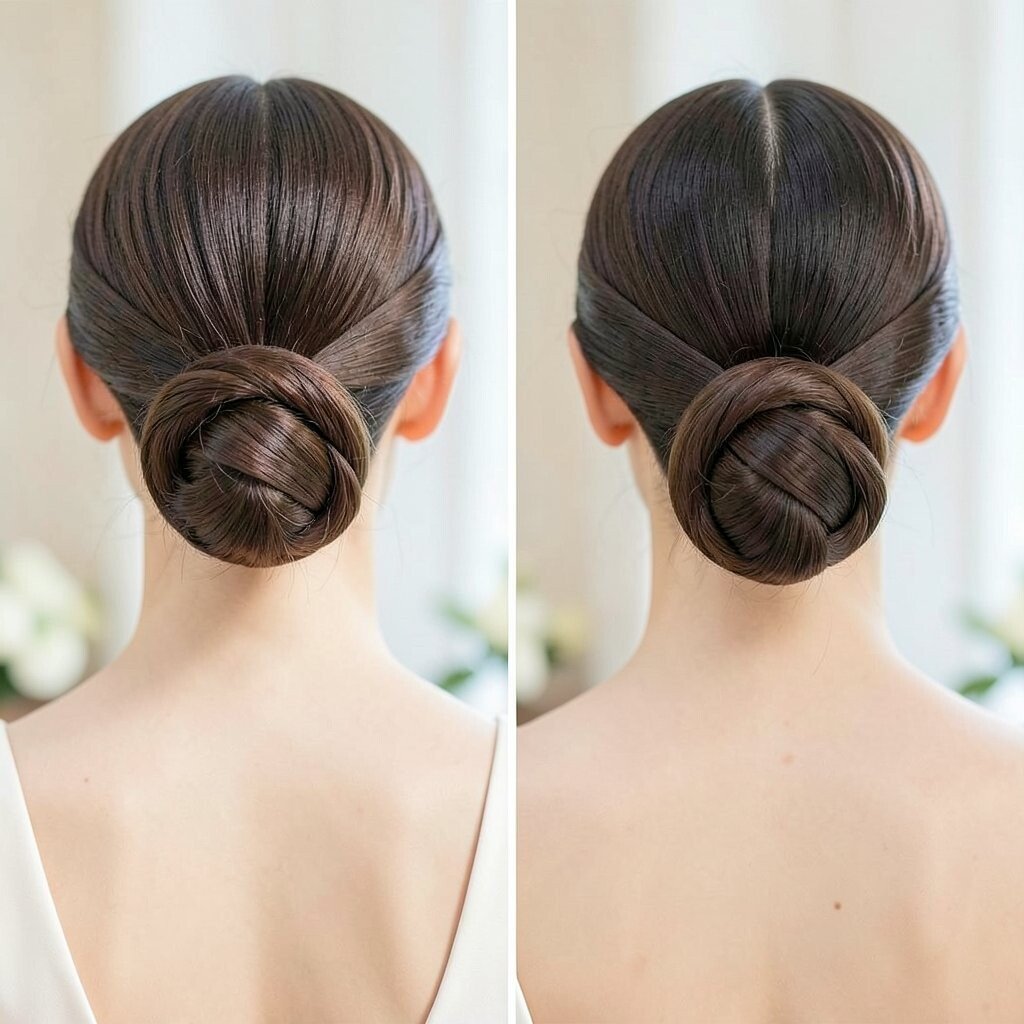
Before, your braid might look uneven or too casual, and the overall hairstyle doesn’t feel wedding-level polished. After, a braided chignon with a clean center part turns your hair into an elegant, structured statement.
This look is unique because it blends the precision of a chignon with the texture of braids. You’ll also benefit from extra hold since the braid adds structure, which helps the style survive windy venues and long photo sessions.
Start with a center part and smooth roots using a blow-dry brush for a crisp line. Braid each side loosely, then wrap into a low chignon, pinning securely underneath. Personalize with a small metallic hair cuff or a thin chain tucked into the braid for a subtle modern sparkle.
12. Waterfall Braid to Bridal Crown Braiding Hybrid
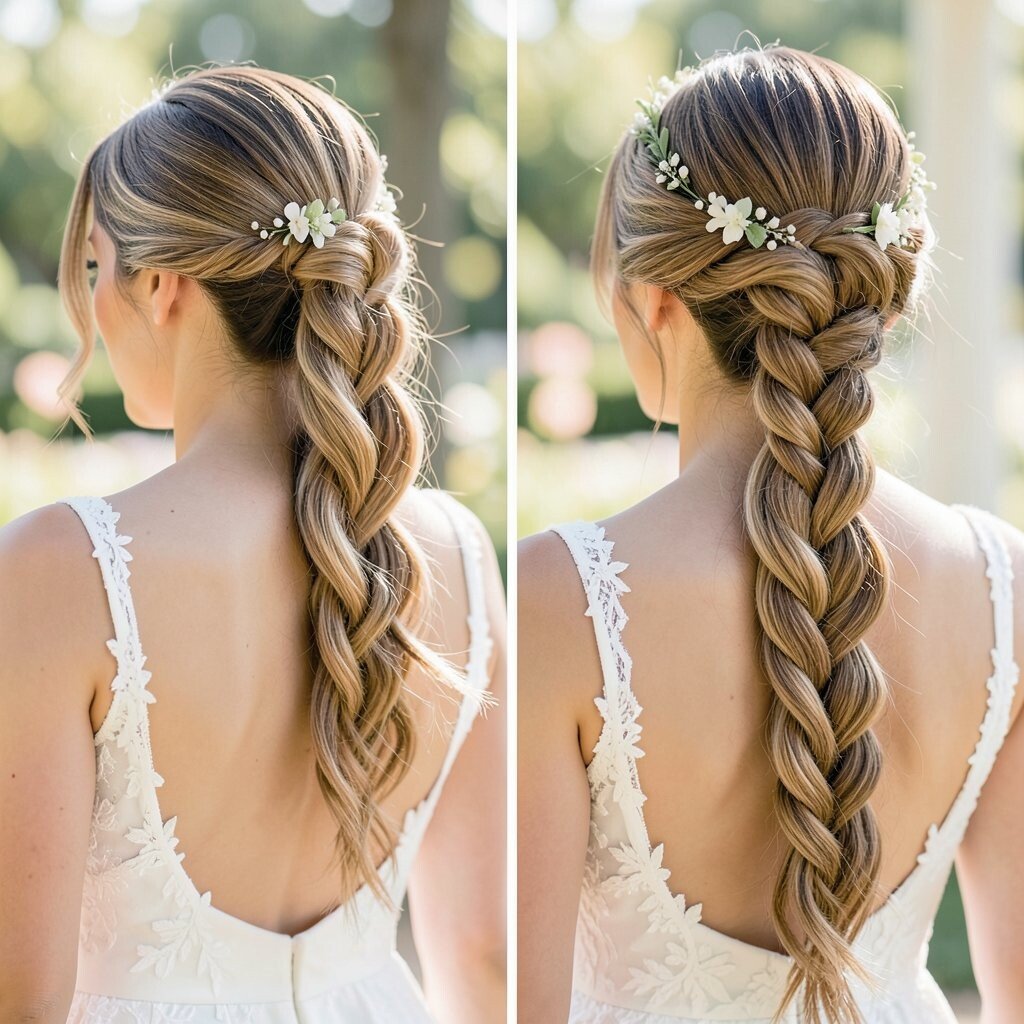
Before, a waterfall braid can fall apart after a while, especially if your hair is slippery. After, the waterfall becomes a bridal crown braiding hybrid with added anchors for a more secure finish.
This transformation gives a romantic “lace-like” effect while still feeling firm for the day. It’s a great option if you love braids but want them to look refined rather than purely casual.
To build it, start the waterfall near one temple and weave so the effect looks continuous and delicate. Then gently add a few more braiding points as you move around, anchoring the crown so it holds. Personalize by weaving in a strand of pearl or using braid-friendly extensions if you want more volume without changing your whole hairstyle.
For cost planning, consider whether you need extra fullness, since that can affect pricing. If your hair is naturally thick, you may only need careful braiding and product work rather than add-on length.
13. Half-Up Bubble Pony With Soft Ribbon Bow
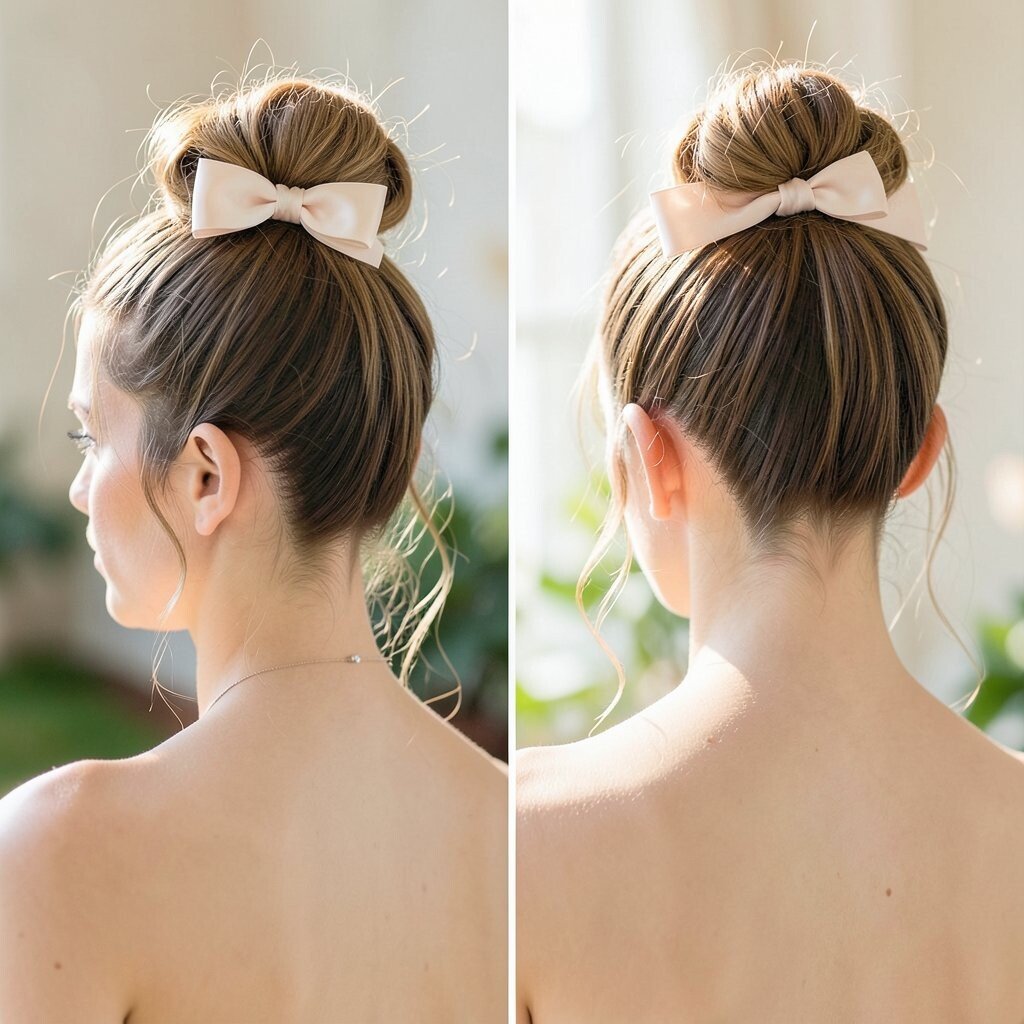
Before, your ponytail might look too basic, even if your hair is nicely styled. After, bubble sections create a playful shape, and a soft ribbon bow makes it feel wedding sweet.
This transformation works because it’s fun and youthful while still looking polished in photos. The benefit is that you get volume at the top and a controlled style that’s less likely to sag over time.
To recreate it, section the ponytail into multiple loops, then secure each bubble with clear elastic and tug slightly for fullness. Add a ribbon bow at the base or at the top where you want the eye to land. Personalize by matching the ribbon to your bouquet wrap or to the color tone of your wedding flowers.
14. Side-Swept Updo With a Loose Chiffon-Feeling Twist
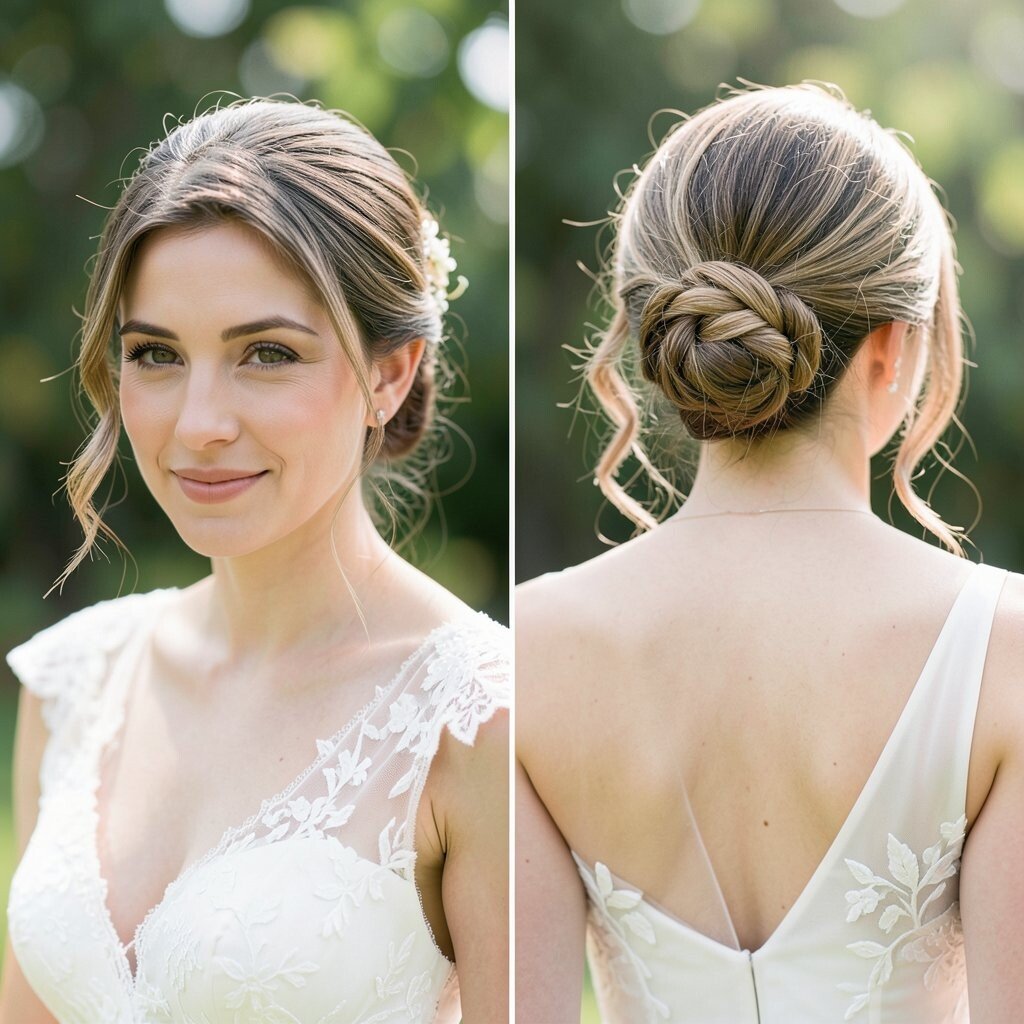
Before, side styling might sit flat and drag your hair to one side too strongly. After, a side-swept updo uses a loose twist so it feels like chiffon, light and romantic.
You’ll get a dramatic look without making your hair feel heavy, which is a real comfort benefit. It also helps frame your face and works especially well with off-shoulder or one-shoulder dresses.
Use a gentle side placement, then twist sections rather than pulling them tight. Secure with pins that hide under the twist, and finish with a flexible hold spray so the style stays soft. Personalize by adding a few curled ends that peek out near the collarbone for a modern, styled edge.
If you want to manage cost, bring your own hair accessories and ask your stylist to focus spending on pinning and shaping. Accessories you choose can be affordable, while skilled placement gives the true “after” difference.
15. Glossy Retro Bun With Feathered Texture and Pearl Pins
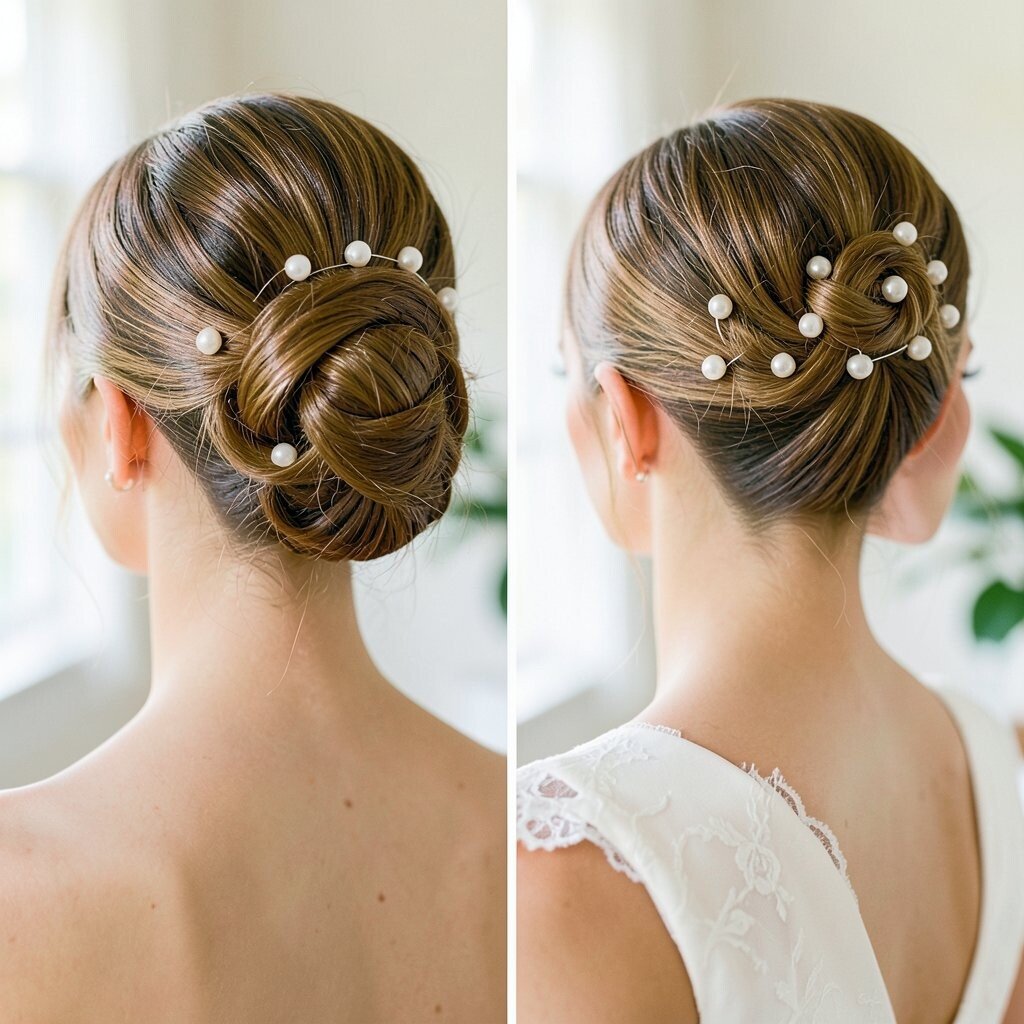
Before, your hair might be shiny but too uniform, which can make it look heavy in wedding photos. After, a retro bun with feathered texture creates depth, and pearl pins add that instant bridal sparkle.
This is a unique transformation because it mixes clean lines with soft movement. The benefit is that it holds up well during ceremonies while still looking elegant for dancing and candid moments.
To style it, create a strong base bun with volume at the crown, then use a feathering technique on outer sections by gently separating curls. Place pearl pins where the light hits, like near the part line or the bun edge. Personalize with pin size and placement based on your hair thickness and how bold you want the sparkle to feel.
16. Natural Waves to Half-Up Crown With Botanical Clips
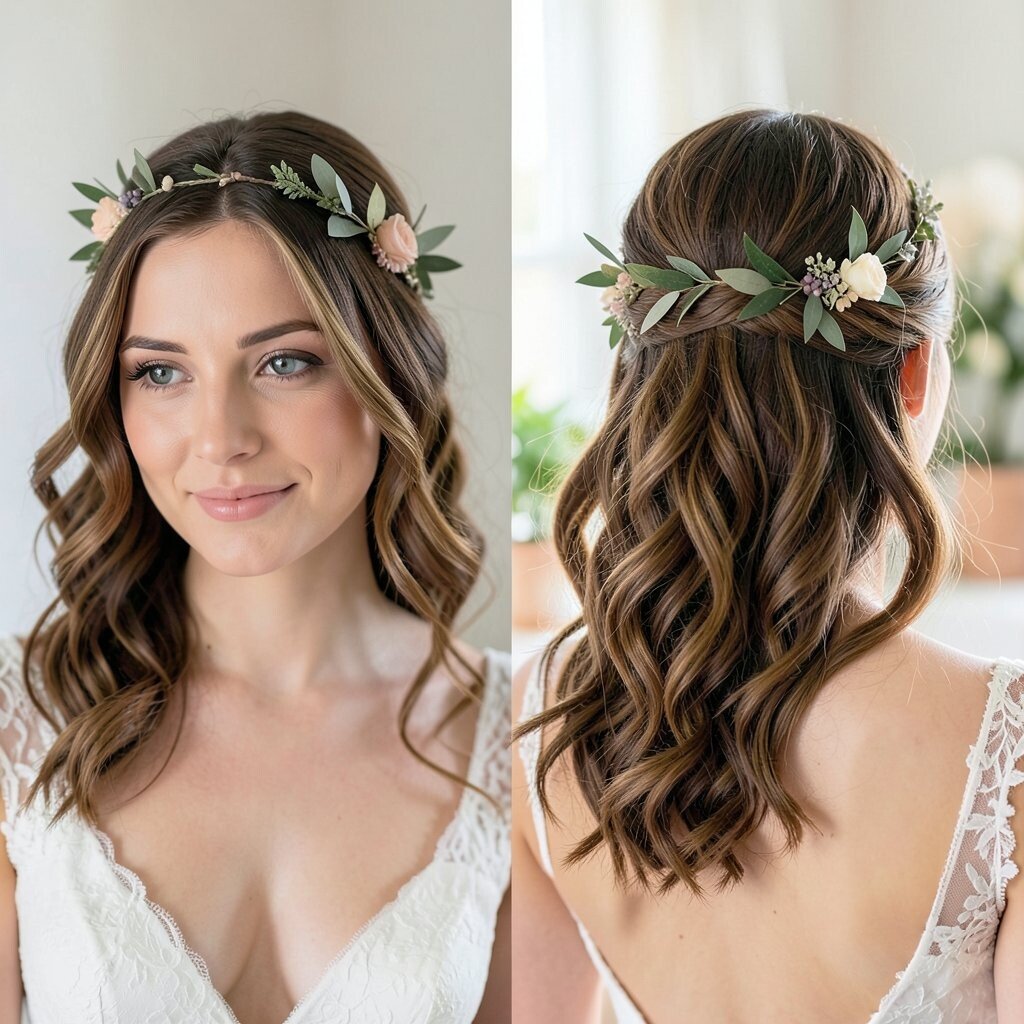
Before, natural waves may look beautiful but undefined, especially after humidity or travel. After, the waves become a half-up crown that keeps texture in place while adding a botanical, fresh bridal vibe.
This transformation is perfect if you want to look like yourself, just upgraded for the big day. You get movement you can see and feel, plus practical hold near the top where wind tends to mess with hair.
Use a curl cream or wave foam to refresh texture, then pull the front sections back into a crown and secure with strong pins. Add botanical clips that match your floral style, like greenery tones or small blossoms. For personalization, choose clip shapes that echo your bouquet, then keep the rest of your waves soft and touchable.
If cost matters, botanical clips are often budget-friendly and can be reused later. You can also do the wave styling at home and schedule a salon appointment only for crown pinning and final checks.