Your wedding day deserves a hairstyle that feels like you, only more radiant. A bun can look soft, polished, romantic, or bold, all while keeping your hair secure.
From sleek and minimal to wildly textured, the right bun can boost comfort, elevate photos, and make your whole look feel complete.
1. Classic Low Bun With Soft Volume
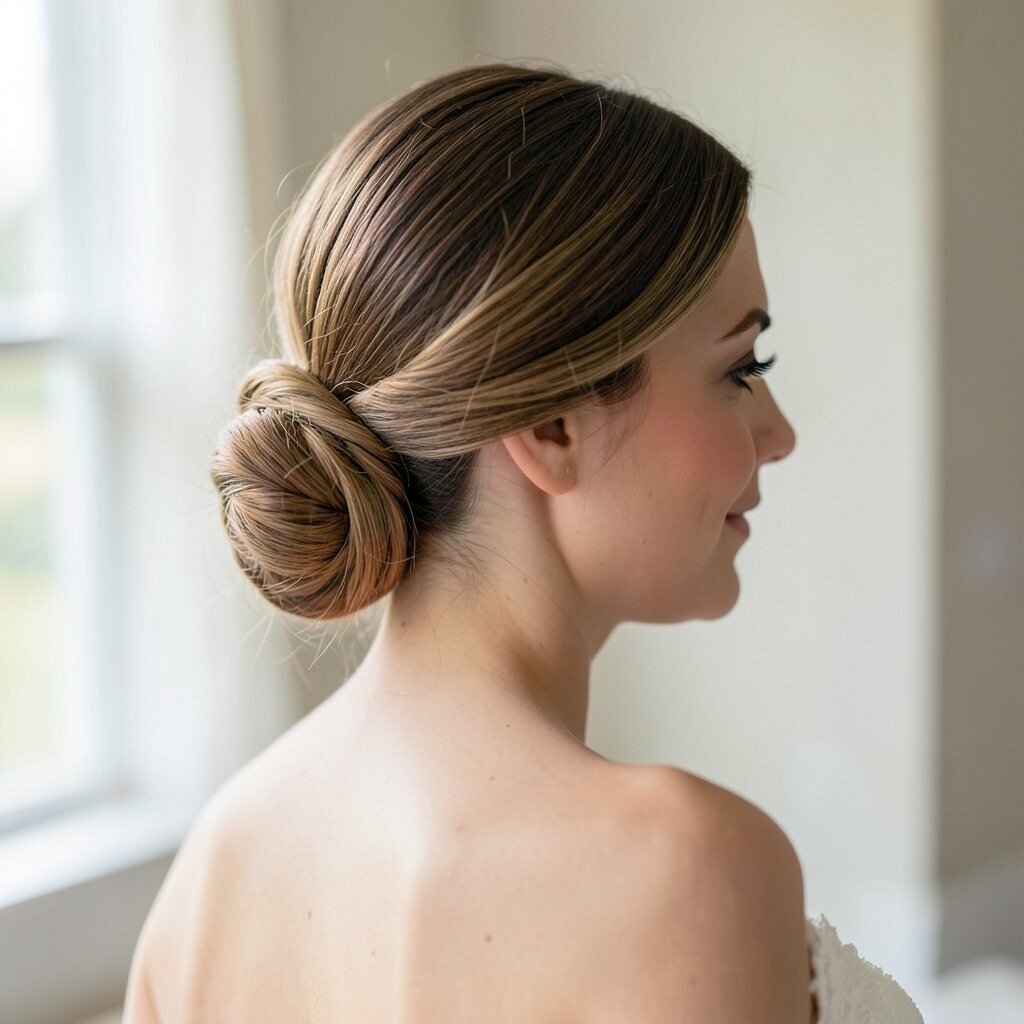
This timeless low bun sits close to the nape and lets your face take center stage. The gentle lift at the crown creates a flattering shape without feeling too styled.
Use a light volumizing mousse before you blow-dry for that airy, natural finish. If you want extra security, pin with bobby pins in a crisscross pattern, then lightly set the style with hairspray.
To personalize it, tuck in a few wispy strands around your ears so it feels romantic instead of rigid. For cost, this look is budget-friendly because it relies mostly on technique, not special hair extensions or heavy accessories.
2. Sleek Ballet Bun With Glossy Finish
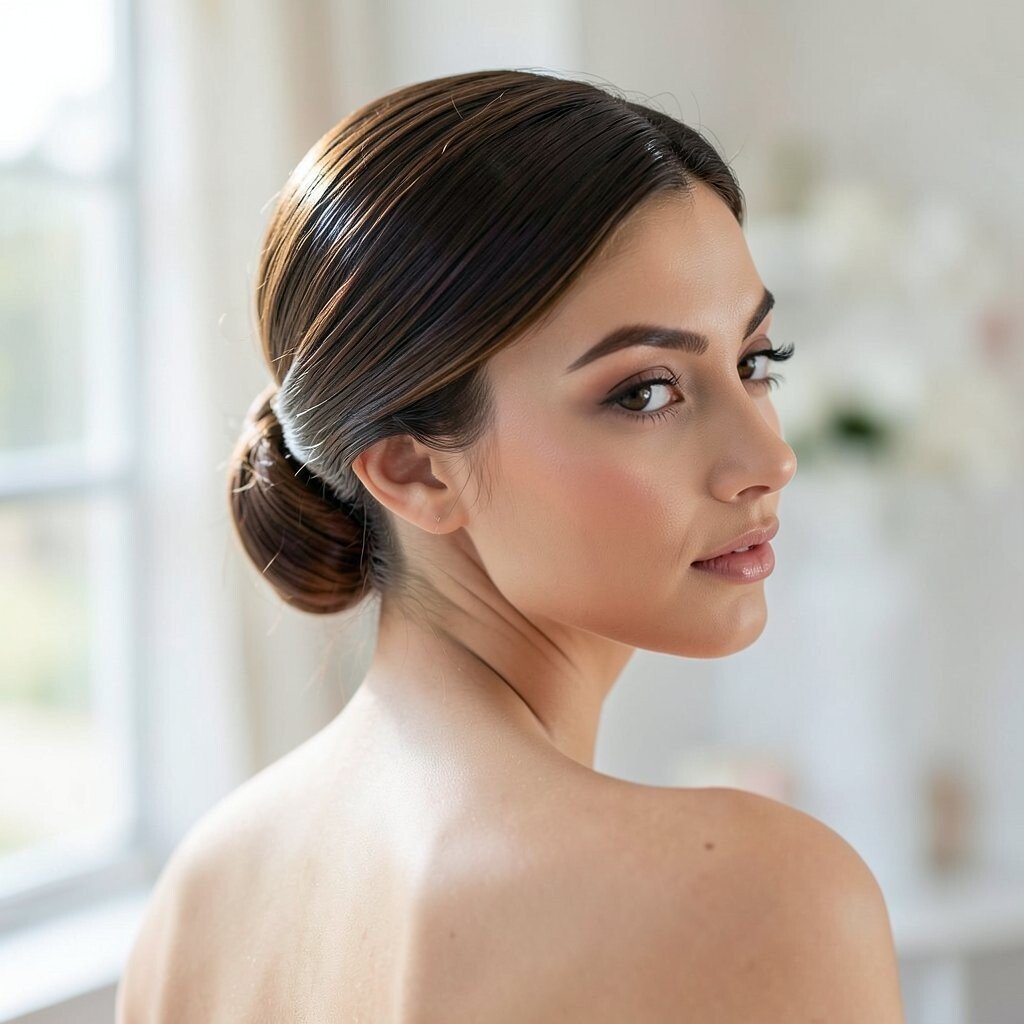
A sleek ballet bun has a smooth, elegant look that feels modern and refined. When your hair is brushed and polished, it frames your neckline beautifully.
Start with a heat protectant and use a flat brush or paddle brush for shine. Apply a small amount of gel to the hairline, then secure the bun tightly so it holds through dancing and hugging.
Choose a satin ribbon or minimalist hair comb to add uniqueness without breaking the clean lines. This is a great pick for brides who want a high-end look but prefer a simple routine on the morning of the wedding.
3. Textured Messy Bun With Face-Framing Pieces
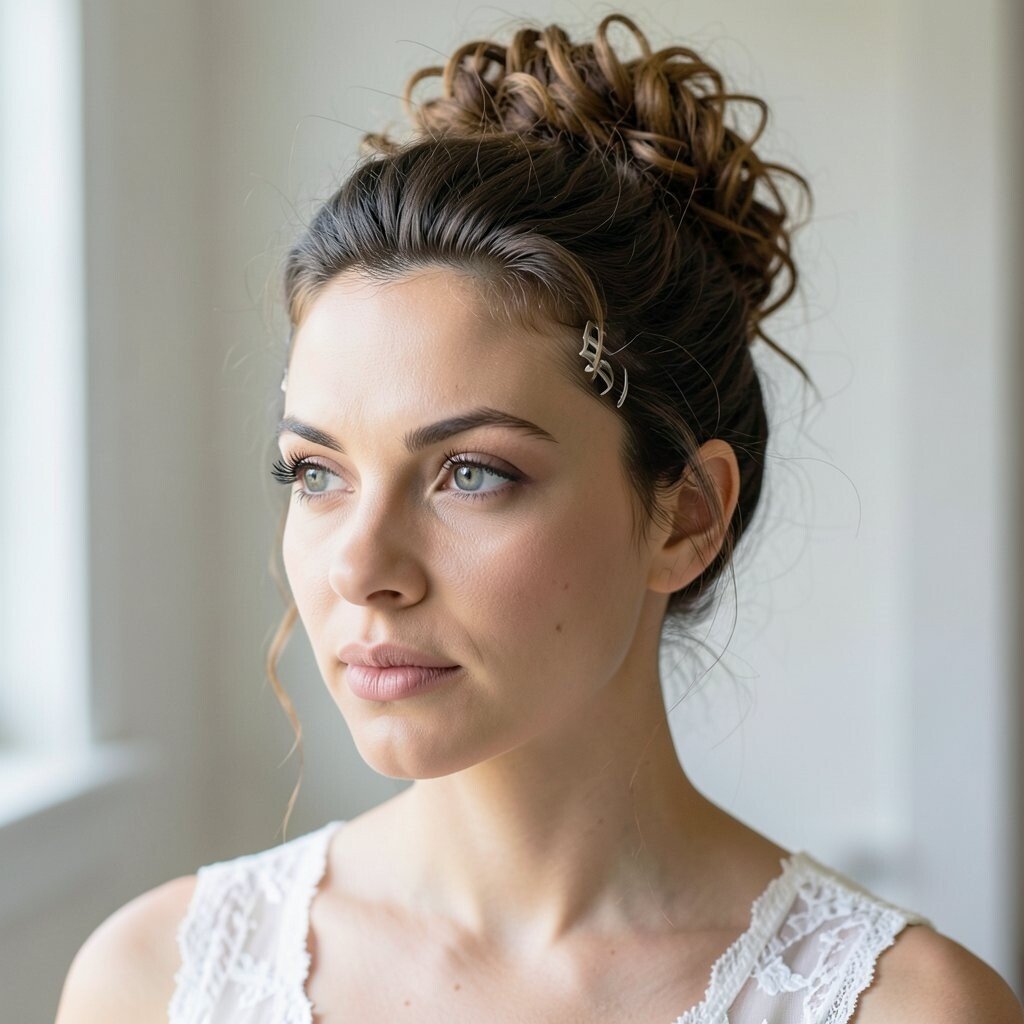
A textured messy bun looks effortless, like your best hair day turned wedding-ready. Loose curls and soft edges give it movement even when you are standing still.
Work curl cream or texturizing spray through dry hair, then gather it loosely at the back. Pull a few strands forward near the cheekbones so your hairstyle looks styled, not accidental.
For uniqueness, mix in a thin braid or twist right before pinning the bun, so it has hidden detail. This look can be cost-effective because you can skip expensive extensions by using styling products for volume.
Pair it with a soft veil or a simple pearl pin to balance the relaxed vibe. If your hair is very fine, tease lightly at the roots and spritz with a flexible hold hairspray.
4. Twisted Crown Bun With an Open Center
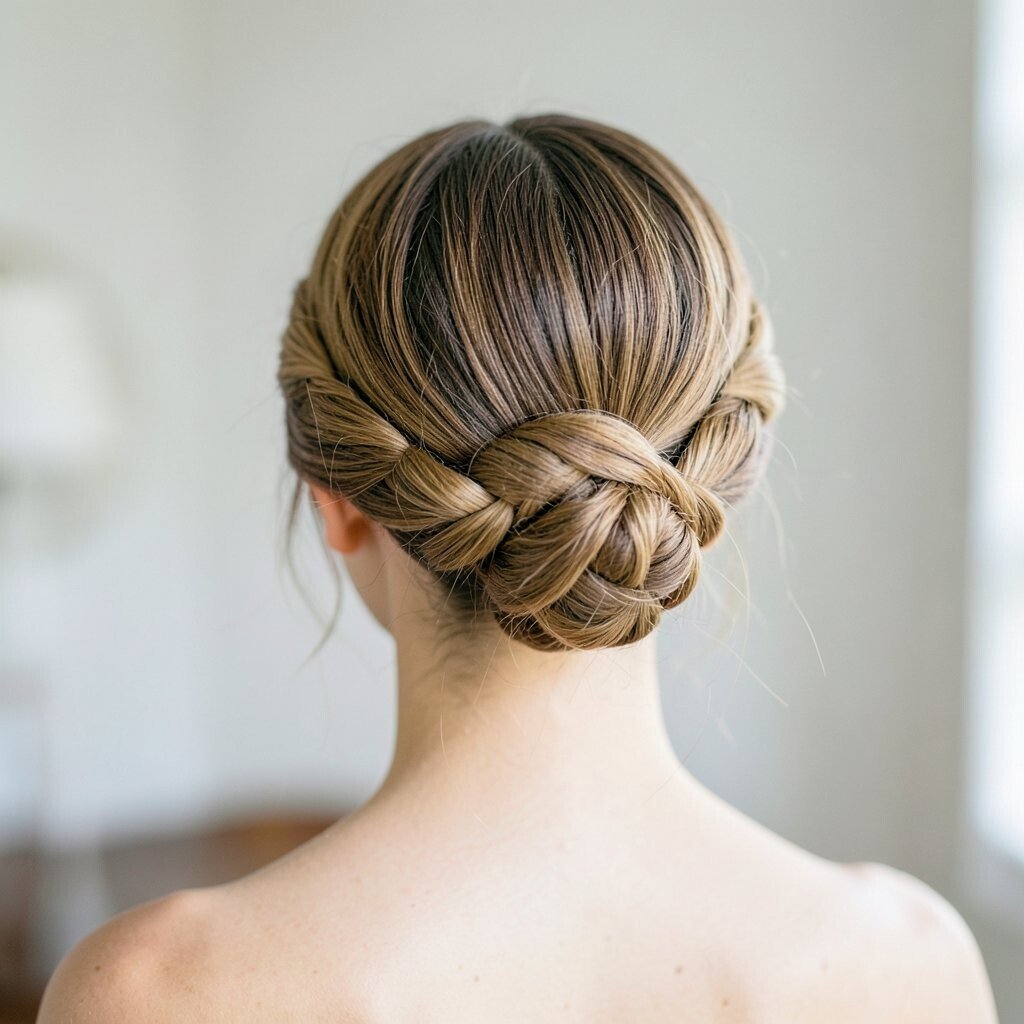
This style wraps twisting sections around the head, forming a crowned effect that feels regal. The open center can make your face look brighter and your earrings stand out.
Part your hair with a clean line, then create two or three twists from the front, pinning them outward before joining at the back. Finish by setting the twists with a light mist so they stay defined.
To personalize, add tiny pearl clips along the twist line instead of placing everything at the very top. It is a lovely choice for brides wearing hair accessories that need a visible base.
5. High Bun With Loose Ringlets
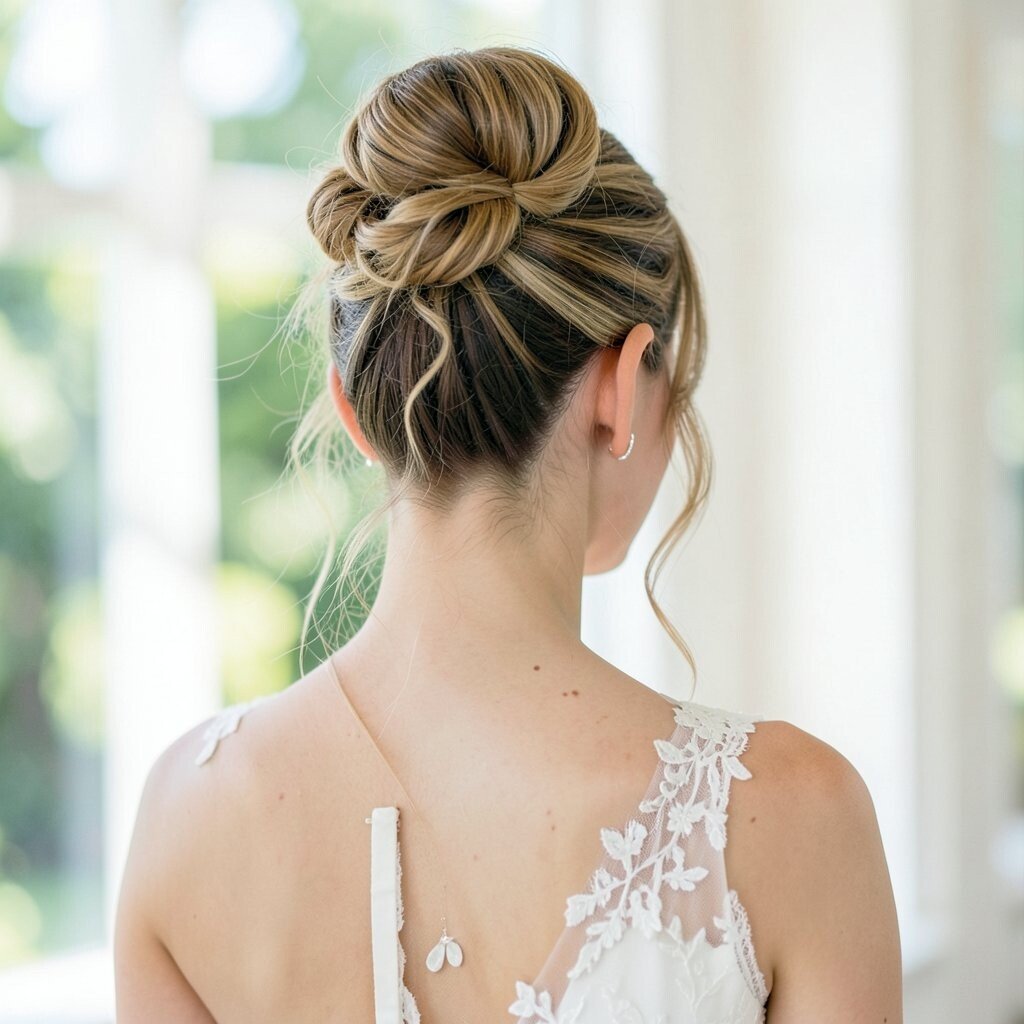
A high bun gives you height, drama, and a playful bridal feel. Loose ringlets around the bun soften the look and keep it from feeling too severe.
Lift your hair upward, secure the base, then wrap pieces around for a slightly undone effect. Use a curling wand for the ringlets, then brush them gently so they look romantic rather than stiff.
If you want uniqueness, add a delicate chain headpiece that hugs the bun and travels into the ringlets. For cost considerations, this look can be done with your natural length, and only a few strategic pins for hold are needed.
Schedule a small trial ahead of time, especially if you want the ringlets to last for hours. A flexible-hold spray will help the curls stay bouncy without turning crunchy.
6. Braided Bun With Waterfall Sections
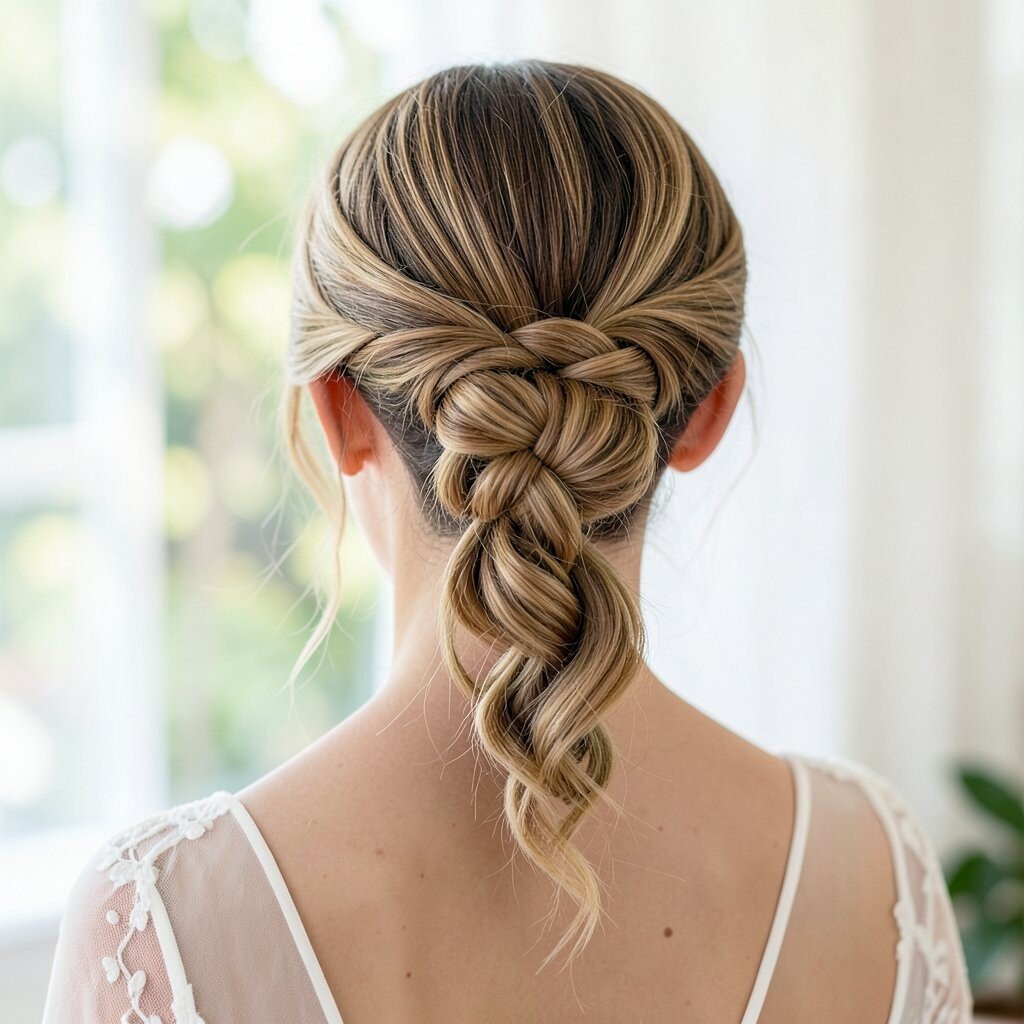
A braided bun with waterfall sections blends softness and structure in a very pretty way. The braid adds texture, while the “falling” pieces keep it light and airy.
Begin by creating a braid pattern near the temple, then let a few sections fall as you continue pinning. Gather everything into a bun and secure with pins that match your hair color.
For practical tips, use small elastic bands at hidden points so the braid doesn’t loosen during the day. This is a great option if you want uniqueness without needing bold accessories.
Consider cost by doing the braid base yourself and hiring a stylist only for the final pinning and smoothing. You will save money while still getting a polished bridal result.
Pair it with a veil that won’t hide the braid, or choose a headband that can show off the pattern in photos.
7. Vintage Finger-Wave Bun
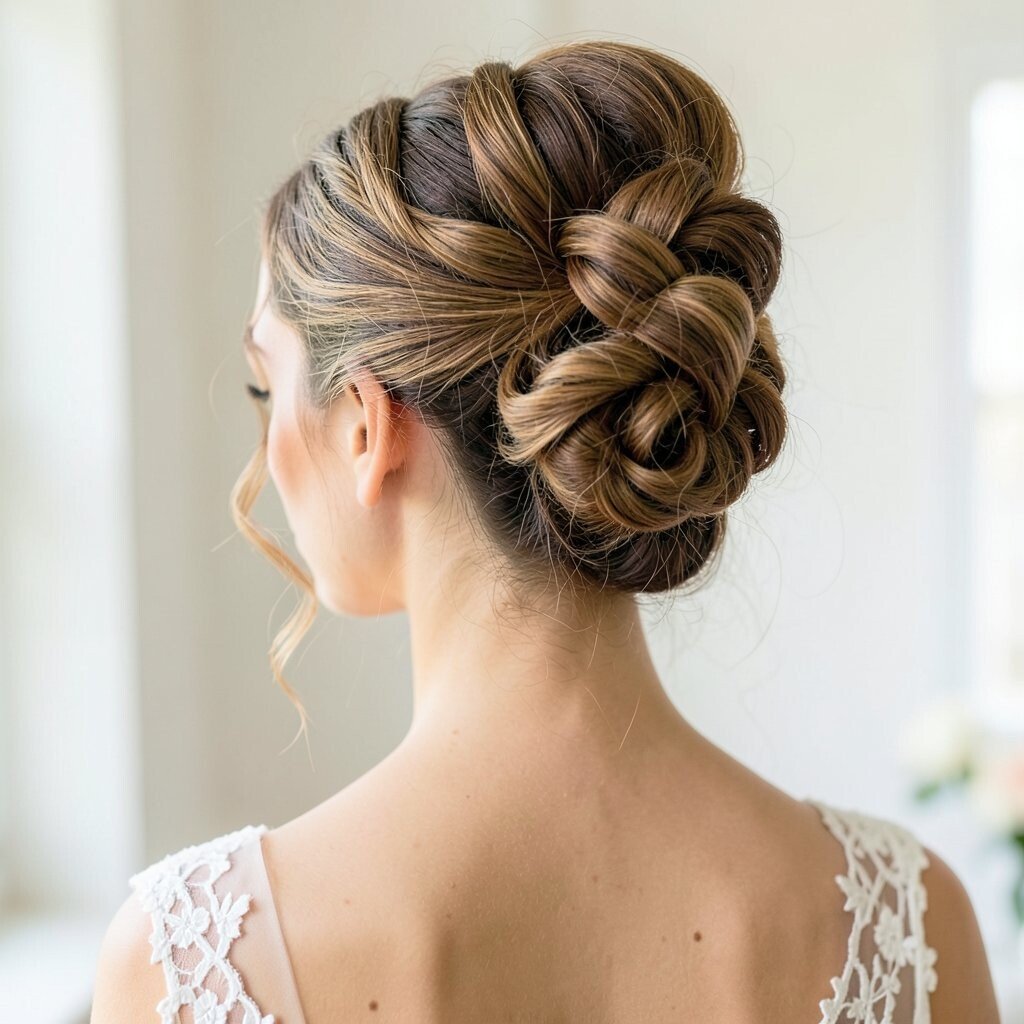
Vintage styling brings instant bridal charm, especially with finger-wave texture near the front. This bun feels like a throwback that still looks fresh in modern photos.
Create soft waves using a setting gel and careful shaping, then pin the front waves before building the bun at the back. Keep the waves smooth and close so the look stays classy rather than messy.
To personalize, use a rhinestone barrette instead of a full comb, so the sparkle is focused and elegant. If your hair is short, you can use a small hair topper to get the rounded bun shape.
8. Bun With Wrapped Scarf or Ribbon Tie
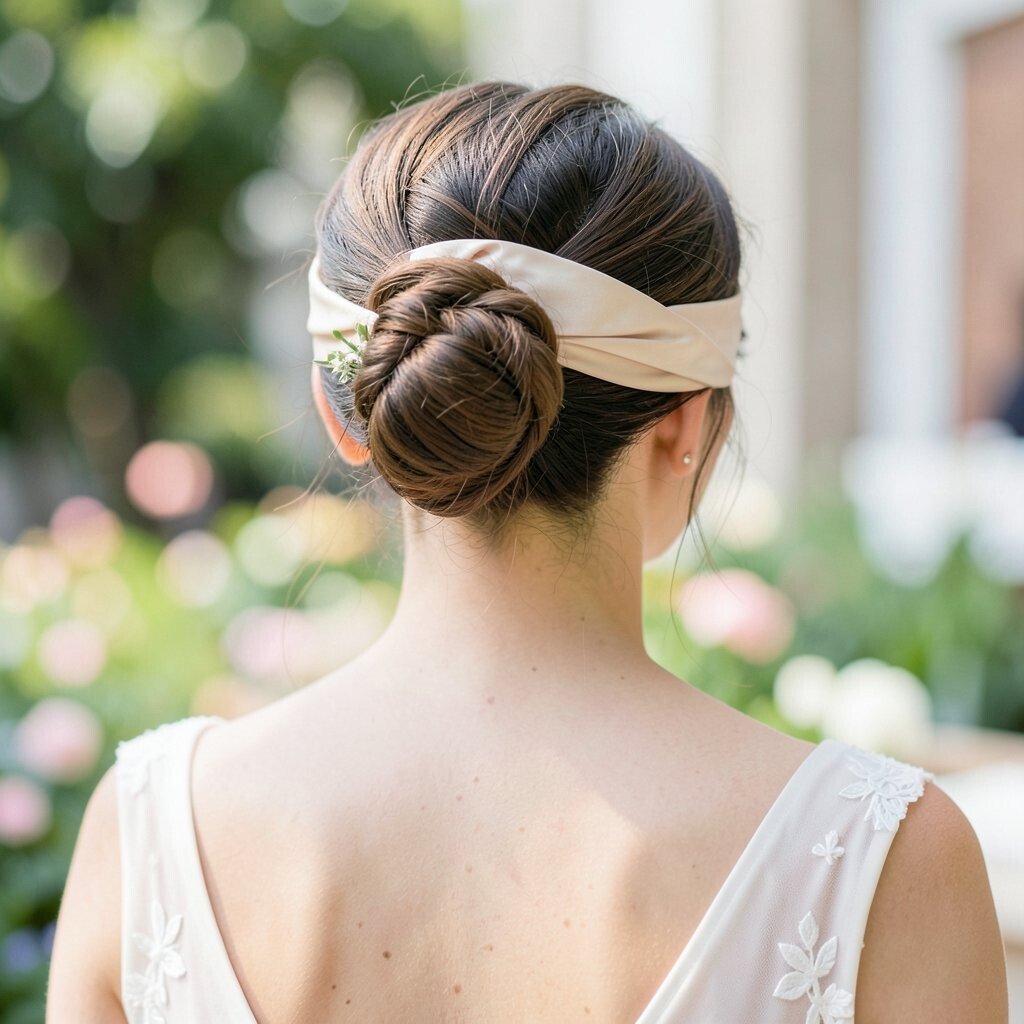
Adding a scarf or ribbon gives your bun a charming, storybook vibe. The wrapped detail can also help hold flyaways in place.
Choose a ribbon that matches your dress tones, such as ivory, blush, or a soft champagne. Wrap it around the bun base, then tie it in a way that sits flat so it looks neat under a veil.
For personalization, let the tails hang slightly longer near one side for a graceful asymmetry. This option can be budget-friendly because a single ribbon does the heavy lifting visually.
Current trends lean toward playful textures and soft accessories, so this fits right in. If you plan to dance, use a few extra pins so the ribbon stays secure.
9. Half-Up Bun With Sleek Back and Soft Crown
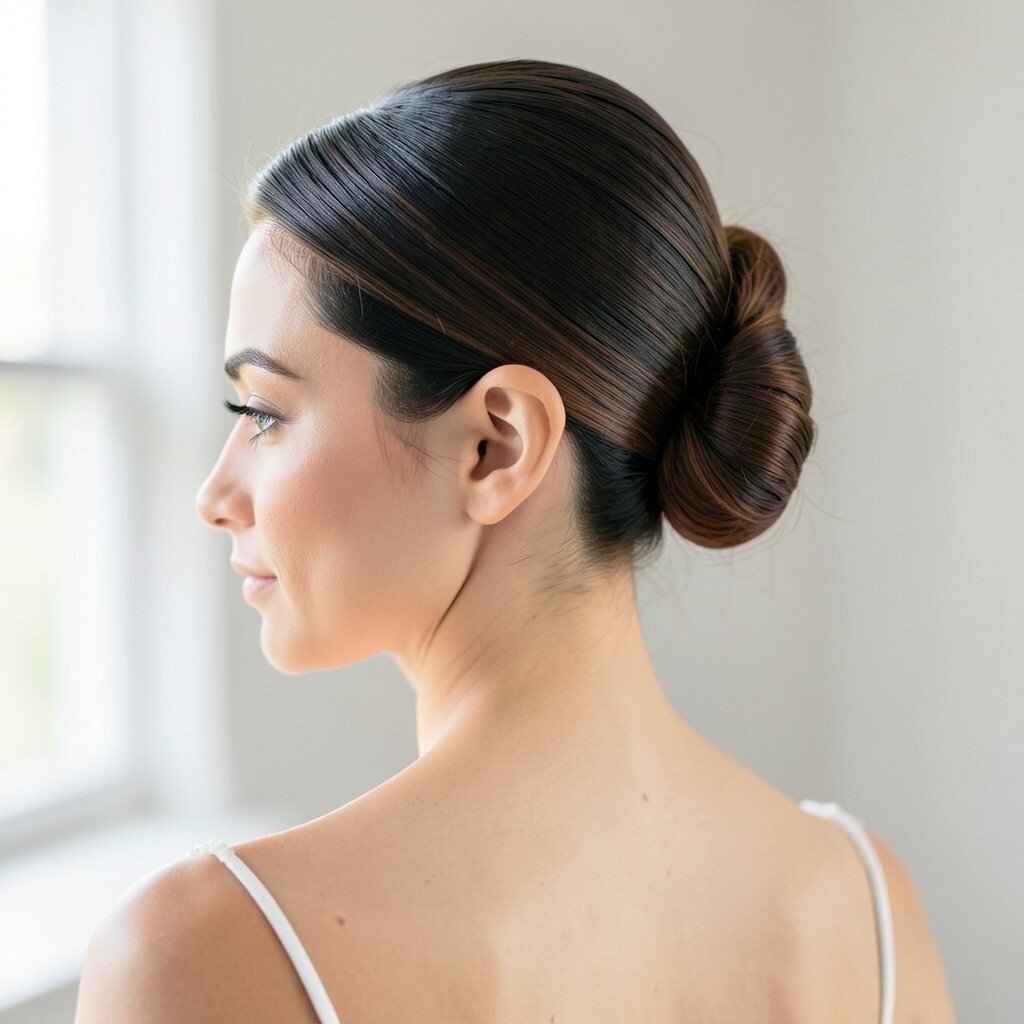
A half-up bun keeps things light by leaving your hair partially down while still giving you the bun’s elegance. The sleek back makes the whole look tidy, even if your hair is naturally wavy.
Gather the upper section, smooth it with a serum, and shape it into a small bun at the crown. Pin the rest of your hair to fall in gentle waves behind your shoulders.
To personalize, add a slim headband just above the bun for extra sparkle without covering everything. This style is especially great for brides who love volume in photos but still want their face framed neatly.
Cost is usually manageable because it uses your hair length first, plus a few styling products. A flexible hairspray and anti-humidity mist can help if you are getting married outdoors.
Practice the placement once so both sides look balanced when you turn your head for pictures.
10. Low Bun With Braided Halo Edge
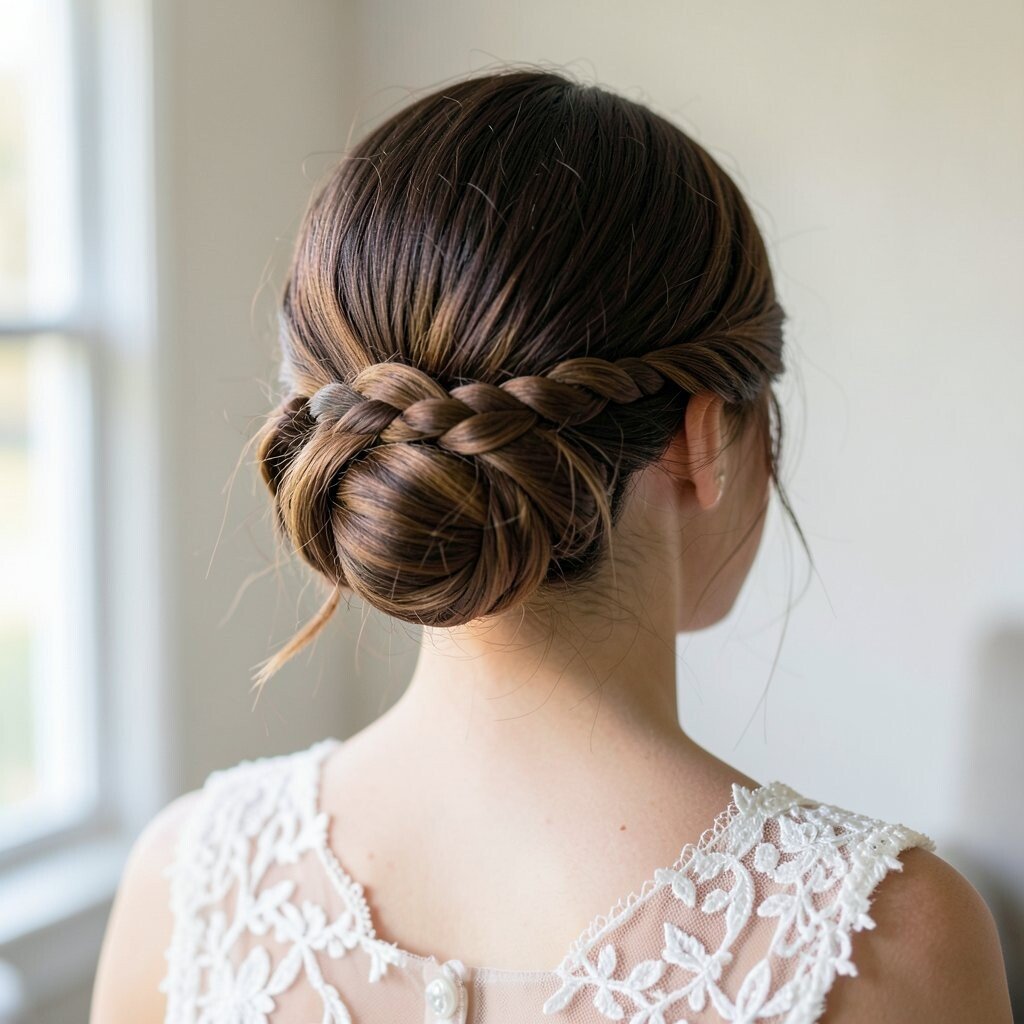
A braided halo edge creates a beautiful crown-like frame around the bun. It looks detailed from the front, yet it feels comfortable and secure at the back.
Part your hair into two sections, then braid along each side near the part line. Pin the braids around the bun like a soft halo, then hide the ends underneath for a clean finish.
For uniqueness, keep the braids slightly thicker so they show in photos, even with a veil. This look can be cost-friendly since it mainly uses technique, and the braid detail replaces the need for a large accessory.
11. Curled Bun With Side Sweep Fringe
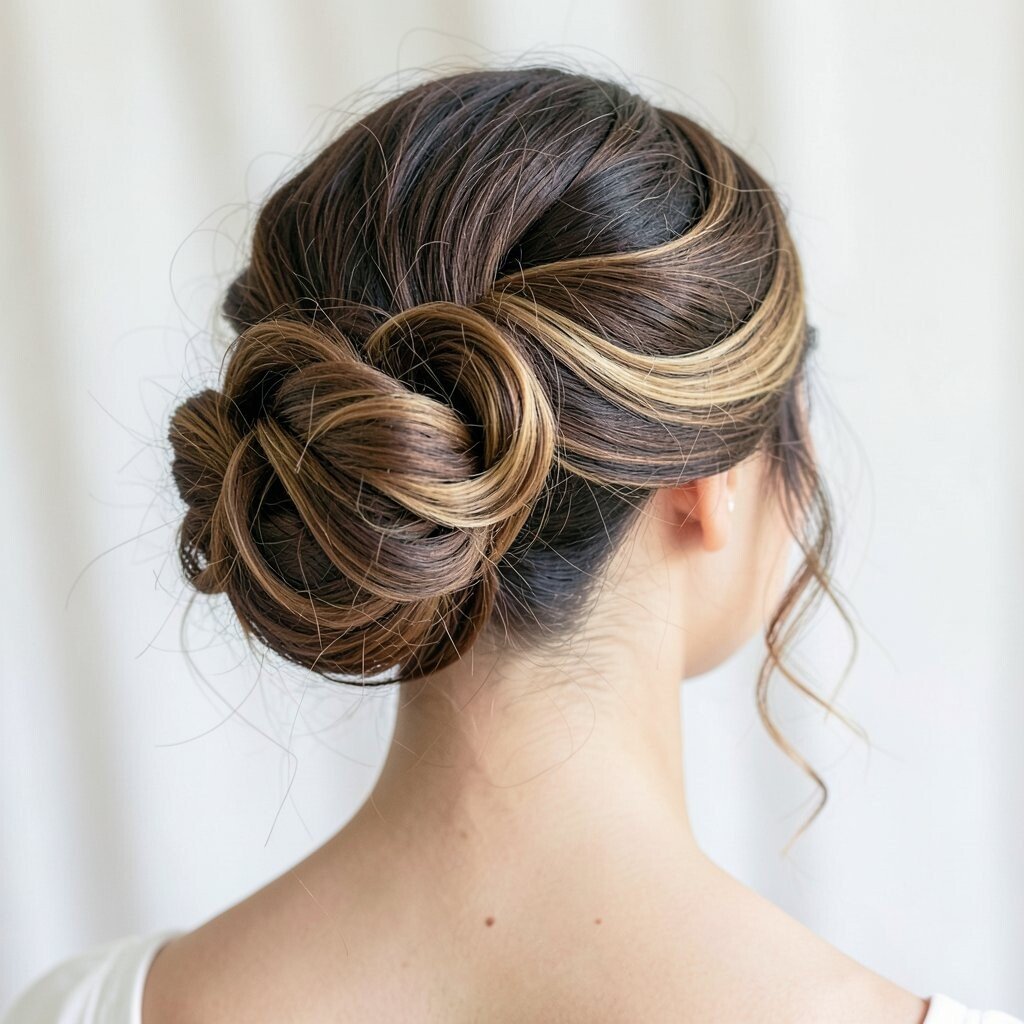
Curled buns look extra bridal when paired with a side sweep that flatters your eyes. The curls add softness, while the angled fringe creates movement and balance.
Set your hair into curls, then gather into a bun that feels full but not bulky. Pin the bun securely, and shape the side sweep to sit just where you want it for your makeup to show.
To personalize, choose loose, romantic curls for daytime photos or tighter curls for a more dramatic look. If you have layers, tuck them into the bun for a seamless finish instead of letting them stick out randomly.
For cost considerations, you can rent a heat tool or use your own and invest in a good curl spray. A quality product makes curls last longer, saving you from re-styling later.
12. Bun With Rhinestone Hair Pin Cluster
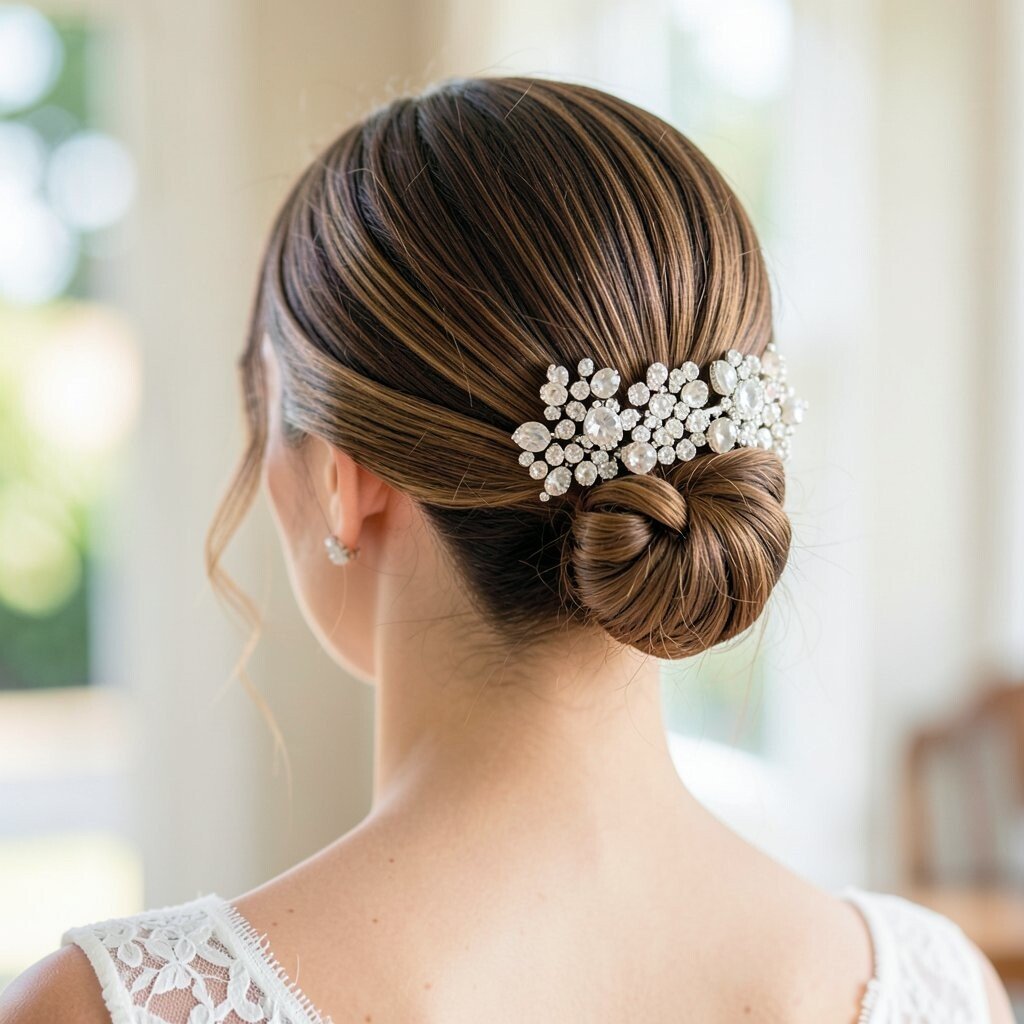
A bun can look totally different when you add a cluster of rhinestone pins. Even a simple bun base becomes statement-worthy in seconds.
Keep the bun neat and controlled, then place the pins where the light hits most in photos. Concentrate the sparkle near the top or slightly off-center so it complements your veil or earrings.
For uniqueness, mix sizes of pins so it feels curated, not uniform. If you are thinking about cost, buy one quality set of rhinestone pins rather than multiple cheaper pieces that may shed or shift.
13. Double Twisted Bun With Minimal Pins
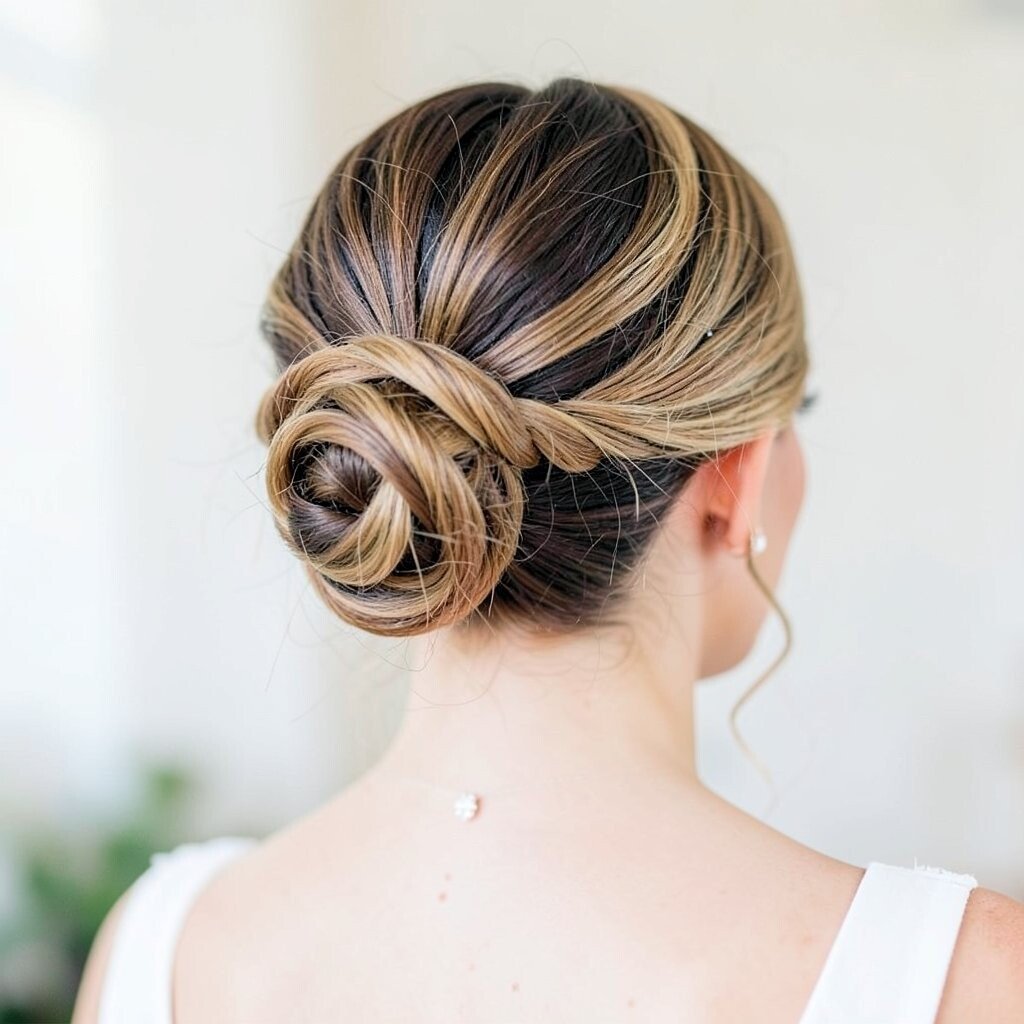
A double twisted bun looks intricate while still staying clean and easy to wear. Two twist paths create symmetry, which makes it feel elegant without feeling heavy.
Divide hair into two sections, twist each one toward the back, then wrap them together into a bun. Use fewer visible pins by tucking ends into the twist and securing with hidden bobby pins.
Personalize it by softening the twists slightly at the crown with your fingers after pinning. This is a good choice if you want structure but still want a natural, lived-in bridal vibe.
Cost considerations are simple here because the look uses your hair plus standard styling tools. If you need extra length or thickness, clip-in pieces can help without a full extension commitment.
14. Bun With Waterfall Braid Into the Base

A waterfall braid that feeds into the bun adds gentle drama without making your hair feel too tight. The strands look like they are cascading into the style, which photographs beautifully.
Create the waterfall braid along the side or down the back, letting some strands “fall” as part of the braid pattern. When you reach the gathering point, pull everything into the bun and pin smoothly.
For practical tips, keep the falling pieces slightly shorter at the front so they do not tangle with your veil. A light detangling spray can help, especially if you have fine hair that tangles easily.
To personalize, match the braid direction to your dress neckline, such as angling slightly toward a sweetheart neckline. Cost can stay low because braids use no extra tools, just patience and a good hair brush.
15. Crown Bun With Fresh Flower Inserts
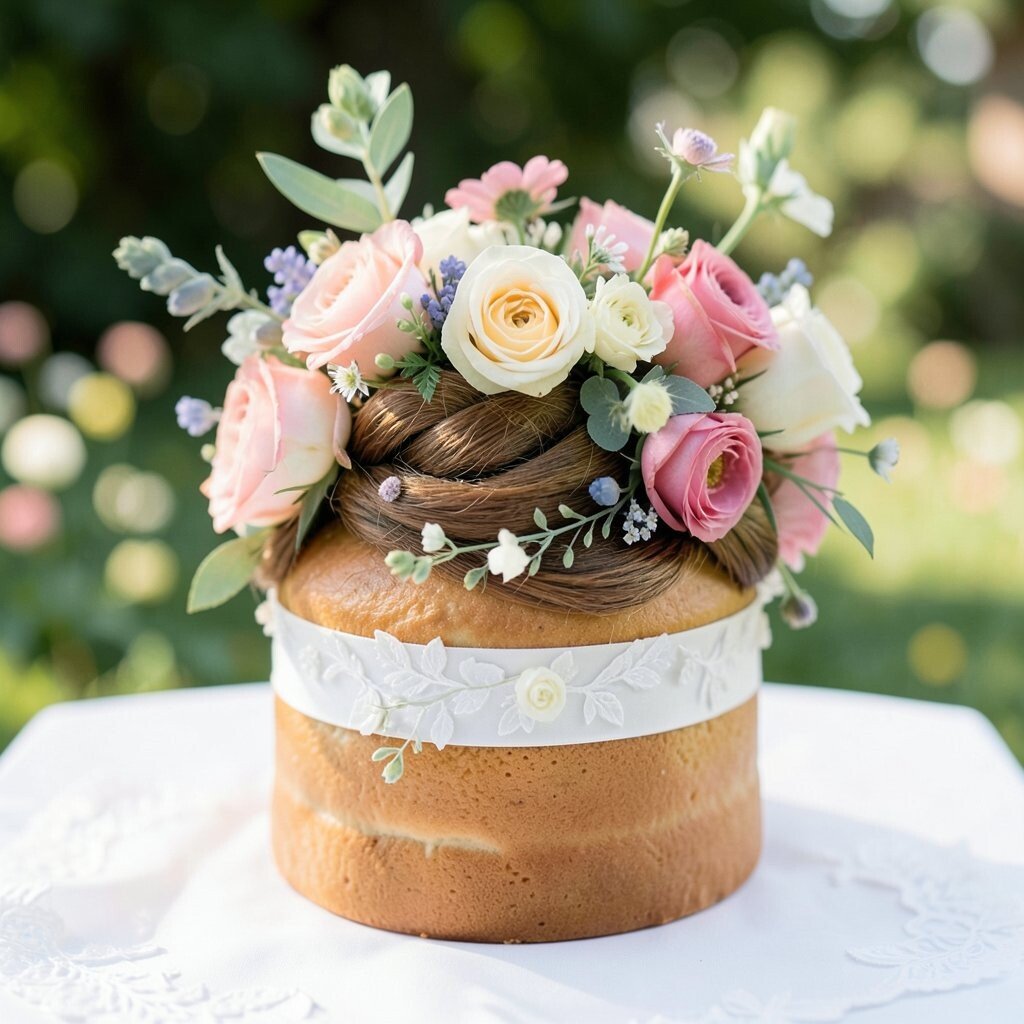
Fresh flowers make a bun feel alive and full of color and meaning. A crown bun style is a perfect match because it already frames your head like a soft wreath.
Place small flower buds near the top and sides, then keep the center secure so the bun does not shift. If you use real flowers, ask a florist for flower-safe stems and consider a barrier so your hair stays protected.
Uniqueness comes from choosing flowers that match your bouquet mood, from tiny white blooms to deeper petals for contrast. For cost, consider smaller but meaningful clusters instead of covering the whole bun, which can be more affordable.
Plan for comfort by using sturdy pins and checking the feel behind your head before you leave for photos. This style looks best with natural makeup and airy fabric for a cohesive bridal story.
16. Bun With Pearl Comb and Loose Waves
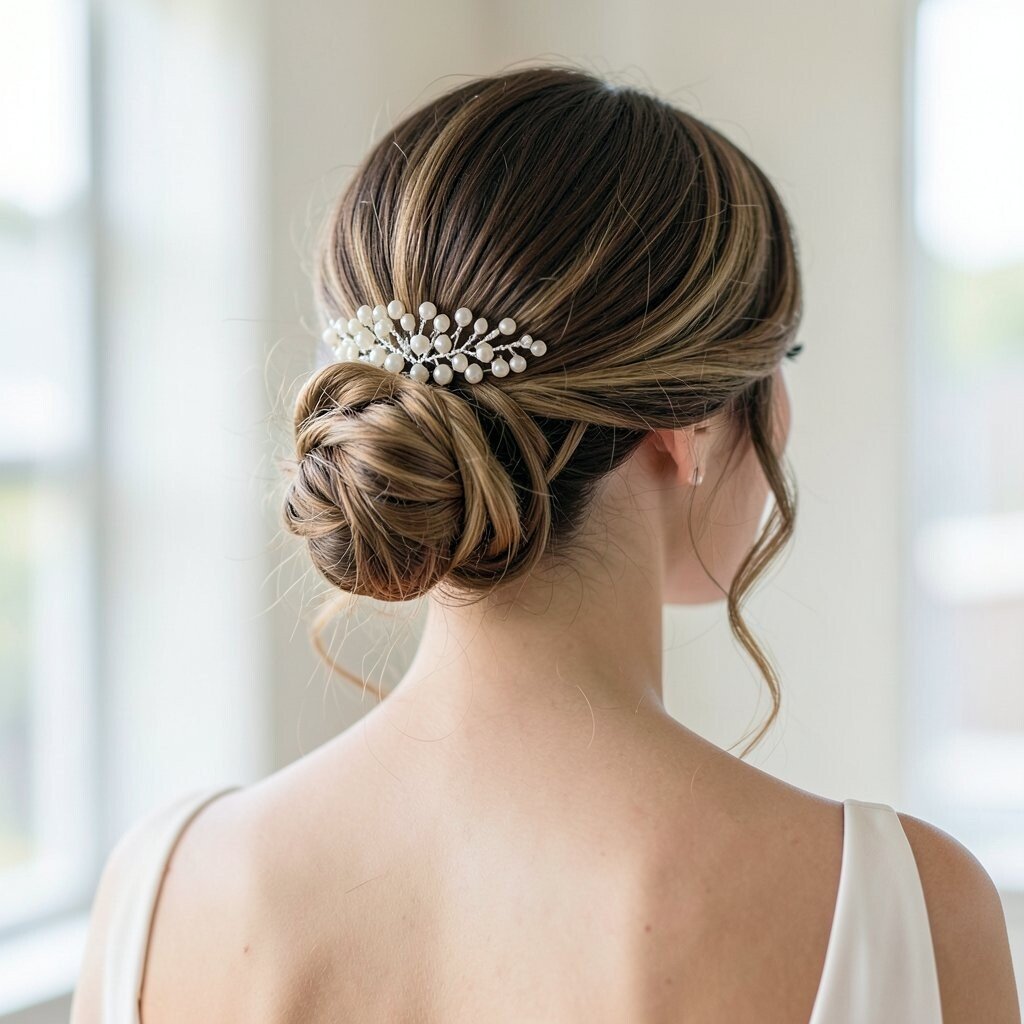
Loose waves around a bun create a soft bridal frame that feels both classic and relaxed. A pearl comb adds a gentle shimmer that works with almost any veil style.
Start by curling your hair, then gather it into a bun with a slightly lifted base for volume. Place the pearl comb at the side where it meets the bun, so it catches light when you turn your head.
To personalize, choose pearls in the same tone as your jewelry, whether it is warm ivory or cool white. This style is great for brides who want a polished finish without needing a lot of extra hair accessories.
17. Messy Bun With Braided Rope Detail
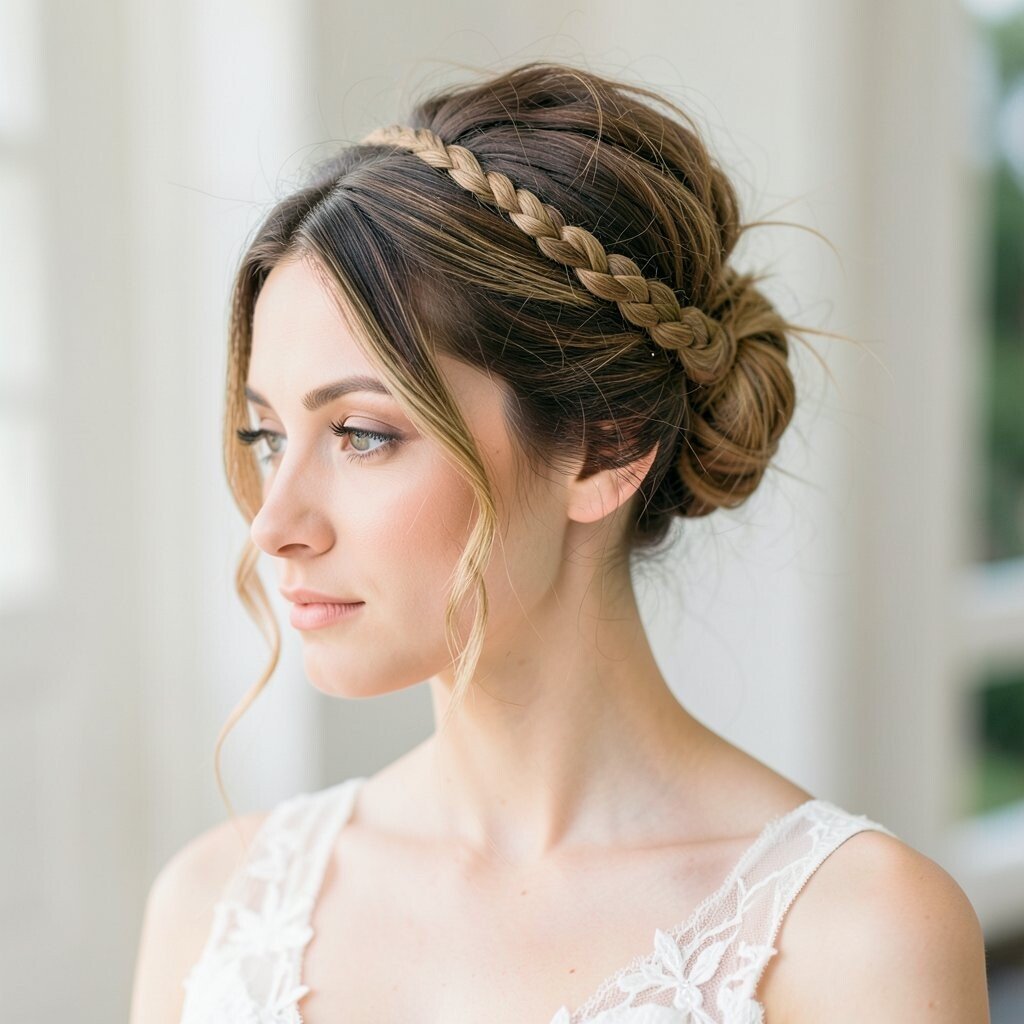
A braided rope detail adds a unique twist of texture to an otherwise messy bun. It feels artsy and bridal at the same time, especially with loose, imperfect edges.
Gather hair into a bun base, then create a rope braid using two sections twisted with a repeating pattern. Wrap the rope braid around the bun and pin it lightly so it looks intentional but still relaxed.
For practical tips, keep your rope braid slightly tighter than the bun so it stands out clearly in photos. If your hair is slippery, a little dry shampoo at the roots can help grip and hold.
Cost considerations are friendly because you likely only need hair product and a few pins. If you want extra thickness for the messy bun, consider affordable clip-in volume pieces that remove easily for hair touch-ups.
18. Minimalist Bun With Center Part and Skinny Loop Pins
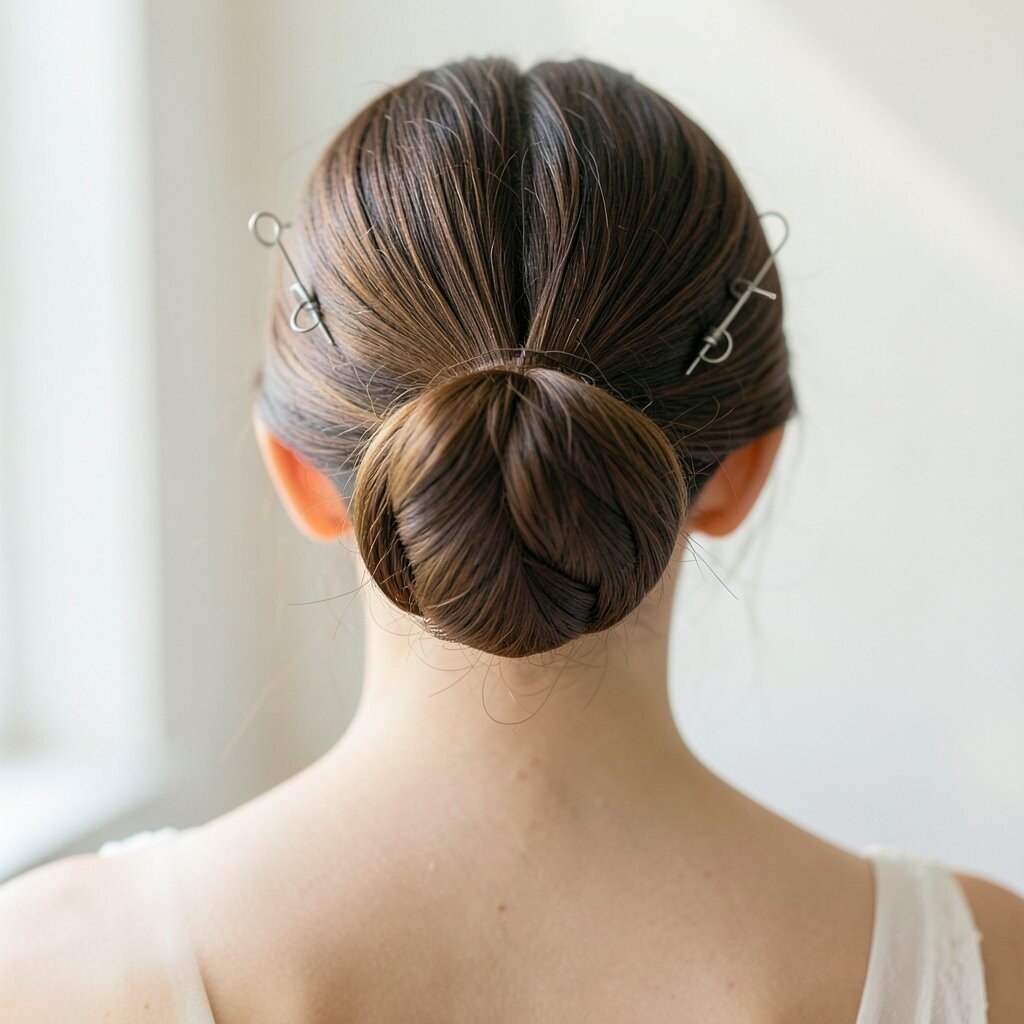
Minimalist buns feel modern and graceful, especially with a clean center part. Skinny loop pins can create a subtle, architectural look that stays elegant all day.
Part your hair neatly, then smooth it into a low bun at the back center. Add loop pins along the bun’s edges so the style has detail without becoming overly busy.
To personalize, add a single delicate drop earring style or a thin veil that matches the simplicity of the bun. This option can help keep costs down because it relies on technique and a small accessory choice.
For current trends, simple shapes with smart pin placement are gaining popularity because they look polished in both bright daylight and low indoor lighting. After styling, lightly mist with hairspray and avoid heavy touch-ups so the shape stays crisp.