
Soft hair moments can feel magical and doable at the same time. Start with simple styles that look like you planned every detail.
You’ll see how gentle tweaks make each look feel special for your wedding day.
1. Romantic Half-Up Braided Halo
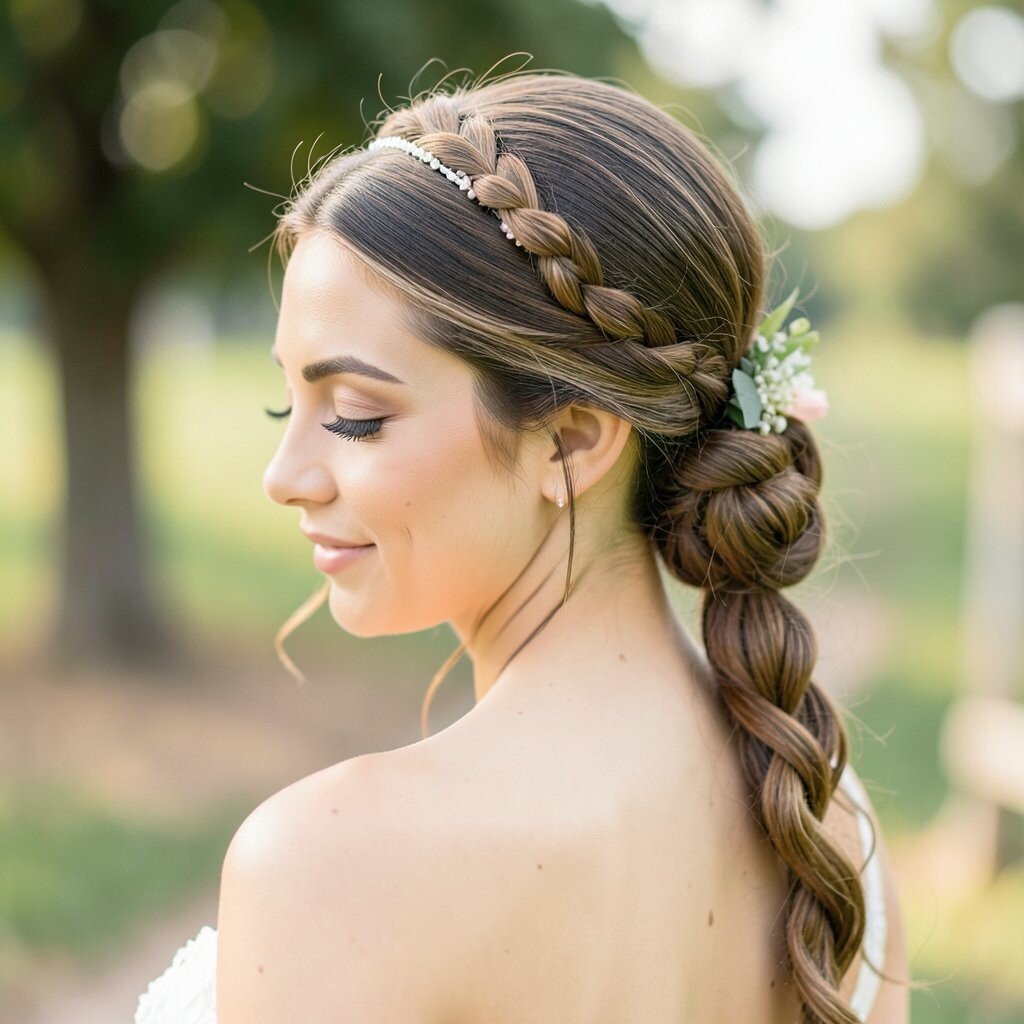
This style wraps a braid around the crown like a wreath made of hair. You’ll get a sweet, bridal vibe without needing advanced skills.
Part your hair into a top and bottom section, then braid the top section loosely. Tuck the braid across the head and secure it with bobby pins. For a clean finish, mist a little hairspray and gently tug the braid so it looks fuller. If you have fine hair, use a small amount of teasing near the roots for extra hold.
2. Low Twist With a Side Clip
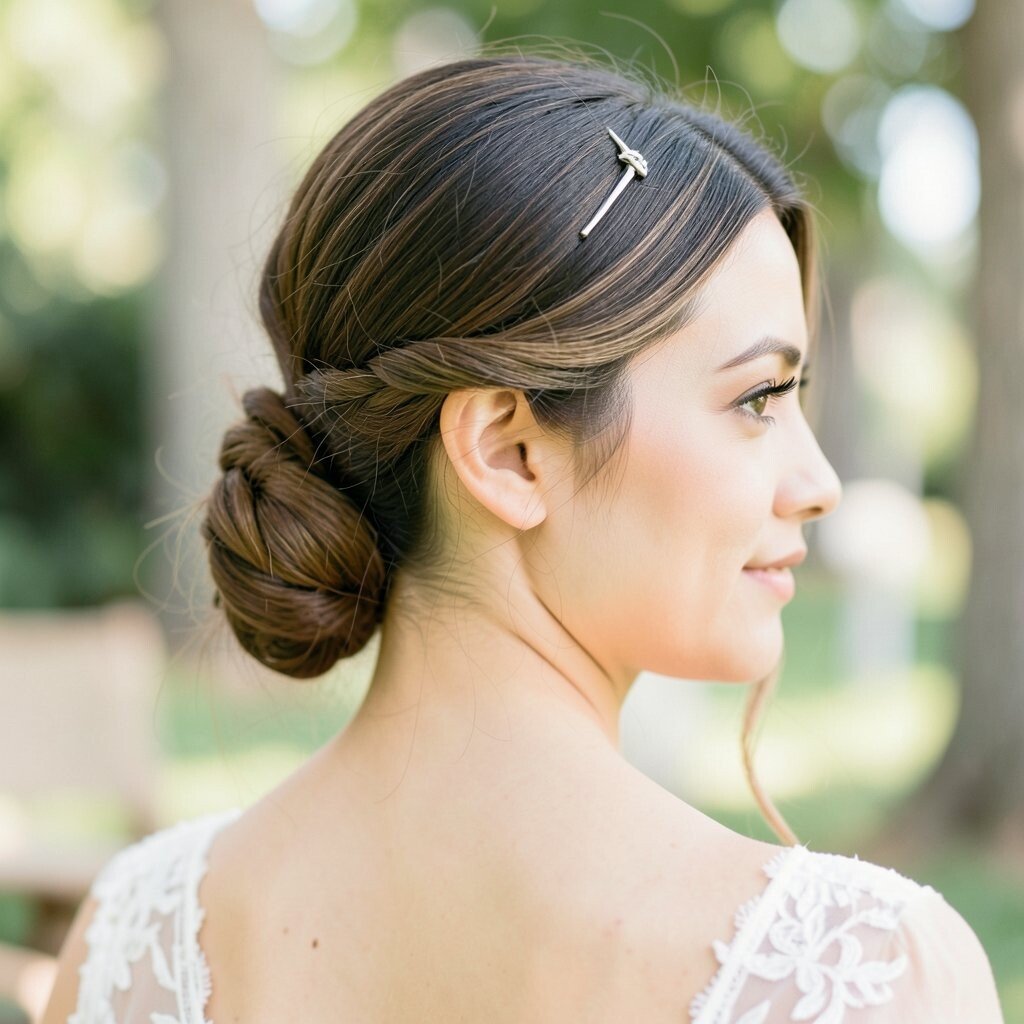
This look feels polished but still easy to do. It frames your face with a smooth twist that sits comfortably at the back.
Gather your hair to one side, twist it toward the back, and pin it low. Add a sparkly clip at the twist for a focal point that looks like jewelry. Finish by pulling one soft strand near your cheek for a relaxed, natural feel. Keep pins close to the scalp so the style stays secure through photos and dancing.
If you want personalization, choose a clip that matches your earrings or hair comb. A simple acetate or pearl clip is usually budget-friendly compared with custom pieces. This style is trending because it looks elegant in close-up shots and doesn’t fight heavy veils.
3. Classic Sleek Low Bun
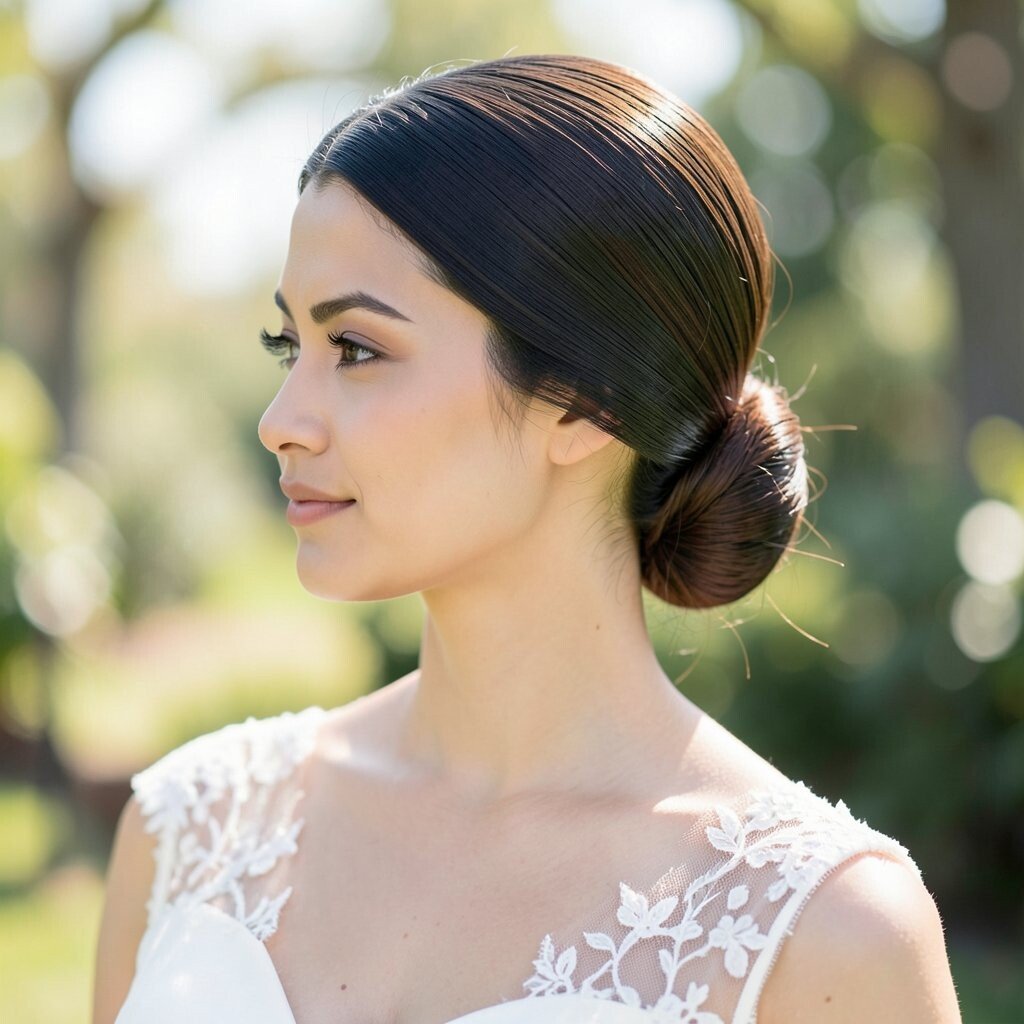
A sleek low bun has that timeless wedding energy. It makes your neckline look neat and gives your features a sharp, clean frame.
Start by smoothing your hair with a light gel or cream, then gather it at the nape. Twist into a bun shape and secure with bobby pins and a bun pin if you have one. Use a fine-tooth comb to remove bumps for a runway-like finish. If your hair is thick, split the bun into two sections before pinning so it sits flat.
For uniqueness, tuck a small ribbon or thin braid around the base. This style works well with many headpieces and looks great in both indoor and outdoor lighting. Current bridal looks often favor simple shine, so a satin-sheen finishing spray helps the bun look fresh.
4. Messy Bun With Soft Face-Framing Pieces
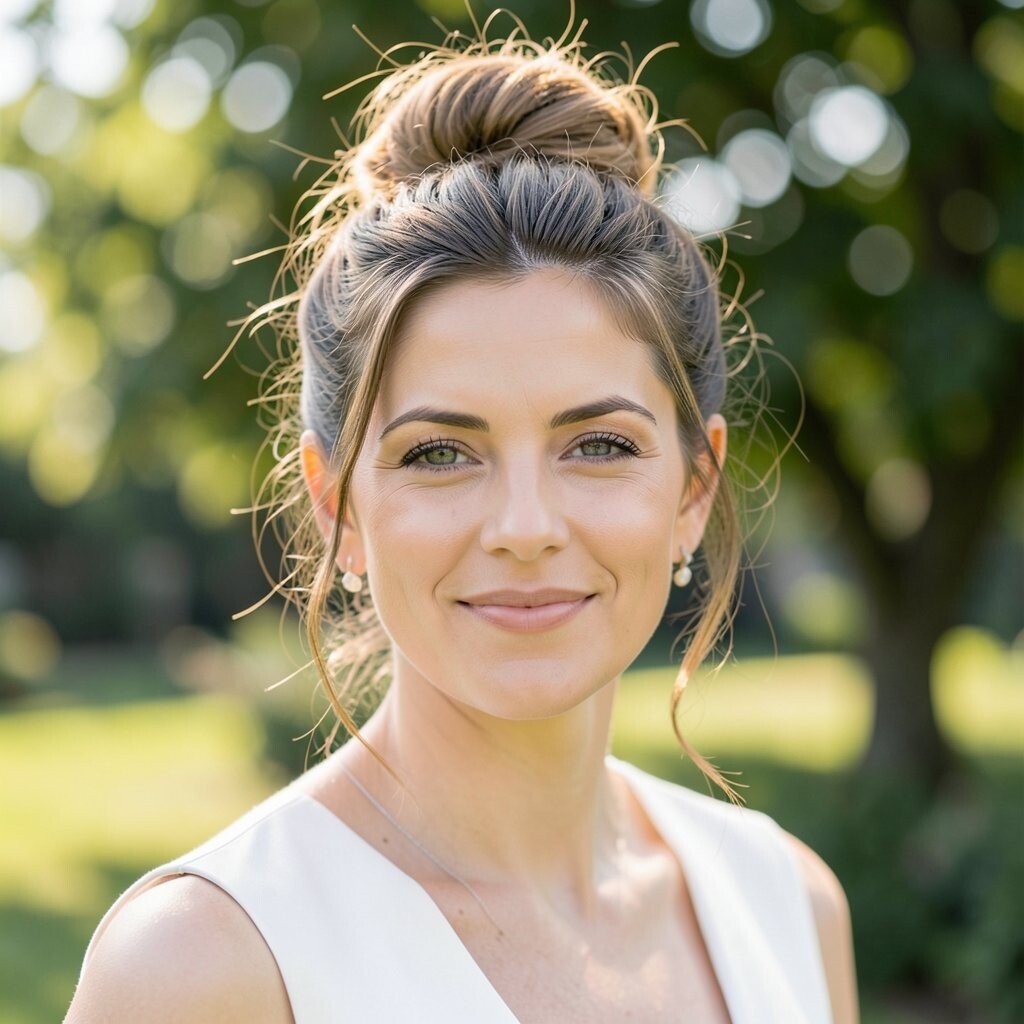
A messy bun is perfect when you want “effortless” instead of “perfectly styled.” It still photographs beautifully, even when you aren’t aiming for a super tight look.
Gather your hair loosely, twist, and pin it in a slightly uneven shape. Let a few strands fall around your face and adjust them until they match your vibe. Add volume by pulling at the bun gently, then set with a flexible hold spray. This hairstyle stays comfortable all day because it avoids tight tension around the scalp.
If you want a personalized touch, weave a tiny crown braid into the top before pinning the rest. For cost considerations, you can skip fancy tools and rely on bobby pins and hairspray. If you wear bangs, tuck them where they look best instead of forcing everything back.
For uniqueness, think about contrast like sleek roots with a looser bun, or a bun with visible texture. When trends lean toward natural texture, this style fits right in.
5. Textured Top Knot With Mini Clips
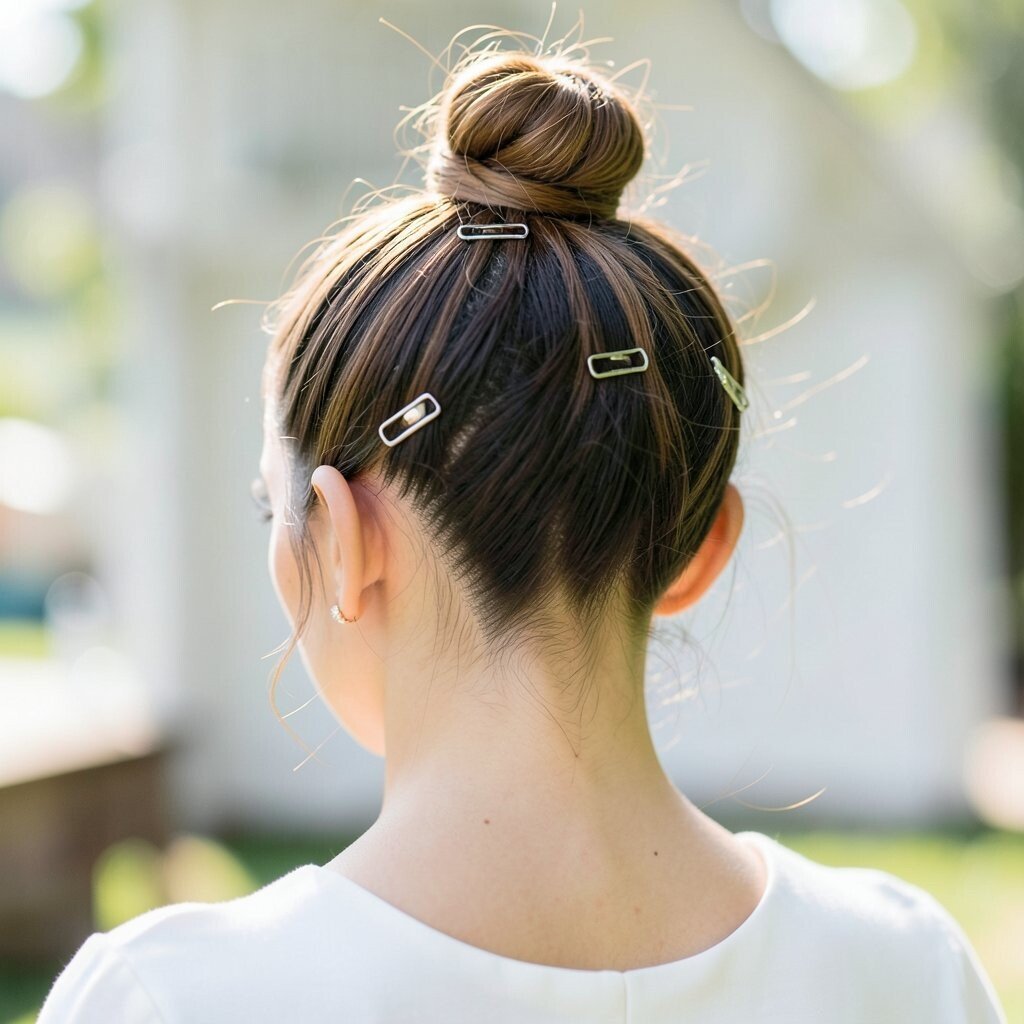
A top knot gives a playful, youthful look that feels modern for weddings. It’s also beginner-friendly because you’re building shape quickly at the crown.
Gather your hair at the top, twist it into a bun, and pin it firmly. Add mini clips along the hairline for a sparkly, scattered effect. Use dry shampoo or a texturizing spray beforehand if your hair is too slippery to hold. If you have shorter layers, twist them around the bun and pin them where they naturally land.
This style is trending because it looks fun in candid photos and feels less formal than a full updo. To personalize, choose clips in your wedding colors or use one small comb instead of multiple pieces. For cost, mini clips are usually inexpensive, and they add big impact without heavy styling.
6. Dutch Braid Crown (Beginner-Friendly Version)
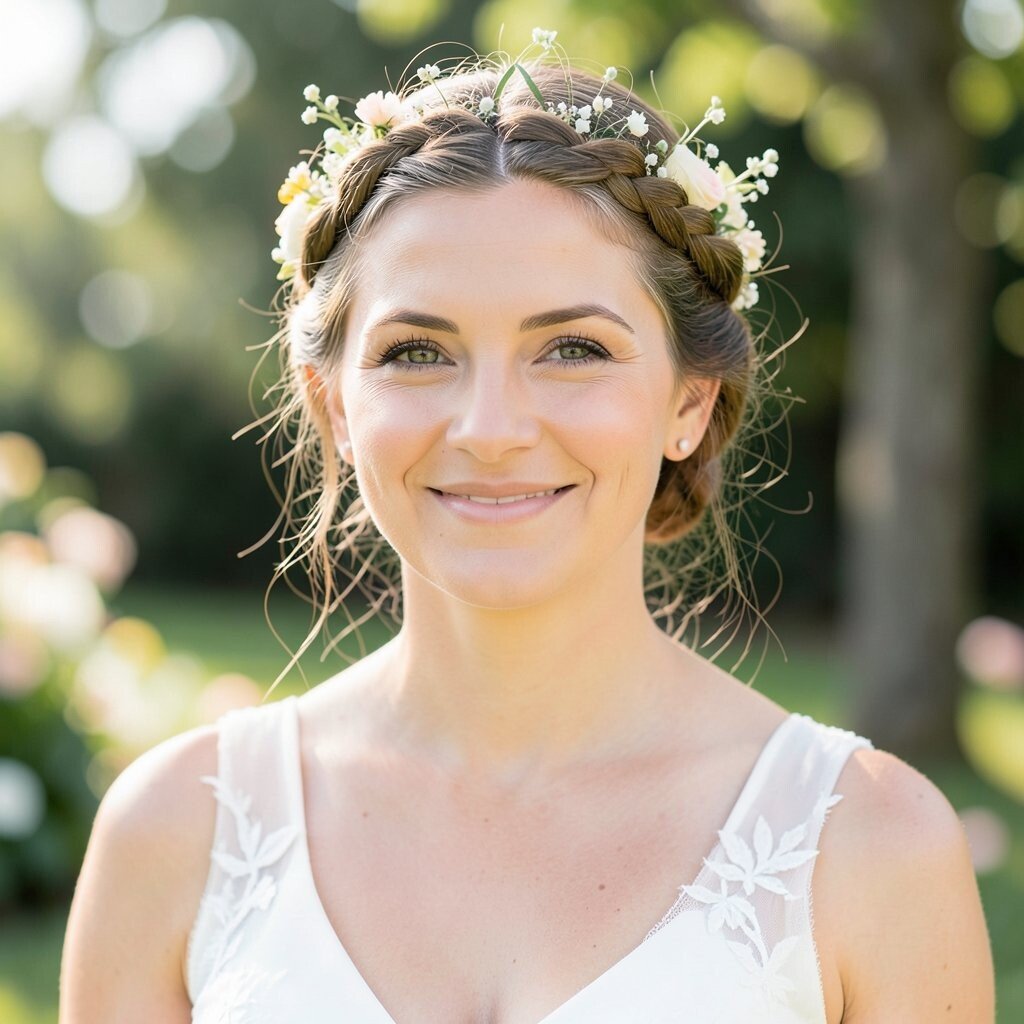
A braid crown looks instantly bridal, like you belong in a fairytale painting. The Dutch braid creates an eye-catching texture that stands out in photos.
To keep it beginner-friendly, start by making a center part and braiding one side first. Use a simple over-under pattern, but keep the sections medium-sized so the braid stays manageable. When you reach the back of your head, pin the braid in place and repeat on the other side. Join them at the back with pins so the crown feels secure.
For personalization, add a thin flower or pearl pin where the two braids meet. This look is unique because the braid sits lifted rather than flat, giving extra dimension. If your hair is fine, lightly tease the braid after pinning to make it look fuller without extra products.
7. Soft Low Ponytail With a Twisted Wrap

Not every wedding hairstyle has to be an updo. A soft low ponytail looks elegant, and the twisted wrap makes it feel special.
Brush your hair into a low ponytail and secure it with an elastic. Take a small section of hair from the ponytail, twist it, and wrap it around the elastic. Pin the end underneath so it hides completely. For benefits, this keeps your hair out of your face while still feeling light.
If you want extra hold, apply a little styling cream to the crown before brushing down. Personalize by curling the ends with a wide-barrel iron or leaving them wavy for a more natural look. Many brides are leaning into sleek yet flexible styles, and this ponytail fits that trend nicely.
8. Half-Up Puff With a Gentle Bouffant
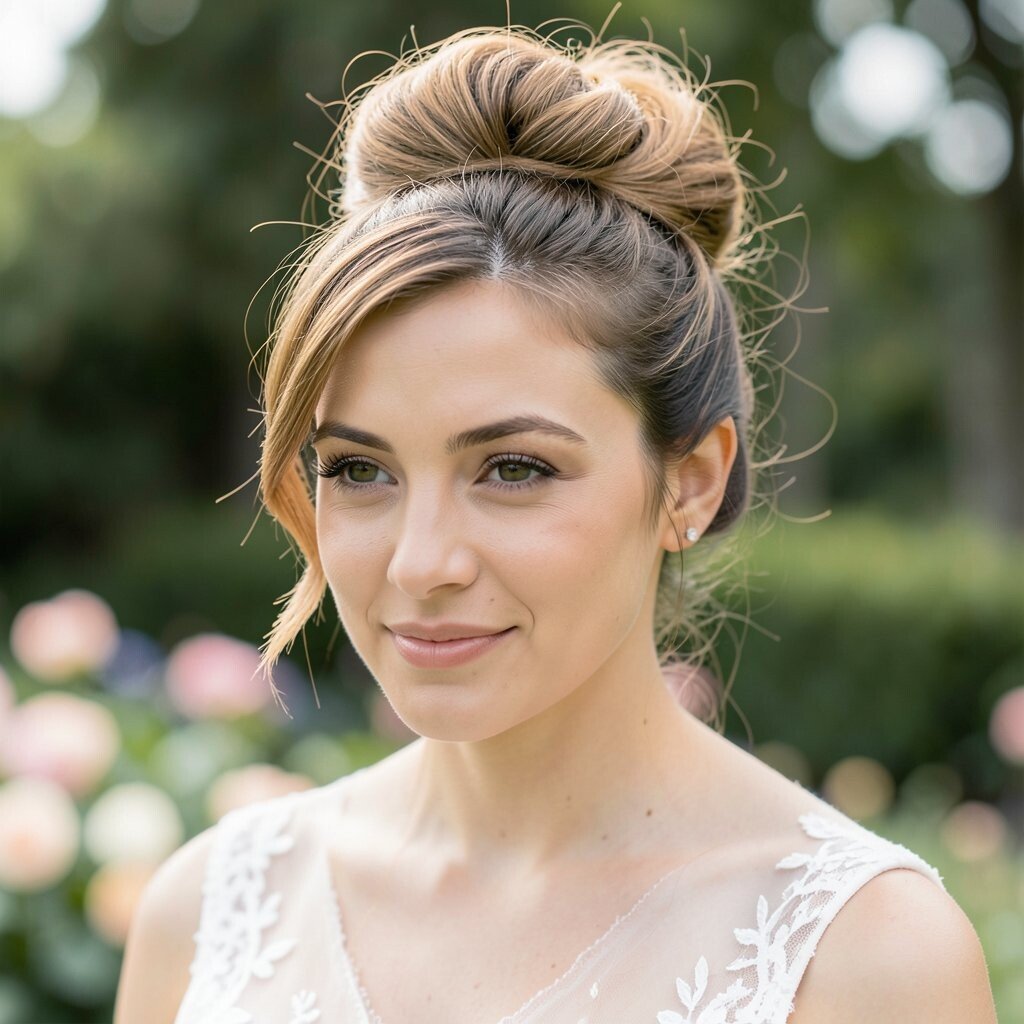
This hairstyle brings instant volume without needing complicated tools. A soft puff on top makes your face look lifted and elegant.
Start by creating a small section at the crown, then tease it lightly for lift. Smooth the outer layer so it looks neat, and pin it in place. Take a small top section near each temple and tuck it back to meet the puff. Leave the rest of your hair down for a romantic, classic look.
For uniqueness, braid or twist the ends of the pinned sections before securing them. This helps the style feel more detailed without adding a lot of time. If you’re worried about cost, you can skip fancy hair extensions and work with your natural hair texture using a volumizing spray. Current bridal trends favor soft movement, and this puff keeps things airy rather than stiff.
9. Side-Swept Waves With a Jeweled Hair Pin
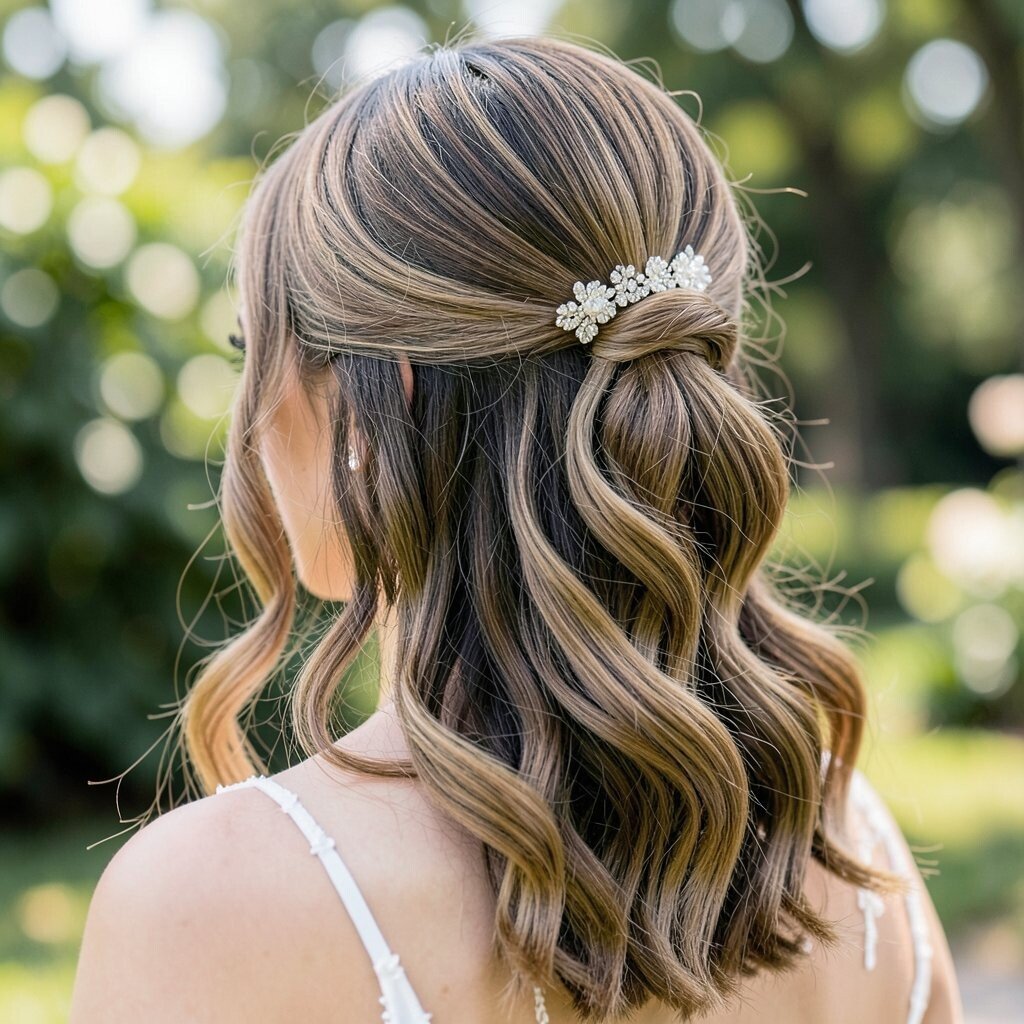
Side-swept waves look glamorous and feel effortless once you see them in the mirror. They also give your hair a natural flow that looks great in motion.
Create loose waves with a curling wand, then brush them gently so they look soft. Sweep your hair to one side and secure it with a large jeweled pin near the temple. Tuck any stray ends and use hairspray to keep the waves from falling too quickly. This style benefits brides who want a fancy look but don’t love heavy updos.
For personalization, pick a pin that matches your theme, like pearls for classic weddings or crystals for a modern vibe. This hairstyle is unique because the hair pin acts like a centerpiece while the waves do the storytelling. Cost can stay low since a single statement pin often replaces multiple accessories.
10. Bubble Ponytail With Easy Elastics

A bubble ponytail turns a basic ponytail into something playful and unique. You get that bouncy, rounded look without needing braid skills.
Secure your hair into a ponytail, then divide it into sections using elastic ties at intervals. Gently pull each “bubble” outward to create volume and shape. Keep the elastics close enough together so the bubbles look neat in photos. This hairstyle benefits thin hair because each bubble adds the look of thickness.
For personalization, tuck a thin ribbon around the base or add a small charm at the end of the ponytail wrap. If you have thick hair, use fewer bubbles so it stays comfortable and doesn’t feel heavy. Bubble styles are trending as a fun alternative to traditional bridal updos, especially for modern ceremonies.
11. Low Half-Up Twist With Claw Clip

This is the style you reach for when you want to look styled in minutes. A claw clip makes it feel secure and also adds a chic, modern touch.
Pull the top half of your hair back, leaving a few strands out near your face. Twist the top section lightly, then slide the claw clip over the twisted hair. Adjust the clip so it sits where your head naturally curves for the most flattering look. Let the bottom half fall naturally for a soft, romantic finish.
For uniqueness, choose a clip with a matte finish, tortoiseshell coloring, or subtle pearl details. This style is budget-friendly because you can reuse the clip after the wedding. Current trends often show “re-wearable” accessories, and a good claw clip fits right in.
12. French Twist With a Simple Hair Comb

A French twist looks classy and keeps hair off your shoulders. It’s a bold choice that feels like you belong on a special occasion poster.
Gather hair at the nape, twist it upward, and pin it close to your head to form the twist. Use a few bobby pins in a crisscross pattern so it holds. Smooth any flyaways with a tiny bit of gel or smoothing cream. Add a simple hair comb on top or slightly to the side for that bridal sparkle.
For personalization, place the comb where it visually balances your face, especially if you wear earrings. If your hair is very slippery, use a light styling product before twisting so it grips. This style can feel unique even with minimal accessories, because the twist shape does most of the talking. Cost-wise, a comb is often cheaper than a full set of decorative pins.
13. Braided Side Chignon
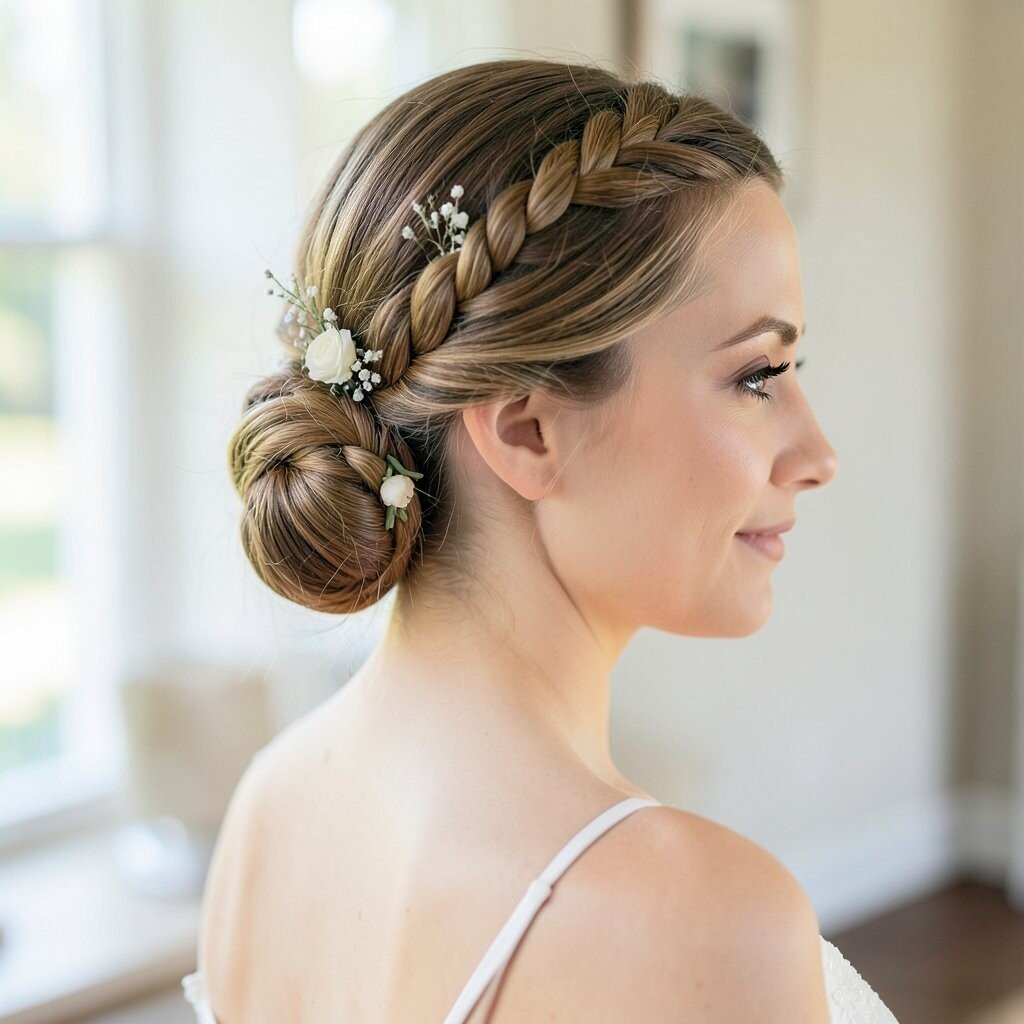
A chignon feels elegant, and adding a braid makes it look extra detailed. It’s a great option if you want an updo that still has movement.
Start by creating a side part and braiding a portion near the front or at the side. Twist the rest of your hair into a loose chignon at the back or slightly off-center. Pin the braid into the chignon so the braid looks like it’s woven through the style. Finish by gently tightening or loosening sections until it frames your face nicely.
This hairstyle benefits beginners because you can choose how much braid to show, from subtle to bold. Personalize with a small ribbon loop or a few pearl pins within the braid. The braided chignon look is a modern twist on classic bridal styles, and it matches many wedding aesthetics.
14. Crown Braid Ponytail Hybrid

This style blends a crown braid with the fun of a ponytail. You get the “hair up” feeling without committing to a fully pinned bun.
Create a braid along the top like a crown, then gather the remaining hair into a ponytail behind. Secure with an elastic, then wrap a small section of hair around it. If you want the ponytail to look fuller, tease lightly before wrapping. This look benefits brides who want their hair to move during the ceremony and reception.
For personalization, use a jeweled elastic or add a ribbon that matches your bouquet colors. Cost can be kept simple since elastics and bobby pins are inexpensive, and you can invest in one decorative piece. Current trends favor braid-meets-pony looks because they feel fresh, youthful, and photo-ready.
15. Simple Rope Twist Updo With Veil-Friendly Pins

A rope twist updo is soft, structured, and surprisingly easy to make. It holds shape well, which matters if you plan to wear a veil.
Divide hair into two sections, twist each one tightly in the same direction, then twist the sections together. Pin the rope twist into a low or mid updo, adding more pins where you need support. If you’re veil-friendly, place pins in a way that creates a stable base for the veil comb. Use a flexible hairspray so the twist stays put without feeling crunchy.
For uniqueness, tuck small decorative pins into the twist like tiny stars. Personalization can also be as simple as choosing a twist direction that mirrors your natural part. Cost considerations are friendly here because the style mainly uses basic tools, while the finishing pins provide the bridal sparkle.