
That bold headpiece deserves a hairstyle that knows how to frame it. The right look can make you feel both regal and completely like yourself.
Start with comfort, then build drama where it counts. With a little planning, your photos will look effortless and your wedding day will feel light.
1. Sleek Low Bun With a Front Crown

A sleek low bun sits neatly at the nape, letting your headpiece look tall and crisp. When you place a front crown or tiara right at the hairline, the whole look feels balanced and polished.
This style works especially well if your statement piece has structure, like beading or metalwork. For best hold, use a smoothing cream before you pin, then lightly mist only the roots so the bun stays touchable in photos.
2. Soft Chignon With a Side-Drift Fascinator
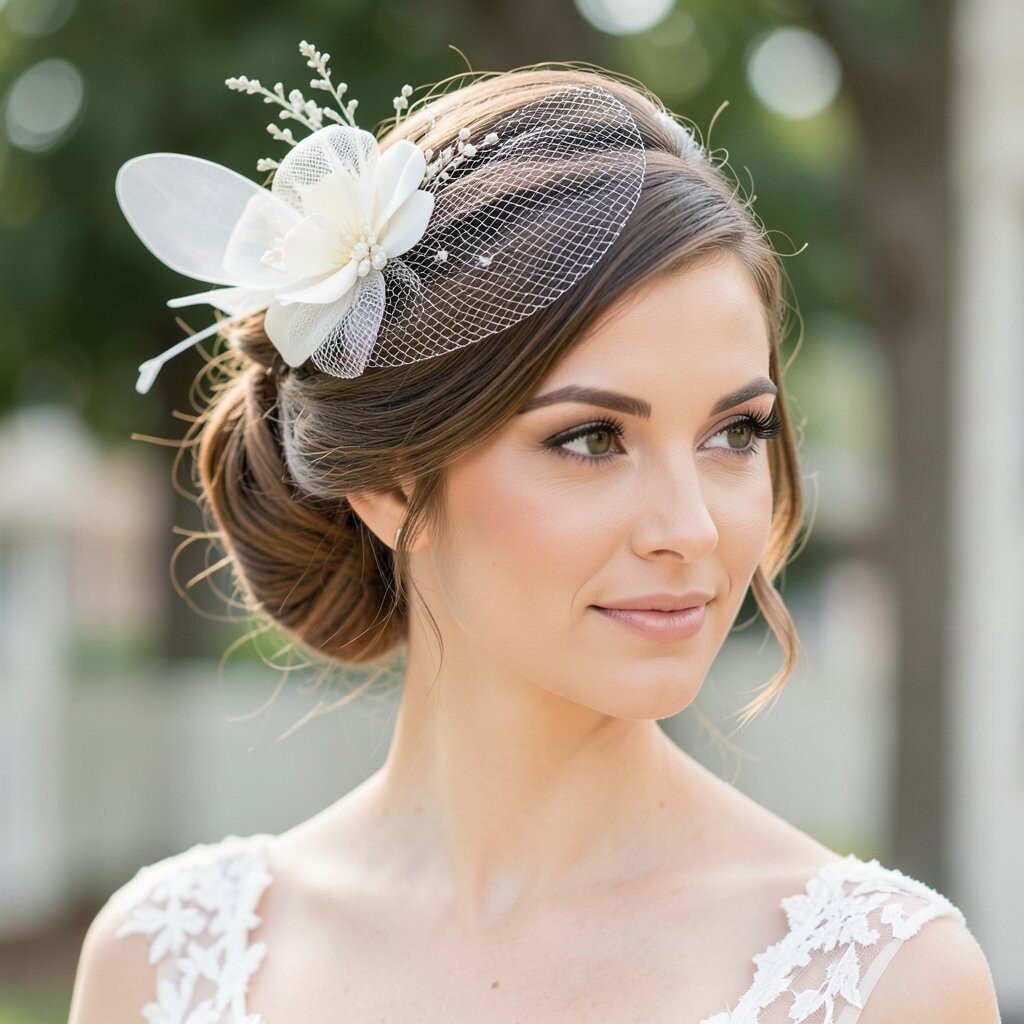
A chignon that’s slightly soft instead of too tight gives your face room to breathe. If your headpiece drifts to one side, the gentle shape makes it feel intentional, not accidental.
To keep the style practical, anchor the chignon with bobby pins and tuck in any loose ends. Add a light hairspray around the top layer, because you want the hair to stay elegant while you move and mingle.
This combination is unique because the headpiece becomes the headline while the chignon stays calm. If your fascinator is feathered or floral, pair it with a slightly glossy finish so the colors look rich without feeling heavy.
3. High Ponytail With a Dramatic Veil Clip
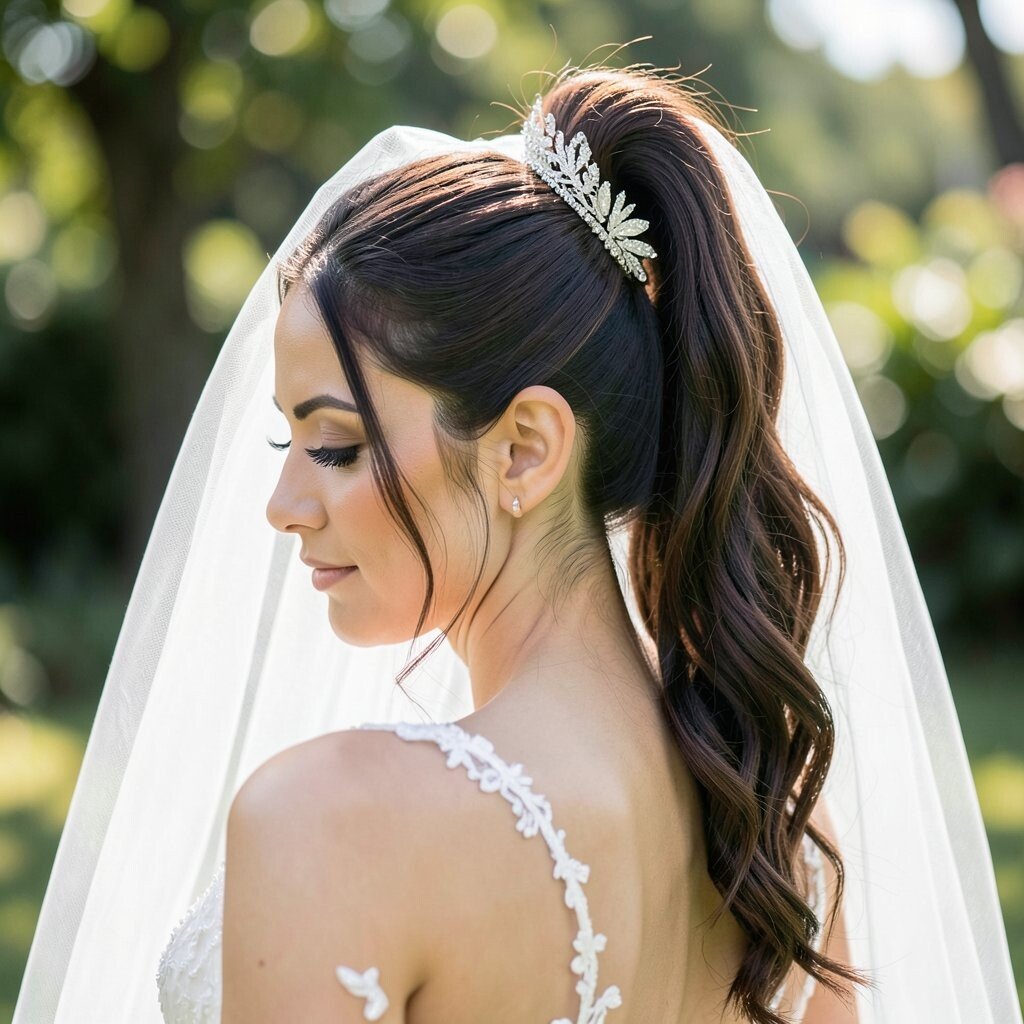
A high ponytail turns a statement veil clip into a clean, modern focal point. When the pony sits high, it gives your neck and earrings a chance to shine.
Choose a ponytail that’s either sleek or lightly waved, depending on how bold your veil clip is. Use a thin elastic hidden with a wrapped strand, and secure the veil clip near the crown so it stays centered even when you hug and dance.
If you want personalization, add a subtle braid into the base before wrapping, which looks special in close-up photos. This can be cost-friendly because you can style your own hair and rent or reuse the clip for a second look later.
Current trends favor less fussy hair around the face, so keep flyaways smooth and let the headpiece do the talking. A satin ribbon tucked under the elastic can also echo the shimmer of your jewelry without adding extra bulk.
4. Half-Up Waves With an Oversized Floral Headpiece

Half-up waves give you movement while still keeping the headpiece front and center. When the floral piece is large, the hair behind it should feel airy, like a soft backdrop.
For a practical result, create gentle waves from mid-length to ends, then pin only the top section. Use a flexible hold spray so the waves stay bouncy and you don’t feel crunchy during the ceremony.
5. Vintage Finger-Wave Bob With a Beaded Headband
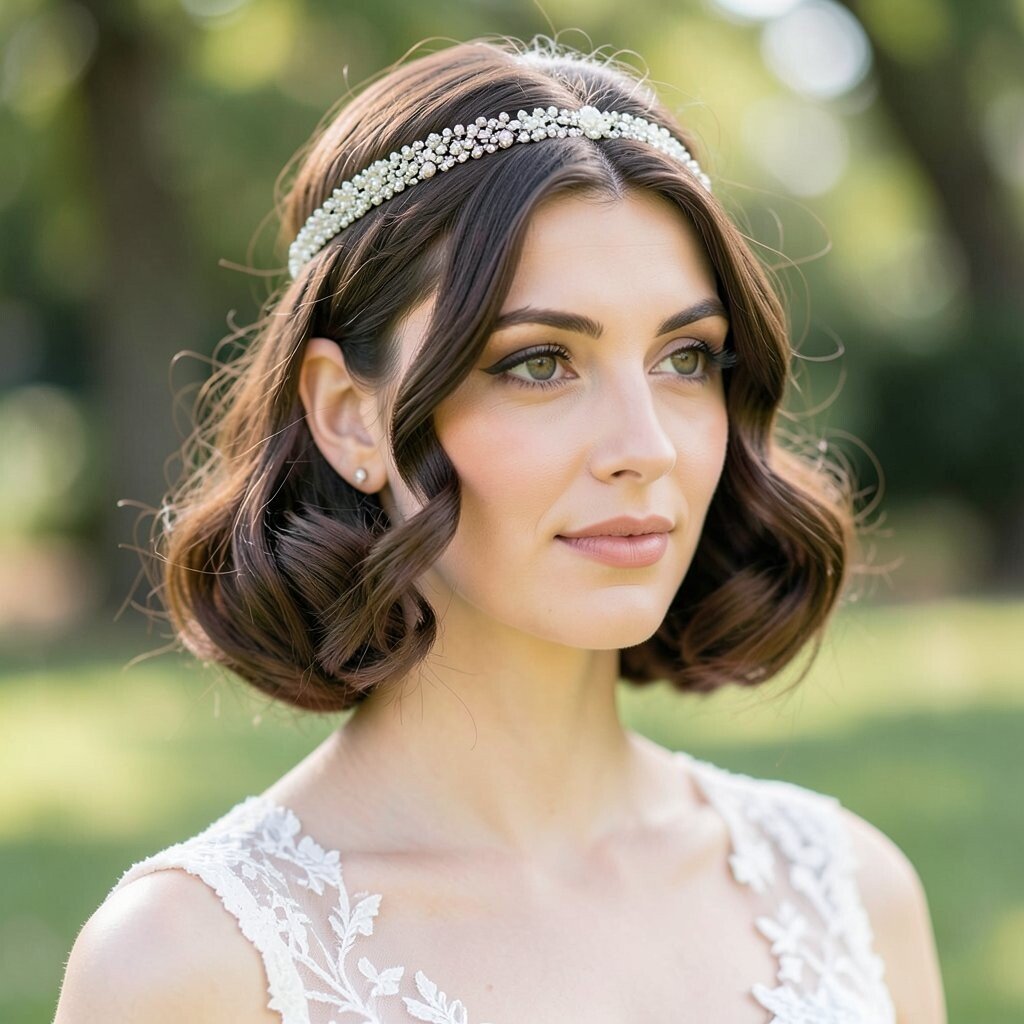
Finger waves on a bob look classic, and a beaded headband makes them feel bridal instead of costume. The tight waves hold their shape, so your headpiece stays crisp through photos and hugs.
If you have shorter hair, this is a great choice because it doesn’t require extra extensions. You can also personalize by matching the bead color to your wedding palette, like pearl for ivory gowns or gold for warm tones.
For longevity, set the waves while hair is slightly damp and let them cool fully before you add bobby pins. This helps you avoid re-styling midday, which can save money on last-minute touch-up products.
6. Low Twisted Crown With a Pearl Statement Comb
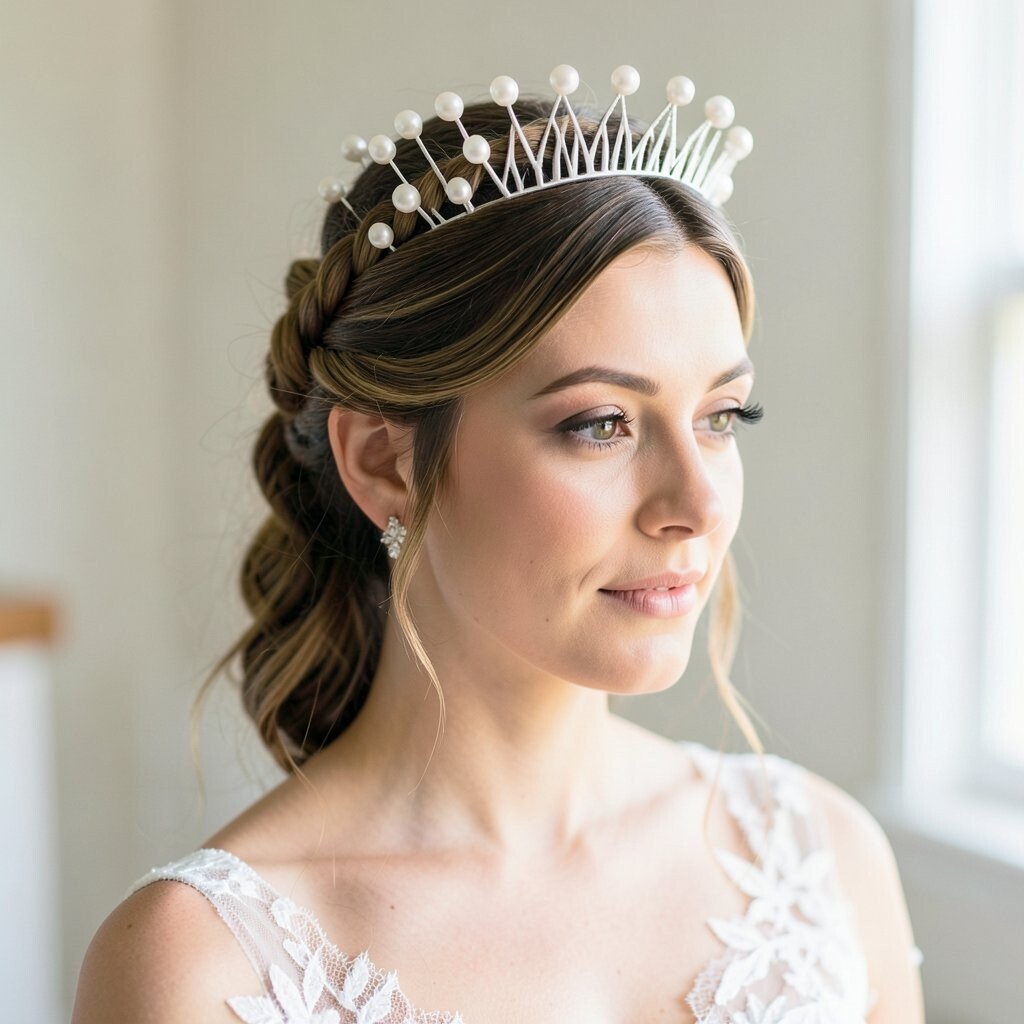
A twisted crown at the front creates a natural frame, which is perfect for a pearl statement comb. The pearls look like they’re floating because the twist gives them a tidy base.
This hairstyle is unique because it blends structure and softness in one look. Keep the twists snug but not tight, and use cream to reduce frizz so the pearls look clean instead of fuzzy.
7. Ballet Bun With a Sparkling Hair Vine

A ballet bun is smooth and minimal, so a sparkling hair vine can be the star. When the vine traces your scalp, your photos will show delicate details from every angle.
To make it bridal and not too strict, leave out a few wispy strands near the face. Secure them with a tiny pin that matches your hair color for an easy, natural look.
If your headpiece is lightweight, this style keeps it comfortable because there’s no heavy layering. For cost considerations, you can often reuse a hair vine across events, since the look stays refined even if you change earrings.
8. Loose Romantic Updo With a Feathered Fascinator

A loose romantic updo adds bounce, which helps feathers look soft and alive instead of stiff. When you place a feathered fascinator high or slightly back, the hair’s movement makes it feel airy and graceful.
Use textured hair or add dry shampoo to create grip before pinning. This reduces slipping, which matters when feathers are involved and you need the headpiece to stay steady throughout the day.
9. Twisted Side Updo With a Geometric Headpiece
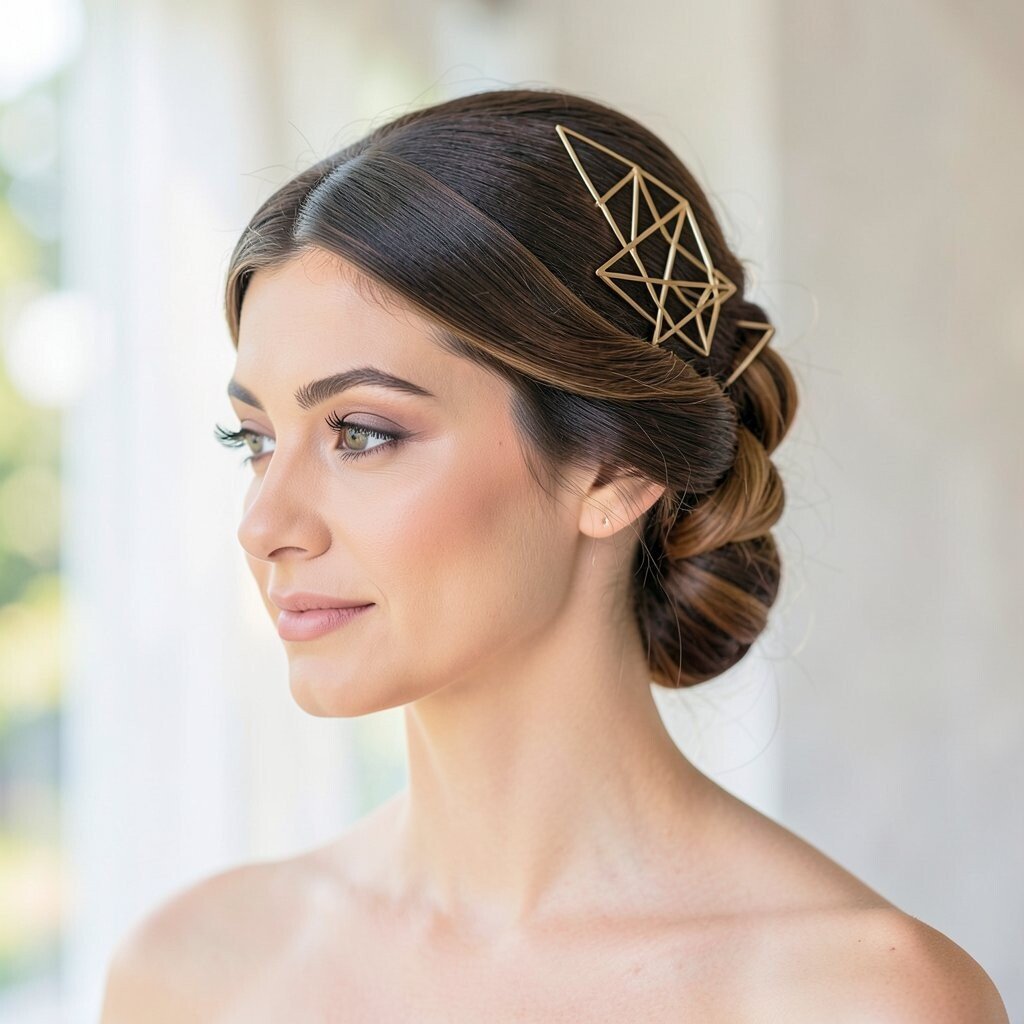
A twisted side updo makes geometric headpieces look sharp and intentional. When the shape angles away from your face, it adds structure without overwhelming your features.
Keep the twists uniform and use a gloss spray over the pinned areas so the geometric details pop. If you want personalization, match the hair parting to the headpiece direction, like a diagonal for modern pieces.
This hairstyle is practical because it keeps hair off your neck while still letting you show length in the back view. It’s also a smart choice for wind, since the side placement is less likely to fly around than loose styles.
10. Sleek Half-Up With a Bow-Like Statement Clip
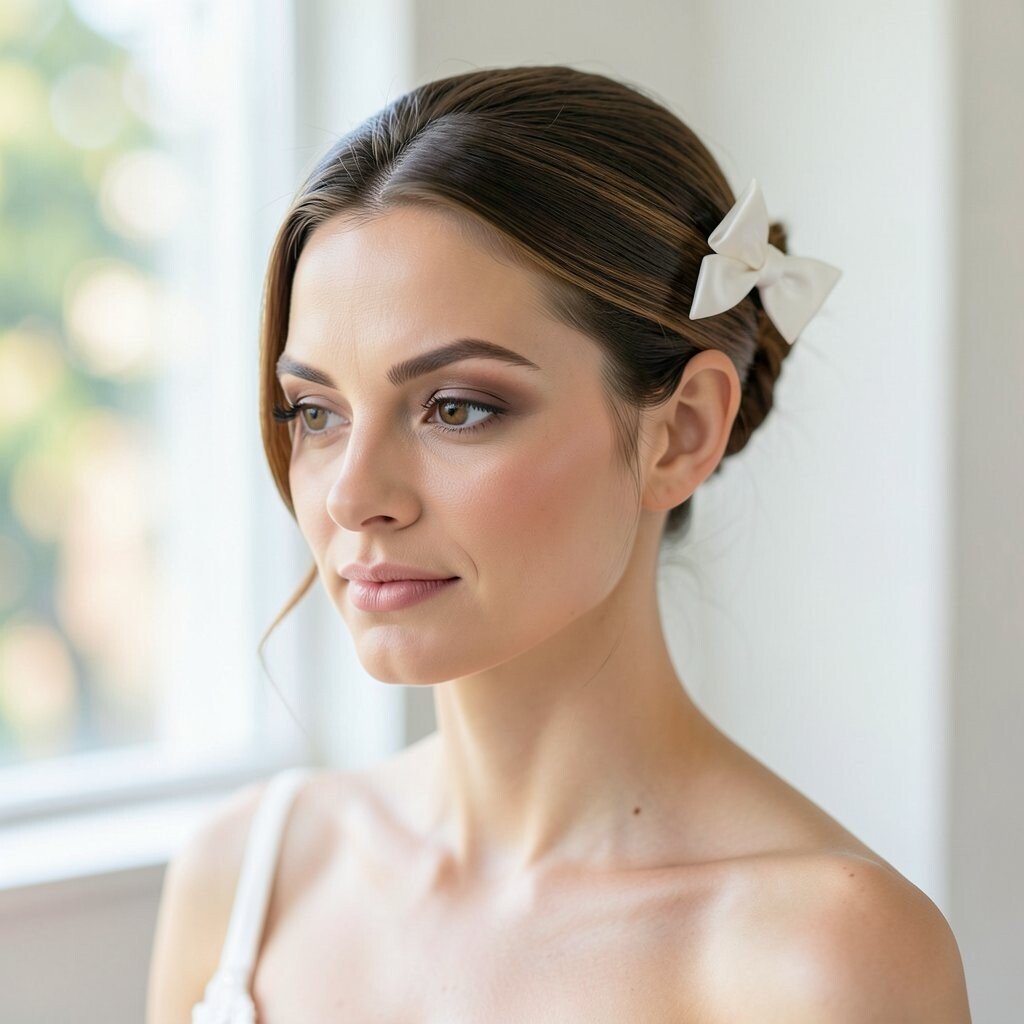
A sleek half-up style puts your clip at the center, and the shine makes it feel extra luxe. When the clip looks like a bow or oversized ribbon, keeping the rest of the hair smooth prevents competing textures.
Apply heat protectant if you flat iron, then add a shine serum to the top layer only. This helps you avoid greasy buildup while keeping that “just set” look for the ceremony and portraits.
11. Waterfall Braid Updo With an Embellished Tiara
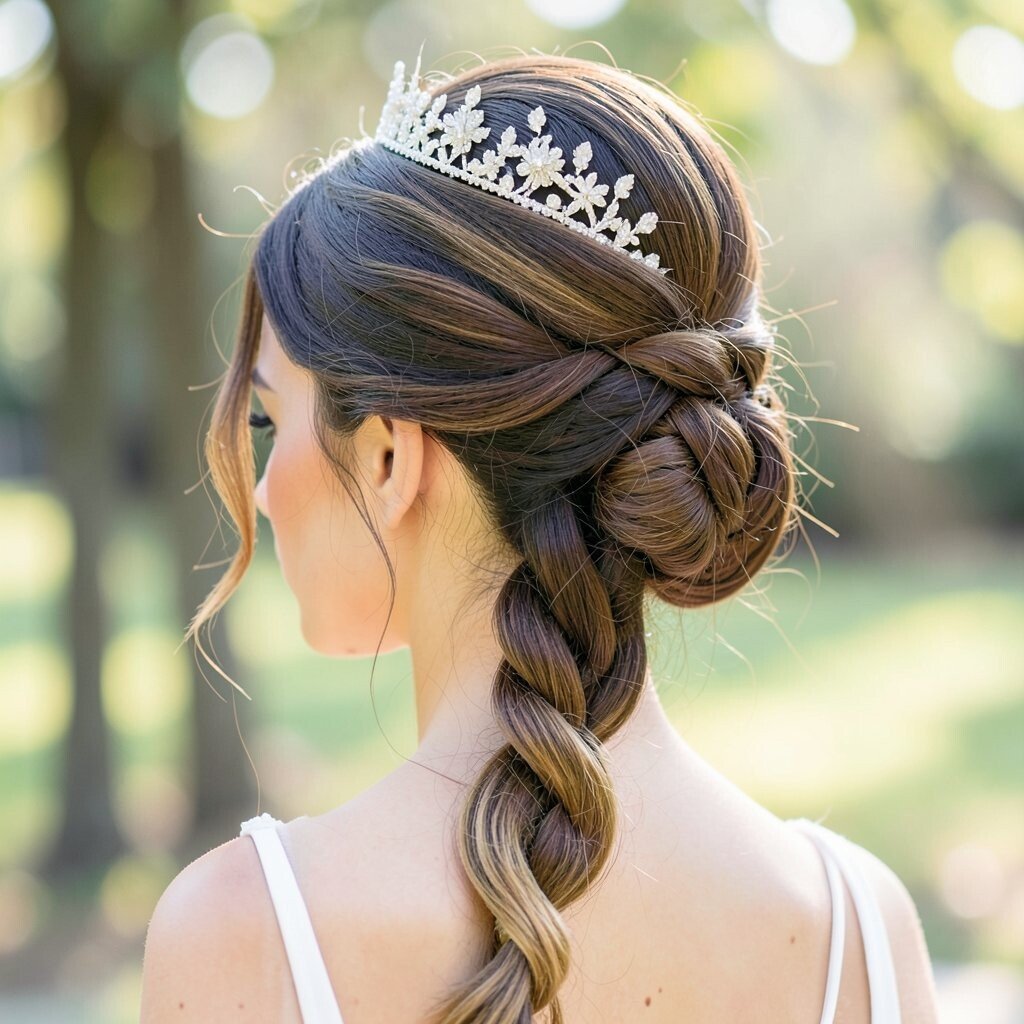
A waterfall braid updo feels romantic, and it gives your tiara extra support at the crown. The braid pattern leads the eye upward, so the tiara looks perfectly placed rather than sitting on top of hair.
Start the braid so it frames your cheekbones, then pin it into a neat updo. For practical tips, secure with a mesh hair net if your hair is slippery, because tiaras can shift if the base isn’t grippy.
This option is unique because it mixes classic braid work with statement sparkle. If cost is a factor, you can keep the braid visible around the edges while using a simpler tiara version that still looks bold.
12. Romantic Low Waves With a Veil Crown Headpiece

Low romantic waves feel soft and timeless, especially when paired with a veil crown. The veil crown looks elegant on flowing hair, and your hairstyle lets the veil settle naturally.
Use a curl wand with a medium barrel and alternate directions for a gentle pattern. Then pin the veil crown lightly at the top, so it doesn’t pull and cause discomfort during the ceremony.
If you want personalization, tuck tiny pearls into the waves near the crown so the details match the veil. This also makes the look feel more “you” without adding a lot of time or cost.
13. French Twist With a Dramatic Drop Headpiece
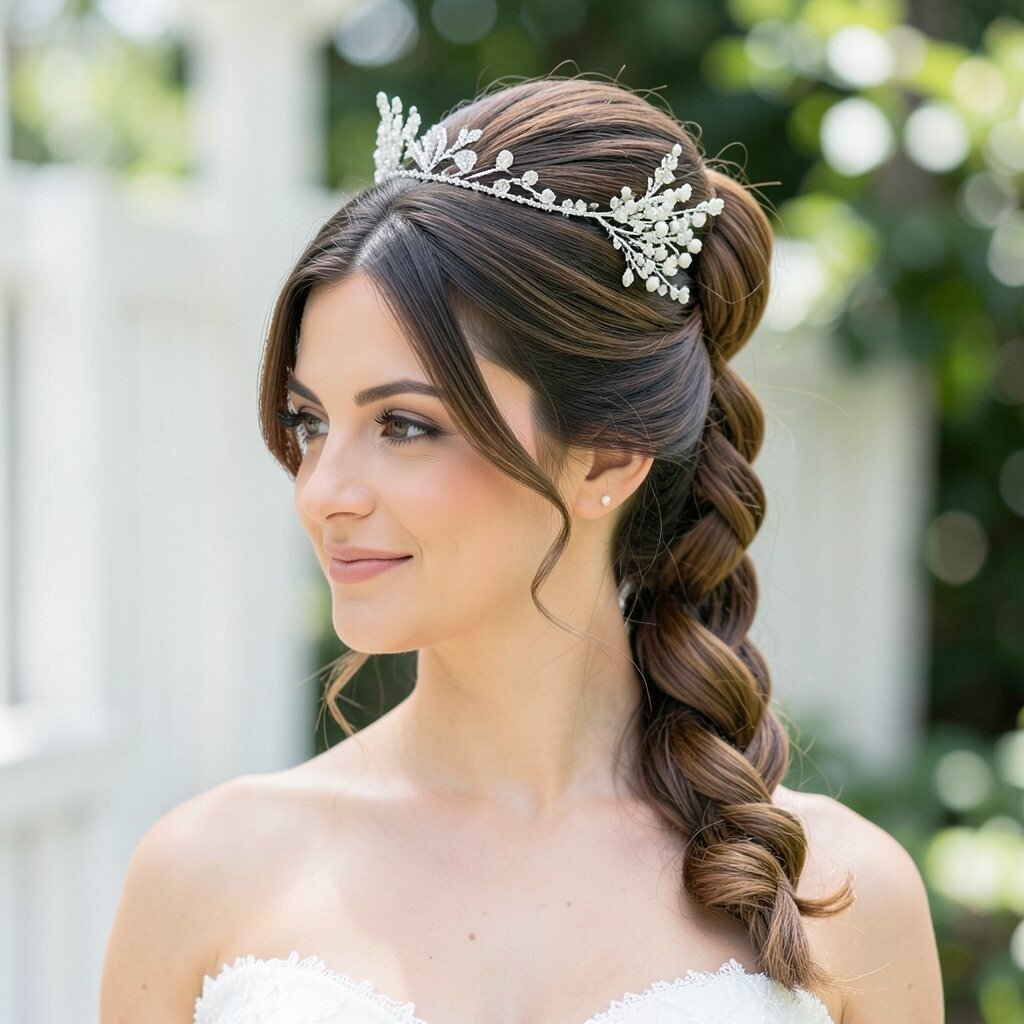
A French twist keeps everything tidy, which is ideal for a drop-style headpiece with dangling elements. When your hair is lifted and secured, the drop pieces move like jewelry instead of getting tangled.
For best results, smooth hair first and then twist firmly, leaving only a small amount of volume at the front. Use strong pins and consider a light setting spray, since twists need grip to stay beautiful for speeches and photos.
14. Messy Textured Updo With a Bold Floral Halo
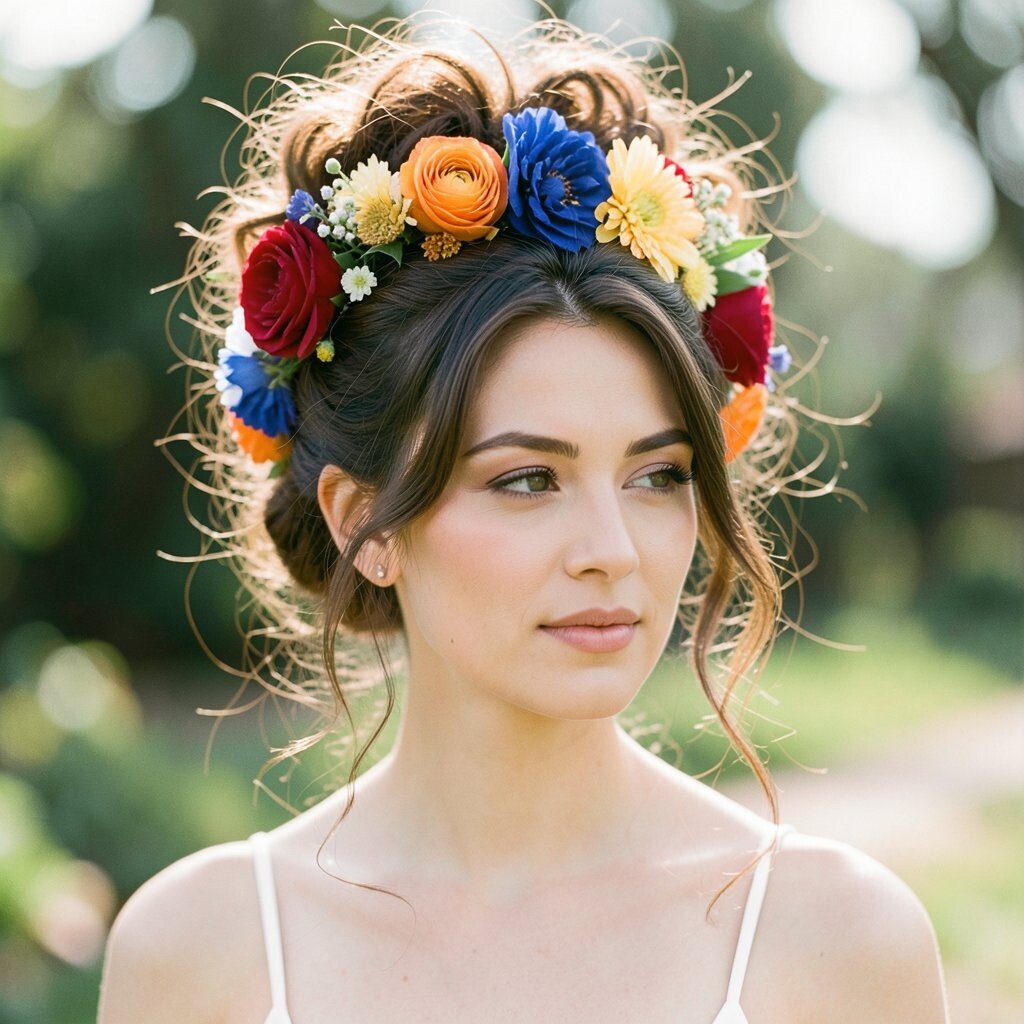
A messy textured updo gives a halo-style headpiece room to look abundant and carefree. Even if the halo is big, the messy texture supports it without making the whole look feel too neat.
Tease the crown slightly for lift and twist sections loosely around the base. Keep the edges soft with a tiny bit of styling paste, so the floral details look like they belong rather than glued on.
15. Side-Parted Sleek Hair With an Art Deco Headpiece
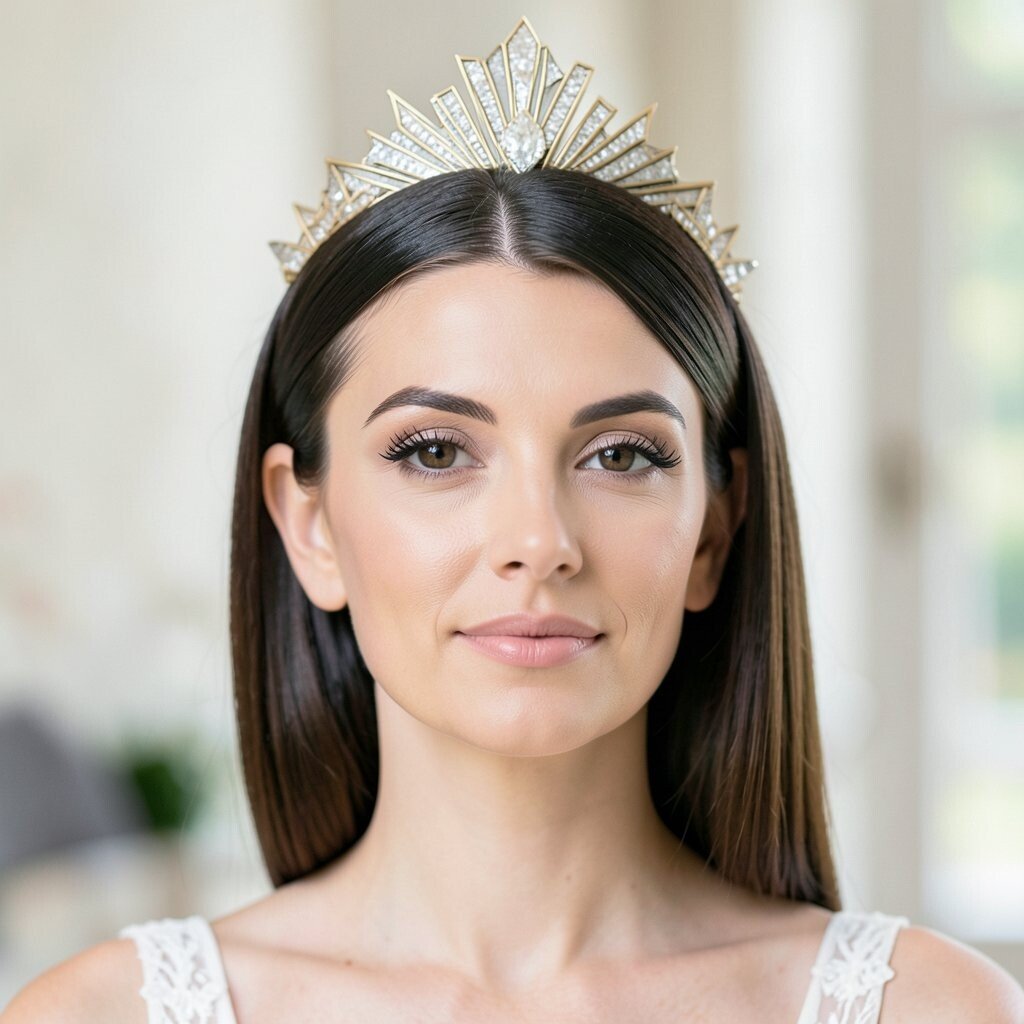
Art deco headpieces shine best with sleek hair and a clean side part. The sharp lines of the headpiece match the polished look, making the overall style feel design-forward.
Use a smoothing mousse before blow-drying, then flat iron carefully for a mirror finish. If your headpiece includes rhinestones or colored stones, choose hair products that enhance shine so everything photographs crisp.
This hairstyle is practical for busy wedding days because it rarely needs re-touching once set. For personalization, you can tuck a thin strand behind one ear to mirror the headpiece angle and make it look custom-made.
16. Curly Volume Updo With a Statement Brooch Headband

Curly volume looks lively with a statement brooch headband because the texture makes the brooch feel like part of your hair story. When your curls are pinned upward, the headband sits securely and visually frames your forehead.
Pin curls in small clusters so the headband has a stable surface. Add a curl-friendly gel before styling to reduce frizz, especially if your wedding day could be humid.
If you want to keep it budget-friendly, you can use your real hair volume rather than investing in extra extensions. And if your headband is removable, you can swap it for earrings later to get more wear from the same piece.
17. Low Braided Crown With a Rhinestone Circlet

A braided crown is the perfect base for a rhinestone circlet because both look structured. The braid holds the circlet in place while giving it that regal, old-world vibe.
Make the braid neat and slightly flatter than usual, then set it at the nape so the circlet rests cleanly at the top. Use bobby pins with a light grip and a final mist of flexible hairspray to keep shine even.
This style stands out because it feels both classic and modern at the same time. If you want personalization, weave in a small ribbon that matches the gem tone, like silver for cool jewelry or champagne for warm highlights.
18. Smooth Hair With a Veil Attached at the Crown

Smooth hair is a calm canvas for a veil attached at the crown. When your veil sits right on top, a simple hairstyle helps it look dramatic without tangling with other details.
Part your hair neatly and secure the veil base with extra pins so it doesn’t shift when you move. Keep the ends softly curled or tucked behind the shoulders, since a statement crown draws attention to the upper half.
This is a comfortable choice too, because there’s less heavy pinning all over the head. It’s also a helpful cost consideration if you plan to keep your hair routine simple on the day of the wedding.
19. Romantic Twist Braids With a Floral Veil Comb

Romantic twist braids look sweet and detailed, and a floral veil comb adds a delicate finishing touch. Because the twists create texture, the comb appears more natural and blended into your hairstyle.
Work the twists from the front so the comb sits smoothly at the crown. If your veil comb has many pieces, keep the hair around it less bulky, so nothing looks crowded or tangled.
For personalization, add a tiny clip or gem near the braid junction to match the comb colors. This style is great for photos because the braid lines show up clearly even when the veil flows.
20. Sleek Bunless Style With an Oversized Statement Bow Headpiece
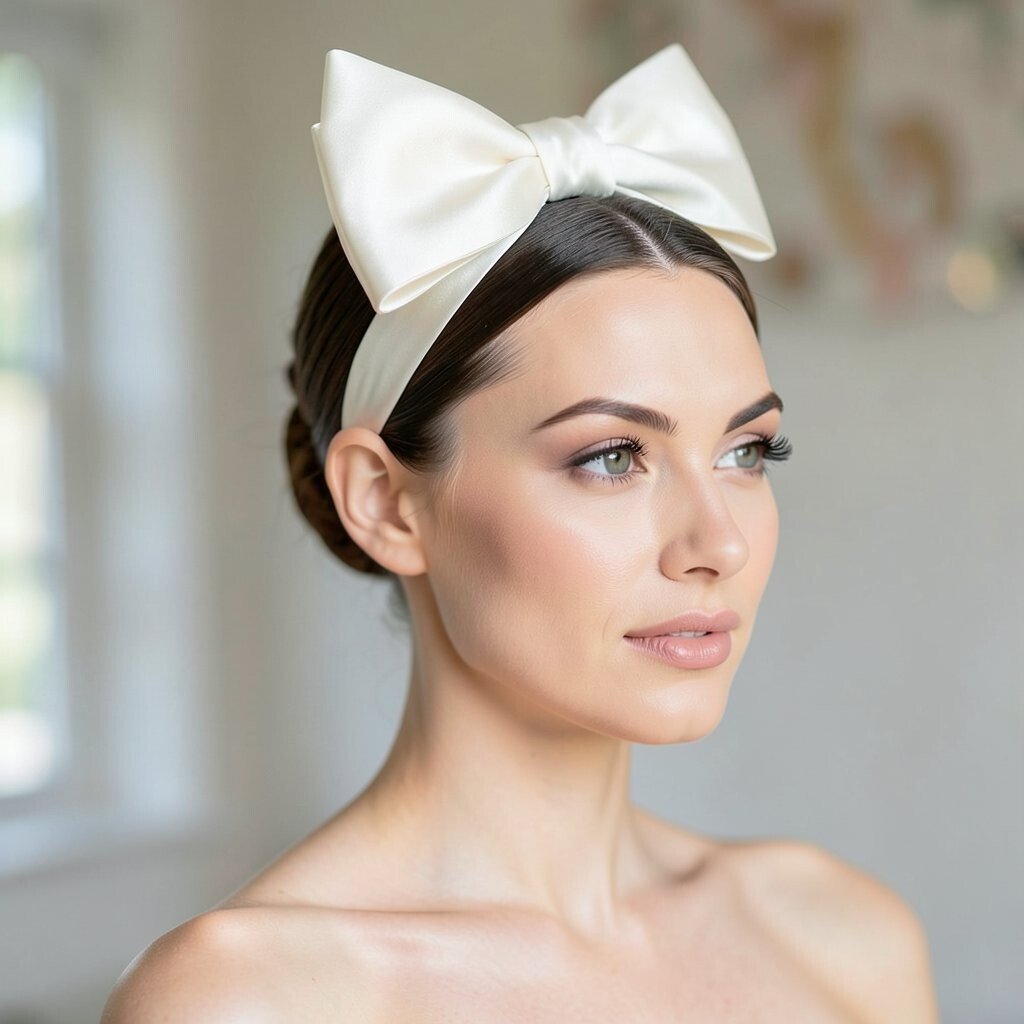
Skip the bun and go for sleek shoulder-length or mid-length hair when you’re wearing an oversized statement bow headpiece. A bold bow often looks best when the hair doesn’t compete with heavy updos.
Brush hair smooth, then create soft bends at the ends for a polished but relaxed finish. Use a strong hold spray near the crown area so the bow stays centered and doesn’t sag over time.
21. Low Braided Chignon With a Crystal Fringe Headpiece

A low braided chignon is perfect for a crystal fringe headpiece because the fringe moves beautifully over hair that’s secure. The braid adds comfort and stability while the chignon keeps everything looking neat and elegant.
Pin the braid into the chignon low and tight, then place the fringe headpiece slightly above it. This helps the crystals frame your face without pulling on your hairline, which makes a big difference for comfort.
If you want personalization, choose a braid width that matches the scale of your fringe. This style can be cost-conscious since you can achieve a high-end look with your natural hair texture and a statement piece that does the heavy lifting.
Keep the crystals clean and dry before the ceremony, and store the headpiece carefully so it doesn’t tangle with your veil. When you do this, the sparkle stays fresh for portraits and keeps the whole bridal look feeling intentional.