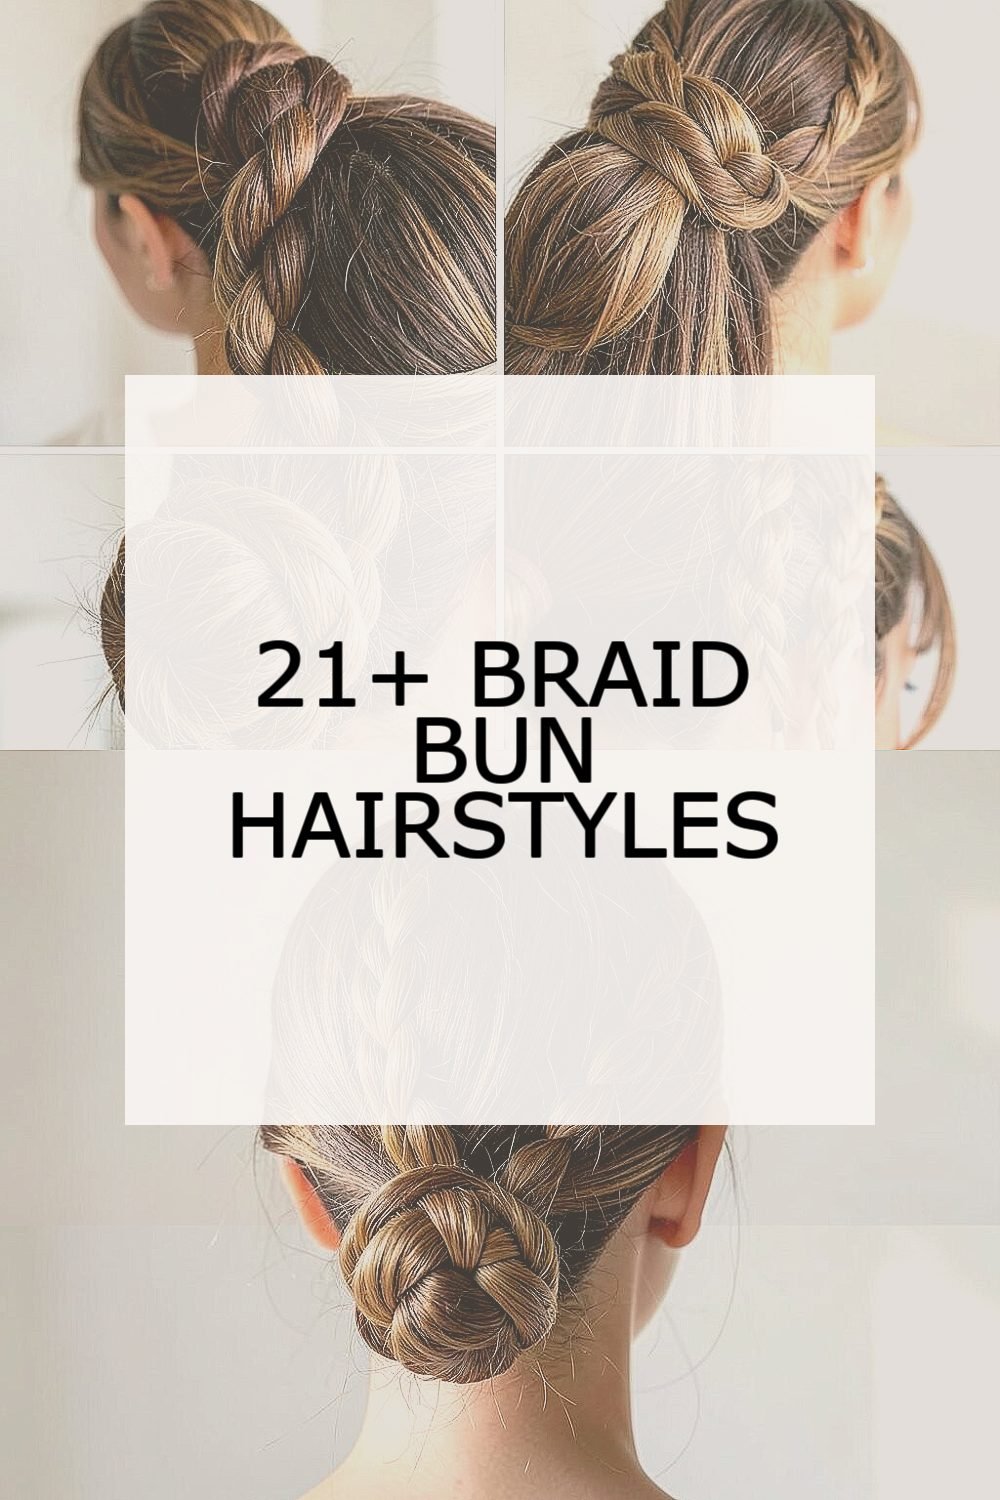
The right braid bun can make your whole day feel more polished. You will get volume, neat texture, and an easy style that still looks special.
1. Classic Three-Strand Braid Bun
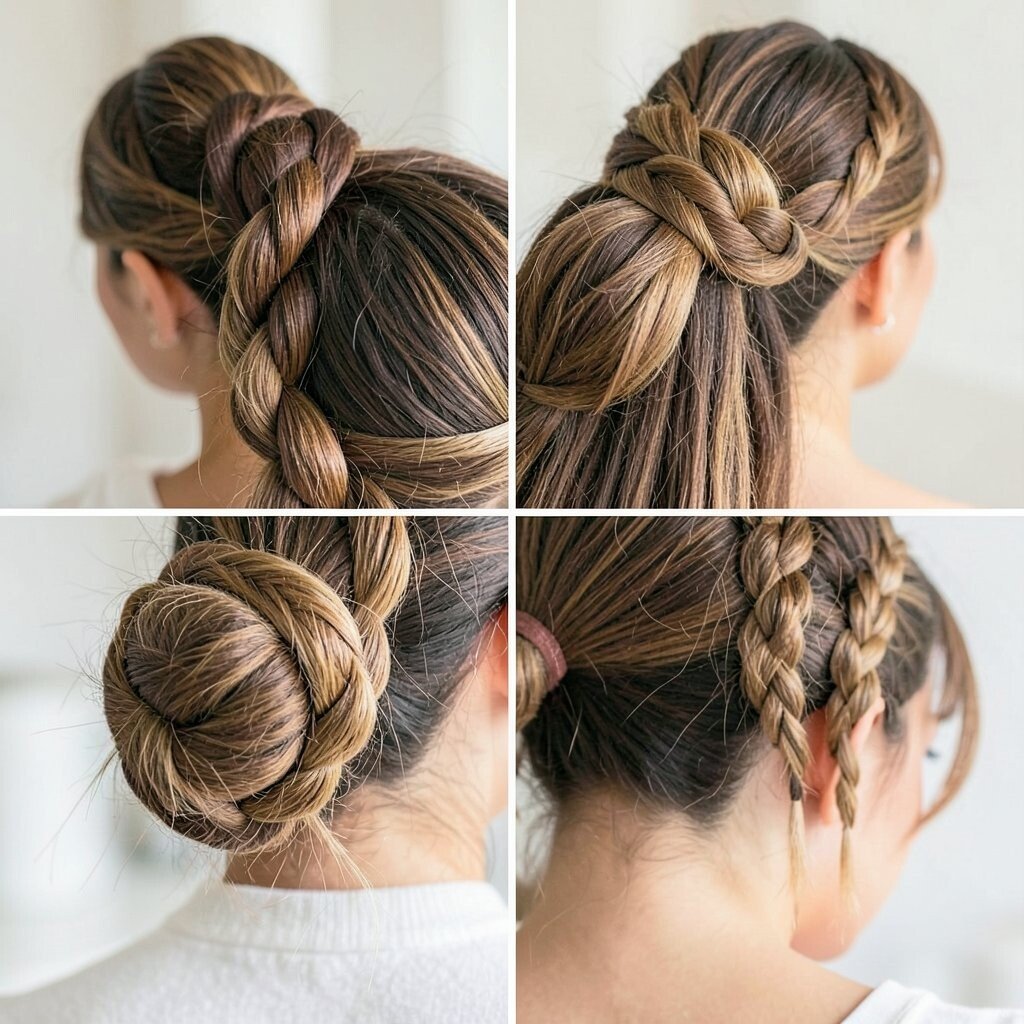
Start with a simple center braid and wrap it into a bun at the nape of your neck. The look feels tidy and neat, like you walked out of a salon without trying too hard.
This style helps your hair stay in place during school, work, or errands. Keep the braid snug at the roots, then loosen the middle slightly for a softer shape. Finish by tucking the ends under and smoothing flyaways with a little gel or cream. If your hair is fine, add a small teasing puff at the crown so the bun looks fuller.
2. Twisted Rope Braid Low Bun
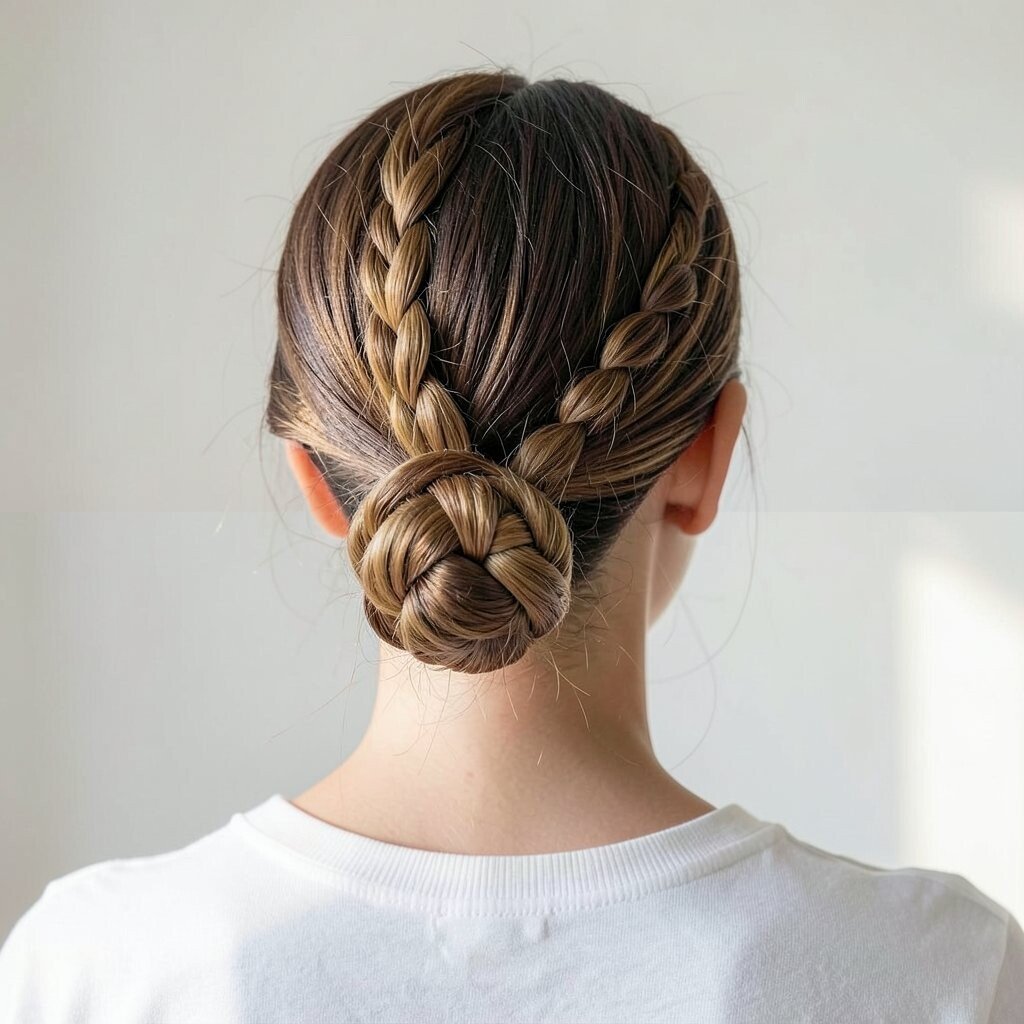
Gather your hair into a low ponytail, then twist two sections like making a rope. Wrap the rope around itself to form a bun, and you get a clean, modern swirl.
This braid bun holds well because the twist creates a naturally secure texture. For a trendier vibe, pull out a few face-framing pieces and curl them lightly for a soft finish. If you want it to last longer, mist the twist with light hairspray before wrapping. Choose bobby pins in a close match to your hair color so everything blends in.
3. Dutch Braid Halo Bun
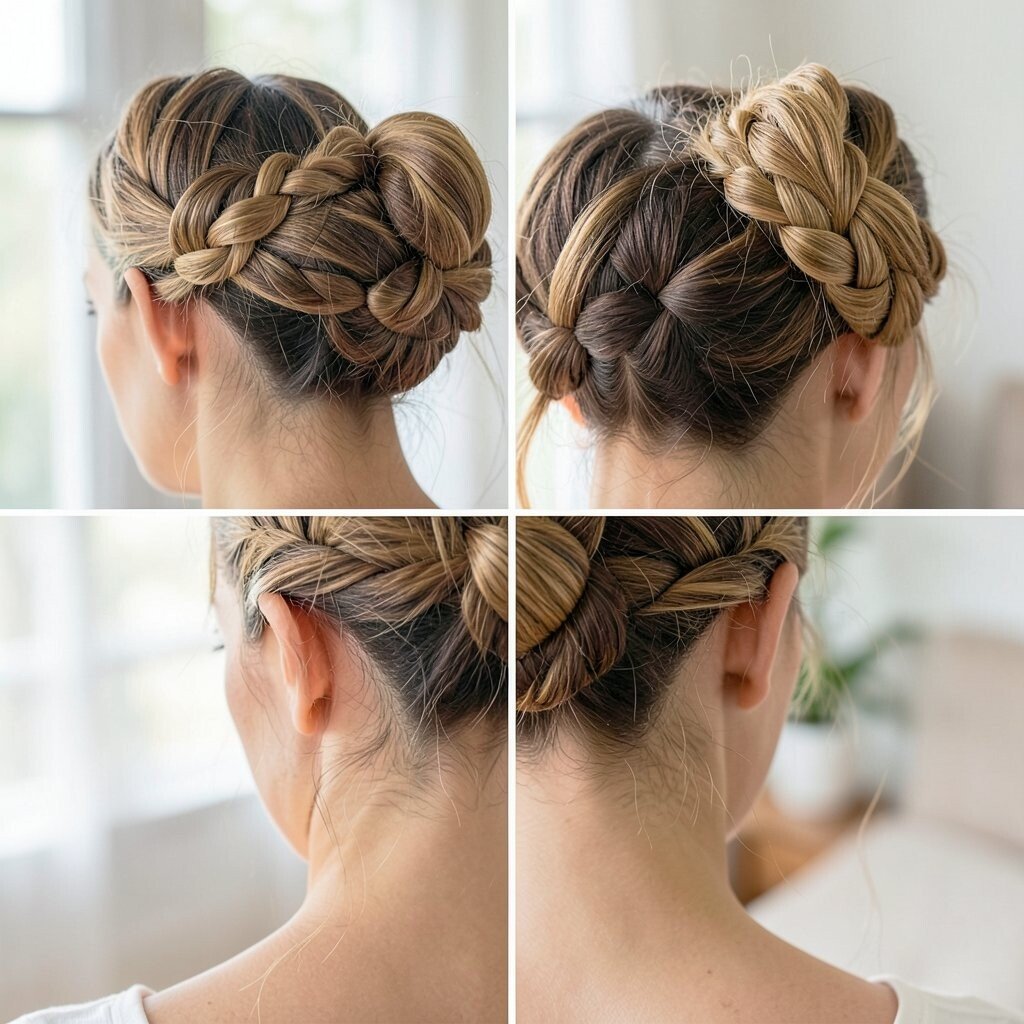
Part your hair and braid across the top using a Dutch technique, then connect the ends into a bun. You will picture a crown-like halo that looks detailed even when it is actually simple.
The raised braid adds instant volume and makes thin hair look thicker. Use a wider tooth comb to gently separate the braid sections so the halo looks airy and not flat. Secure the bun with pins in an X shape for better grip and less slipping. Add a small shine spray to keep it looking fresh in photos and real life.
To personalize it, try a side part for a softer look or keep it straight for a sleek, structured feel. If you have thick hair, work in smaller sections so the braid stays even and not bulky. Keep your tension medium, since too tight can make the style uncomfortable after a few hours.
4. Fishtail Braid Bun With Loose Ends
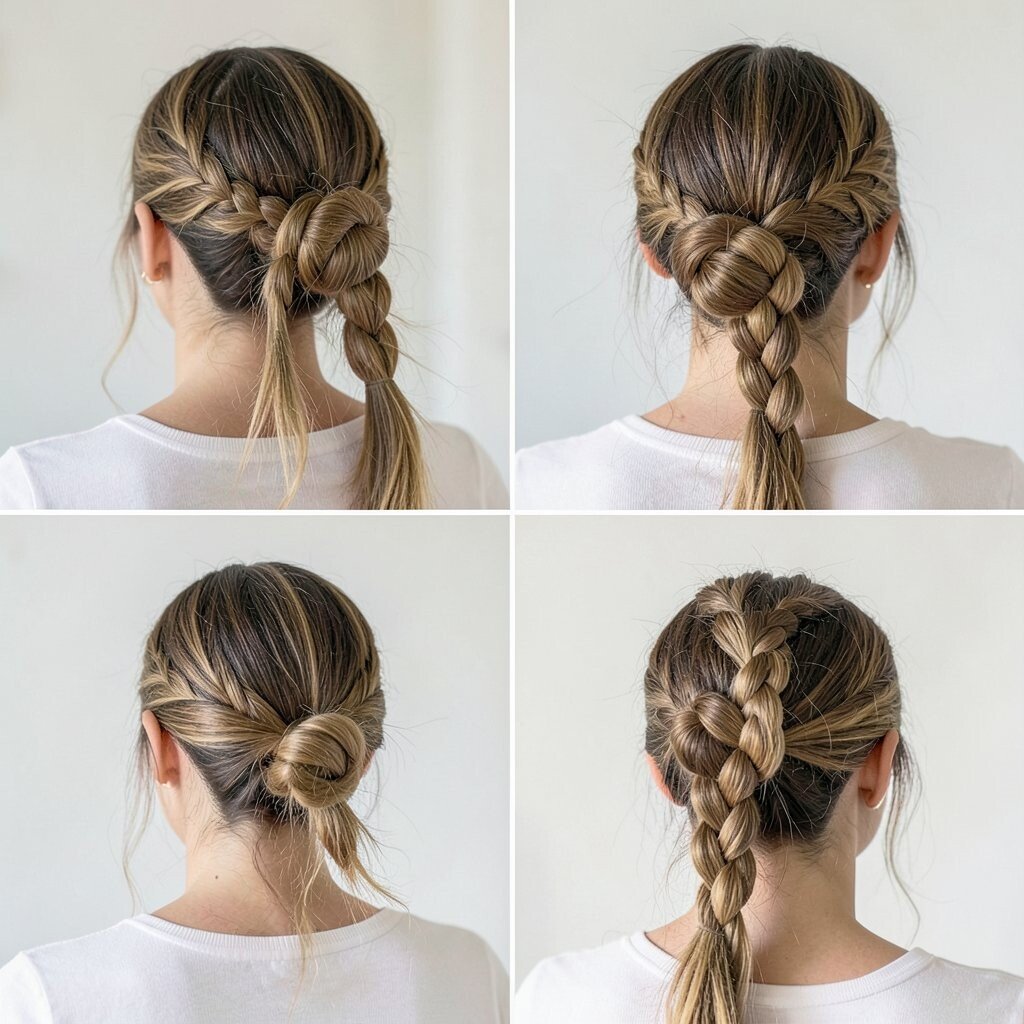
Make a fishtail braid, then wrap it into a bun with the tail ending tucked loosely. The texture of the fishtail gives a delicate, fancy look that still feels wearable.
This hairstyle creates movement because the braid patterns catch light as you move. Start by braiding loosely, then tighten only at the ends so it stays secure. Use a tiny elastics set each segment, and gently tug the edges for a fuller fishtail look.
5. Braided Milkmaid Bun Style
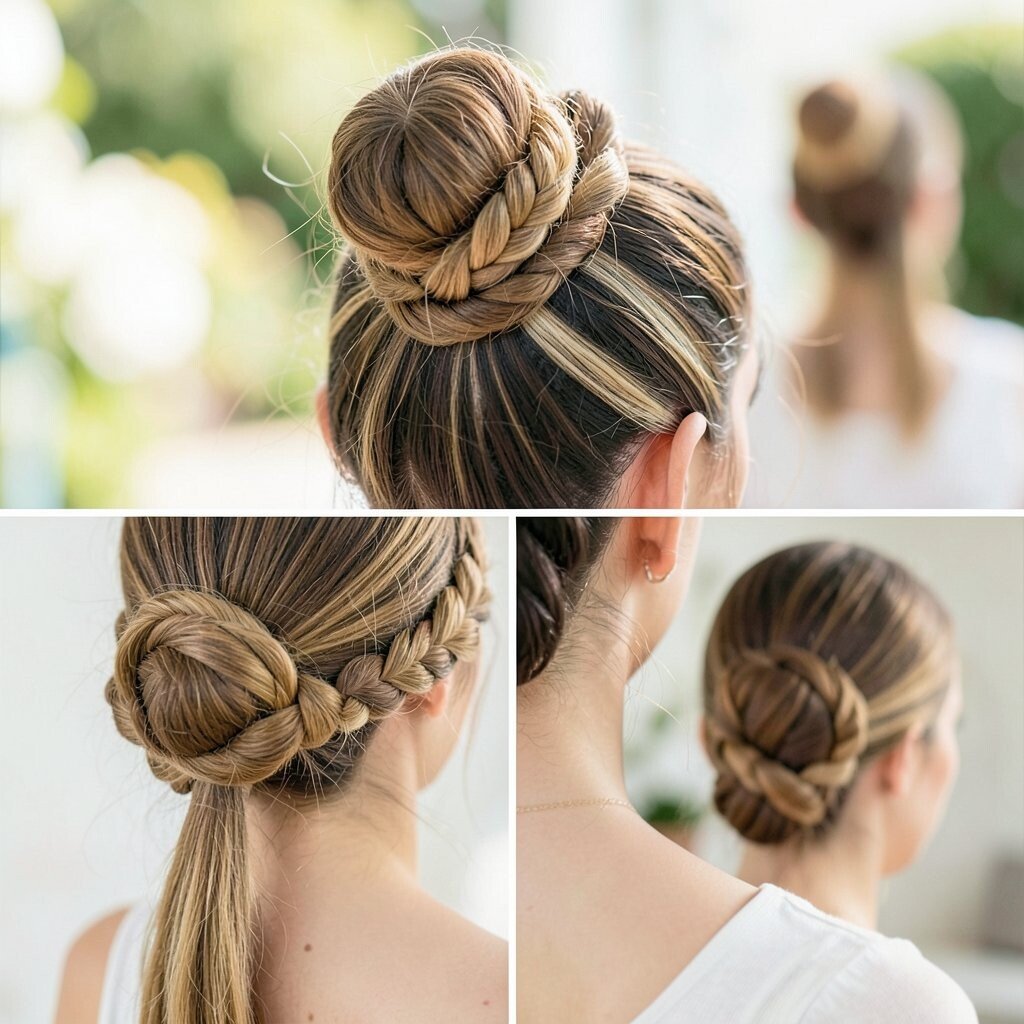
Use two braids that sit like a headband, then tuck them into a low bun behind your ear. The style feels sweet and playful, and it gives your hair a romantic shape.
This bun balances volume on top and keeps the back tidy, which is great for long hair days. If you want extra lift, tease the crown lightly before braiding, then smooth the outer layer. Pin everything close to your scalp so it looks secure without looking stiff.
For a personal touch, add a thin ribbon or a small clip that matches your outfit. If you are on a budget, you can use a plain hair tie and wrap it with a strip of fabric for a similar effect. Finish with a light hairspray so the braids keep their shape without feeling crunchy.
6. Crown Braid Into High Bun
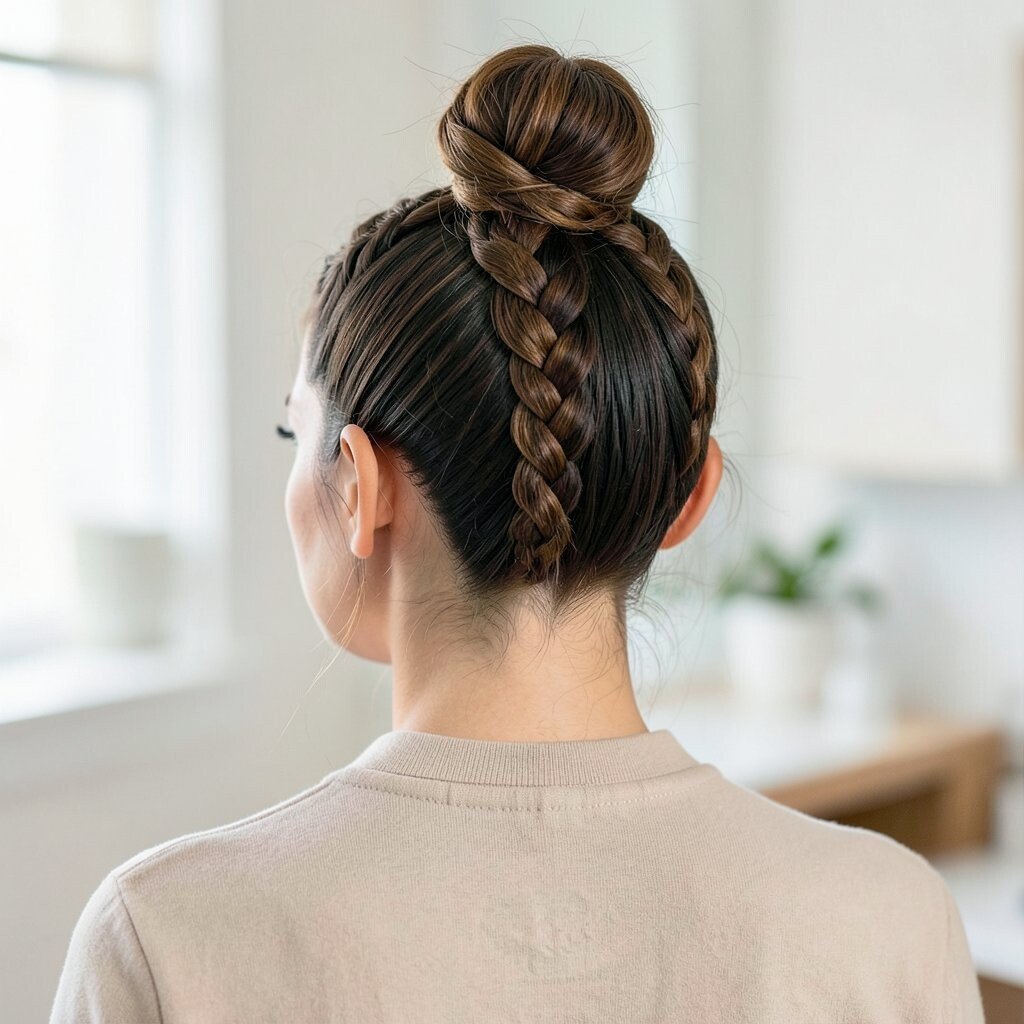
Create a crown braid around the top of your head, then gather what’s left into a high bun. The height gives a fun, bold vibe while the braid keeps it elegant.
This combo looks great for parties, performances, or whenever you want your hair to look extra. Keep the braid tight at the crown for a neat outline, then soften the bun with gentle tugging at the edges. Use several pins around the base of the bun to keep it from drooping. If your hair slips, add a small dot of dry shampoo at the roots before styling.
7. Side-Parted Rope Braid Bun
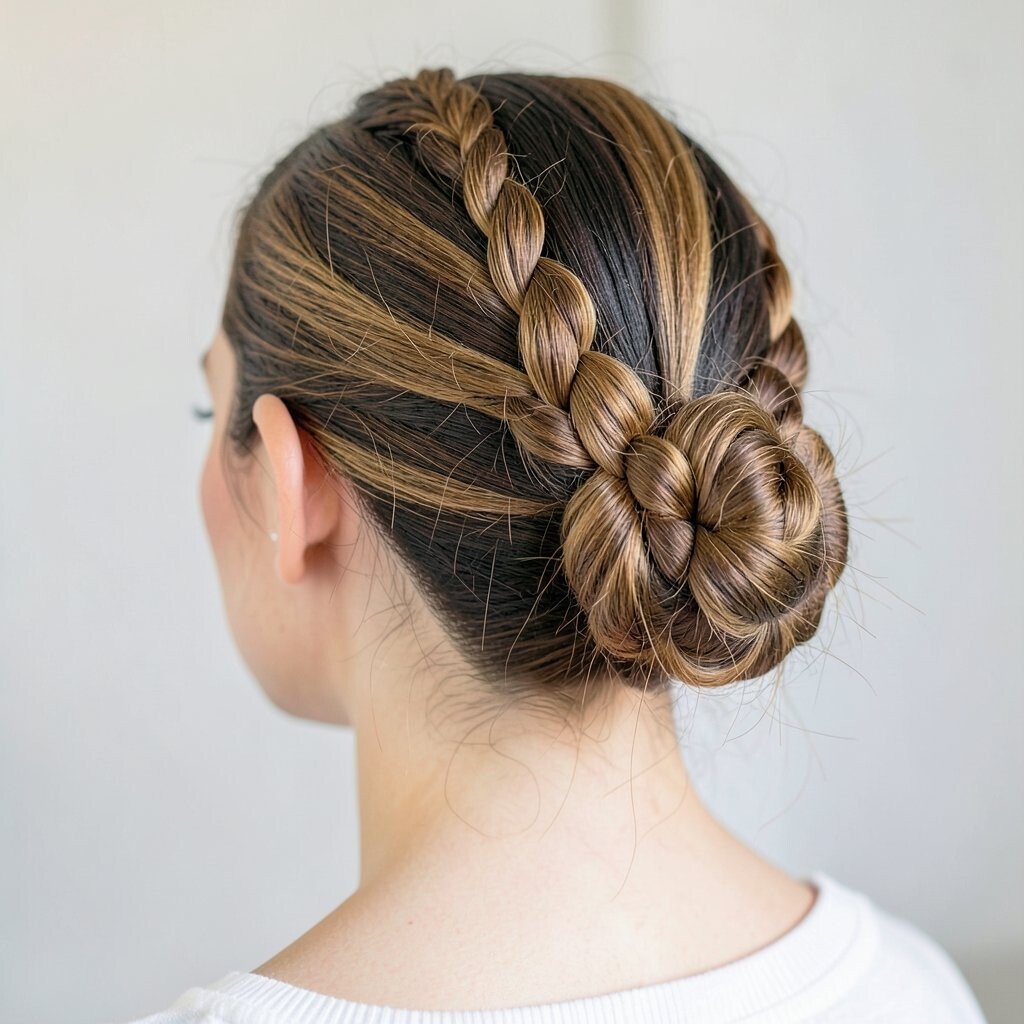
Part your hair deeply to one side, then braid with a rope twist that follows your part. Bring it into a bun slightly off-center for an asymmetrical look that feels effortless.
This style is unique because it frames your face in a flattering angle. Keep the rope twist consistent, then wrap it into a bun and secure with bobby pins. For personalization, add a braid-through clip or a tiny gold pin near the side seam. If you want a softer feel, pull out a thin strand near your cheek and curl it.
You can also adjust the bun size by choosing a tighter wrap for a smaller silhouette or loosening it for a bigger look. Thick hair may need extra pins, while fine hair may need a bit of hair mousse for grip.
8. Triple Braid Mini Buns With One Crown
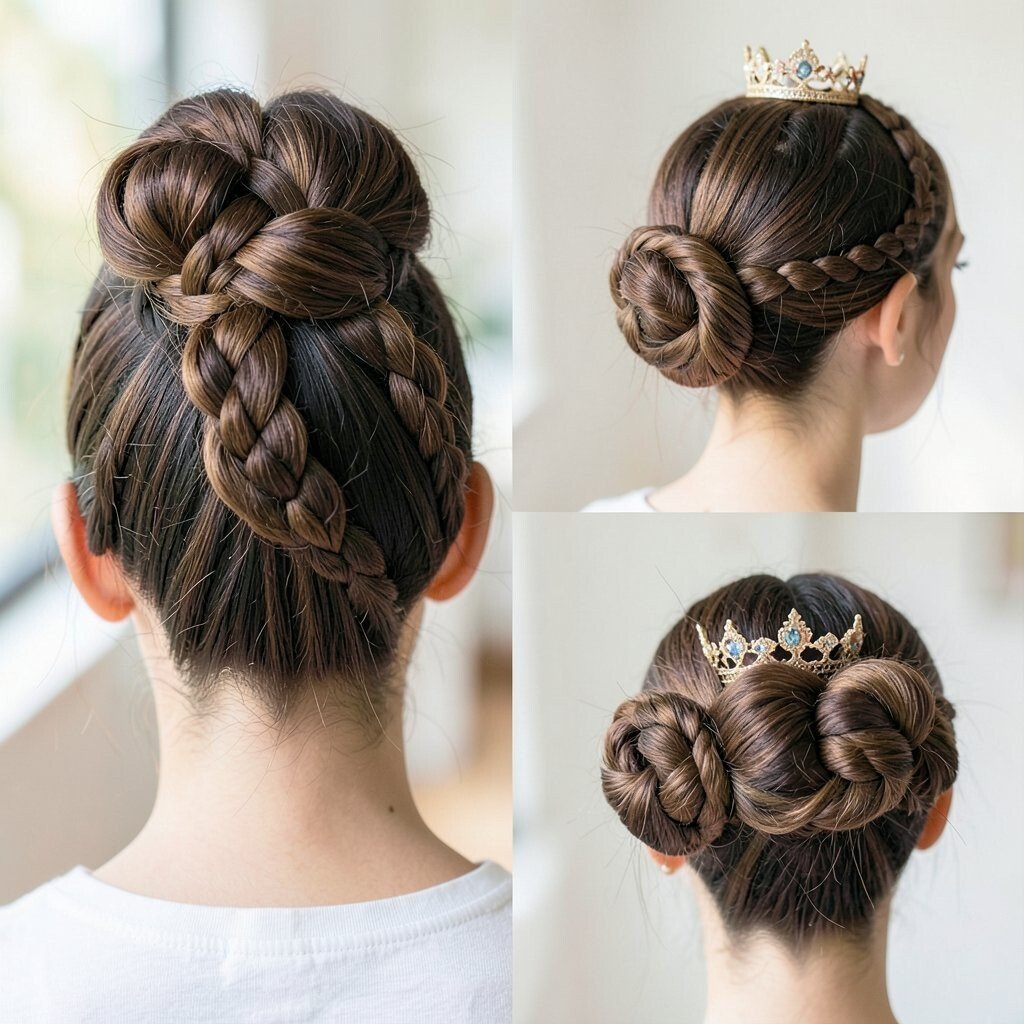
Braid three sections across the front or top, then connect them into one larger crown that leads to mini buns. The visual effect is cute and layered, like your hair is wearing a little bun party hat.
This design makes your style stand out without needing complicated tools. Keep each braid even in thickness, and secure mini buns with two pins each for extra stability. A small texturizing spray helps the braids hold their shape and look less shiny. If you have short hair, use smaller sections and tuck ends carefully under the bun.
9. Waterfall Braid Bun Hybrid
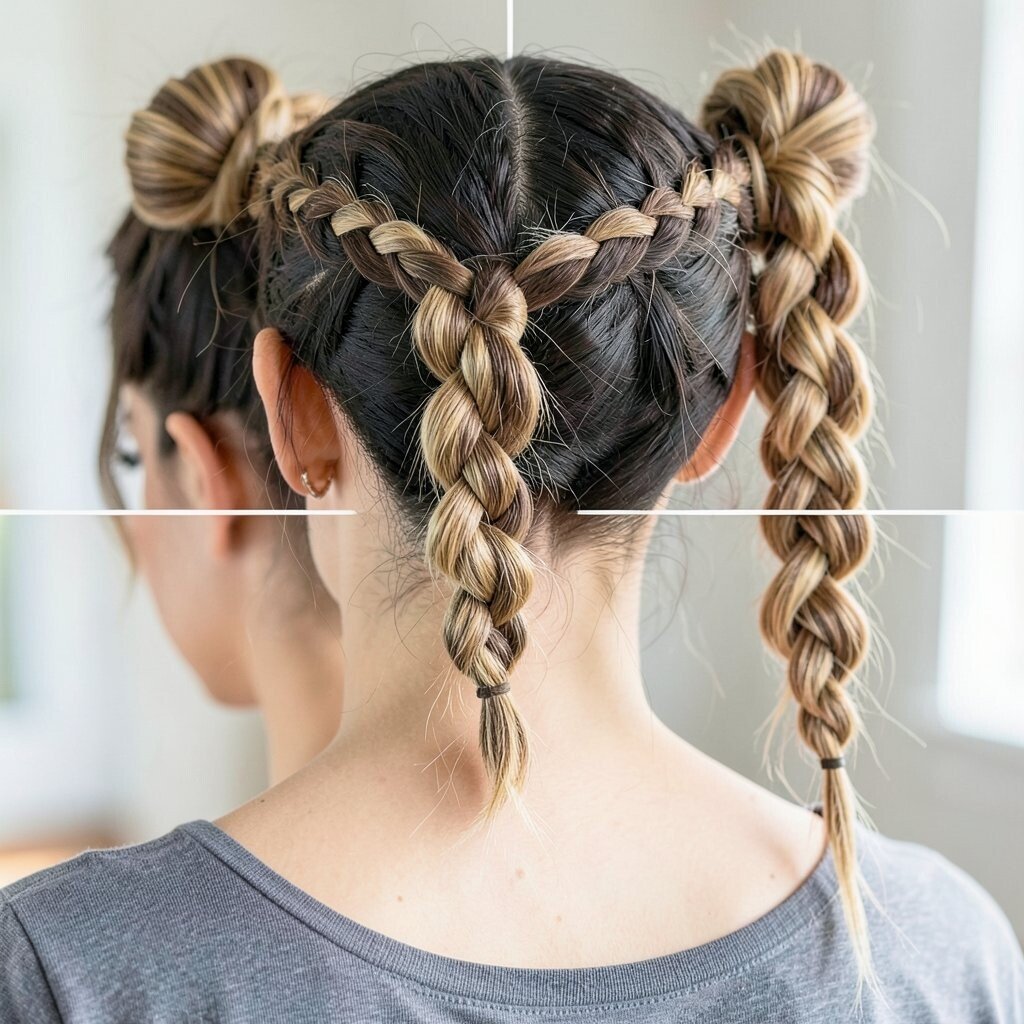
Start a waterfall braid on one side, letting strands fall like ribbons, then pull the remaining hair into a bun. The result looks airy, with braids that feel light instead of heavy.
This bun hybrid is great for dates, brunch, or any day you want something pretty but not too serious. Keep the falling strands loose and soft, then secure them into the bun so they do not slip out. Use a light styling cream to help the braid pieces blend into your hair. For a personalized look, try a deeper side part and add gentle waves to the falling sections.
If you are working with medium thickness, keep each waterfall “drop” small for better control. For cost-smart styling, skip fancy accessories and use matching bobby pins so the braid detail stays the star.
10. Braided Chignon With Side Twists
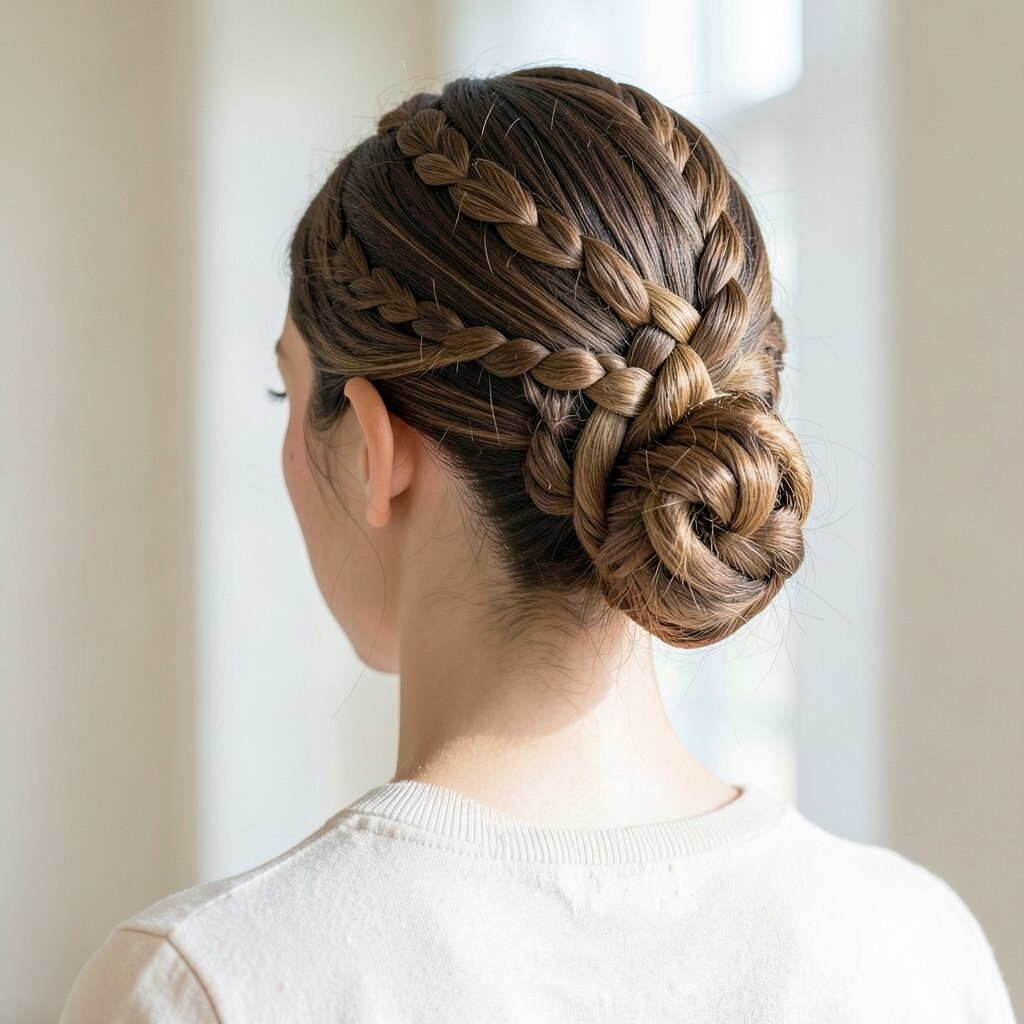
Twist two small sections from the sides and tuck them into a classic chignon bun. The braid detail adds structure while the chignon keeps the overall look polished and grown-up.
This hairstyle helps protect your ends, which can reduce tangling and flyaways. Smooth hair at the sides before pinning so the bun looks seamless. If your hair is frizzy, apply a smoothing serum to damp hair and blow-dry before styling. Add one decorative pin at the side twist for a special finish without overdoing it.
11. Halo Dutch Braid With Bubble Bun
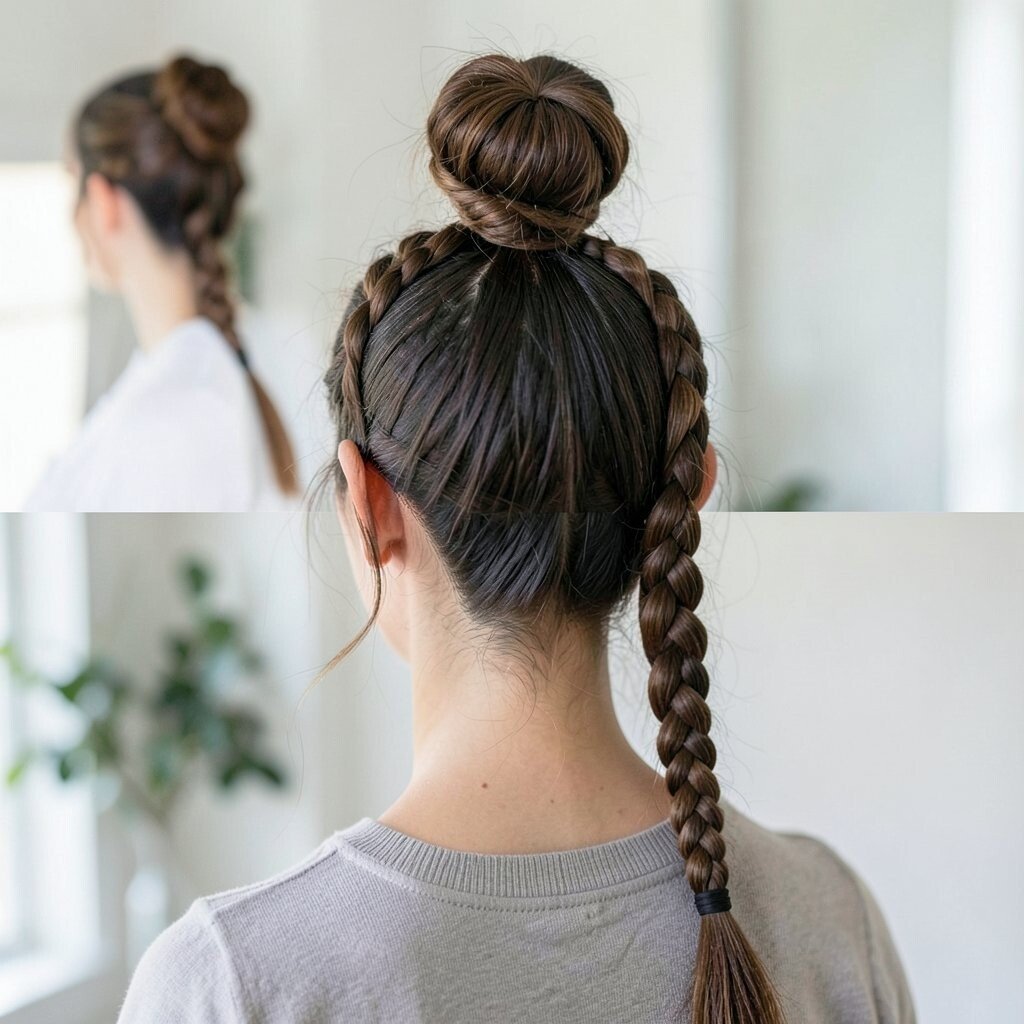
Build a Dutch halo braid around the head, then gather the remaining hair into a bubble bun using hair ties. Your style will look playful, almost like a soft party crown.
This is a fun choice when you want volume and texture that lasts. Use elastics in a consistent spacing so the bubbles look neat, and tuck the last tail into the bun base. For personalization, make the halo tighter for a sleek look or looser for a dreamy effect. If you have fine hair, add a scrunch of volumizing mousse under each bubble to boost fullness.
12. Mermaid Braid Into Low Bun
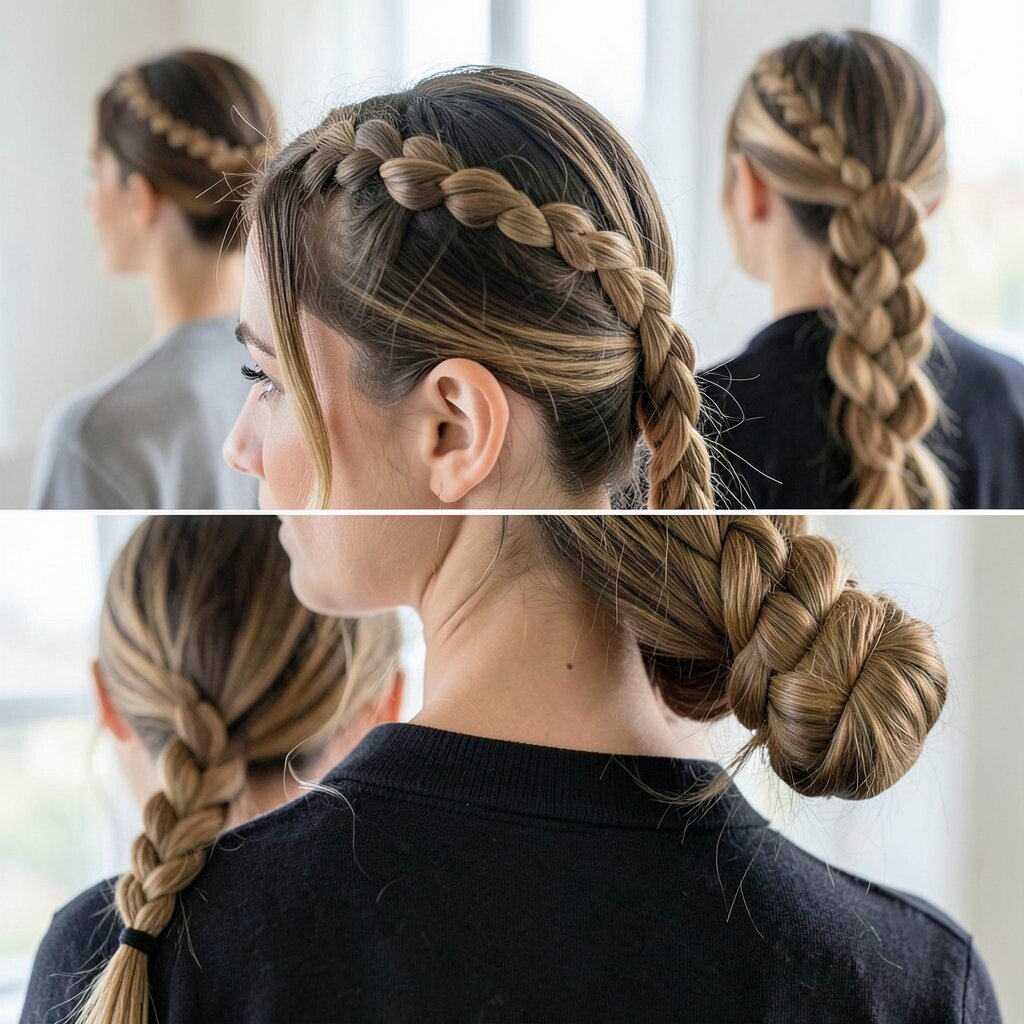
Create a braid that looks like it flows like a mermaid, then wrap it low and wide into a bun. The visual gives a soft, scenic vibe, especially when your hair has natural waves.
This hairstyle is unique because the braid pattern feels like texture art. To make it practical, braid a bit more loosely so you can tug out edges for a fuller look. Secure with pins around the bun and a light hairspray to control loose bits. Add a few sea-salt waves to the ends before wrapping for a fresh, beachy finish.
If you want it to match your outfit, choose a hair accessory in your favorite color, like a neutral clip or a bright pin. Cost-wise, you can get a similar effect by using what you already own and just adding a simple satin scrunchie to hide an elastic.
13. Box Braids Bun With Curved Edge
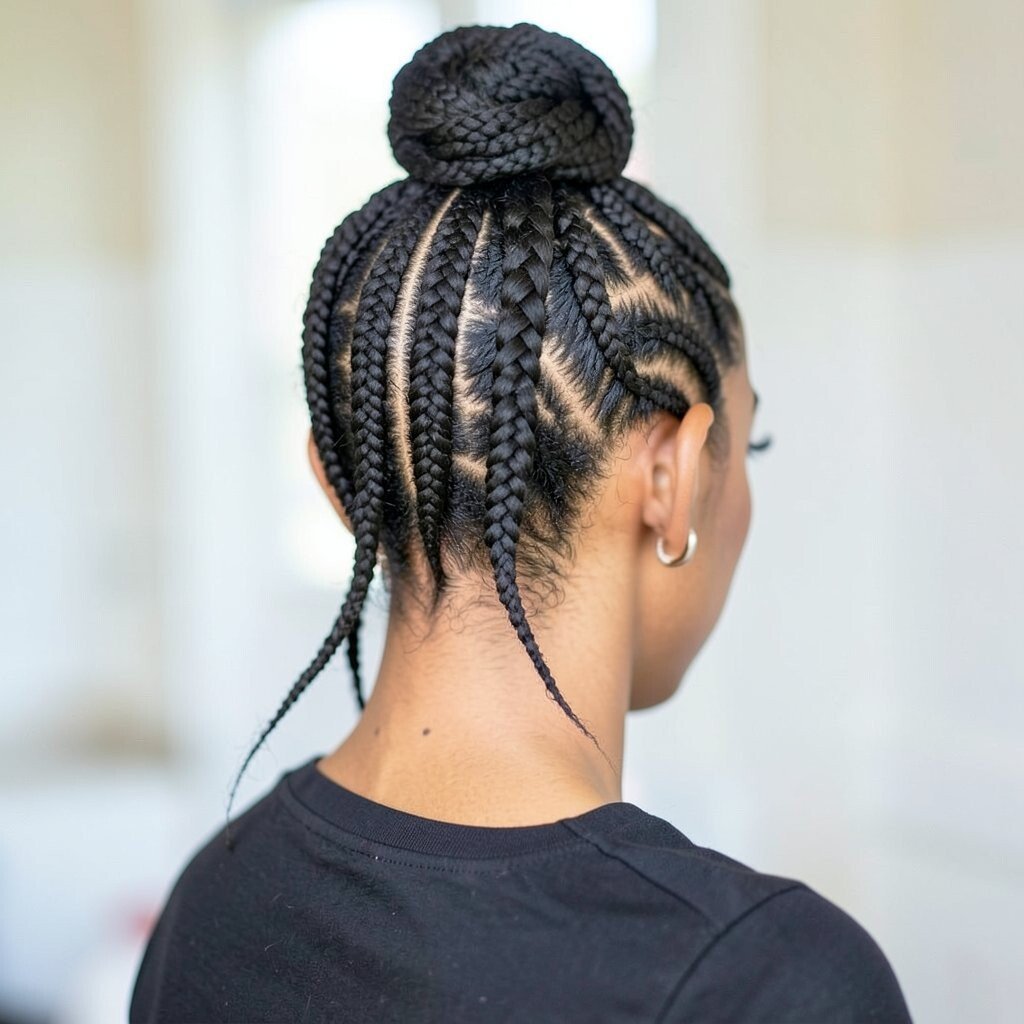
Use box braid sections and wrap them into a bun with a curved shape near the back. The braids already have strong structure, so the bun looks full without extra styling steps.
This is a great benefit for protecting hair while still looking stylish. Keep the braid direction consistent as you wrap so the curve stays smooth and not messy. If you are using extensions or clip-ins, match the braid color closely so the bun looks natural from every angle. Add a little braid sheen spray to keep everything looking clean and defined.
14. Braided Crown Bun With Bun Stitching
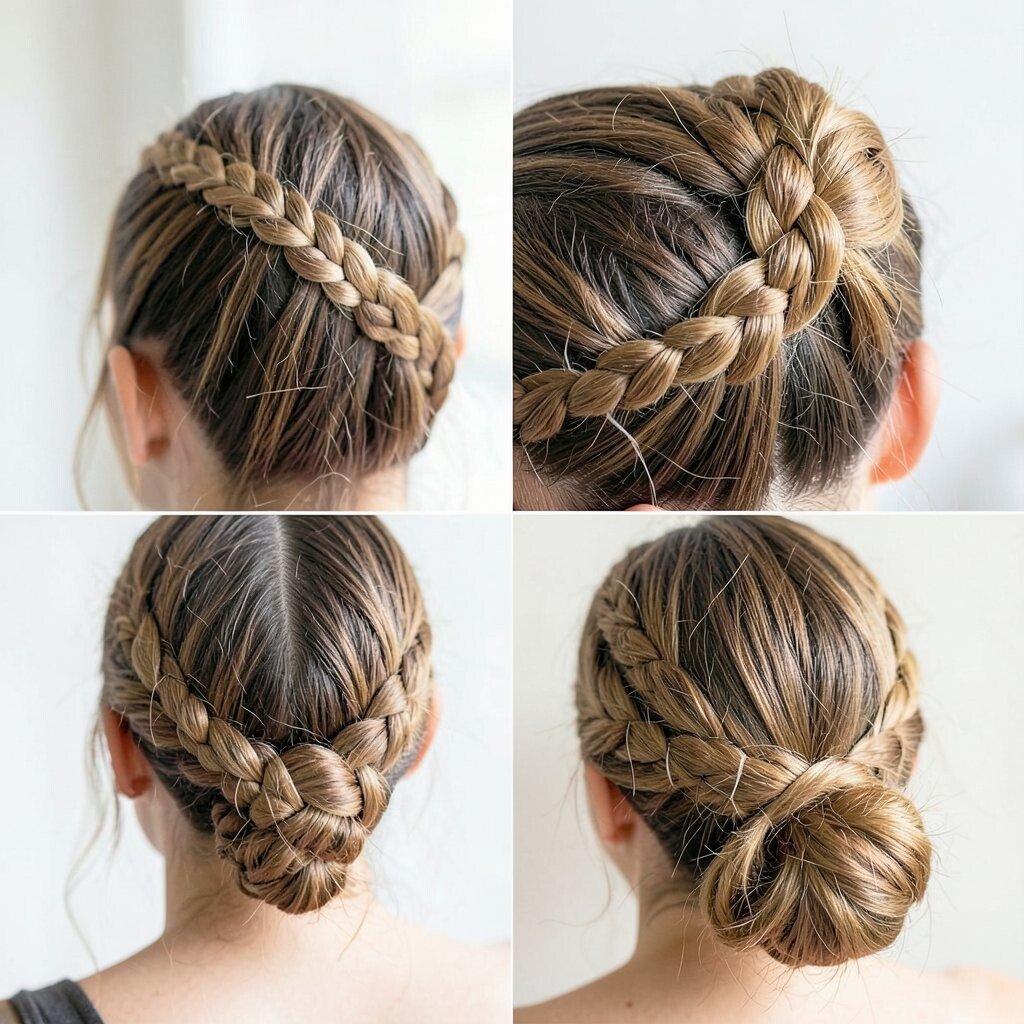
Make a braid crown, then secure a low bun using “stitching” bobby pins around the perimeter. The braid crown gives a detailed top, and the stitching makes the bun feel extra secure.
This method is practical because it reduces shifting throughout the day. Place the first pins vertically, then add a second layer crossing them slightly for strong hold. Smooth the bun with your hands so it looks round and intentional. For personalization, leave a few braid strands at the front and tuck them like gentle bangs.
If you have thick hair, use more pins at the edges where the bun wants to loosen. For fine hair, use a small donut or fabric pad under the bun so the shape stays full.
15. Mini Side Braid Accent Bun
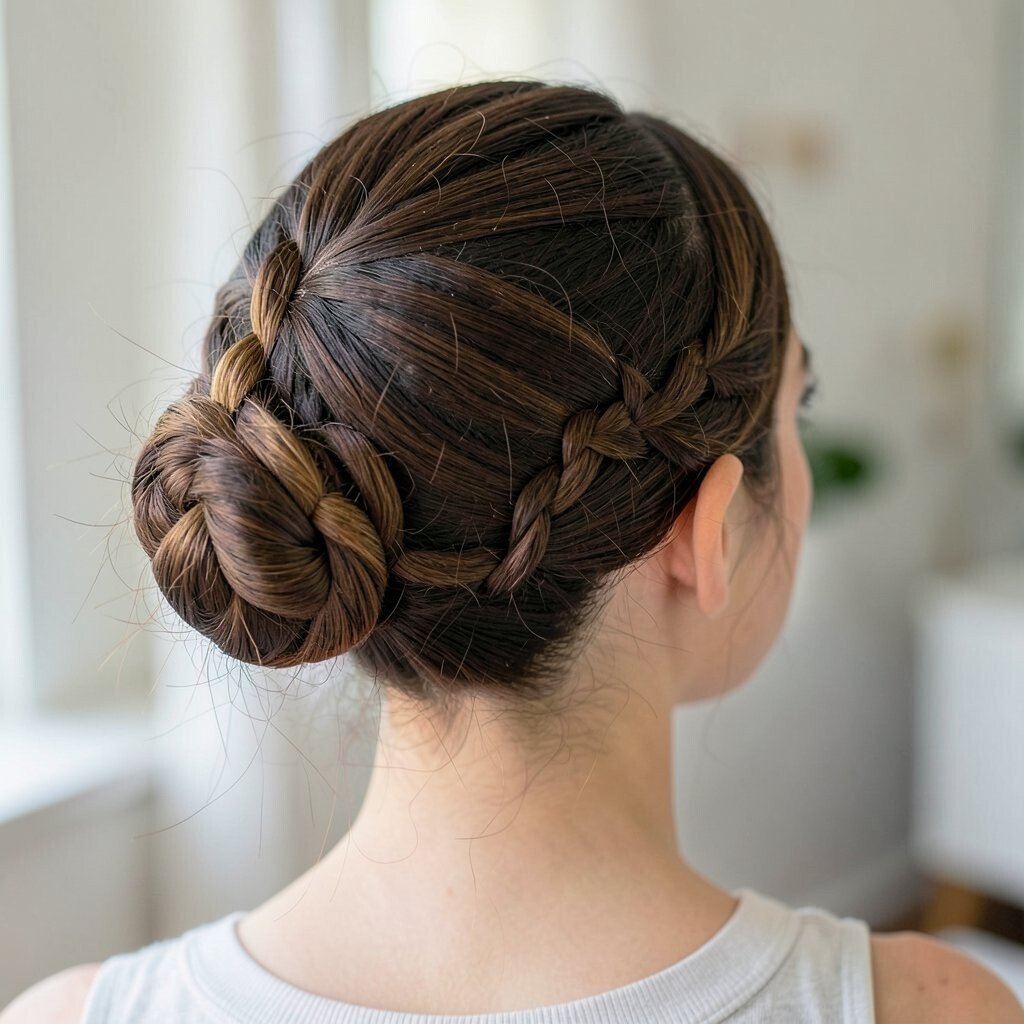
Start with a simple bun, then add a mini braid on one side as an accent. It is small, cute, and perfect when you want braid energy without going fully braided.
This style is easy to redo quickly, which makes it great for busy mornings. Braid a thin section near your temple, wrap it around, and pin it so it hugs the bun. Use a tiny elastic if needed, but keep it hidden under the braid. If you want extra uniqueness, color-cocktail your bun by using a matching hair ribbon or clip.
16. Loose Boho Braid Bun With Texture Spray
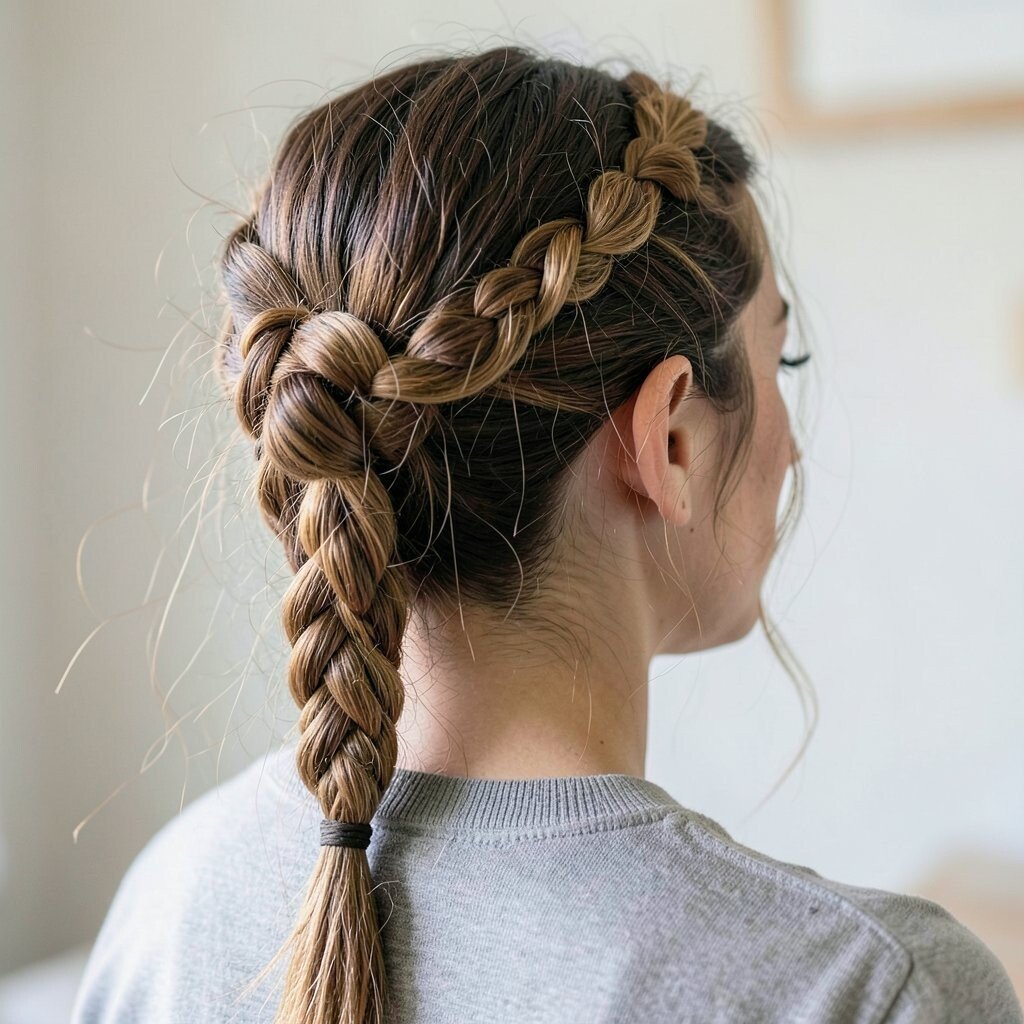
Pull hair into a slightly messy bun, then wrap a loose braid around it like a wreath. The boho vibe looks effortless, and the loose pieces give you a natural, lived-in glow.
This is a current trend look because it feels soft and stylish without being too tight. Spray a texturizing mist before styling so the braid grips and the whole bun feels airy. Tug the braid edges to widen them, but keep the base snug so the bun holds. For personalization, add small rings or beads to the braid ends for a playful touch.
17. Curly Hair Braided Bun With Finger-Set Curls
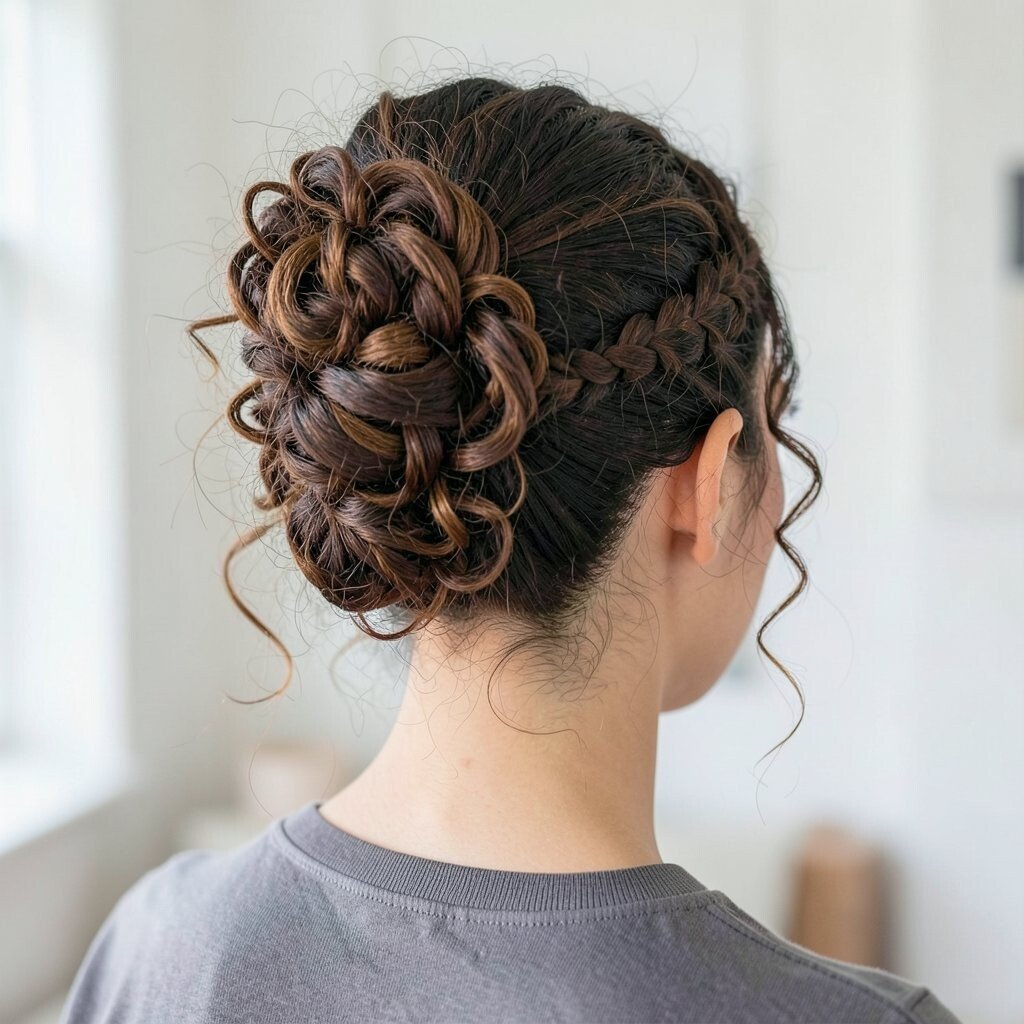
If you have curls, gather them into a bun while keeping the curl pattern intact, then weave in a braid for contrast. The braid creates a neat line, while the curls add volume and charm.
This style is beneficial because braiding curls helps reduce frizz and keeps strands from separating. Use a curl-friendly cream to define your curl clumps before pinning. When you wrap the bun, let the braid sit on top of the curls for a clear visual texture difference. Add a tiny satin scrunchie around the base to help protect your hair from pin pressure.
To personalize, choose either a tight braid for a crisp look or a looser braid that blends into the curls. Cost considerations are simple here since you can use everyday curl products and just focus on pin placement for the polished effect.
18. Braided Bangs Bun With Sleek Center
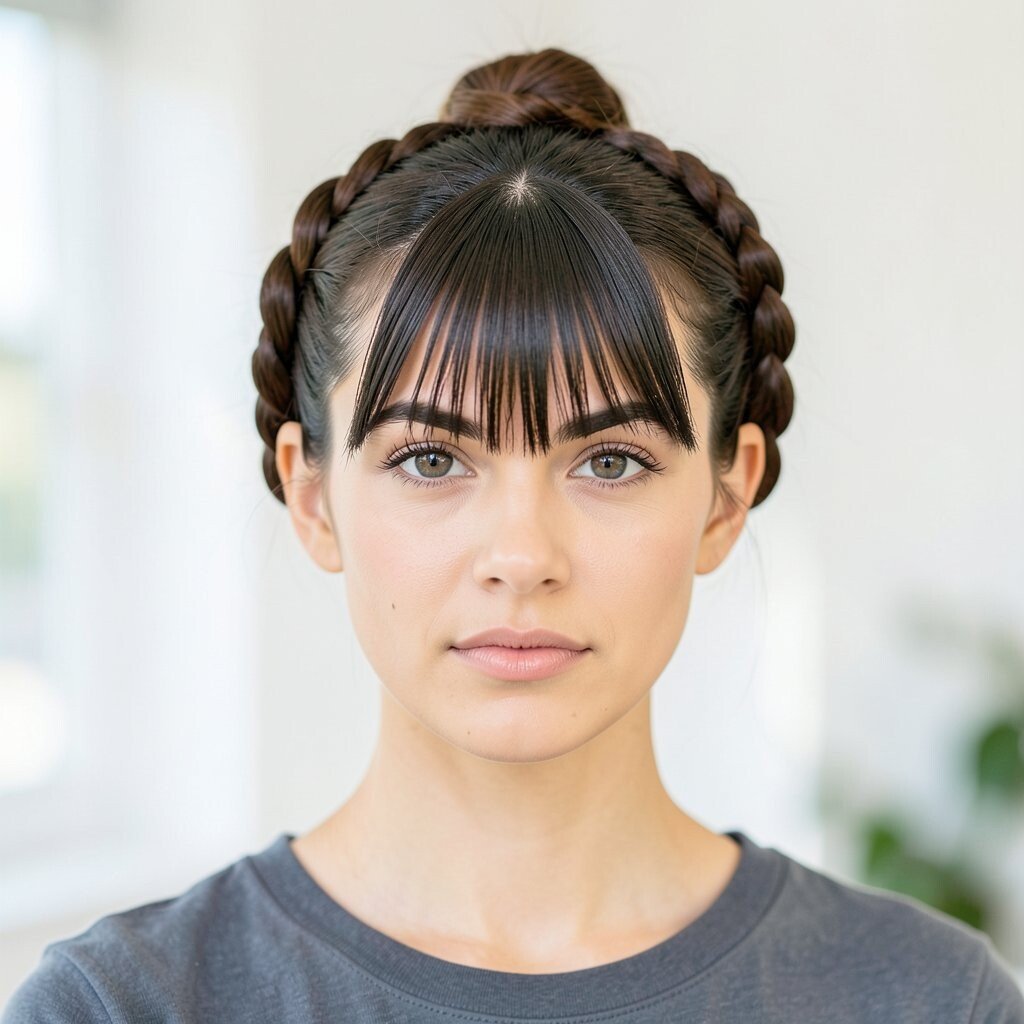
Pull the hair back into a bun, then braid your bangs or front sections into a small crown. This creates a sleek center with braided detail at the front, like a styled frame for your face.
This hairstyle is practical for work and school because your face stays uncovered while still looking cute. Keep the braid sections thin for a delicate look, then pin the ends under the bun. Smooth your hair with a brush and a bit of shine spray so it looks intentional. If your hair is slippery, add a tiny bit of dry shampoo near the roots before you start.
19. Goddess Braids Bun With Wrapped Base
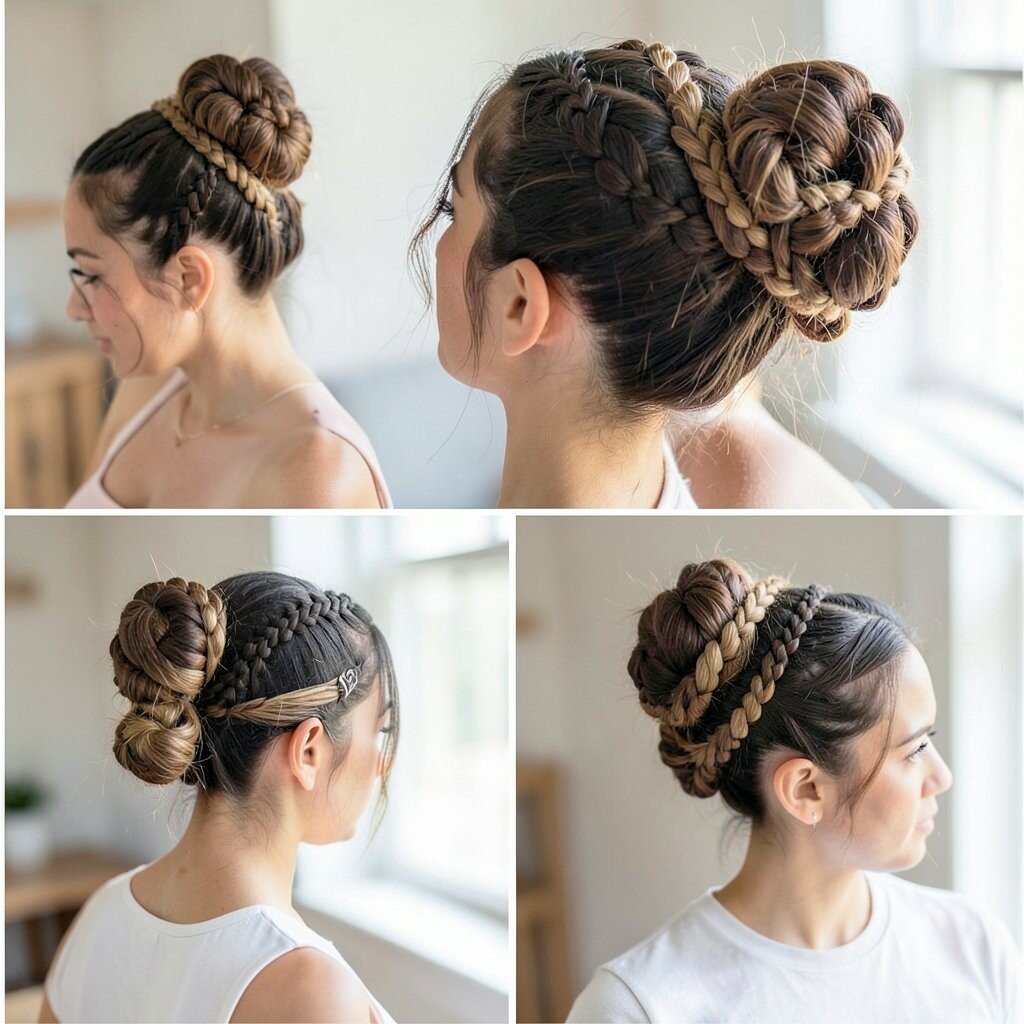
Use multiple braids that feel strong and regal, then wrap them around a bun base that is hidden by one braided strand. The wrapped base makes it look extra finished and less like “just pinned.”
This is unique because the base cover makes every angle look clean. For best results, secure the core of the bun first, then braid a thin strand to wrap around it. Tuck the final end under and hide it with a pin. If you want to match your vibe, keep the braids neat for formal events or loosen them slightly for a relaxed look.
Cost-wise, you can use braid-friendly hair ties and bobby pins you already own, and the rest is about technique. Add a light hair oil on the braid surface for a shiny, goddess-like finish without heavy buildup.
20. Braided Pony-Bun Crossover
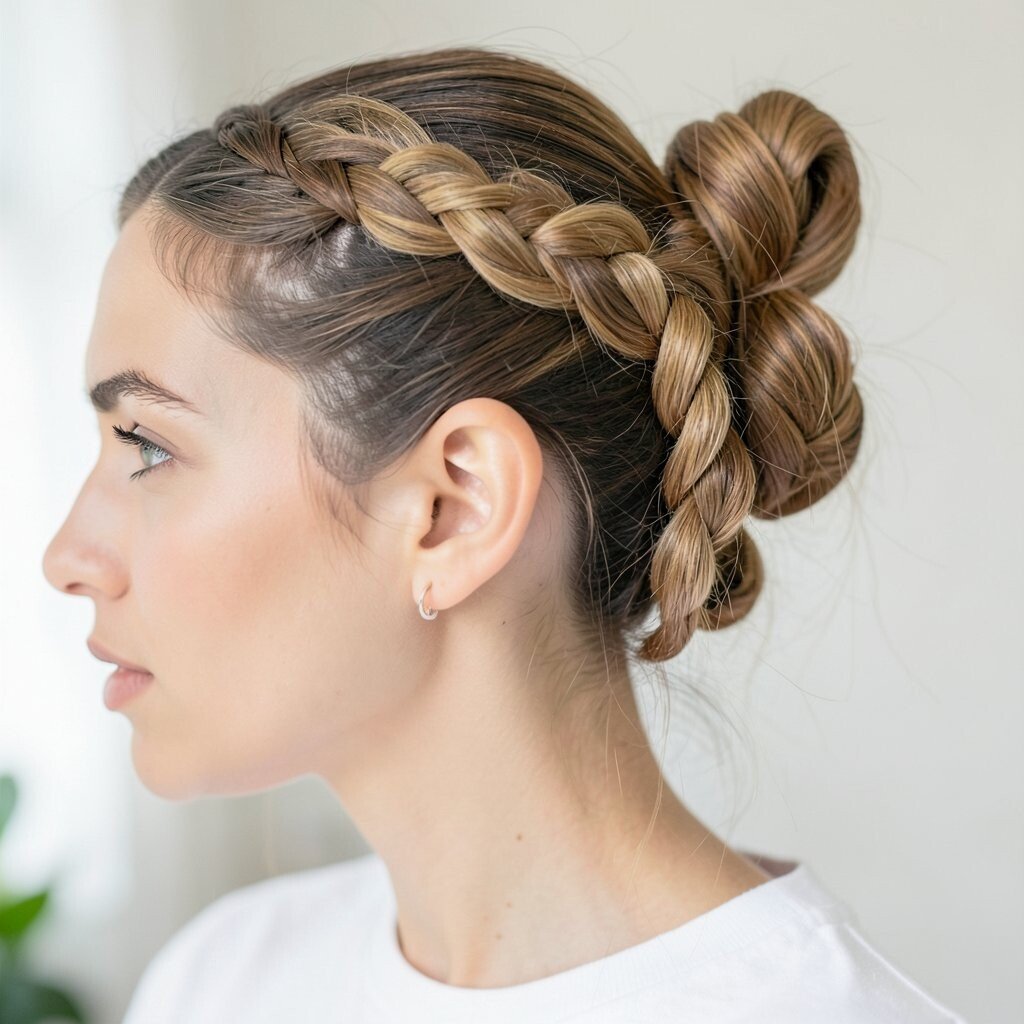
Combine a braided ponytail with a bun by braiding the ponytail first, then wrapping the braid into a bun. This gives you the benefits of both pony volume and bun elegance in one step.
This crossover is great for a “new hairstyle” feeling without starting from scratch. Make sure your braid is secure with elastics so the bun stays tidy. For personalization, position the bun at the middle of the back for balanced proportions or slightly high for a more playful look. Add a small barrette near the crossover point for a stylish touch.
21. Side-Swept Braid Bun With Hidden Volume
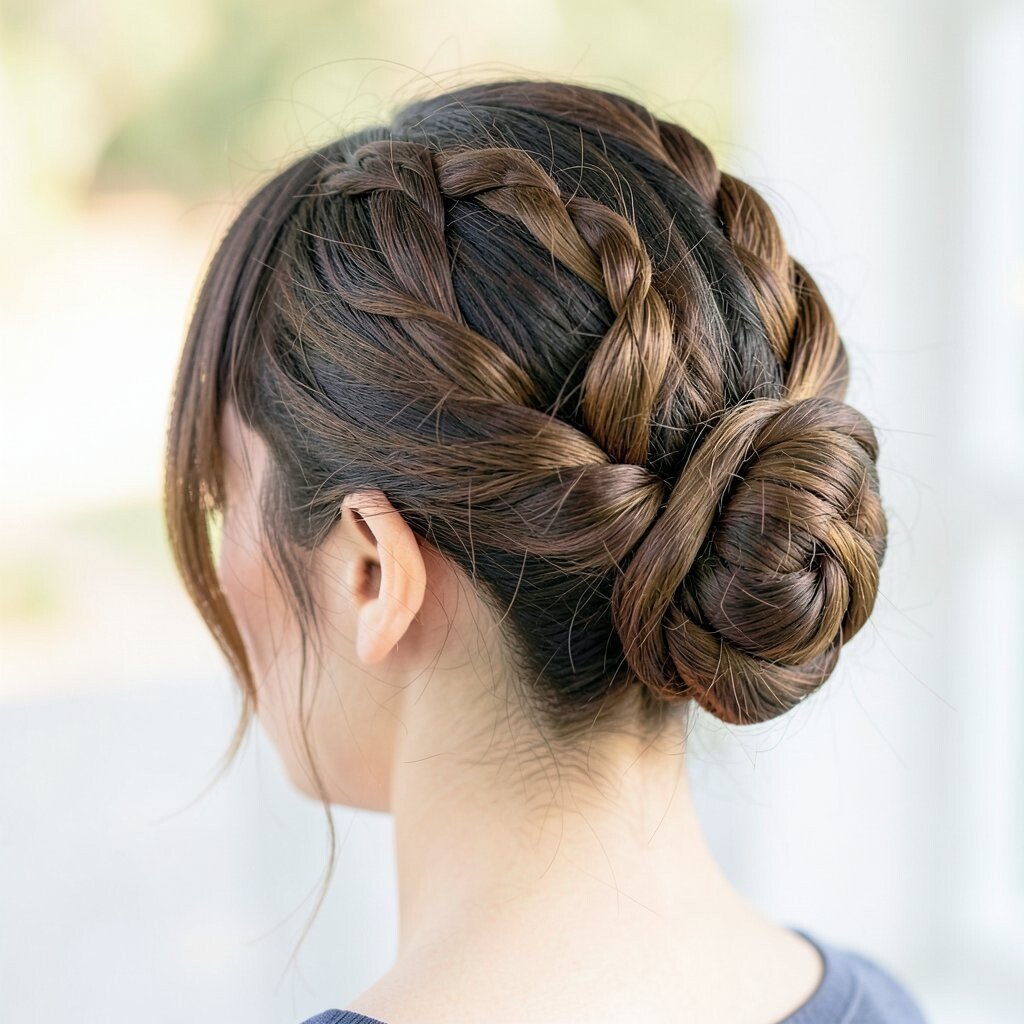
Sweep your hair to one side, braid it loosely, then wrap into a bun that sits over the shoulder line. The side-swept angle looks flattering and makes your hair look fuller, even if it is not.
This works well when you want a practical style that still feels special for evening plans. To create hidden volume, fluff the braid edges lightly before wrapping, then pin the bun firmly at the base. Use hairspray on the roots under the braid so it does not flatten quickly. If you have layers, pin small strands at the sides so nothing slips out.
You can also personalize with part placement, like a diagonal part for a modern look. Keeping the bun slightly lower can feel romantic, while a higher bun can look more bold and fashion-forward.
22. Double Braid Bun With Back Knot Effect
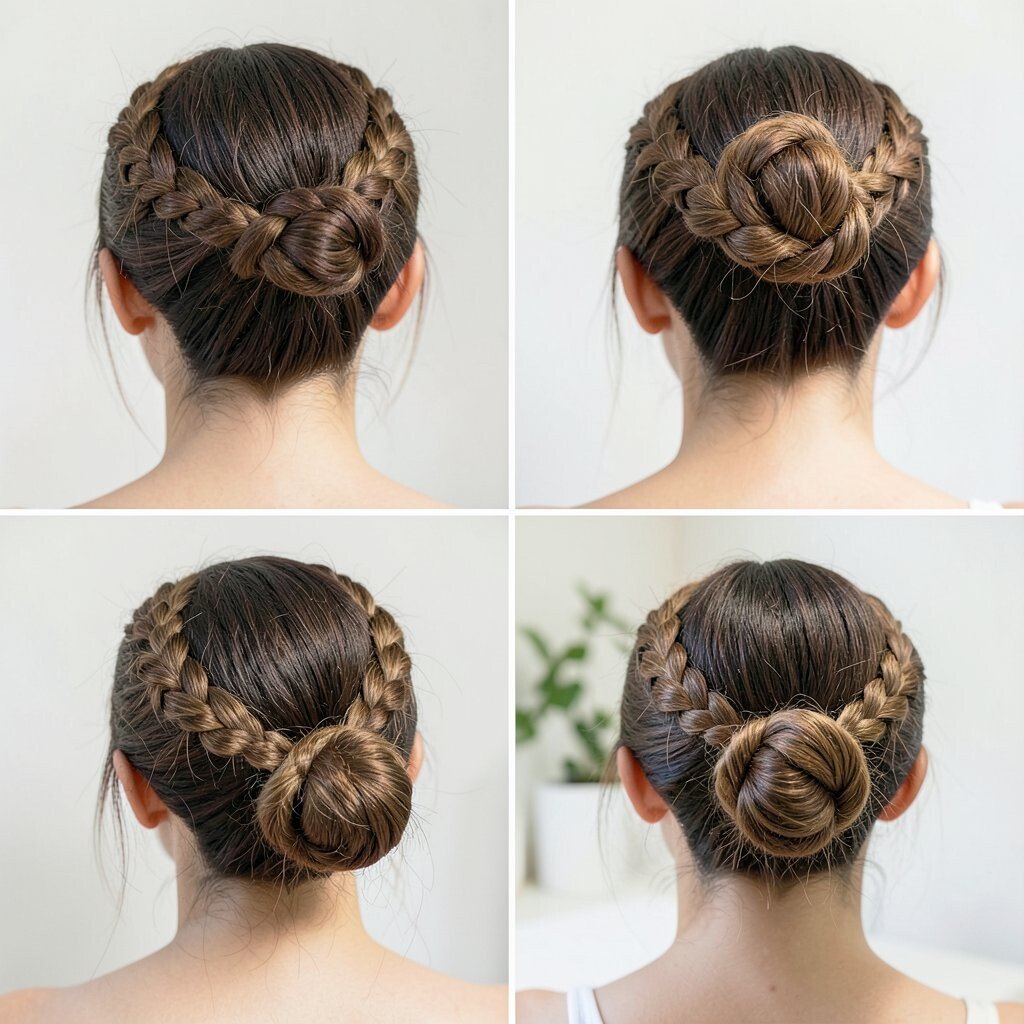
Make two braids, then twist them around each other to form a bun with a knot-like center at the back. The visual feels detailed and stylish, and it looks great in both casual and dressed-up settings.
This hairstyle is beneficial because the double braids give extra hold and reduce flyaways. Start by securing a small knot base with pins, then wrap the braids around it so the center stays compact. For personalization, pull out tiny braid loops around the knot to create a more dramatic silhouette. If your hair is thick, keep the braids slightly wider, while thinner hair benefits from a bit of teasing at the crown before you begin.
To keep cost low, rely on strong bobby pins and a hairspray you already have. Finish with a gentle tug at the ends so the bun looks airy instead of tight, and you are ready for photos, meetings, or a fun night out.