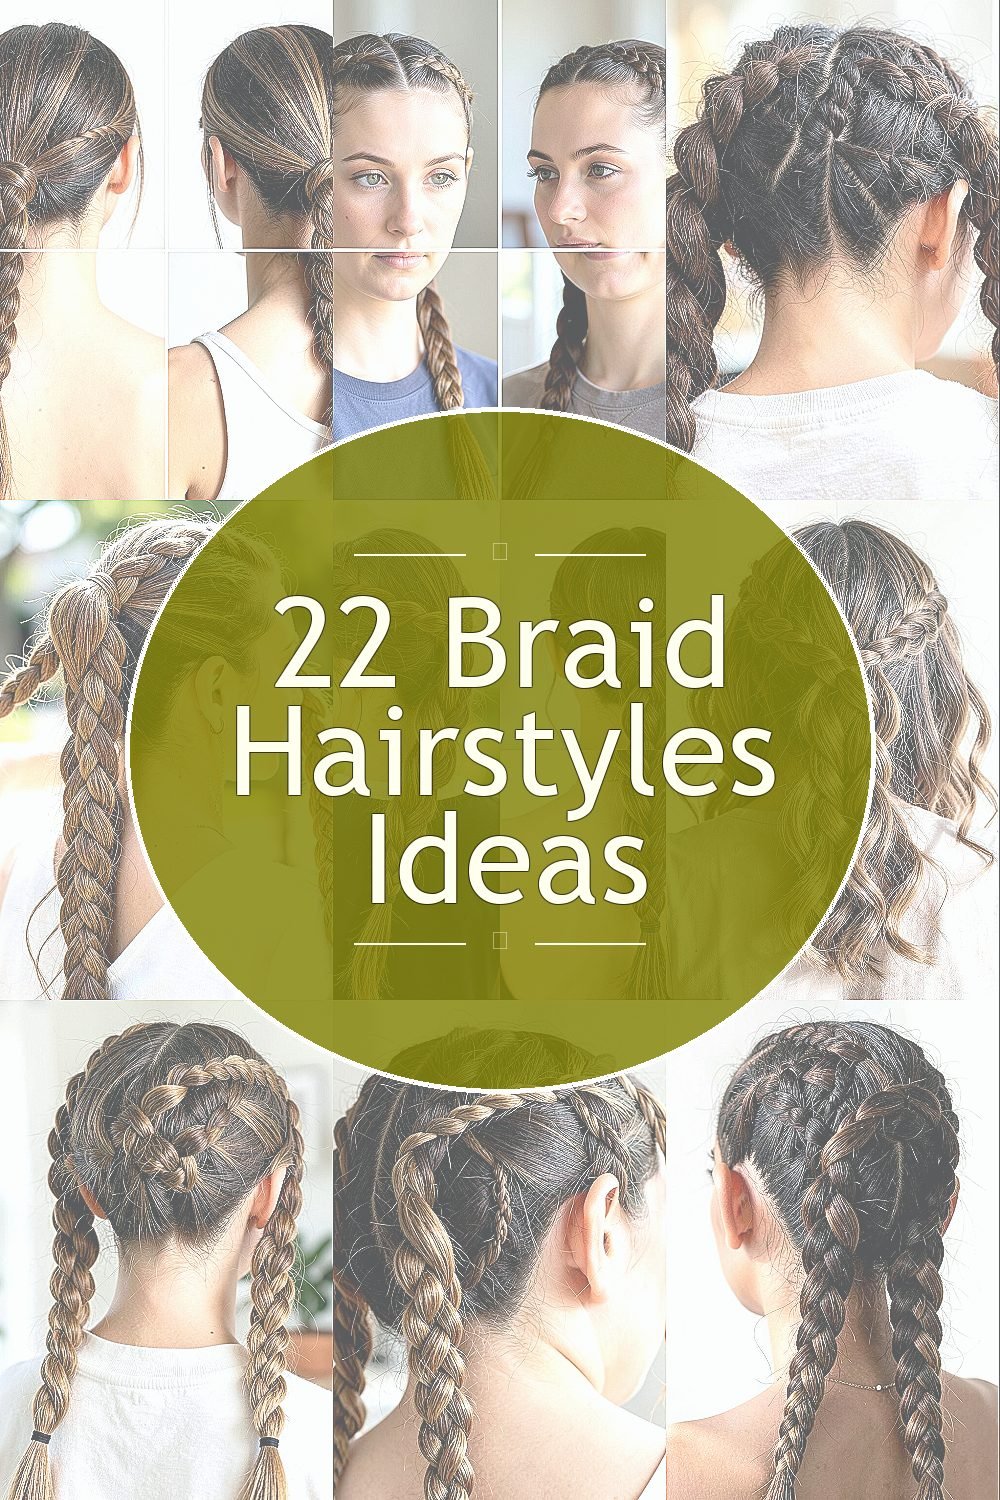
There’s something magical about braids that instantly makes a look feel finished. They can be playful, sleek, romantic, or bold in just a few minutes.
1. The Classic Three-Strand Braid With a Modern Part
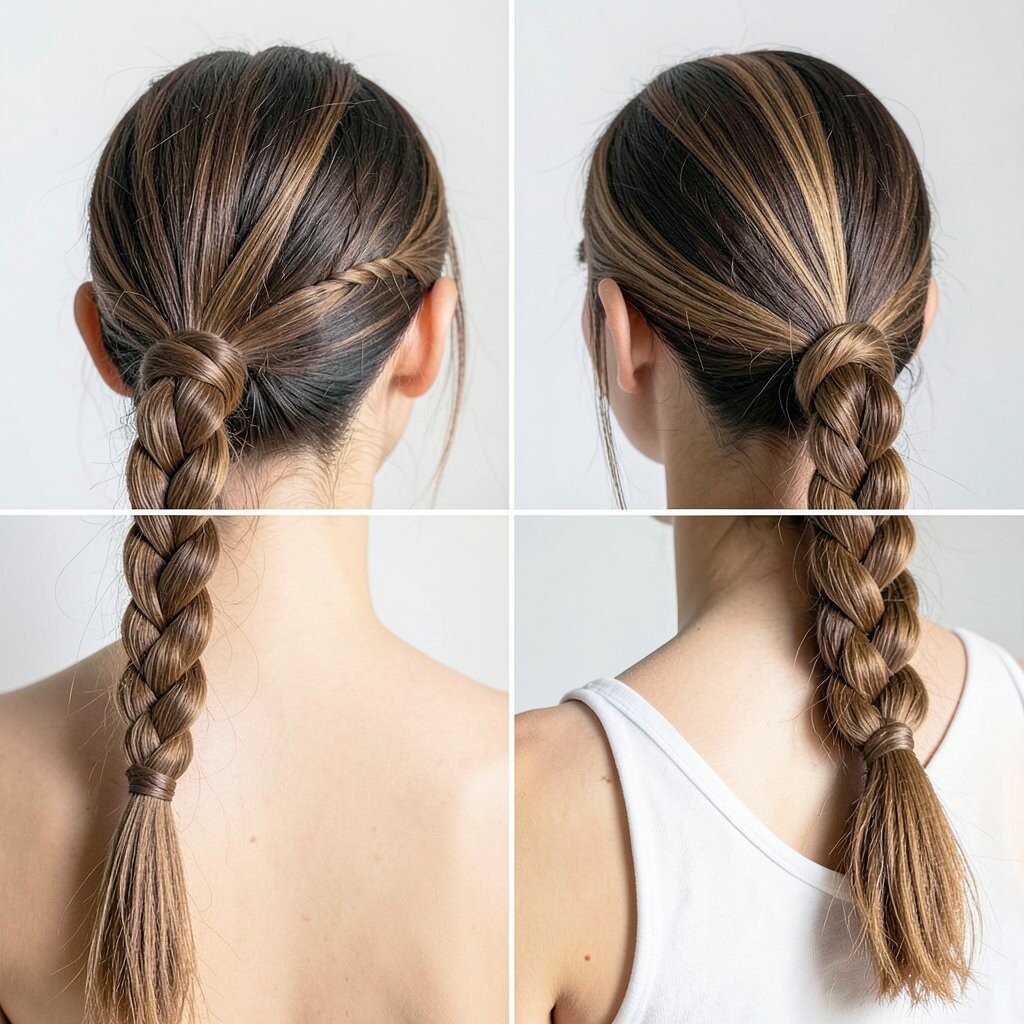
Start with a clean, slightly damp base so the braid grips without slipping. Create a deep side part, then braid from the bigger section for a naturally stylish angle.
This hairstyle looks neat even on busy days, and it keeps hair controlled around your face. For practical shine, smooth a light serum on the outer layer before you begin braiding. Finish with a flexible hold spray so it stays tidy without crunch.
2. Crown Braid That Frames Your Face
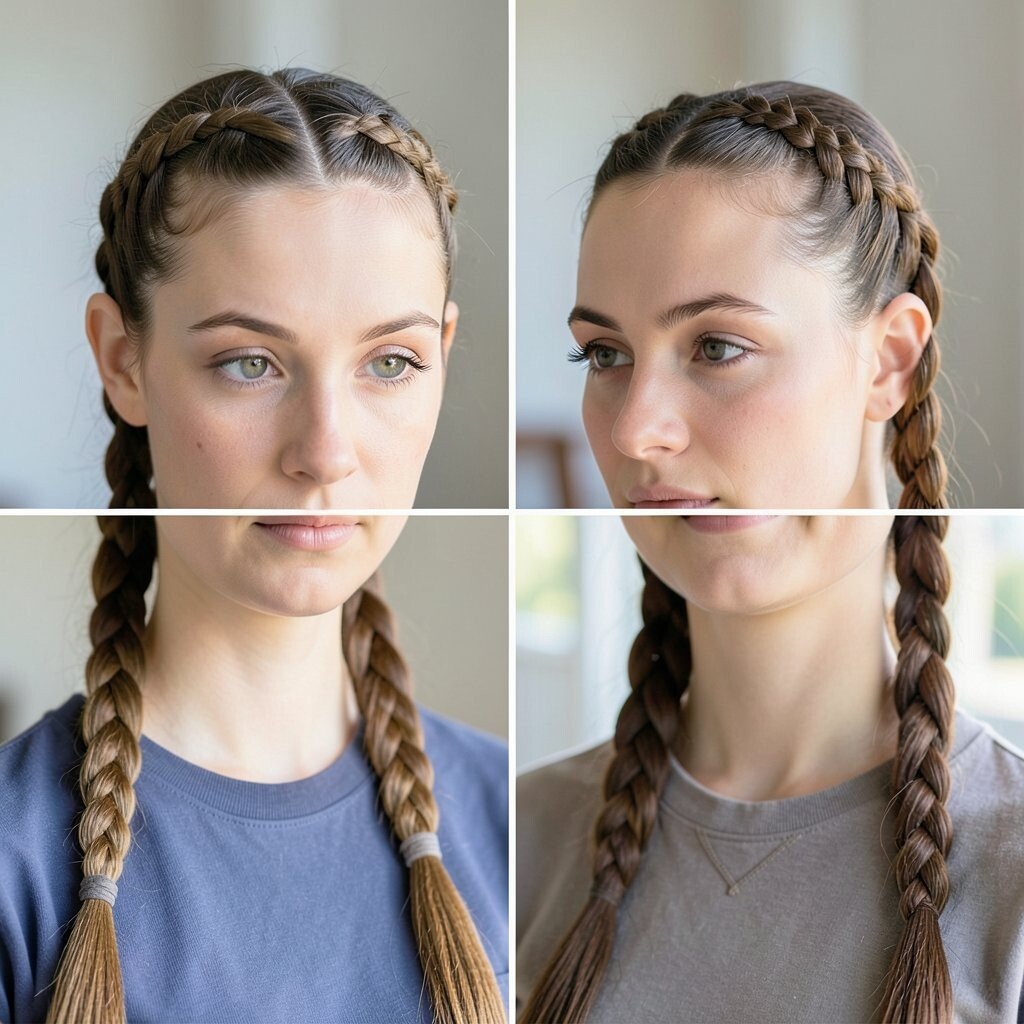
Part your hair down the middle and braid two sections, then bring them toward the top like a soft headband. Tuck the ends neatly under the crown and secure with bobby pins that match your hair color.
This style feels elegant and works for school, brunch, or a casual date. It also helps reduce flyaways because the braid holds hair close to your head. Use small elastic bands if you want a more defined look, or keep it loose if you prefer a relaxed vibe.
For personalization, try adding a tiny braid charm at one side or weaving a thin ribbon into the outer braid. If your hair is fine, lightly backcomb only at the roots for extra lift. A simple crown braid often costs nothing extra beyond pins, elastics, and maybe one product you already own.
3. Halo Braid With a Messy Finish
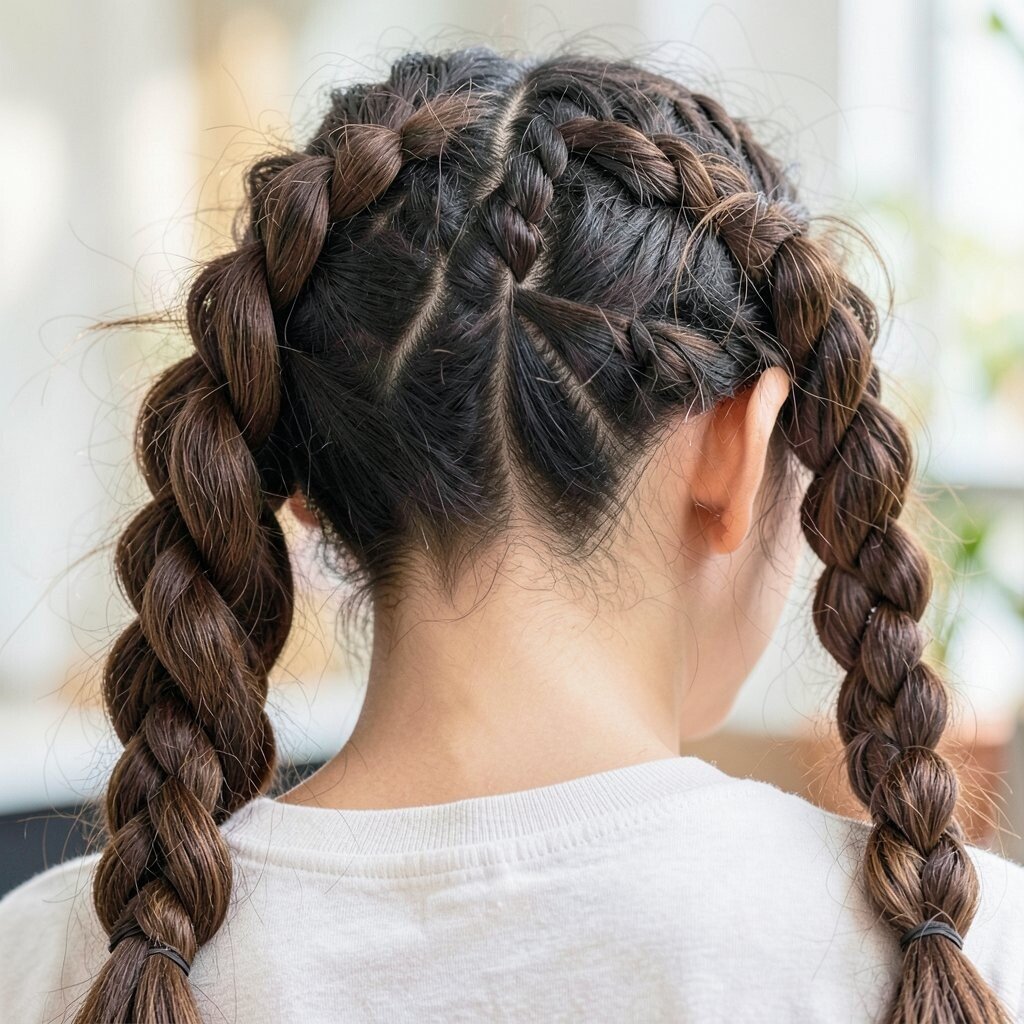
Make a braid that circles your head, then soften it by gently pulling sections outward. The goal is “intentional messy,” so the braid looks airy, not careless.
This look is great when you want comfort and style at the same time. It also hides second-day hair really well because the braid shape does the work. To keep it from becoming too flat, spray a little texturizing mist before you start.
Uniqueness comes from the way you loosen the braid, so don’t be afraid to vary thickness across the circle. If you’re following current trends, this soft, lived-in texture is popular right now. For cost, you can do it with just elastics, pins, and your usual hair spray.
When you personalize, place the braid slightly higher for a youthful feel or a bit lower for a romantic look. Use two or three pins at the underside to keep the halo secure all day.
4. Rope Braid Ponytail for Quick Energy
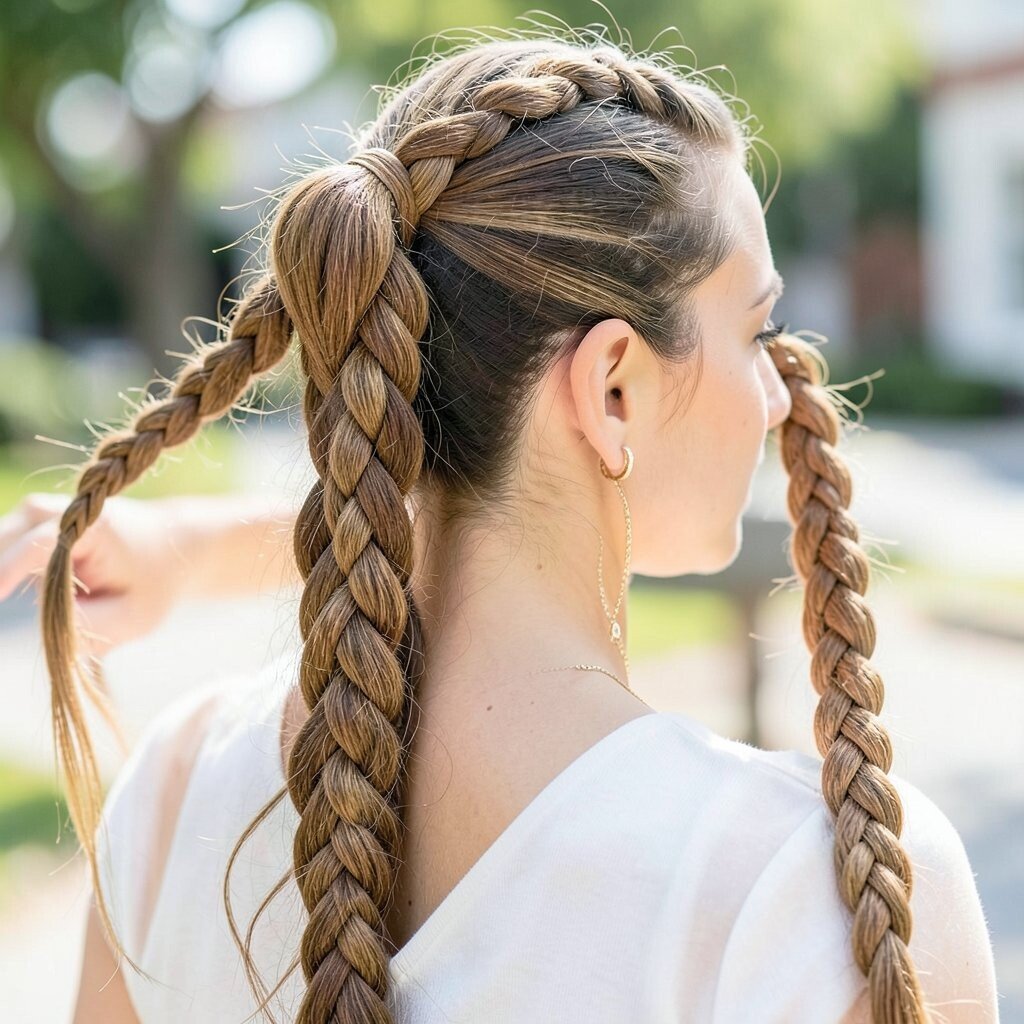
Gather your hair into a mid or high ponytail, then split it into two sections. Twist each section tightly, then wrap them around each other like a rope and secure the end with an elastic.
This braid style is fast, and it gives your ponytail a sleek, sporty vibe. It also works well if your hair is short to medium because the pony anchors the shape. Smooth a tiny bit of gel on the top for a cleaner finish.
5. Fishtail Braid With Side-Swept Drama
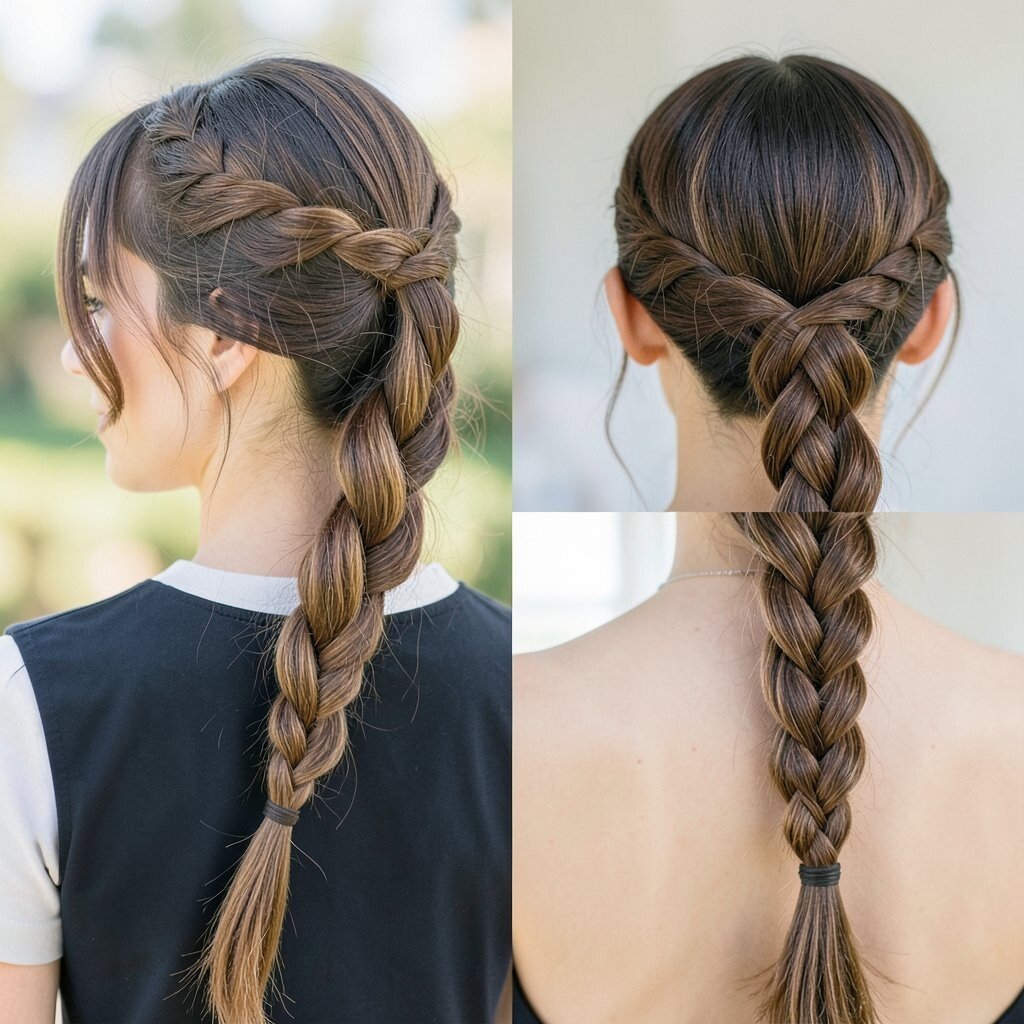
Start with a side part and make a fishtail braid using small sections that trade places over and over. Keep the pulls even so the pattern stays crisp from top to end.
This hairstyle looks fancy without feeling complicated, and it creates a beautiful scale-like texture. If your hair tangles easily, finger-comb each section before you move it to keep the braid neat. For personalization, try braiding slightly tighter at the top and looser near the ends.
For current trends, fishtails are still loved for their detailed look in both casual and glam settings. A light shine spray helps the pattern stand out in photos. The cost is low because you just need elastics and maybe a conditioning mist for slip.
6. Waterfall Braid With Soft Layers
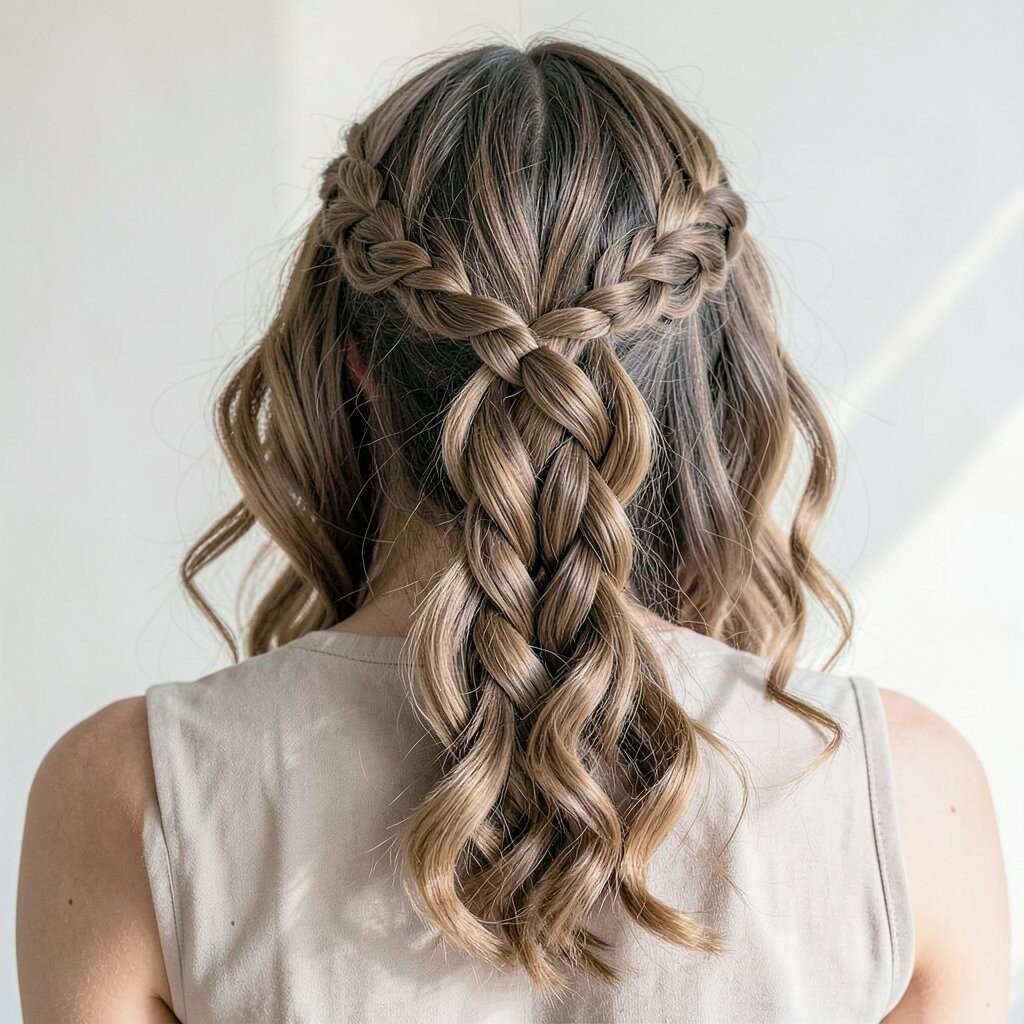
Begin with a horizontal braid near the crown and let strands drop like little ribbons. Each time you cross sections, release one strand and pick up a new one underneath.
This braid is perfect if you want movement because the “waterfall” effect keeps your hair from looking too heavy. It also flatters many face shapes since the pattern sits around the cheek area. Use a lightweight leave-in conditioner so the strands fall smoothly.
To personalize, adjust how much hair you drop, from subtle strands to more dramatic ribbons. If your hair is thick, use slightly smaller sections for a cleaner waterfall pattern. With basic hair tools, this can be done at home for the price of a few clips.
7. Dutch Braid Half-Up for Instant Lift
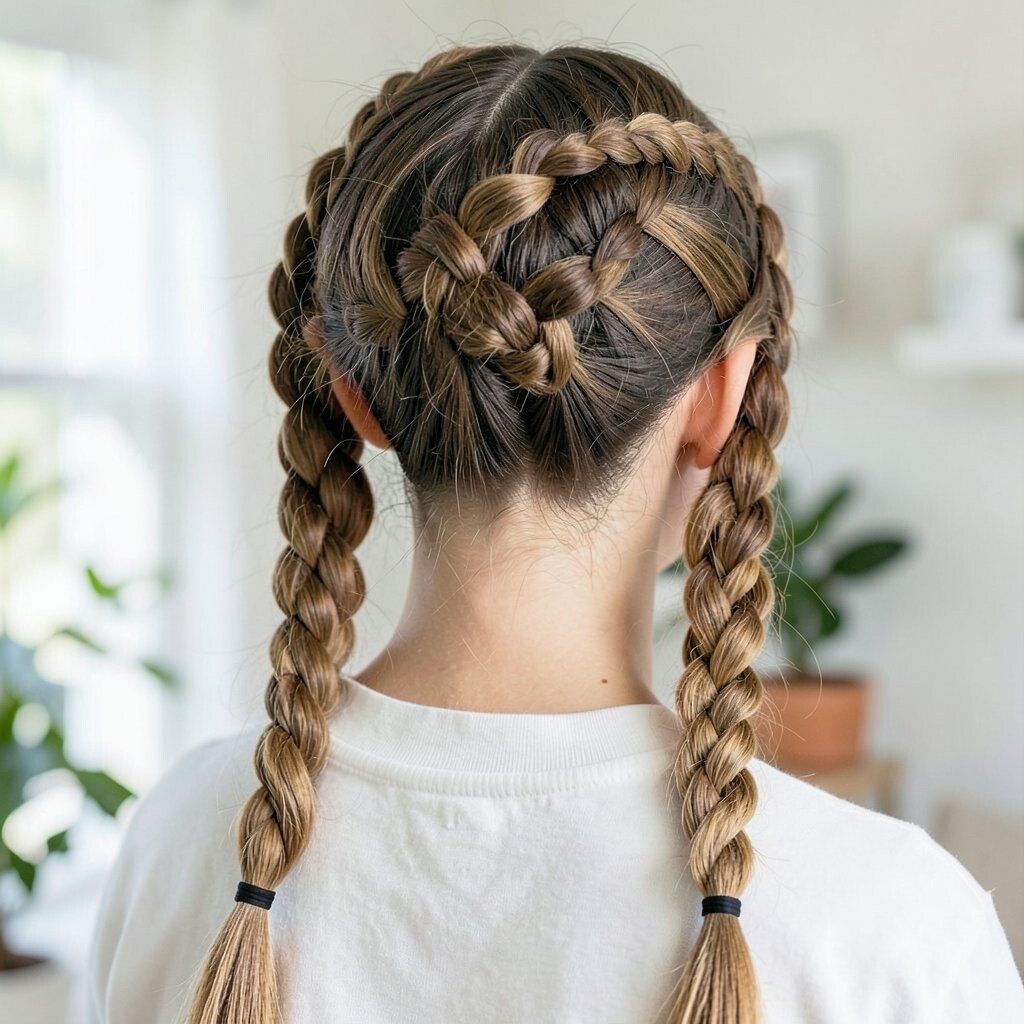
Create a half-up section, then braid it using Dutch technique by crossing strands under. Lift each new section slightly as you go to build volume and make the braid pop.
This is a go-to style because it gives quick height at the crown and keeps hair off your neck. It also works great for workouts since the braid grips and holds shape. Finish with a soft tug on the braid edges to widen it slightly.
8. French Braid With a Twist at the Crown
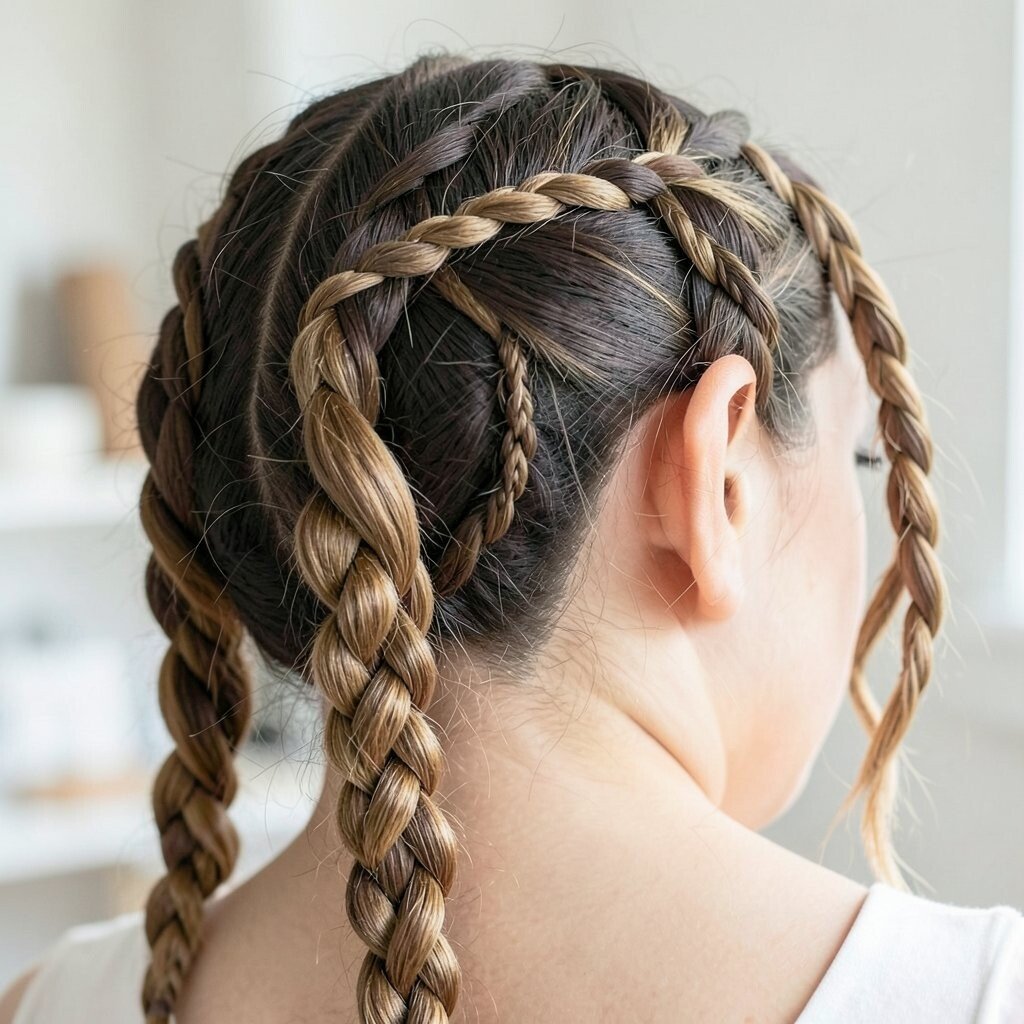
Start a French braid from the top, adding hair into the braid as you go. When you reach the crown, twist the braid direction slightly so it looks like it changes lanes.
The benefit is a sleek look that still feels unique, especially because the braid pattern is familiar but the twist adds flair. This style is also strong for long hair days since the continuous braid holds well. Use a smoothing cream on the outside so flyaways blend in.
For personalization, add a small braid wrap around the base with an elastic and one extra pin for security. If you want a trendier vibe, keep the braid a little tighter for a cleaner, polished look. Cost is friendly since you can create it with pins and your normal hair products.
9. Three-Braid Stacked Style for a Bold Look
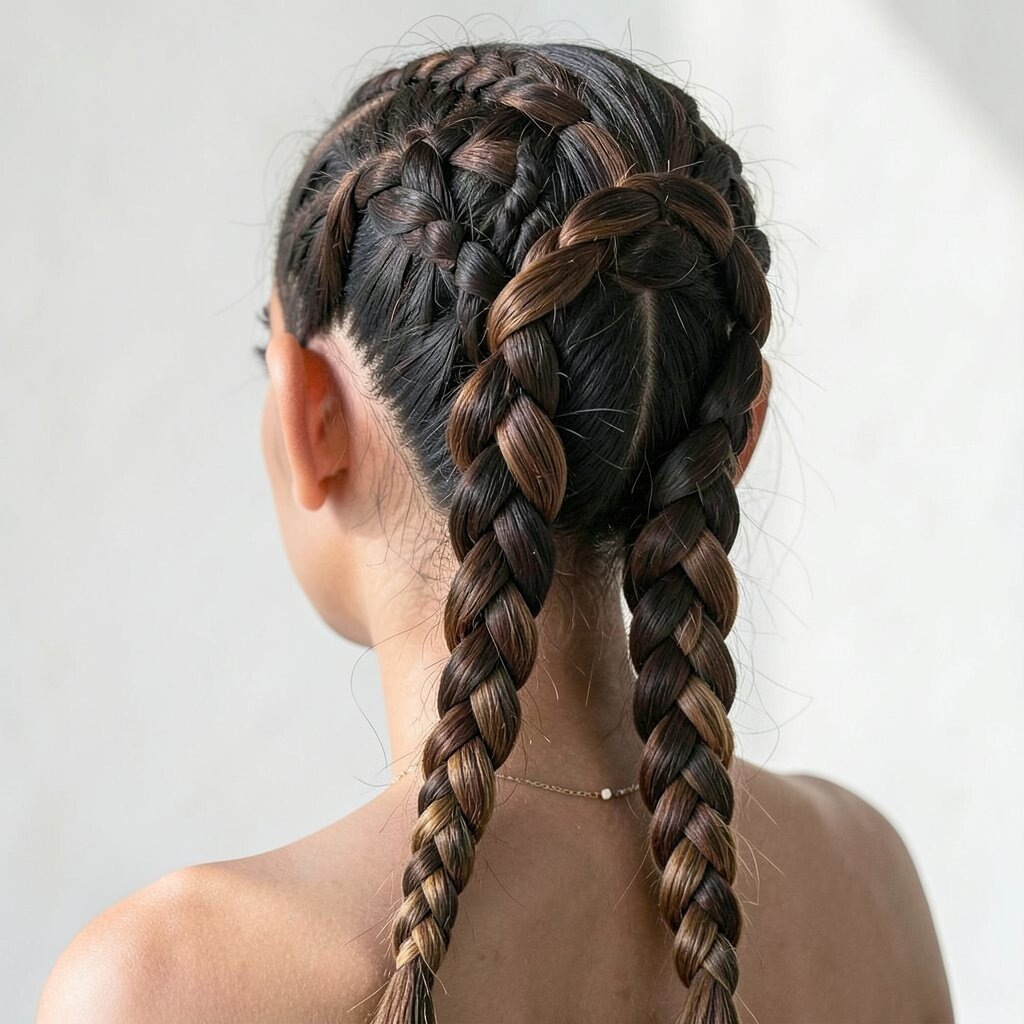
Make three braids vertically or diagonally, then stack them and pin them into place like steps. Use elastics at each section and secure with bobby pins for a strong hold.
This hairstyle feels bold and graphic, and it can make even simple outfits look styled. It also gives you multiple texture areas, which looks great in natural light. Keep the stacks tight if you want a sharp finish, or loosen them slightly for softness.
Uniqueness comes from placement, so try a diagonal stack or a high “staircase” look. For practical tips, use extra pins along the back so the stacked braids don’t slide. If you’re attending an event, consider using a subtle hair gloss to make the braids shine.
10. Micro-Braid Headband With Loose Waves
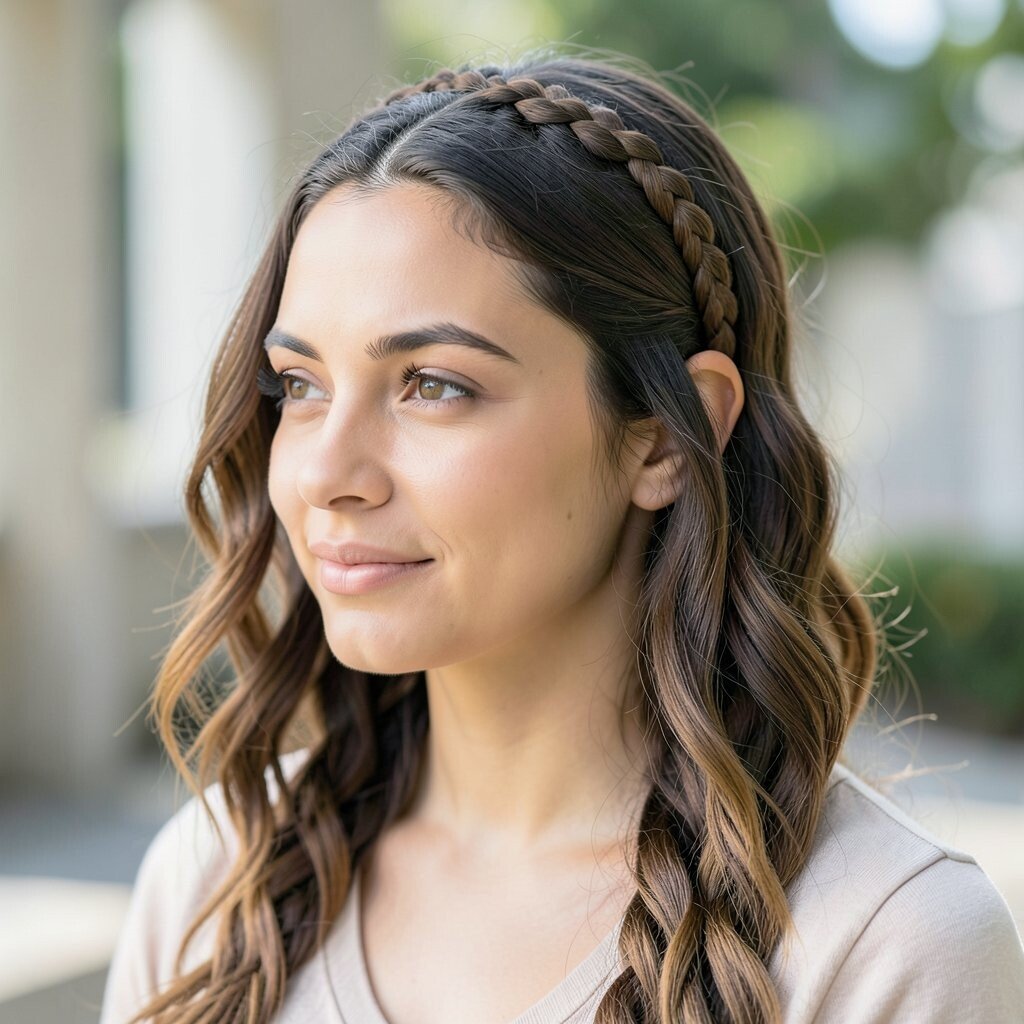
Part the hair and create several tiny braids across the top like a headband. Leave the rest of your hair loose in soft waves for balance.
This look is trending because it mixes detailed braiding with an easy, wearable feel. The benefit is that the braids add structure while waves add comfort and movement. If you’re doing it yourself, take small sections and use thin elastics so the headband stays even.
For personalization, choose a braid direction that matches your part and adjust how wide the headband is. Fine hair can benefit from teasing lightly at the crown so the headband sits nicely. For cost, micro-braids take time, but you can avoid expensive salon add-ons by keeping the sections simple.
To keep it from looking messy, lightly mist the waves with heat protectant and use a small curling tool for the loose pieces.
11. Side Dutch Braid Over One Shoulder
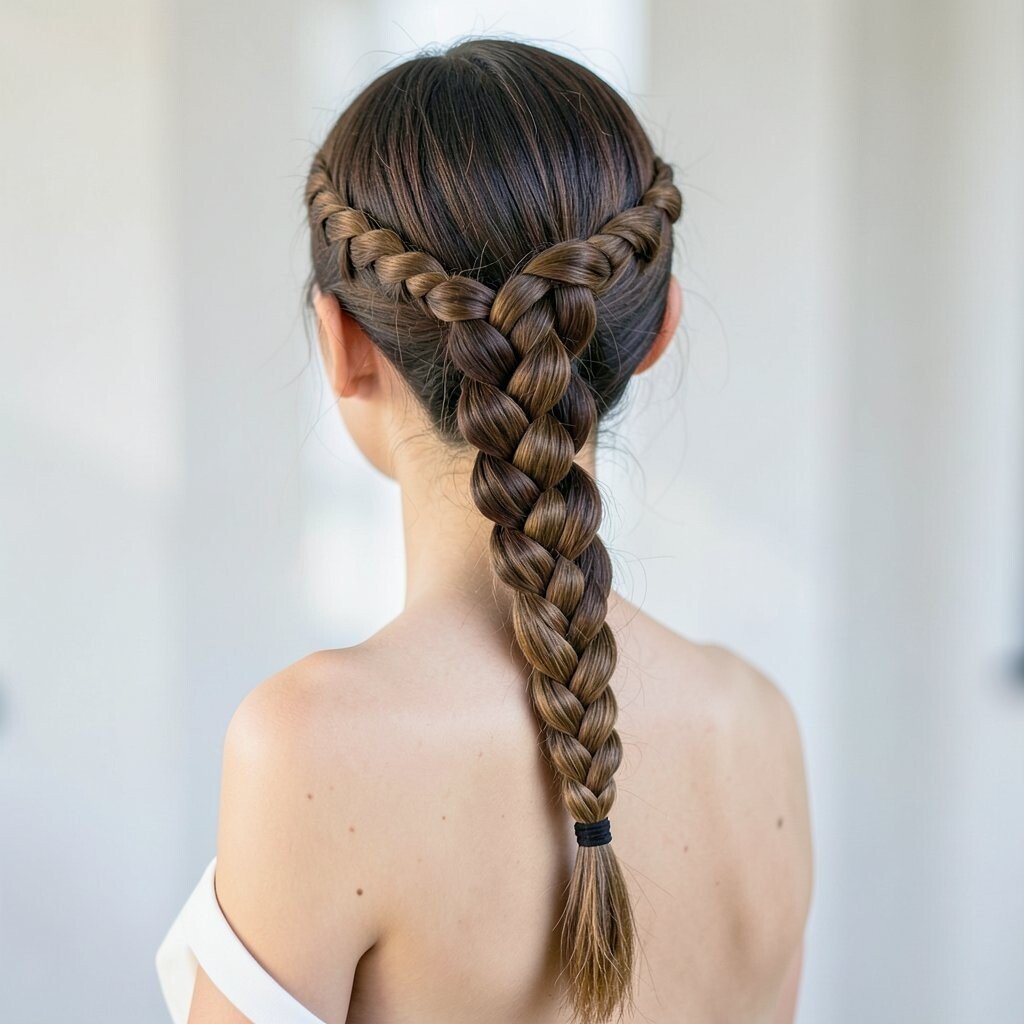
Make a Dutch braid starting at the temple and braid down toward your ear and shoulder. Secure the end and then adjust the braid so it drapes where you want it to land.
This style is great for showing off earrings because the braid sits forward. It also keeps your hair from tangling during the day, which is a real comfort bonus. Use a smoothing cream on the outer sections so the braid looks sleek even when you move.
12. Lace Braid With a Romantic Middle Drop
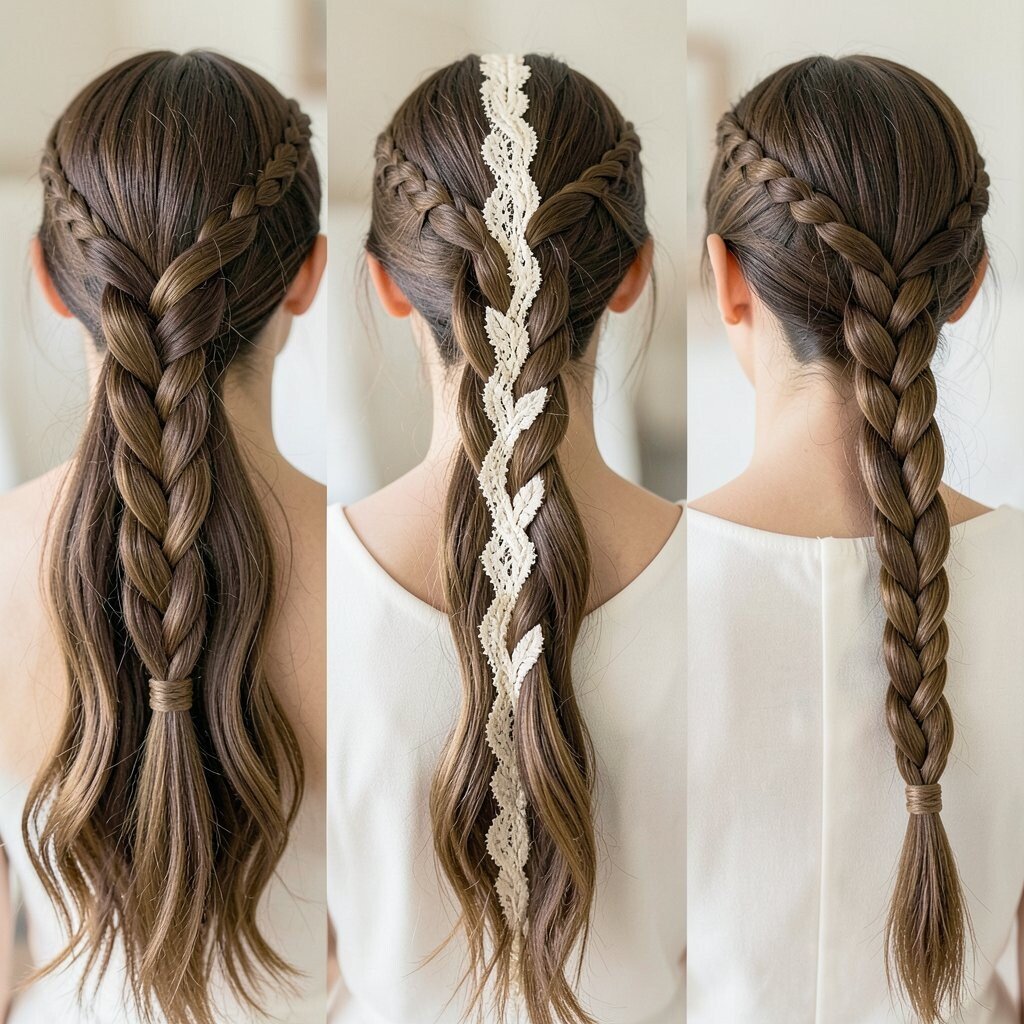
Work a braid near the front, then gently pull loops so it resembles lace. Leave a small middle section to fall through the pattern for that romantic “peek-a-boo” effect.
This hairstyle looks delicate and pretty, and it’s a sweet choice for weekends and celebrations. It also helps hair feel lighter because the braid creates spacing through the front. For personalization, decide whether the lace loops are tight and neat or bigger and more dramatic.
Current trends favor soft, airy texture, so don’t make the braid too rigid. Use pins to anchor the middle drop so it doesn’t get caught on clothing. The cost stays low since most lace effects come from your hands and gentle pulling.
13. Braided Bangs With a Sleek Front
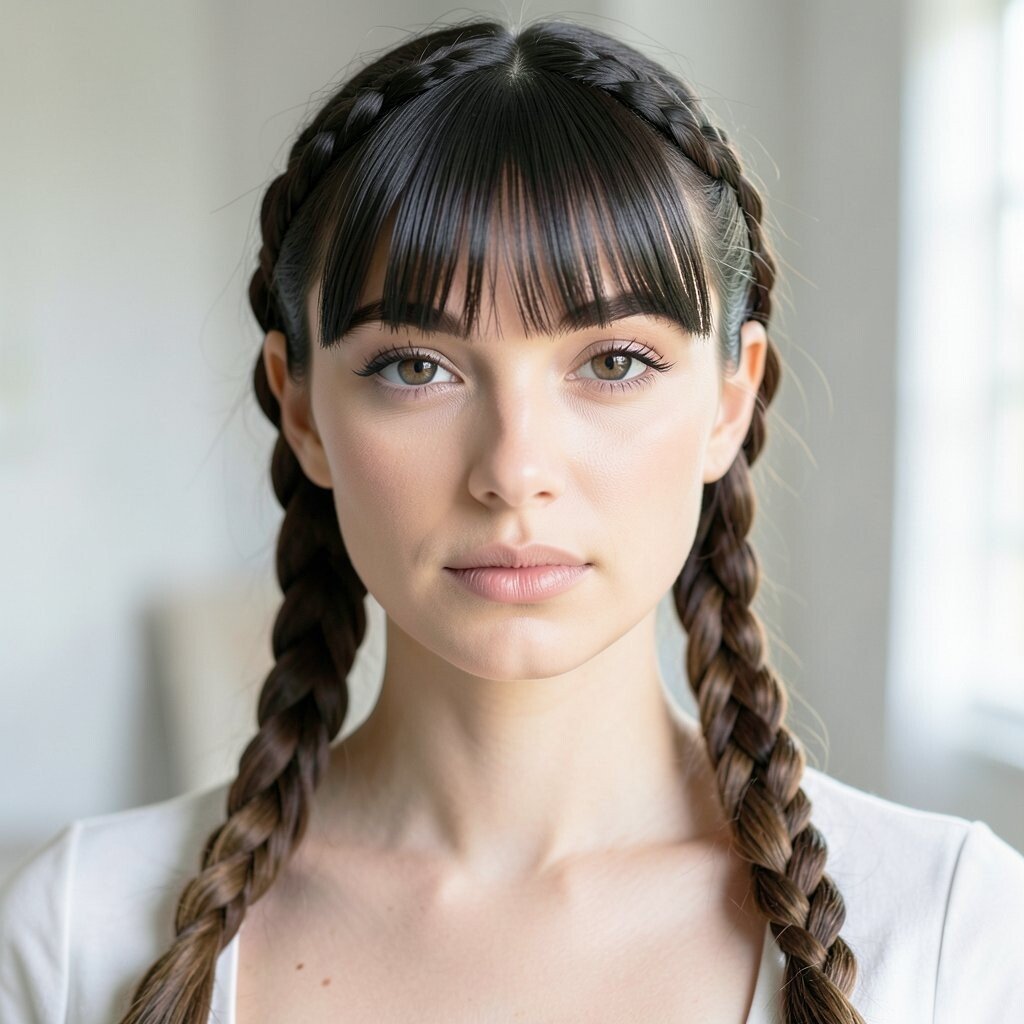
Create small braids across your bangs area, then blend them into the rest of your style. You can braid just two sections or make a short mini-braid row depending on your time.
This look is helpful when you want your face framing to feel tidy without pinning the whole front. It also adds a unique detail that stands out even in simple hairstyles. Use a light styling gel to keep stray hairs tucked under the braid.
14. Braided Space-Buns With Two Mini Braids
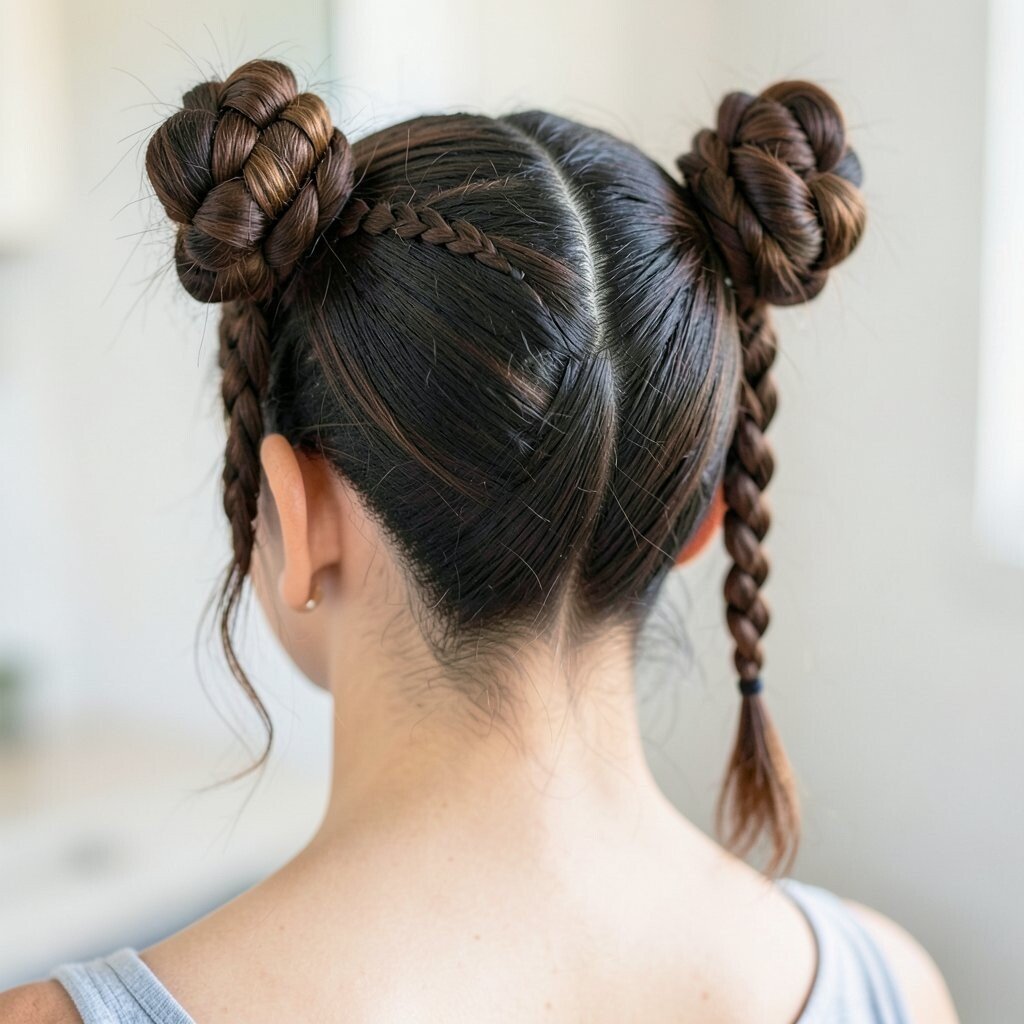
Separate your hair into two sections, twist each into a mini braid, and then wrap into buns. Secure with elastics first, then add pins for a sturdy finish.
This is playful and energetic, and it’s perfect for festivals, gym days, or fun nights out. The benefit is that the braid inside the bun helps lock the shape so it stays put. For practical tips, make sure each bun base is tight before you pin the sides.
Uniqueness comes from the braid thickness, so vary it slightly between the left and right for a cute asymmetry. If your hair is slippery, use dry shampoo at the roots for grip. Cost considerations are easy since you only need pins, elastics, and maybe a hair donut if you prefer a fuller bun.
15. Pull-Through Braid for a Clean, Glossy Finish
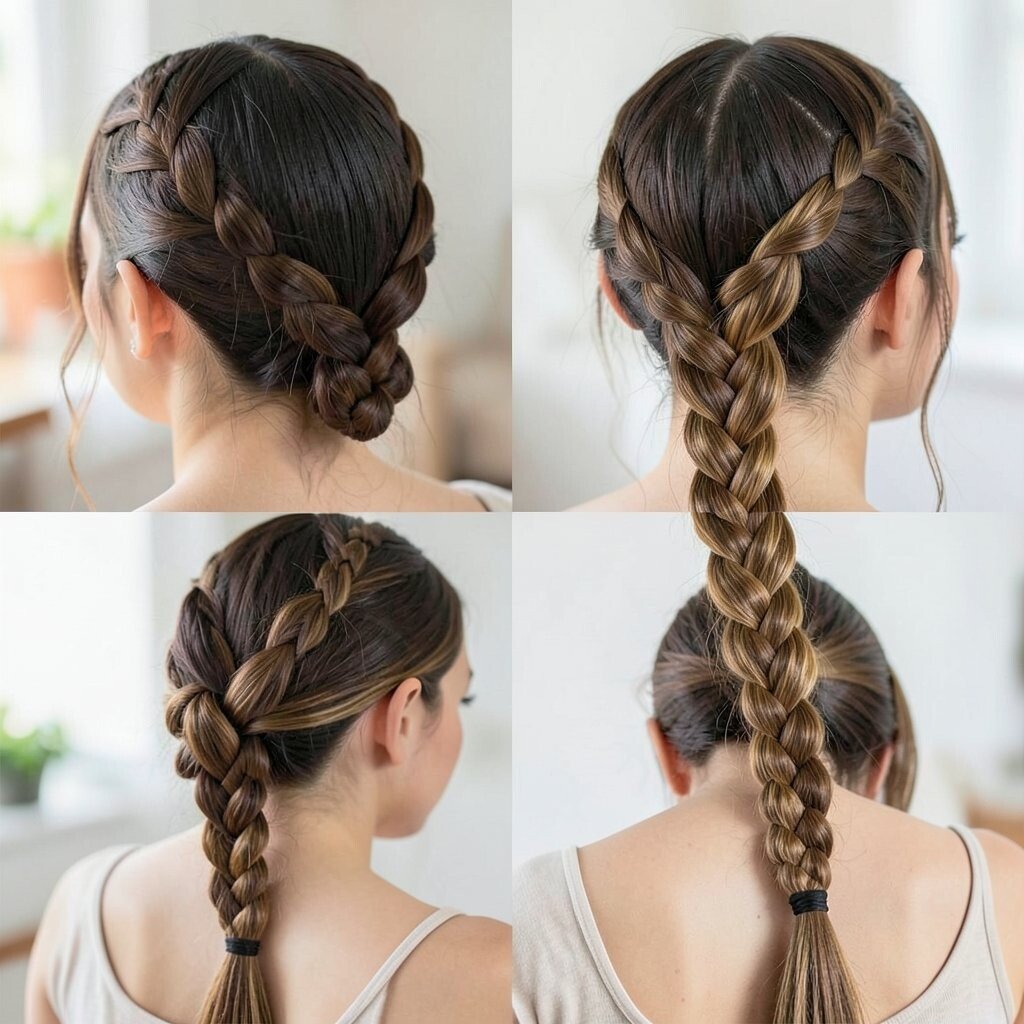
Start with a simple braid base, then add strands into it by pulling sections through small gaps. Keep everything smooth so it looks polished, not bulky.
This hairstyle gives a modern look and a neat shape that works for many outfits. It’s also great if you love braids but want something that feels a bit different from the standard pattern. For personalization, adjust the spacing so the pull-through sections are either tight and sleek or airy and bold.
For trends, clean braiding with glossy texture is very popular, especially for office and event styling. Use a shine spray lightly so the braid catches light without feeling sticky. It’s cost-friendly since you can do it with basic hair tools.
16. Dutch Braid With Beaded Ends for a Party Touch
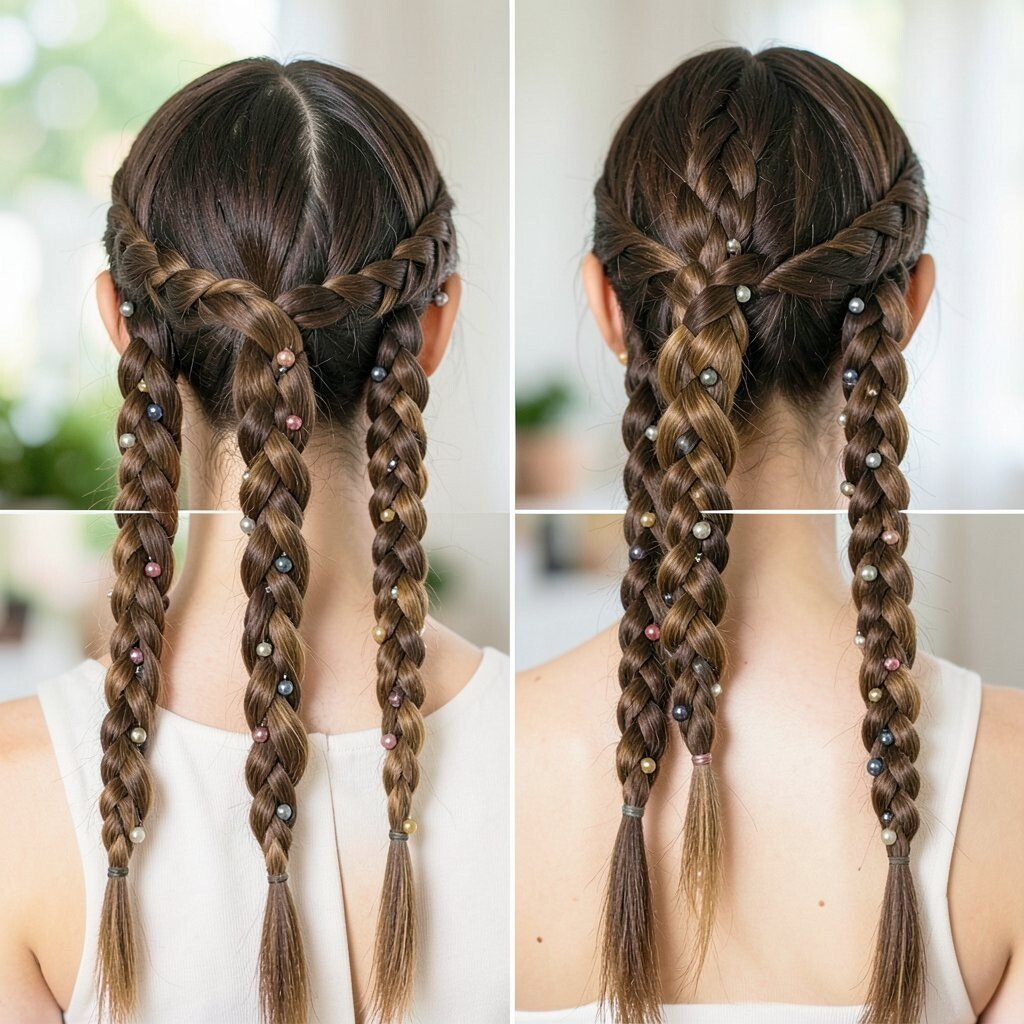
Make a Dutch braid from the top down, then attach small beads to the final section as you braid. Keep the beads spaced so they move when you walk.
This option looks instantly festive and unique, even if your braid is simple. It also gives your hairstyle a focal point, so you can keep your outfit simple and still feel styled. Use tiny elastic ties around each bead so they don’t slide too far.
For practical tips, choose lightweight beads so they don’t pull on your hair. If you want a current trend vibe, go for delicate beads in a matching color family rather than heavy contrast. Cost can vary depending on bead quality, but many craft stores offer affordable packs.
17. Braided Bun With a Side Sweep
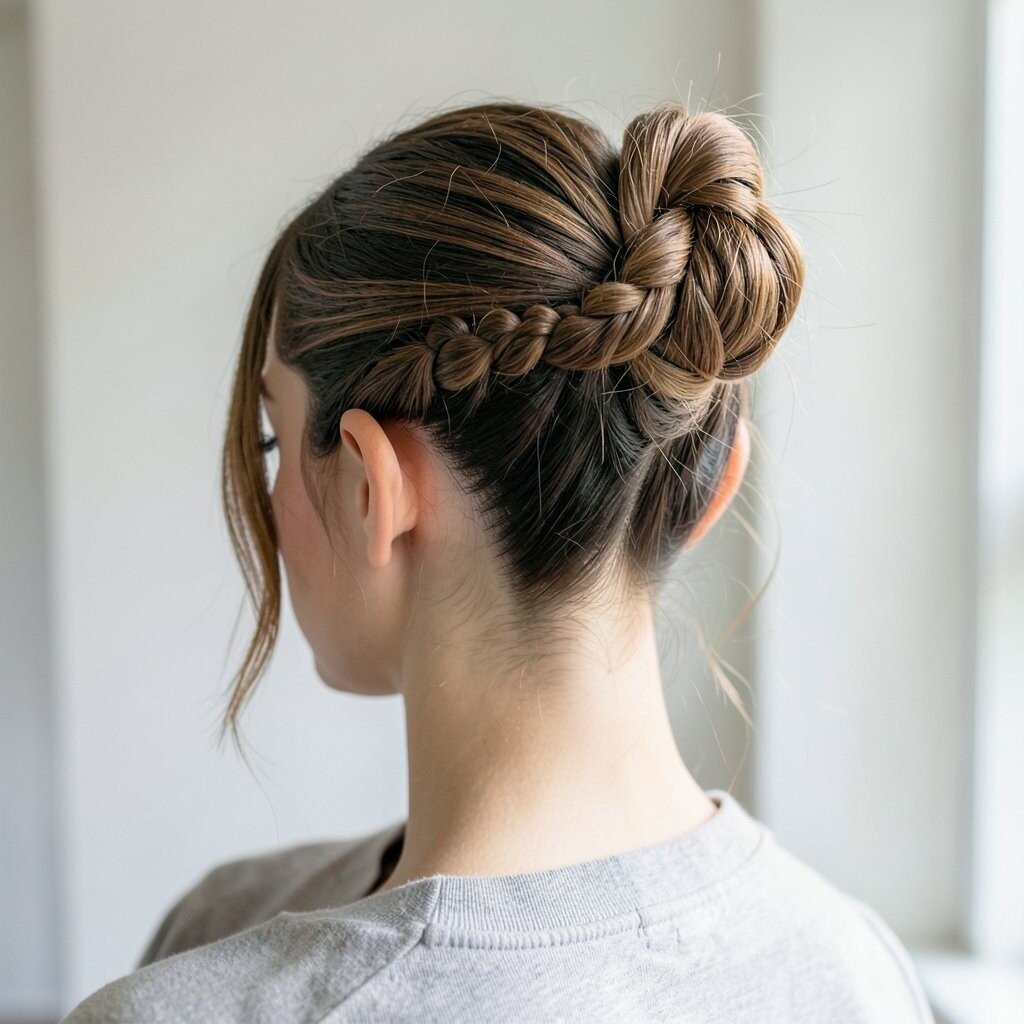
Gather hair into a low bun but braid one side section first, then wrap it around the bun. The side sweep makes the bun look intentional and soft.
This hairstyle is classy and practical, especially for long days when you want hair secured. The braid adds grip, helping the bun stay in place longer. For personalization, braid either a thin strand for subtle detail or a thicker section for a more dramatic frame.
18. Zigzag French Braid for a Geometric Look
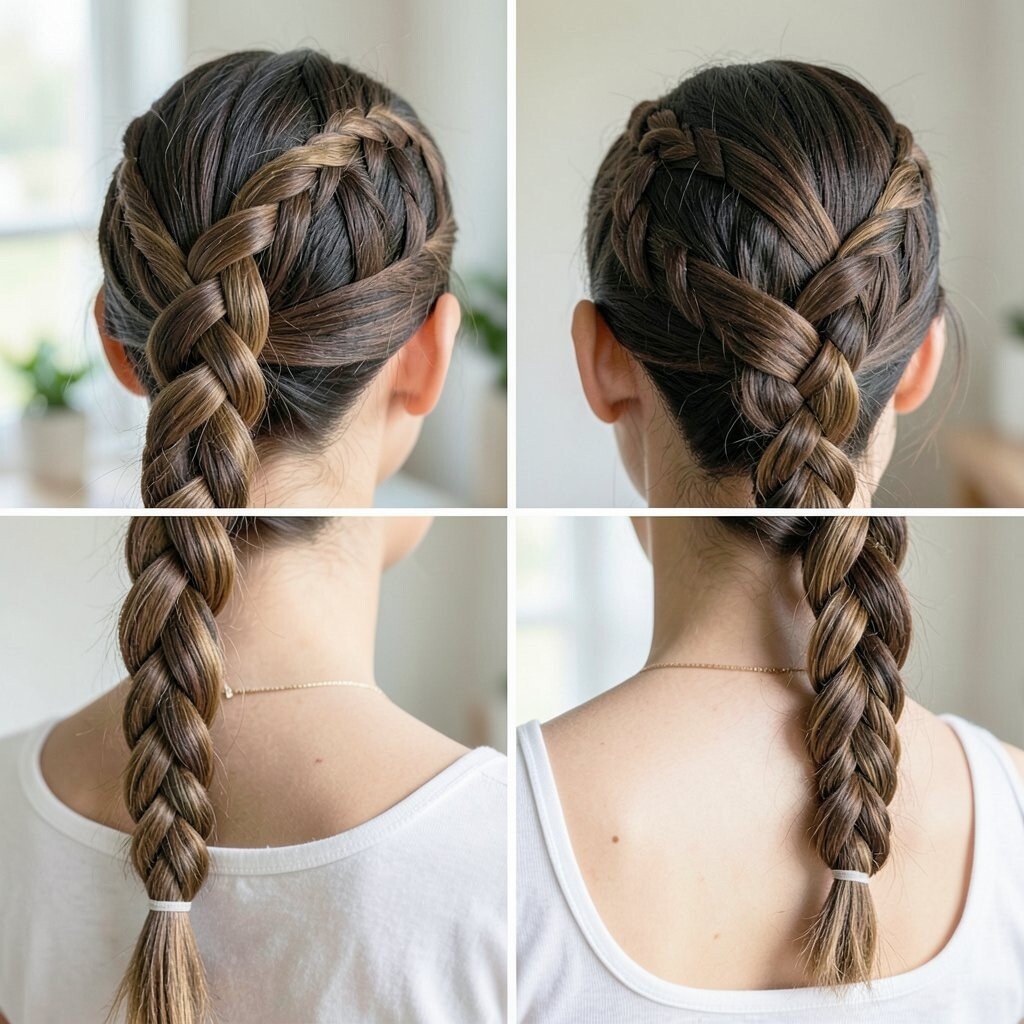
Instead of a straight part, create a zigzag line and start French braiding from there. Follow the zigzag pattern so the braid forms a geometric design.
This hairstyle is unique and creative, and it stands out even from far away. It also gives your hair structure, which can be helpful if your strands are slippery. Keep sections evenly sized so the zigzag stays crisp.
For practical tips, use clips to hold the zigzag pieces while you start braiding. Trends often lean toward graphic patterns, so this is a fun choice for photos and events. Cost is minimal because you only need elastics, pins, and a good comb.
To personalize, try a sharper zigzag for an edgy look or a softer zigzag for a gentle style.
19. Braided Crown Ponytail With Extra Volume
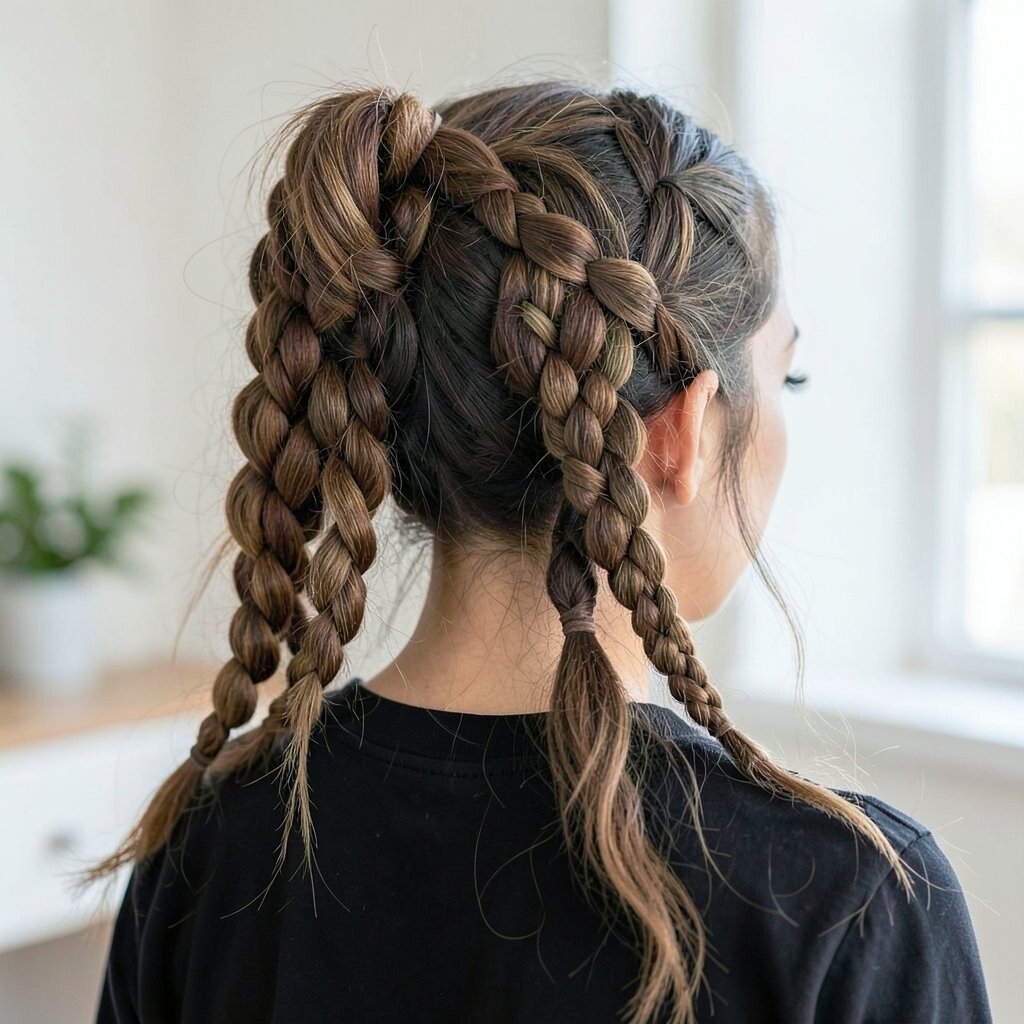
Make a crown braid on the top of your head, then pull the remaining hair into a ponytail. Secure the ponytail and gently blend the crown braid into the base with pins.
This style gives you the best of both worlds: elegant braiding and the bounce of a ponytail. It also helps keep hair off your face, which is great on hot days. If your hair is fine, backcomb the crown lightly to get more lift.
20. Viking-Inspired Braid With Two Backbone Plaits
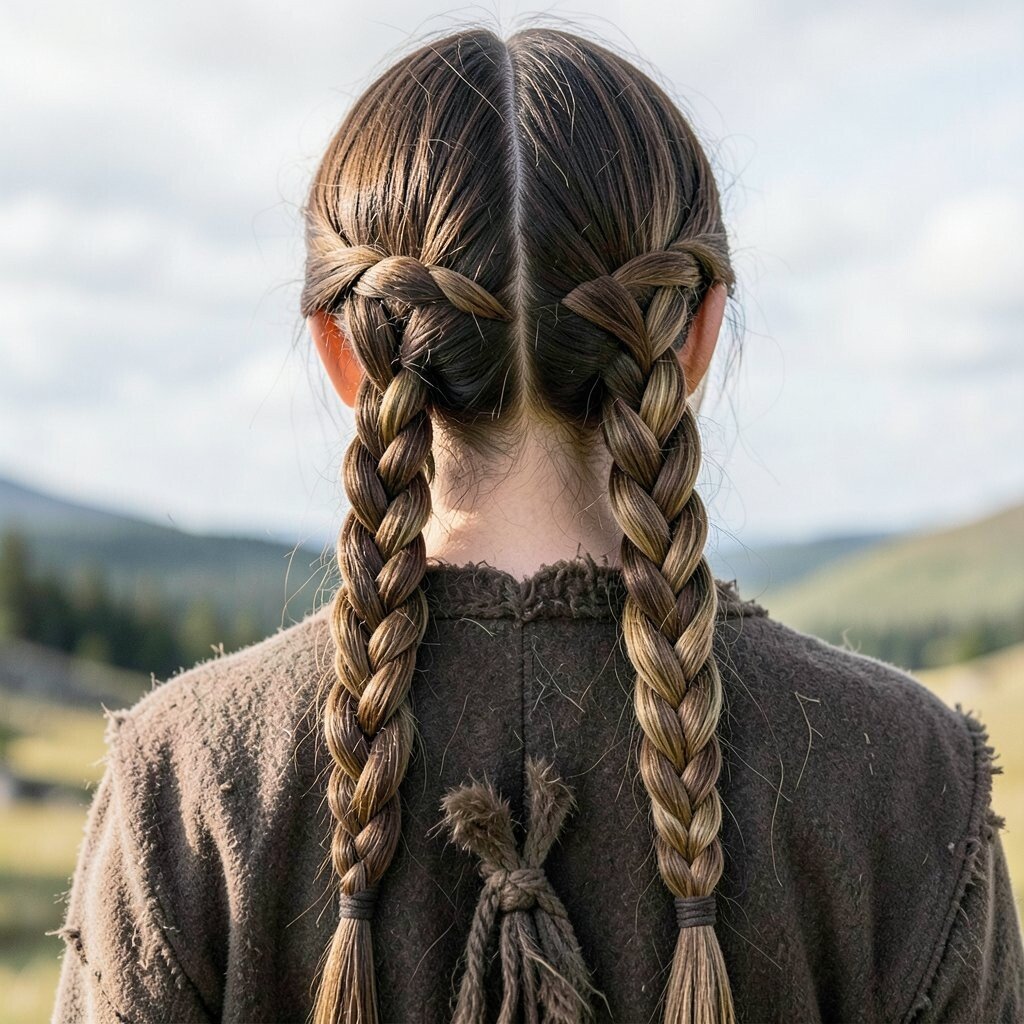
Split hair into two big sections and create two thick braids that run straight down your back. Add small twists at the top so the braids feel anchored and strong.
This look feels bold, and it’s perfect when you want your braid to look powerful. The benefit is that thick braids create a lot of texture, which makes the hairstyle stand out even with simple clothing. Use a smoothing balm before braiding to reduce frizz and flyaways.
For personalization, adjust the braid tightness, since tighter braids look more formal and looser braids look more relaxed. Current trends are showing more statement textures, and this one fits right in. Cost is low because you can achieve it with elastics, pins, and your regular hair care.
If you want extra polish, add a little oil on the outer braid edges right before leaving the house.
21. Waterfall Side Braid With a Hair Clip Finish
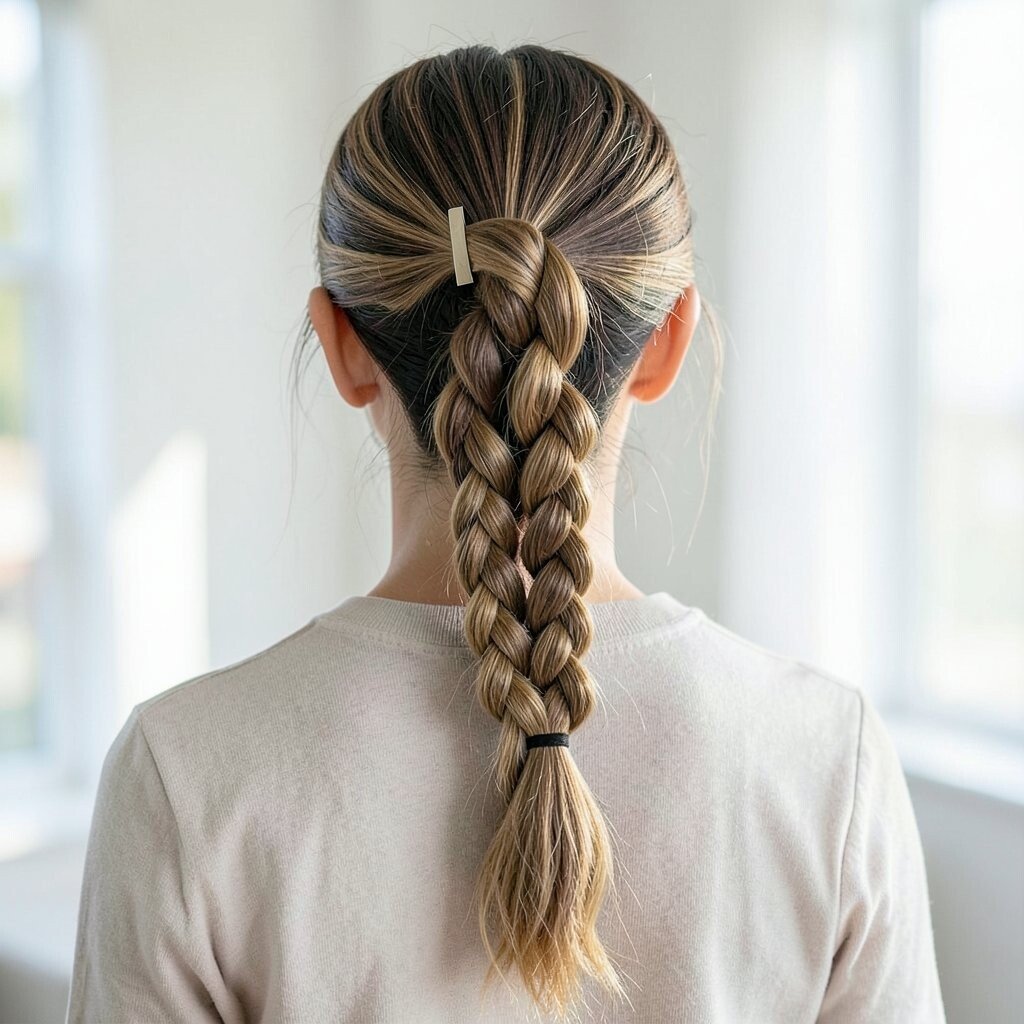
Start your waterfall braid at the temple and work toward one side, letting strands fall across your shoulder. Use a small clip at the end point where the braid meets the rest of your hair.
This is a sweet mix of romantic and practical, since the braid keeps the front neat while the dropped strands add softness. It also lets you show off a clip or accessory without making the entire hairstyle complicated. Personalize by choosing a clip color that matches your outfit or nails.
22. Double Dutch Braids Into a Low Braided Chignon
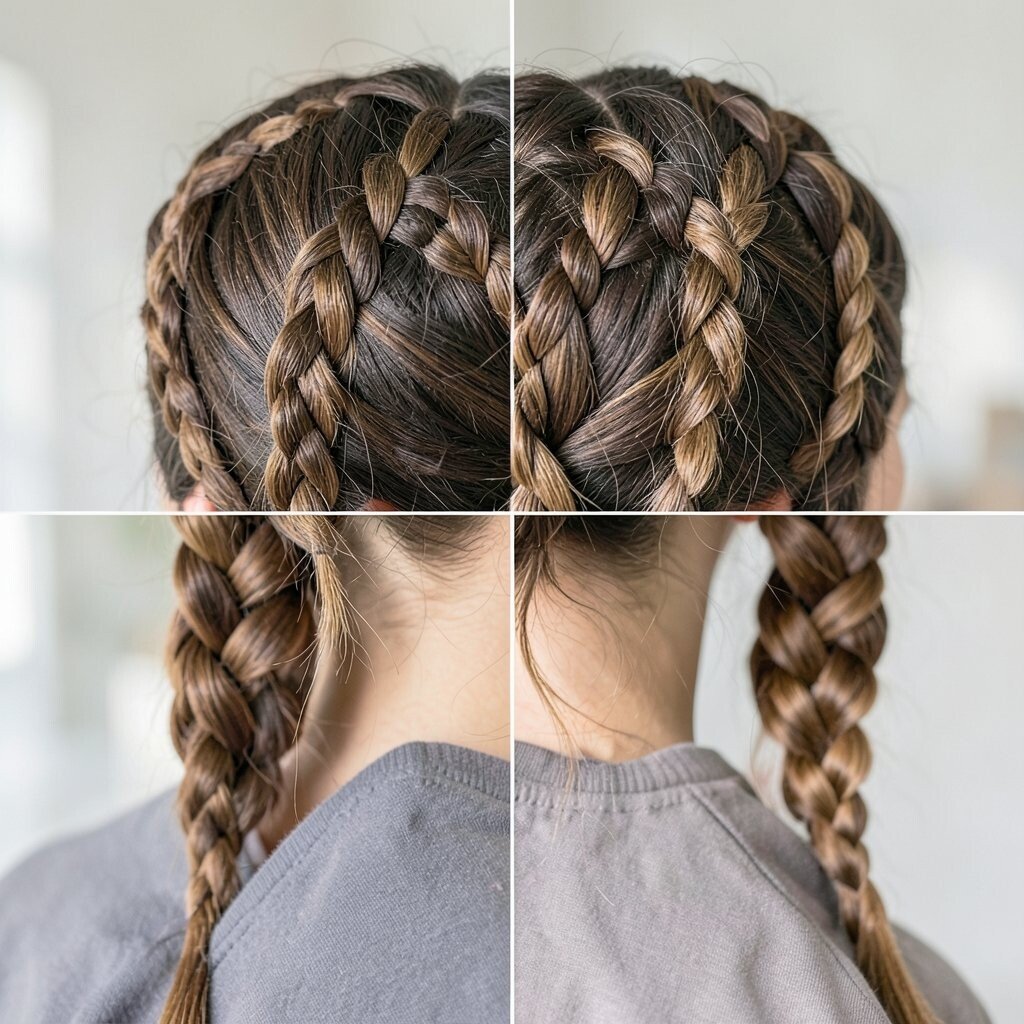
Create two Dutch braids that run down toward the back of your head, then gather them into a low chignon. Twist the braided sections together, wrap into a bun, and secure with pins.
This hairstyle feels polished and special, and it works great for events or workdays when you want a tidy look. The braids add stability, so your chignon holds its shape longer than a simple bun. For practical tips, spray the braids lightly with hairspray before wrapping to help everything stay smooth.
Uniqueness comes from how you tuck the ends, so experiment with whether the chignon is centered or slightly off to the side. Current trends lean toward elegant updos with texture, and this one fits perfectly. Cost is usually just pins and elastics, unless you choose to add a decorative hair comb.
To finish, gently loosen the top of each Dutch braid for volume and soften the overall silhouette while keeping the bun secure.