Picture your day getting better the second you finish your hair. These styles are easy, pretty, and ready for real school life.
You will find options for ponytails, braids, bangs, and even “messy-on-purpose” looks. Each one includes little choices you can make so it feels like you.
1. Half-Up Ribbon Braid
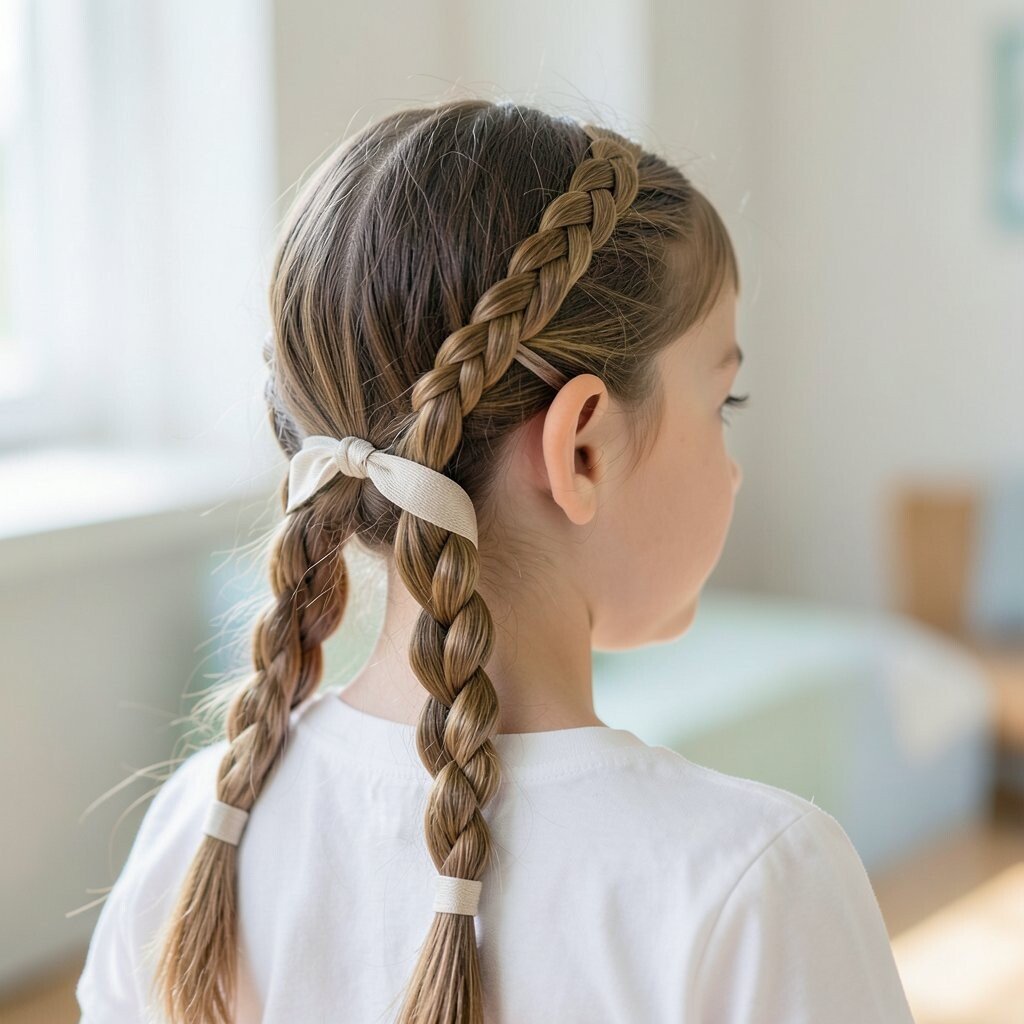
This look starts with a simple half-up section and turns it into something special. Gather the top half, braid it, and weave in a ribbon that matches your outfit or nails.
The braid looks neat from the front and softens your face from the sides. It helps hair stay out of your eyes during class, so you can focus on notes and screens.
If your hair is fine, lightly backcomb the crown before braiding for more volume. For thicker hair, do a looser braid and secure it with a small elastic so it doesn’t feel bulky.
2. Double Dutch Braids With Baby Clips
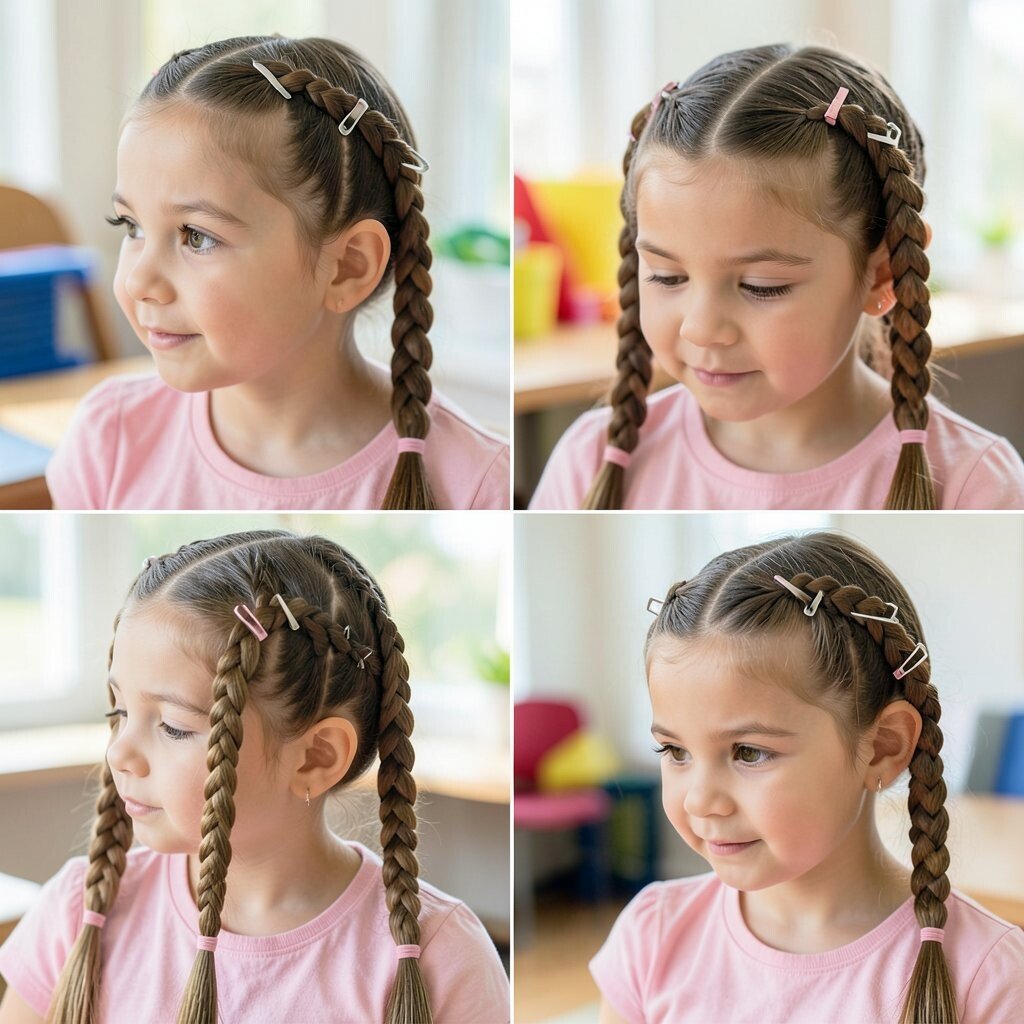
Part your hair down the middle and add two Dutch braids that sit close to your scalp. They look bold and sporty, with that raised braid texture you can actually feel when you touch it.
Finish by clipping small “baby clips” along the outer edges for a cute pop. This style keeps hair contained, which is a lifesaver for gym, recess, and windy hallways.
Choose clip colors that match your backpack or a favorite sweater. If you want it smoother, use a little gel on the top layer and leave the braid a touch textured.
3. Messy Bun With Face-Framing Tendrils
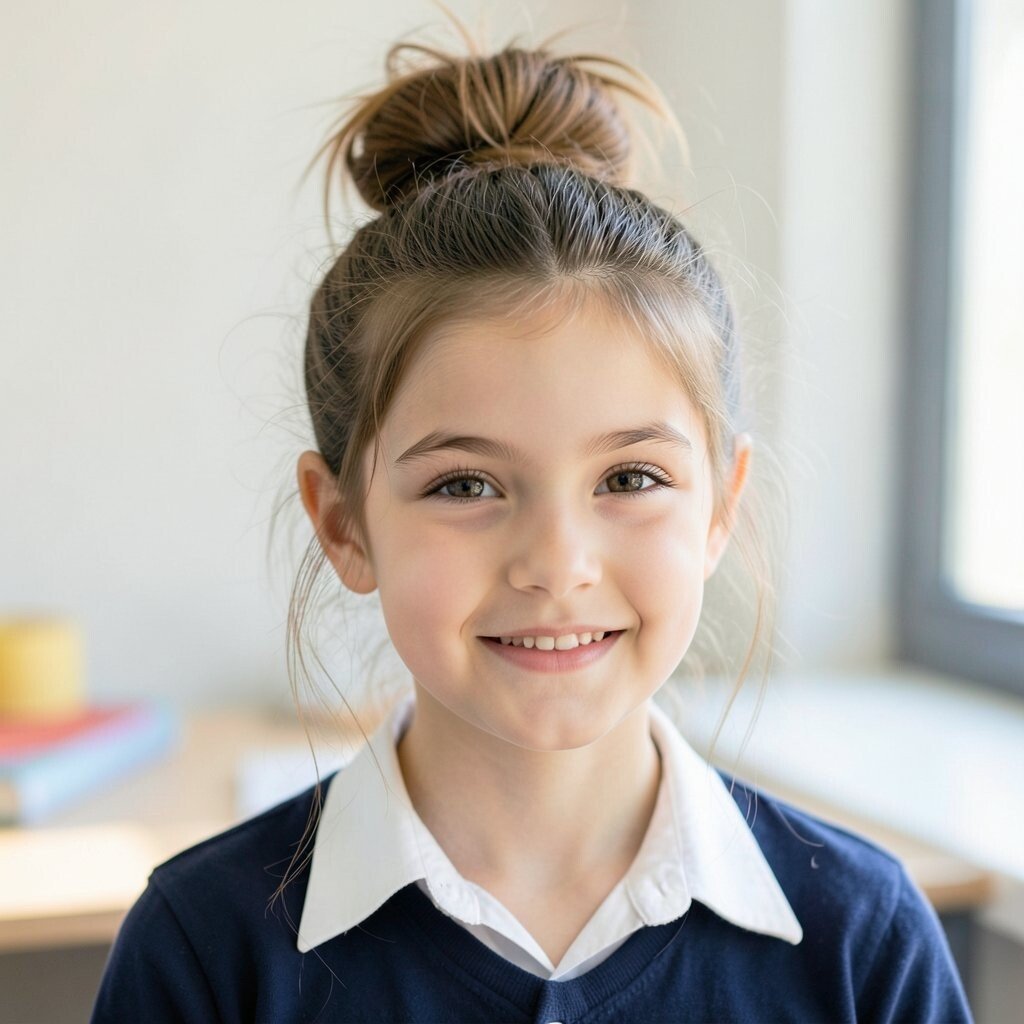
Twist your hair up into a bun, then loosen a few strands around your cheeks. The messy texture looks effortless, like you woke up cute, even though you didn’t.
This hairstyle keeps the back secure while the front stays soft and expressive. It helps reduce tangles because your ends are tucked away instead of bouncing all day.
Use a claw clip if you want quick buns, or try a hair donut for extra hold. For a personalization touch, curl the face-framing pieces with a tiny wand or bend them with braids from the night before.
If your hair is very slippery, spray a light mist of hairspray before twisting. You can also pull the bun slightly off-center for a fun, modern look.
4. Side Ponytail With Braided Crown
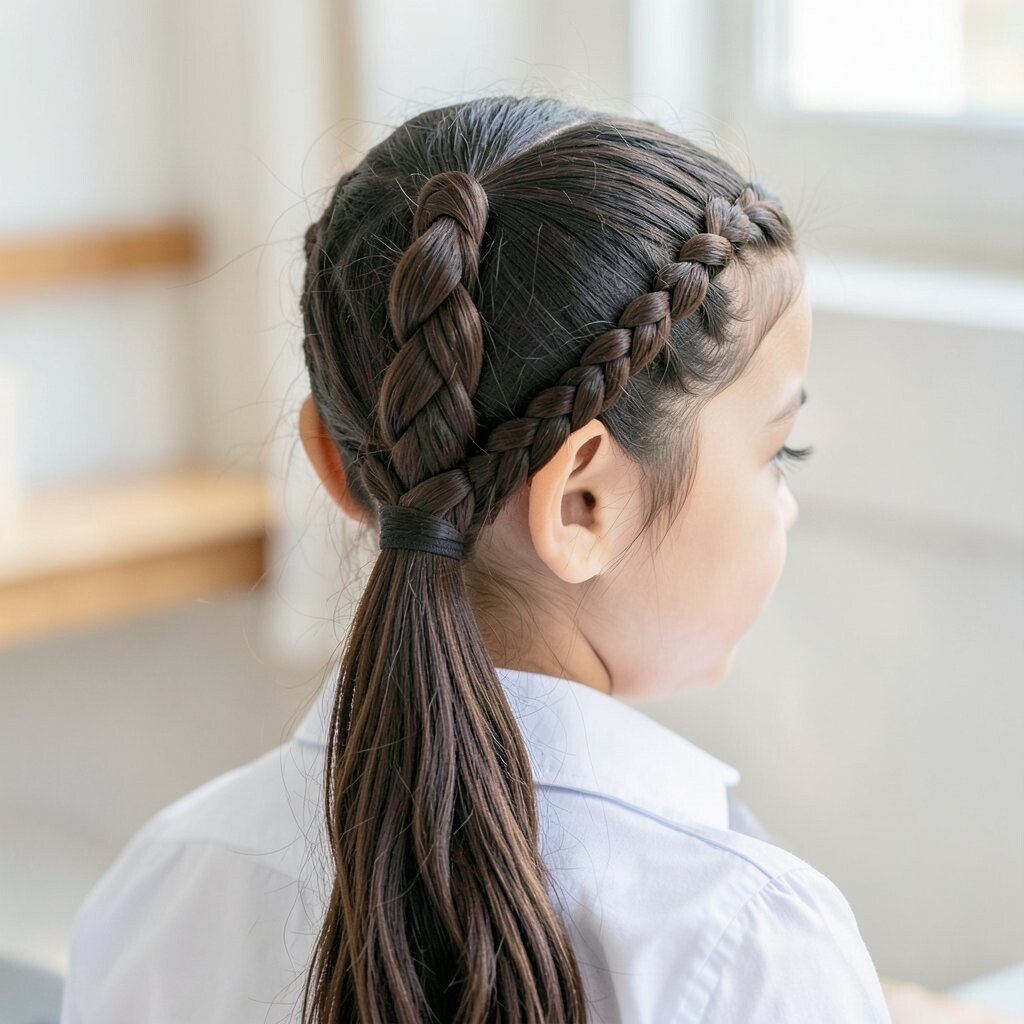
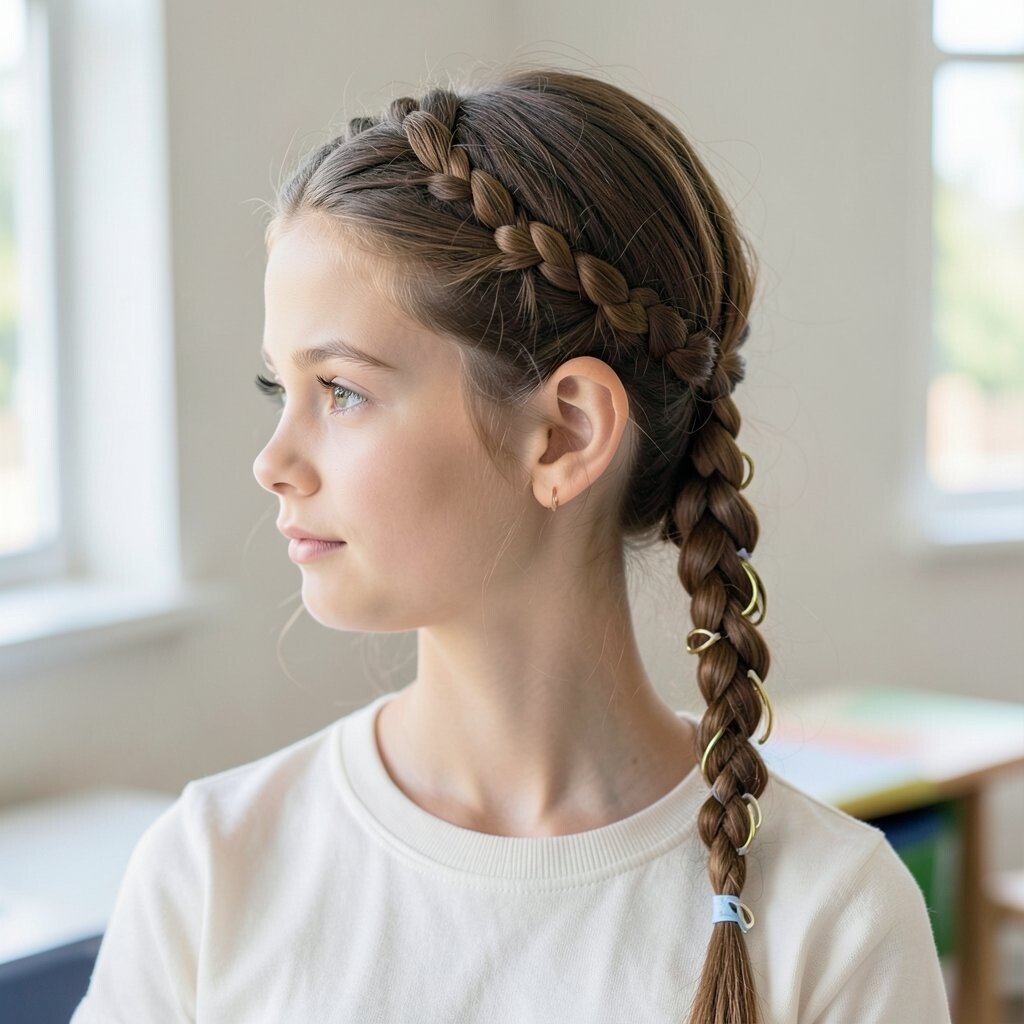
Sweep your hair to one side and start with a small braid across the crown. Then gather everything into a side ponytail so the braid acts like a decorative headband.
This is great for days when you want something polished but not too formal. The side placement adds movement, and the braid keeps the top section tidy.
Use a thin elastic that matches your hair color for a clean finish. If you want extra trend energy, make the braid slightly looser so it looks fuller.
For personalization, add a charm clip near the braid or wrap a thin strand around the ponytail base. If you have short layers, secure the layers with a couple of bobby pins before you pull the ponytail tight.
5. Scarf-Tied Bubble Ponytail
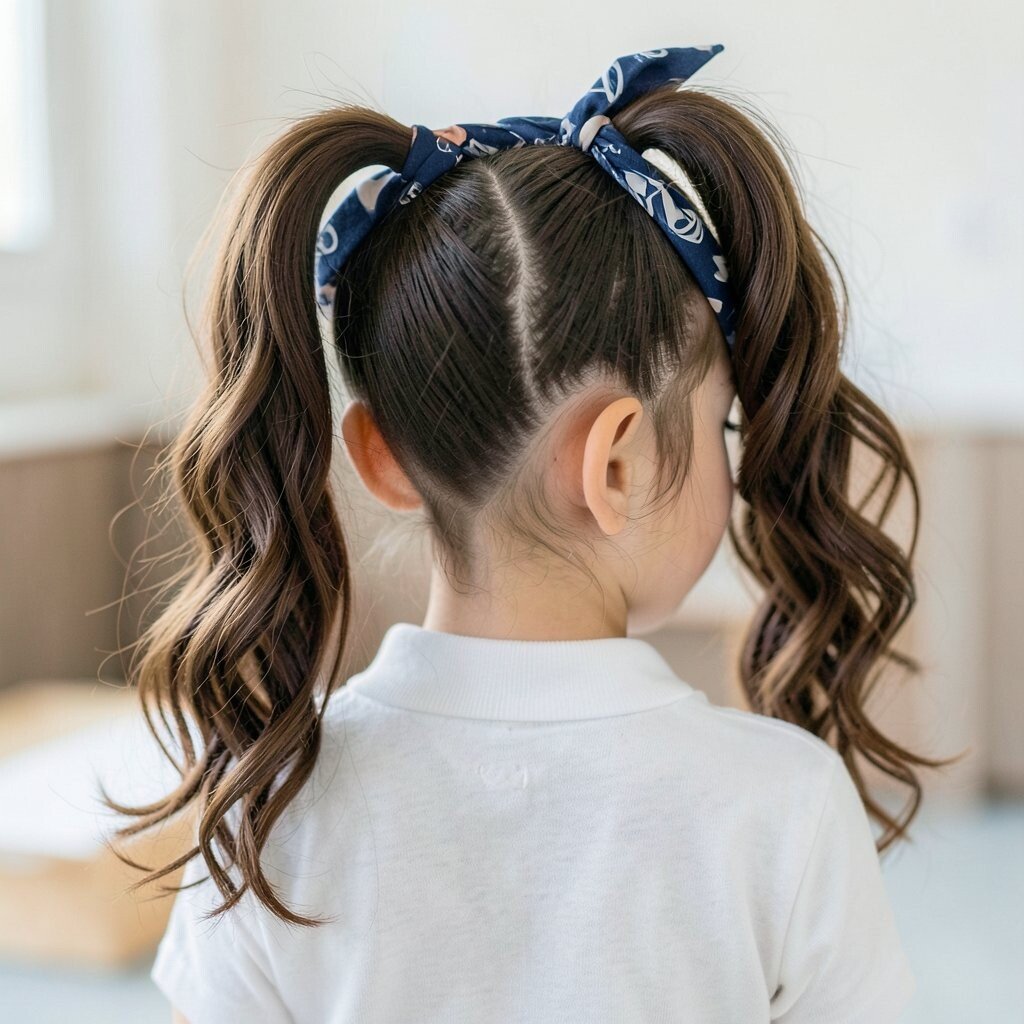
Gather your hair into a ponytail and add small elastic ties spaced along it to create “bubbles.” Then tie a scarf around the top for color and charm, like a mini accessory crown.
The bubble shape looks playful and lifts your hair so it doesn’t fall flat. It also keeps hair controlled during the school day, especially when you’re moving a lot.
If your hair is thick, use stronger elastics and smooth the surface so the bubbles don’t look messy in a bad way. For a cheaper option, use a thin ribbon or a fabric strip cut from an old scarf.
6. French Braid Waterfall With Clips
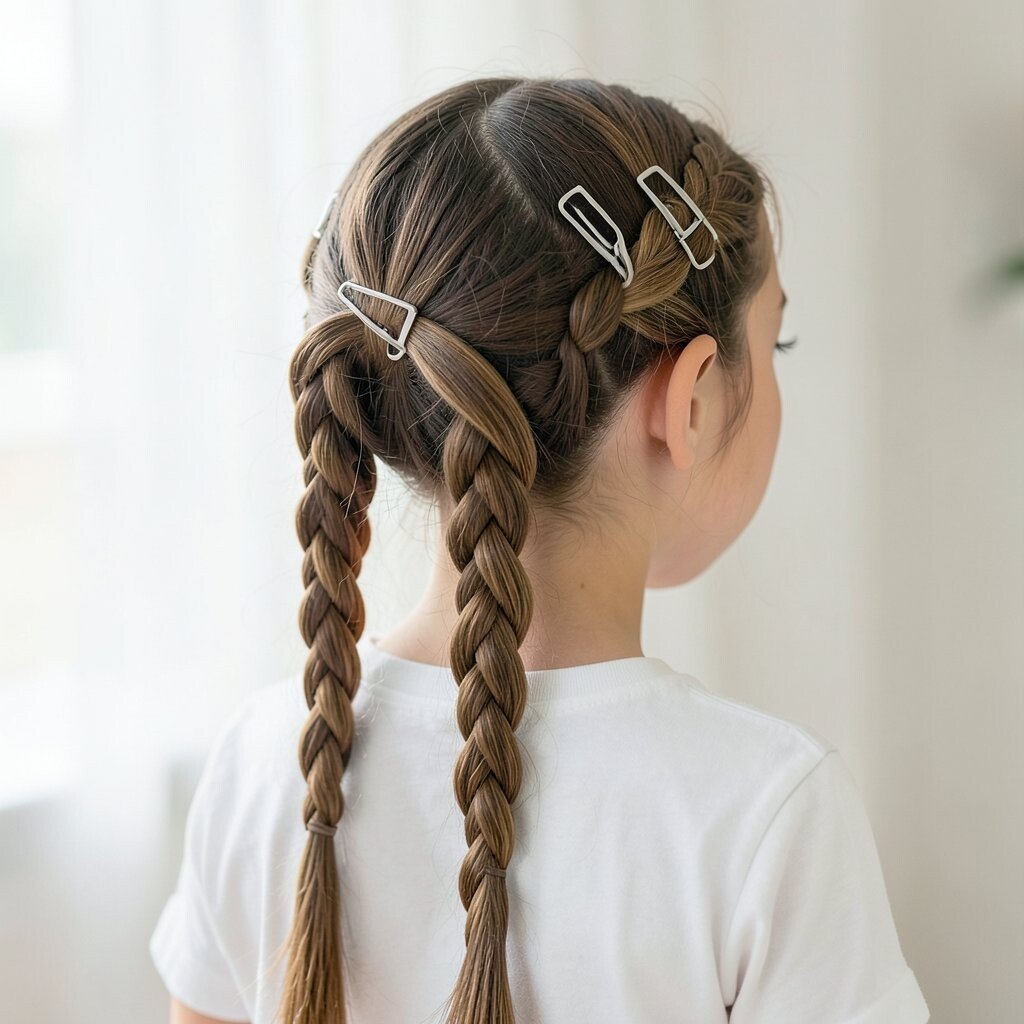
This hairstyle feels fancy, but the steps are simple once you get the rhythm. Create a French braid and let a few strands fall like “waterfall” loops as you move downward.
The result looks delicate, with a ribbon-like stream of hair that frames your face. It’s a great choice when you want your hair to feel styled without locking every strand away.
Use small clips to hold the falling sections temporarily while you braid, which makes the pattern easier. Choose clips that match your hair accessories for a coordinated look.
For personalization, curl the loose strands at the end so they look extra soft and bouncy. This style works well for medium to long hair and looks especially pretty with side bangs.
7. Sleek Low Bun With Tiny Twists
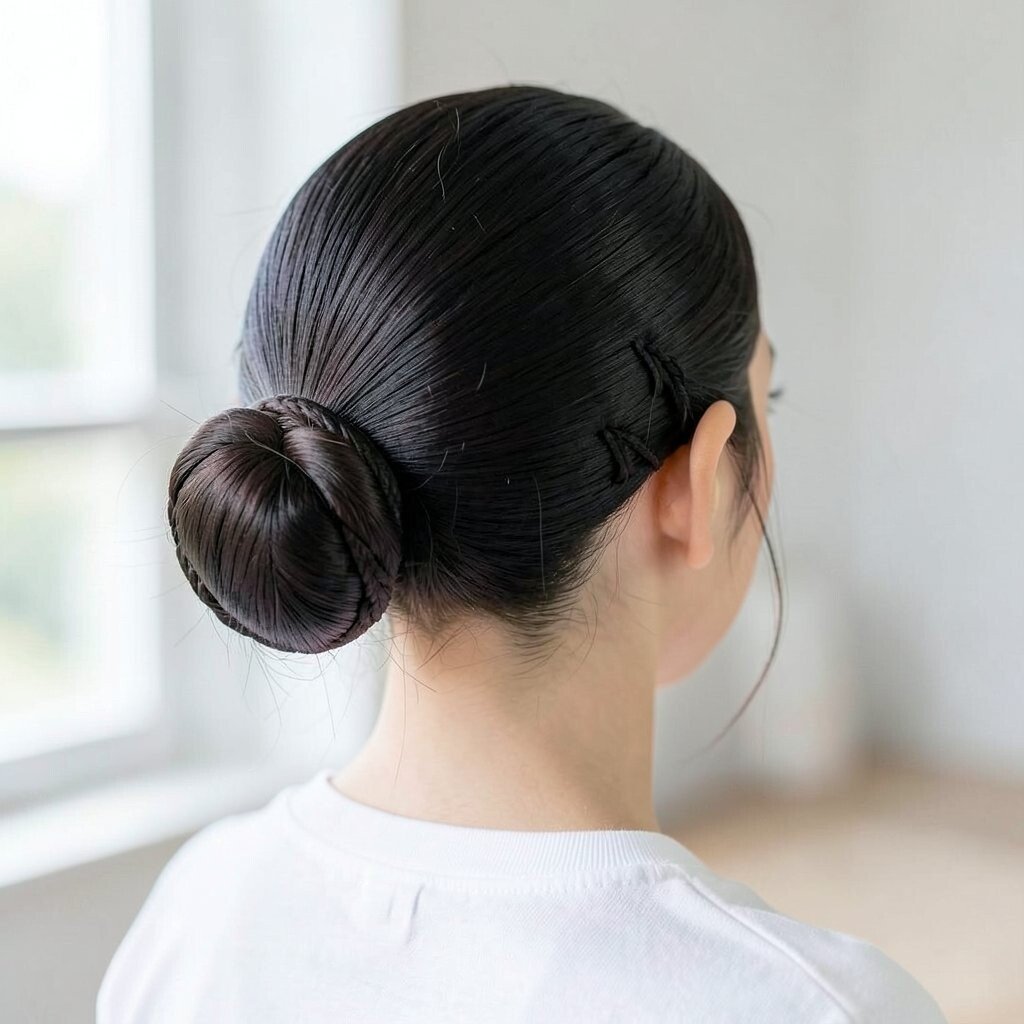
Press your hair smooth, then create a low bun at the nape of your neck. Before you secure it, split a small section and twist it around the bun for a dainty detail.
This style is clean and tidy, which makes mornings calmer when you’re rushing. It also keeps your neck area comfortable and reduces hair flying around in wind.
If you’re dealing with flyaways, use a smoothing cream or a light hair gel on the top. For cost-friendly styling, keep a small travel brush and a few bobby pins in your bag.
8. Puff Ponytails With Twist Ends
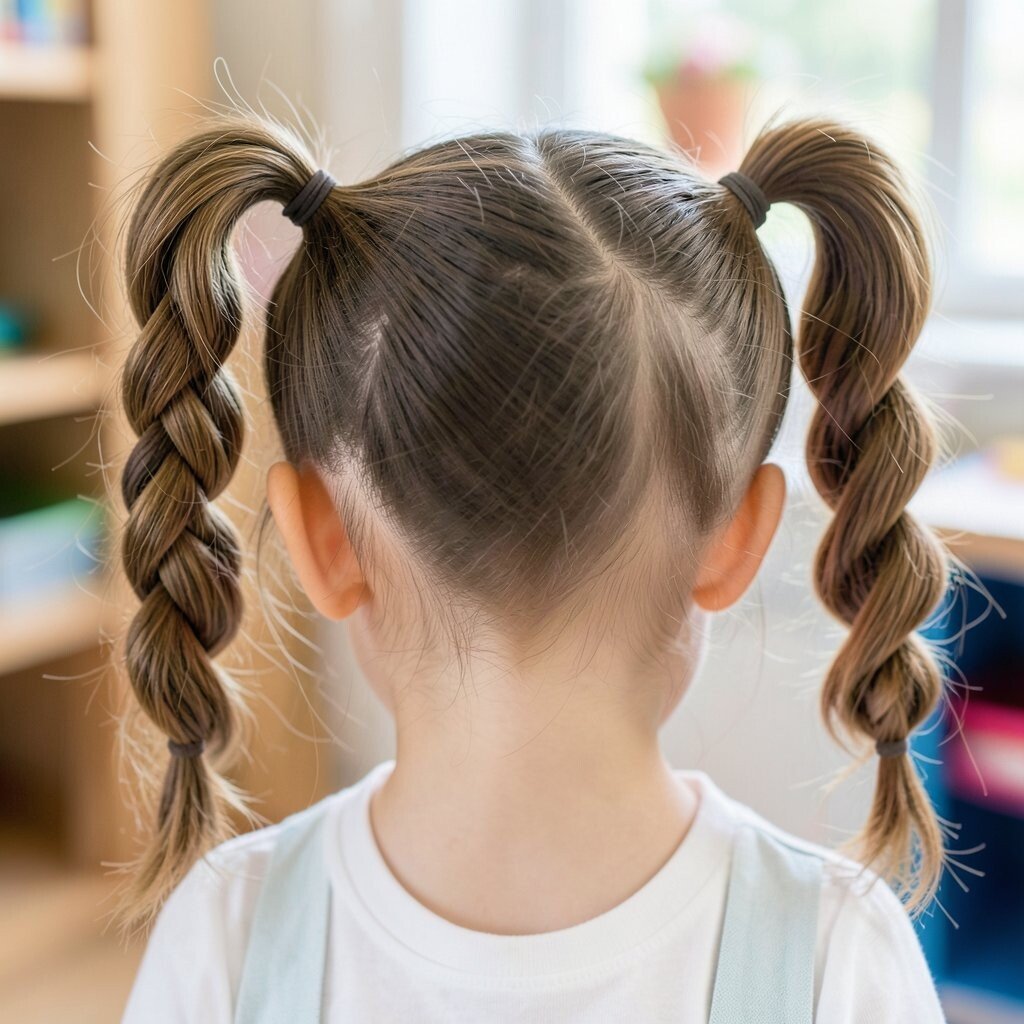
Create two or three mini puffs across the top, then secure each with an elastic. Twist the ends of each ponytail before combining them into one simple finish.
The puffs give you instant volume and a cute “kawaii” vibe that pops in photos. It’s also practical because smaller sections are easier to manage and stay in place longer.
Personalize by adding color elastics for each puff or using one bold color for all. If your hair is curly or coily, stretching the roots slightly helps the puffs look extra defined.
This style feels current because high volume at the crown and playful details are trending in everyday looks. A little edge control on the hairline makes it last through the whole day.
9. Crown Braid Halo With Middle Part
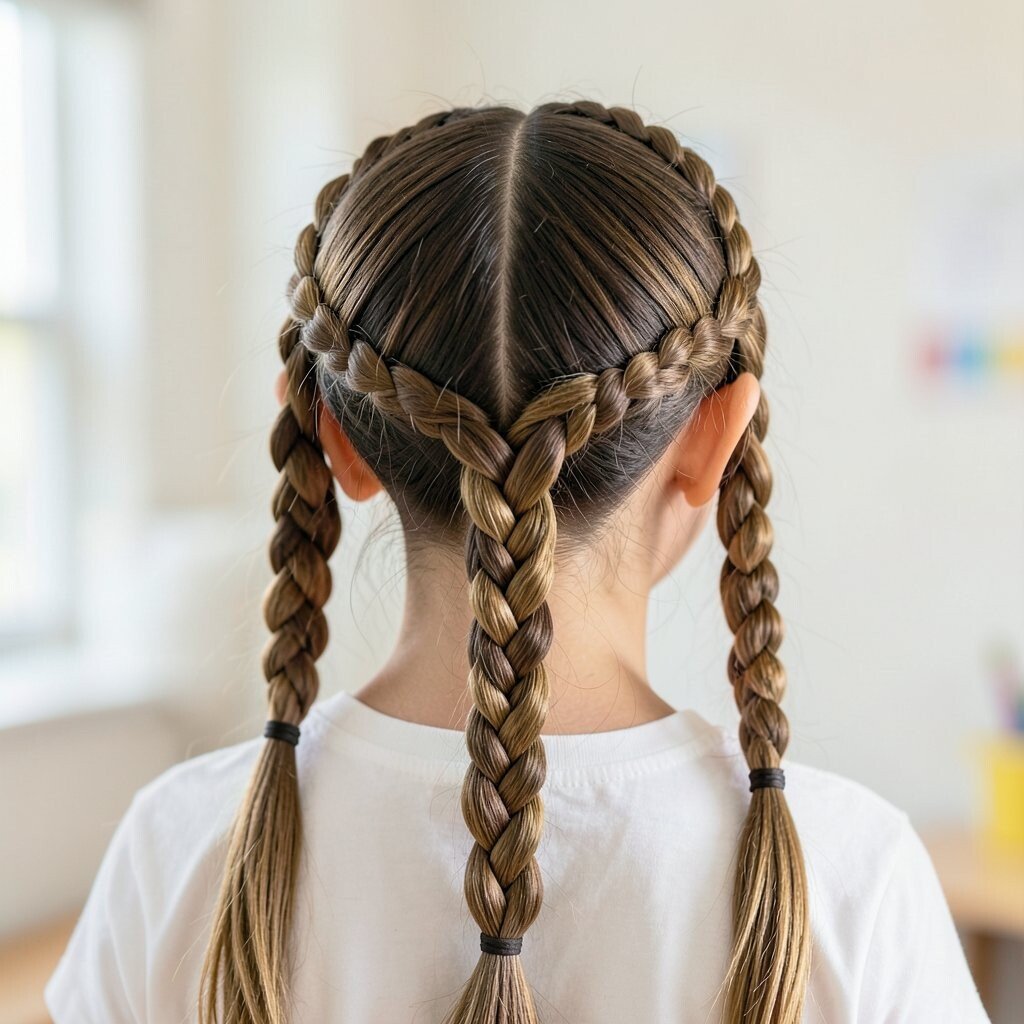
Part your hair in the middle and braid around the head like a soft halo. Tuck the ends neatly and secure them so the braid sits flat and pretty.
This hairstyle gives a gentle, romantic frame while still looking school-appropriate. It’s great for keeping hair away from your face during reading time or science lab.
If your hair is fine, use dry shampoo at the roots for grip before you braid. For thicker hair, braid in slightly smaller sections so everything lies smoothly.
You can personalize the halo by pulling a few thin face-framing pieces free. Try adding a small satin scrunchie hidden near the braid for an extra sweet touch.
10. Top Knot With Two Side Braids
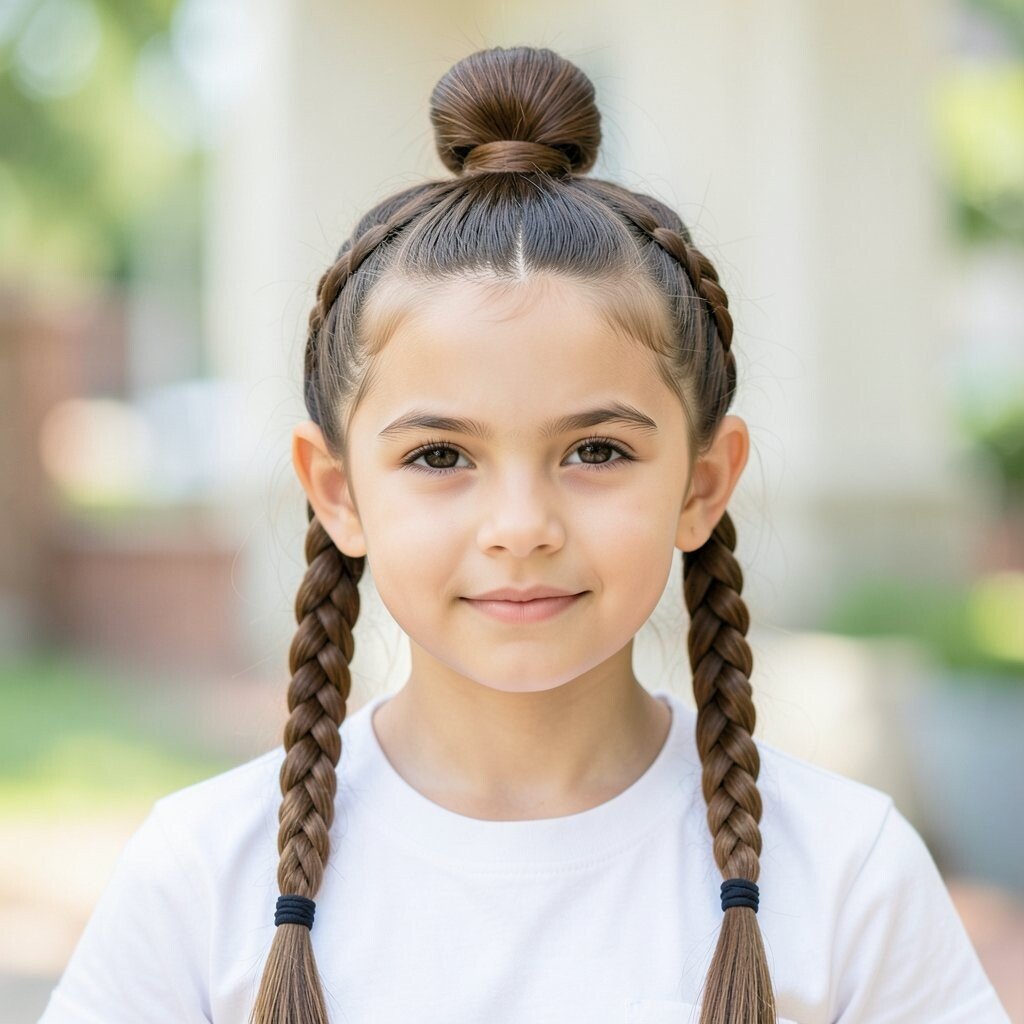
Make a top knot, then braid two small sections from the front and pin them along the sides. This creates a fun “half-protected” look where the braid details add interest.
Top knots are quick and work on busy mornings, and the side braids keep the front tidy. It’s also comfortable because your hair is lifted away from your neck.
For personalization, switch the direction of the side braids, like braiding upward instead of downward. If you want it more polished, use a hair donut or bun ring to get a smoother shape.
11. Low Ponytail Lace Braid Wrap
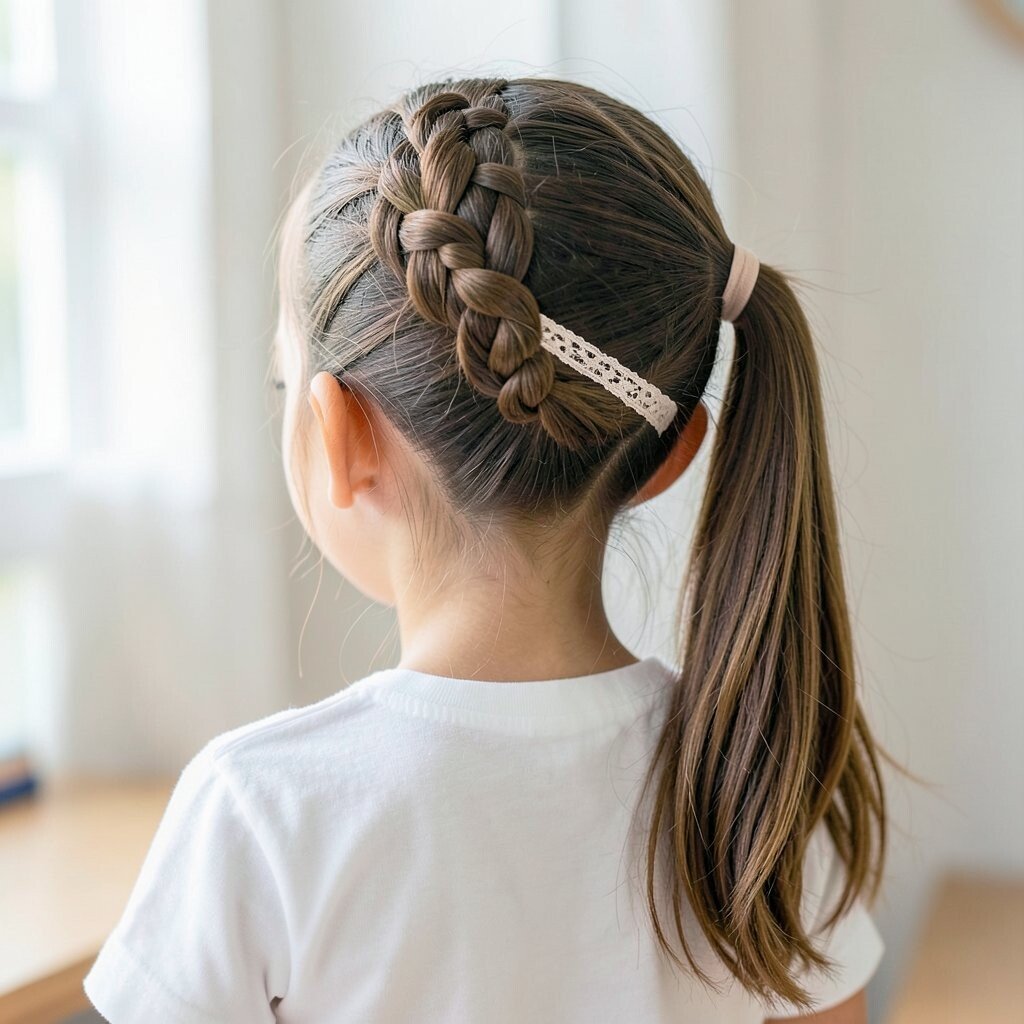
Start with a low ponytail, then take a thin strand from underneath to weave into a small lace braid. Wrap the lace braid around the elastic to hide it completely.
This gives you an elegant finish that doesn’t take forever. It’s helpful because the wrap holds the ponytail base and prevents that annoying “elastic peek.”
If your hair is short enough to struggle with wraps, secure the braid with two bobby pins and keep the strand thin. Use a light mist of water if your hair is dry, so the braid looks smoother.
For a trendier feel, make the lace braid a little chunkier by gently tugging it after you secure it. Choose a clear elastic for a clean look or a matching one for a fun pop of color.
12. Crown Twist Headband Style
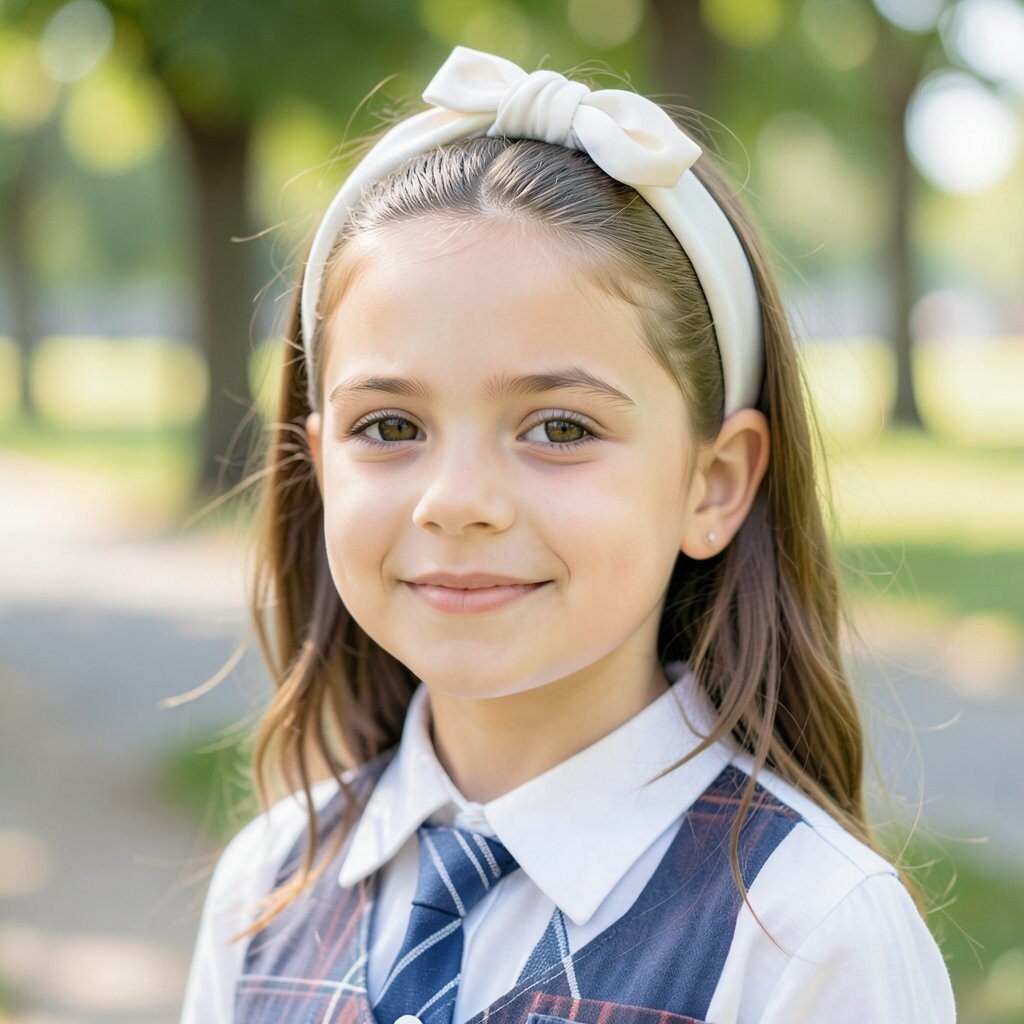
Create two twists at the front, then bring them back and secure them like a headband. Leave the rest of your hair down so it flows naturally with movement.
This style is perfect when you want your face open but still want a cute detail around the hairline. It also keeps your bangs or front pieces from poking you during the day.
Personalize with tiny bobby pins that match your hair color so they blend in. If you have longer hair, pull the twists tighter for a cleaner shape, and if you have shorter hair, use a few extra pins for grip.
For cost consideration, this is a “use what you have” hairstyle since bobby pins are usually already in your drawer. Add a small hair clip near the twist for a quick upgrade without spending much.
13. Curly Half-Up Clip Combo
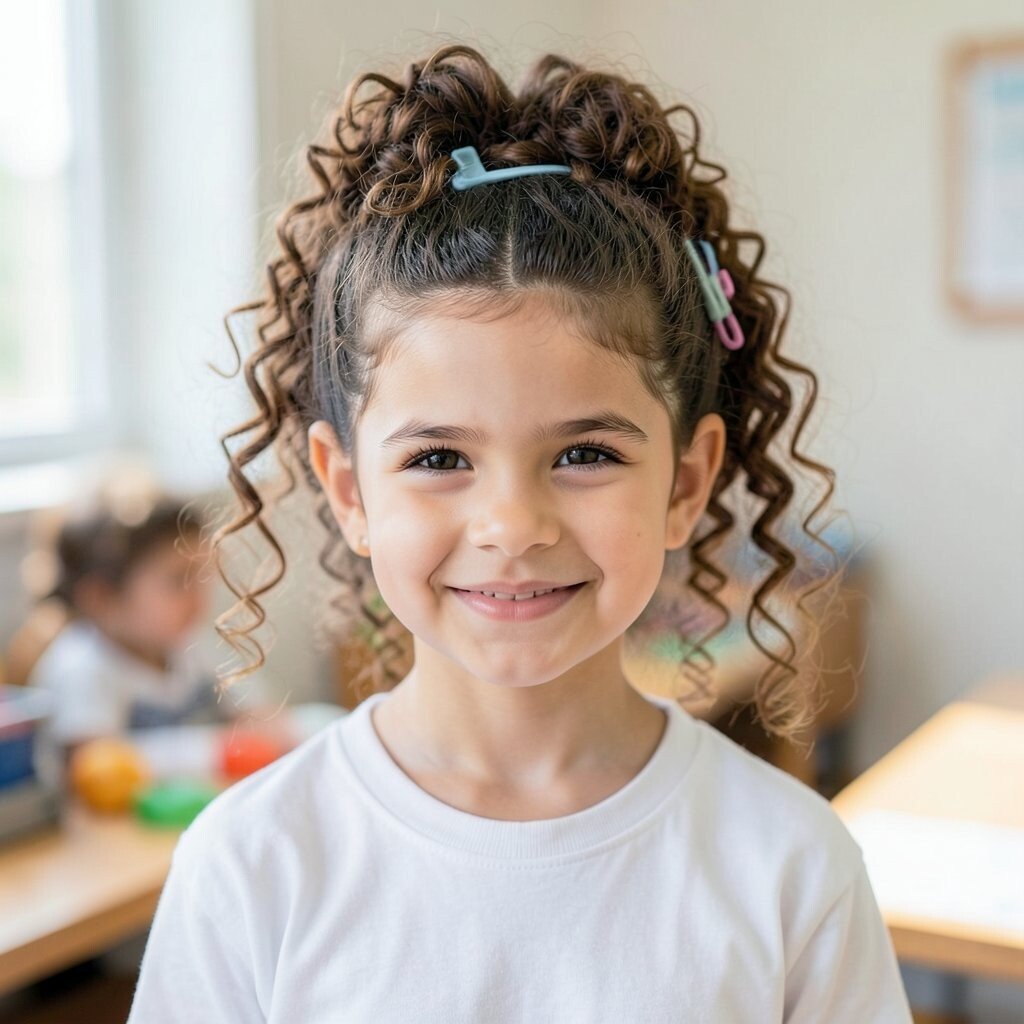
If you love natural texture, try a half-up style with a strong clip on top. Gather the upper section, twist it slightly, and secure it with a pretty claw clip or decorative barrette.
The clip adds instant style while letting your curls or waves stay free and bouncy. It’s practical because it clears your forehead without flattening your whole hairstyle.
For personalization, use a clip that matches your school spirit colors or a favorite aesthetic. If your hair is straight, add a few quick waves with a clip method or overnight braids for a similar vibe.
This look fits current trends because “easy and textured” styles are everywhere right now. Keep a small smoothing serum on hand to tame frizz around the clip area.
14. Braided Ponytail With Zigzag Part
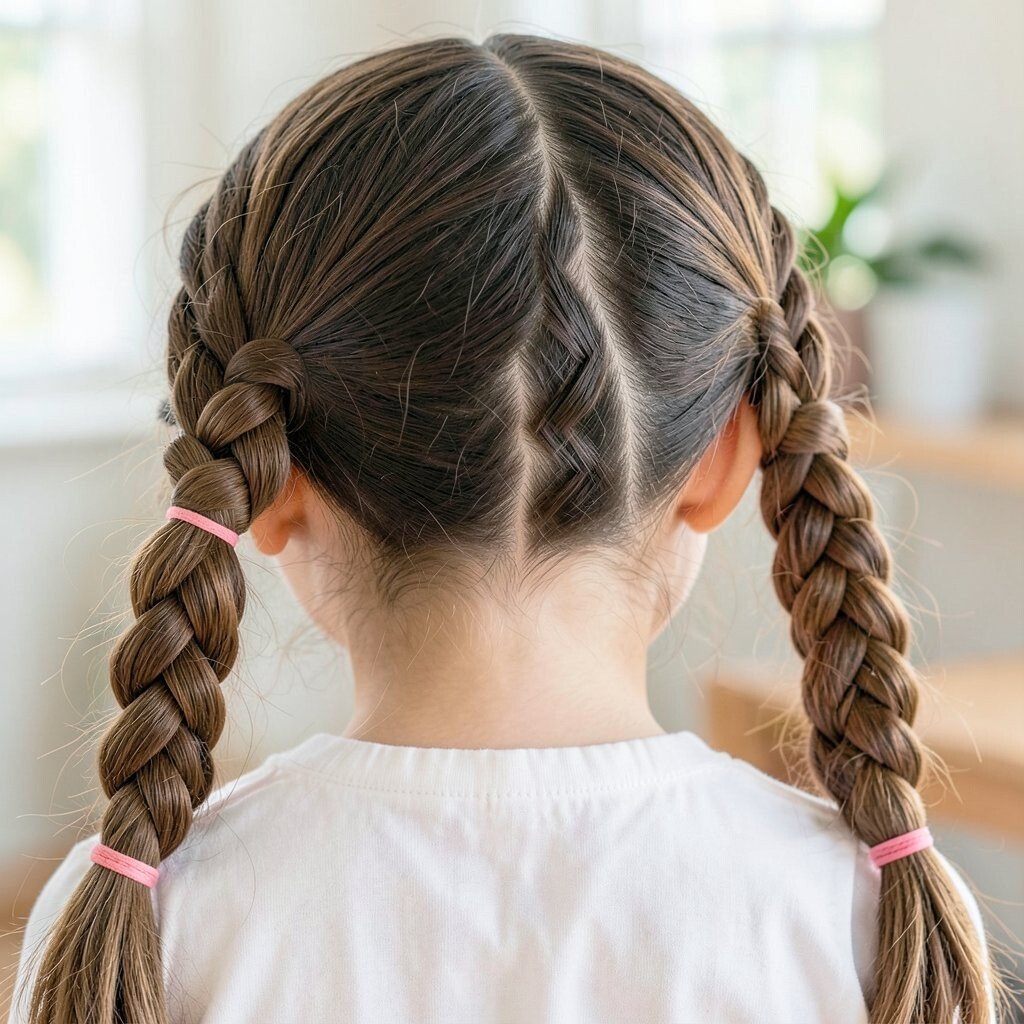
Draw a zigzag part down the middle or off to the side, then gather your hair into a ponytail. Braid the ponytail itself, so the braid becomes the highlight instead of just the base.
The zigzag part looks playful and unique, and it makes even a basic ponytail feel special. It also helps keep the top area neat, since the part encourages a clean layout.
Use a fine-tooth comb to sharpen the zigzag shape and add a little hairspray at the roots for long-lasting hold. If your hair is thick, braid loosely so the ponytail doesn’t feel heavy.
Personalize by switching where the ponytail sits, like low, mid, or high. For cost considerations, you can use regular elastics and upgrade with one cute clip at the end.
15. Twisted Crown Braidless Style
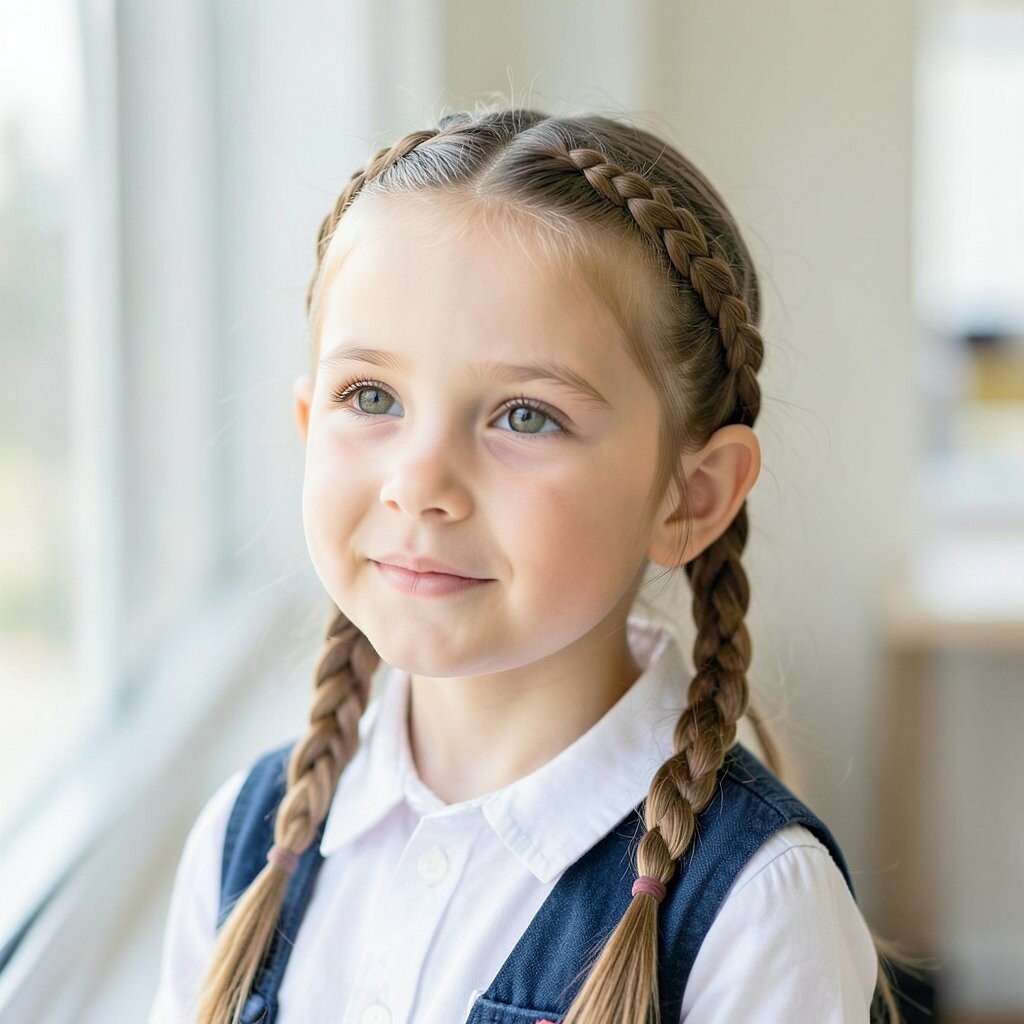
Instead of a full braid, twist two sections from the sides and secure them at the back like a crown. Then add a small bobby pin “lock” so the twist doesn’t slip loose.
This is a braid-free way to get that regal, face-framing look. It’s also great when you’re tired of braids but still want your hair to look intentionally styled.
If your hair is slippery, lightly tease the roots where the twists attach. For personalization, leave tiny pieces tucked out to soften the look, especially around cheeks and jawline.
To keep it practical for school, use a firm hold elastic at the back and a light hairspray mist. This style works for medium and long hair, and it’s easy to reset after a windy bus ride.
16. Tie-Back Half-Up With Mini Braid Loops
Pull the front sections back into a half-up hold, then make mini braid loops inside the tie-back. Think of small braided shapes that sit above the elastic like little decorations.
This style is unique because it mixes a simple half-up with a detailed finishing touch. It keeps hair off your face while still showing your hair’s length and shape.
Personalize by choosing the elastic color and matching it to a bow, scrunchie, or even your keychain charm. If you want it faster, use pre-made braid strands or practice with small sections until it feels natural.
For cost consideration, you can get the same effect with basic elastics and a few bobby pins plus one cute accessory. Current trends favor these small, intricate details, so it’ll feel modern without needing a complicated routine.