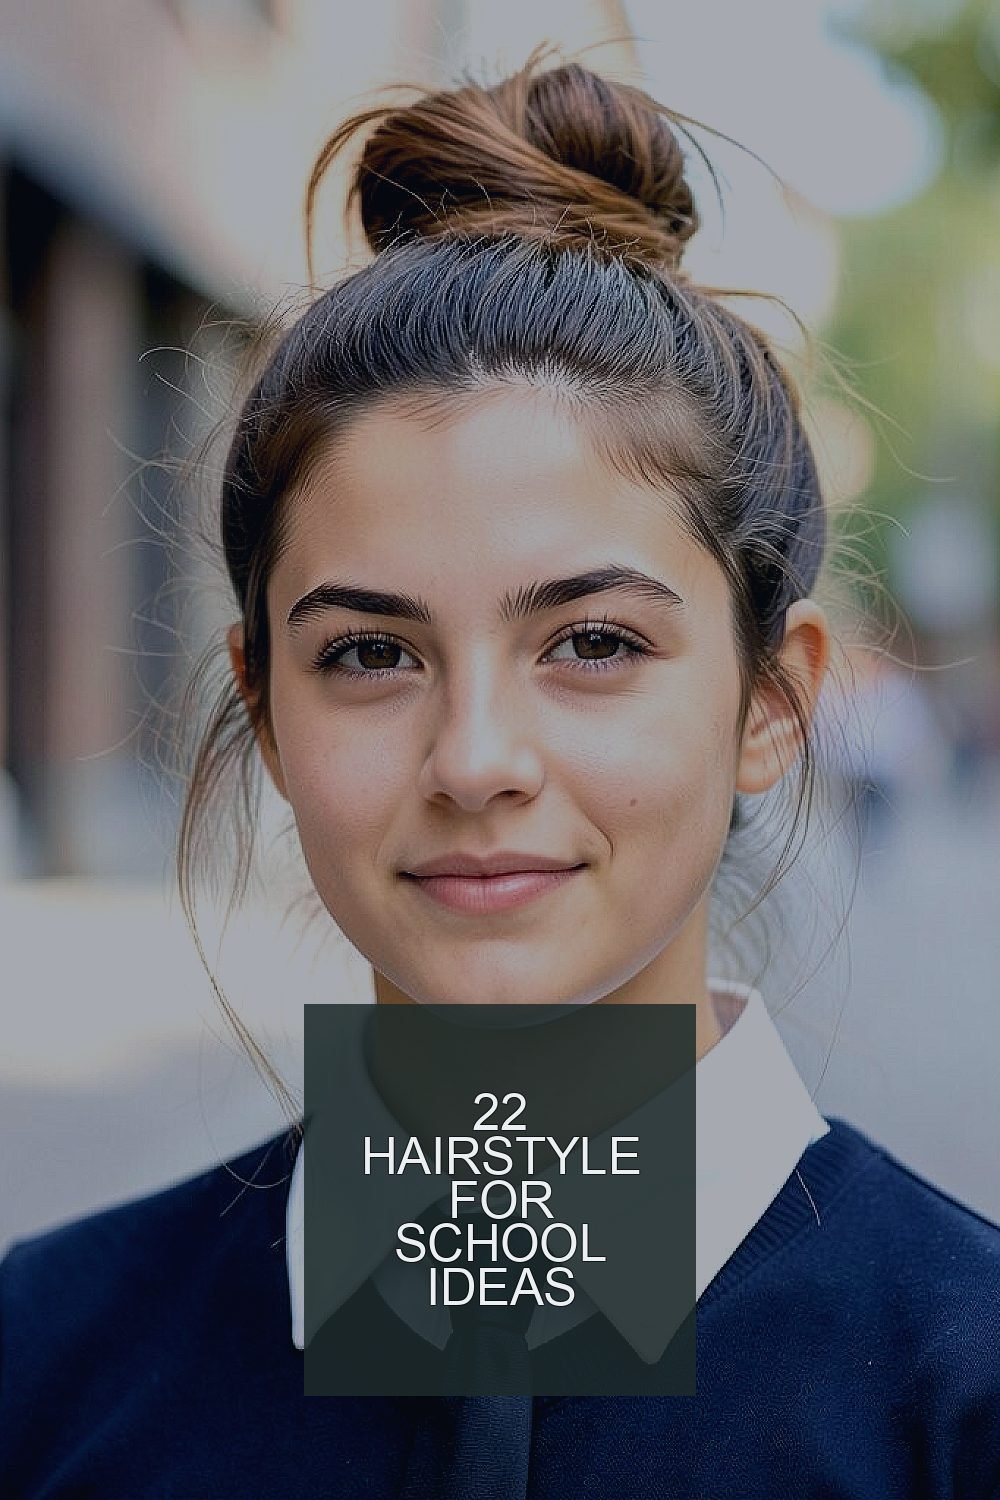
Morning time feels like a race, but your hair can still look amazing. With the right simple style, you can feel confident the second you walk out the door.
These ideas work for busy school days and real classroom life, with practical ways to make each look stay put.
1. Sleek High Ponytail With Side Part

A smooth high ponytail makes your hair look polished in seconds. It pairs really well with almost any face shape because the lines lift your features.
Use a brush or a soft comb to pull everything up neatly, then secure with an elastic that matches your hair color. Add a small smoothing cream or a dab of gel to tame flyaways near the hairline. For extra stay power, spritz a little hairspray on the brush before you final-sweep the top.
2. Messy Bun With Loose Face-Framing Pieces

The messy bun is the “cool but effortless” choice for school. It creates a soft, lived-in look that still feels tidy when the bun is placed high or mid.
Pull your hair into a quick bun and let a few strands fall around your cheeks. If your hair is slippery, twist the bun lightly before pinning it so it grips better. Finish with two bobby pins hidden under the bun for a stronger hold.
This style looks great on straight, wavy, or slightly curled hair. Choose a scrunchie or thicker elastic for comfort if your scalp gets tender by midday.
3. Bubble Braid Ponytail

A bubble braid ponytail looks like playful loops that catch the light. It feels unique without needing a complicated pattern.
Start with a high ponytail, then split it into segments using small elastics. After each elastic, gently puff the sections so they look rounded, like bubbles. Keep the elastics close together for a neater look, or space them out for a bolder vibe.
This style is great for keeping hair off your neck during warm days. If you want it to last longer, use a light styling mousse before you braid and secure the end with an extra elastic.
If you have thick hair, use smaller elastics so the braid doesn’t look lumpy. For thinner hair, tease the ponytail base lightly so the bubble sections have more volume.
4. Half-Up Twist With Clip

The half-up twist is sweet, simple, and perfect for everyday classes. You get the best of both worlds because the top looks put together while the rest stays relaxed.
Take two small sections near your temples, twist them toward the back, and secure with a cute claw clip. Let the remaining hair fall naturally for an easy, breezy frame around your face. Choose a clip color that matches your backpack or favorite hoodie.
5. French Braid Crown

A crown braid makes you look like you spent extra time on your hair. The braided band across the head looks detailed and impressive even when you keep it simple.
Begin at one side and braid across the top by adding hair as you go, then finish near the opposite side. Tuck the end under and secure with pins that match your hair shade. For a clean finish, keep the braid slightly tighter at the start and gradually loosen it a bit as you reach the back.
This style helps protect hair from tangles during the school day. If your hair gets frizzy, smooth a tiny amount of leave-in conditioner on the outer layer first.
6. Two Dutch Braids

Two Dutch braids create a fun, sporty look that feels ready for anything. They sit close to the scalp, which is helpful when you’re moving between classes.
Part your hair down the middle, then braid each side by adding hair from the outside as you go. Keep the sections even so both braids look balanced and full. When you reach the ends, secure with elastics and gently tug the edges for a thicker look.
7. Soft Side Braid Over One Shoulder

A side braid feels romantic and also very practical for school. When it’s worn over one shoulder, it keeps your hair from blocking your face.
Sweep your hair to one side, then create a standard three-strand braid. For a more current style, braid slightly looser and pull small sections outward. Finish with a light hairspray mist to hold the shape without making hair stiff.
If you have bangs, let them blend naturally into the braid start or tuck them behind the first loops. For cost-friendly styling, use whatever elastics you already have and add decorative bobby pins you can reuse.
8. Classic Straight Hair With Tucked Ends
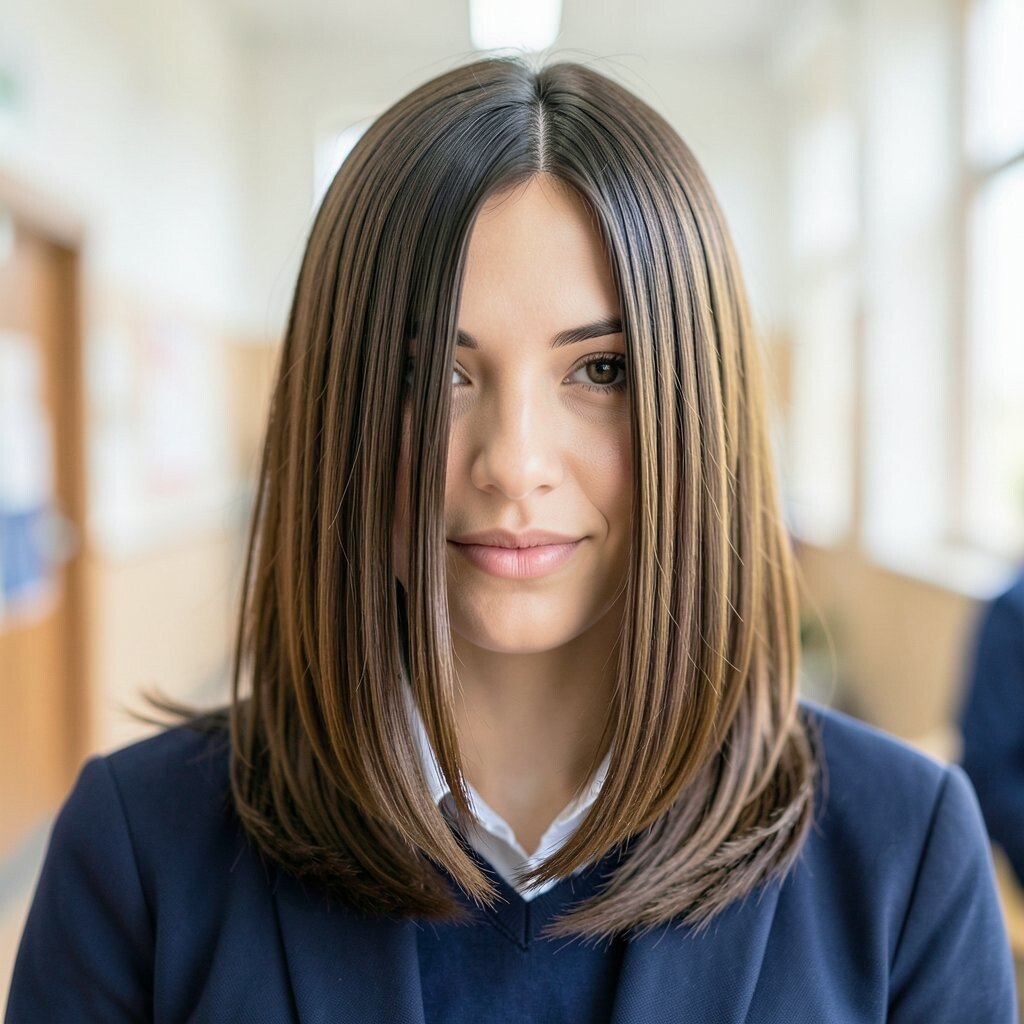
Sometimes the easiest style looks the most expensive. Clean straight hair with tucked ends gives you a smooth, polished silhouette.
Use a flat iron only if you need it, then tuck a small portion of hair behind each ear for a tidy frame. If your hair won’t stay straight all day, apply a heat protectant and finish with a smoothing serum on the ends. This helps reduce frizz near the collar area where hair often gets messy first.
9. Crisscross Half Ponytails

Crisscross half ponytails look playful but still school-friendly. The pattern adds interest without needing a braid.
Take the top half of your hair and split it into two sections. Tie one section into a small ponytail, then gather the other section across the front and tie it so they cross. Use a second small elastic at the base to keep it secure.
This style works especially well with medium to long hair. If you want more volume, gently tug the top sections at the crown before you cross them.
For personalization, add a ribbon or mini scrunchie near the elastic to match a color theme for the week.
10. Low Twisted Ponytail

A low twisted ponytail looks elegant while still being quick. It gives your hair a sleek twist that feels neat even during a long day.
Gather your hair at the nape of your neck, then split into two sections. Twist them together, then wrap the twist around itself to form a low bun-like shape and secure with pins. Add a little shine spray to make the twist look extra smooth.
11. Waterfall Braid With Soft Waves

A waterfall braid looks like gentle ribbons of hair flowing down. Pair it with soft waves and you’ll get a stylish look that still feels easy to manage.
Create the braid at the top and let a few strands drop each time you add new hair. The “falling” pieces make the braid look airy, which is great if you don’t want your hair to feel too tight. Use a small elastic to hold the end, then curl just the loose strands lightly.
This style can be trendy for photos but also practical because it doesn’t require a heavy amount of product. If you want it to last, use a light hold mousse before braiding and avoid soaking your hair with too much conditioner on the day of styling.
12. Sleek Braided Headband Look

The braided headband look gives the illusion of a braid wrapping your head. It’s a classy touch that keeps hair controlled around the face.
Part hair slightly off center, then braid a small section on the side. Bring the braid across to the other side and pin it where you want the “headband” to sit. For a natural finish, blend the pinned area by tucking a few small hairs over the pins.
13. Curly Top Puff With Tapered Sides
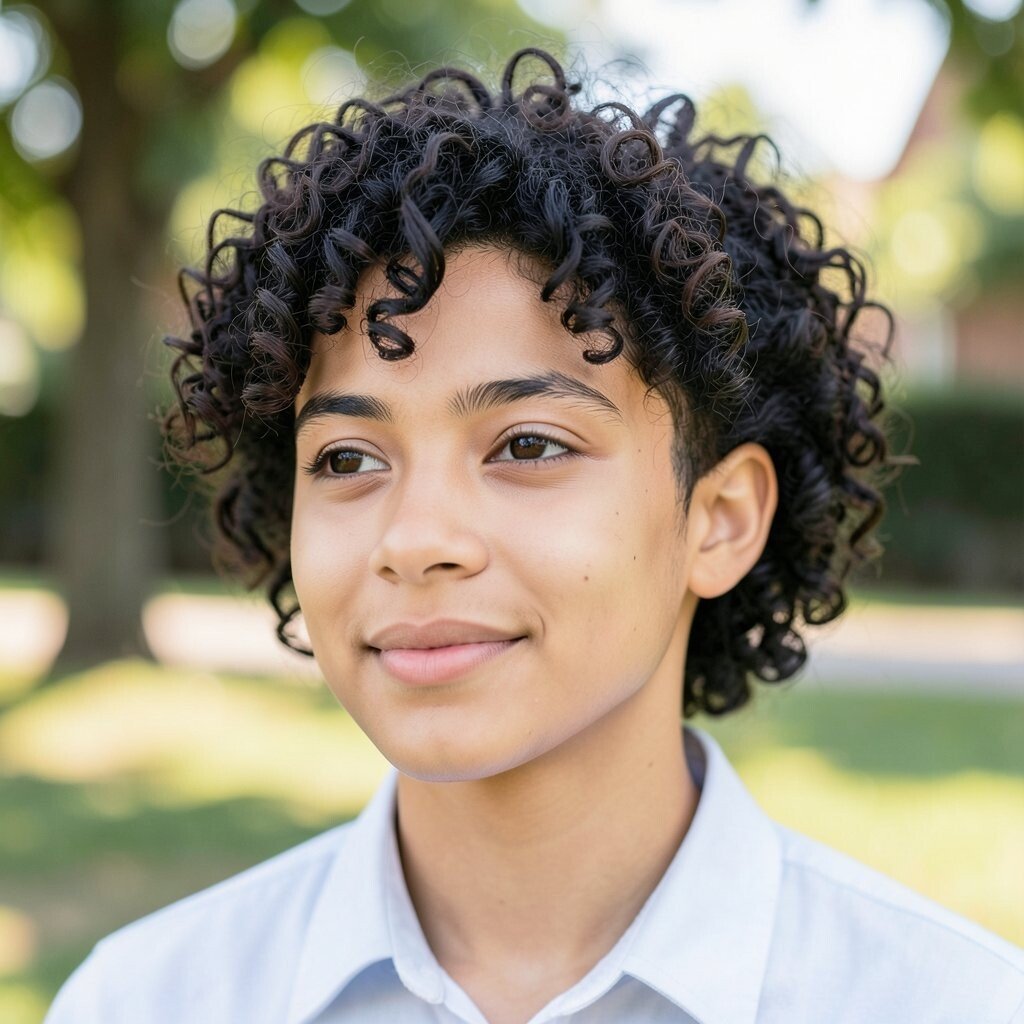
A curly top puff is bold, cute, and perfect for textured hair days. It keeps curls lifted while the sides stay lighter and less bulky.
Gather the top section of hair into a puff, securing it with a gentle elastic. Smooth the sides with a little curl cream or edge control so everything looks neat. Fluff the puff slightly for shape, then let your natural texture do the rest.
This style is unique because it focuses attention on your hair volume and curls. If your hair is fine, use a smaller elastic to avoid flattening the puff later in the day.
14. Half-Up Braided Crown With Ponytail Base

This look combines a crown braid with a ponytail, so it stays secure and cute. You get that “special outfit” vibe without turning hair into a whole project.
Braid across the top like a crown, then continue to the back and connect with a ponytail. Secure the ponytail with an elastic, then add a few pins to keep the crown section from slipping. For a softer feel, leave a couple of tiny face-framing strands loose.
If you’re wearing glasses, place the braid so it doesn’t press on the frame arms. You can also adjust the crown height so it complements your hairstyle and brow shape.
15. High Ponytail With Braided Wrap

A high ponytail becomes extra fancy when you wrap it with a braid. The braided wrap hides the elastic and makes the whole style look intentional.
After tying your ponytail, take a small section from underneath the ponytail and braid it. Wrap that braid around the elastic, then pin it in place. Keep the braid thin for a neat look, or thicker for a more visible, trendy finish.
This style works great for school events, sports days, and picture days. For cost considerations, it uses basic elastics and bobby pins, so you don’t need special tools to get the effect.
16. Low Bun With Center Part

A low bun with a center part looks classic and tidy. It’s the kind of hairstyle that pairs well with uniforms, sweaters, and everyday accessories.
Part your hair down the middle, then gather it into a low ponytail. Twist or roll the ponytail into a bun, then secure with pins around the edges. Smooth the top with a soft brush and finish with a small amount of hairspray to reduce flyaways.
If your hair is thick, use more pins so the bun feels stable by lunch. If it’s fine, lightly tease the ponytail base to add a bit of fullness before you roll it.
17. Side-Swept Bangs With Slick Clip Back

If you love your bangs, make them the star. Side-swept bangs with a slick clip back keeps hair out of your eyes while looking stylish.
Brush your bangs to one side, then smooth the rest of the top hair and clip it back with a flat clip. For a sleek finish, use a tiny amount of styling gel and a soft toothbrush for smaller flyaway hairs. This method is quick, and it helps your bangs stay in place for long hours.
18. Messy Twist Bun With Hair Accessory

A messy twist bun looks artsy and relaxed, and it’s also super forgiving. Even if a few pieces stick out, they can look like part of the design.
Twist sections of hair toward the back and wrap them into a loose bun, then pin as needed. Add an accessory like a headband, bow clip, or small scarf knot for personalization. Choose accessories that match your school dress code and won’t scratch during the day.
This style is unique because the “mess” can be tailored to you, from soft and romantic to bold and spiky. If you want it to hold better, mist lightly with hairspray right after pinning.
For cost savings, choose one accessory you can swap between outfits instead of buying many separate hair items.
19. Loop Ponytail Style

A loop ponytail is playful and gives your hair a bouncy shape. It looks like a mini fashion twist, but it only takes a few steps.
Secure your hair into a ponytail, then when you pull the elastic through the last loop, stop so it forms a half loop. Use bobby pins to shape the loop and tuck the ends under so they look neat. Finish by gently fluffing the loop for a fuller look.
20. Halo Braid With Hidden Pins

A halo braid frames your head like a soft crown. It looks gorgeous, and it also helps keep hair off your face during lessons and activities.
Braid from side to side around the head, working slowly and keeping the braid even. As you reach the back, tuck the end under the braid and secure with hidden pins. Use a light smoothing cream on the outer strands so the braid looks sleek and not fuzzy.
This style feels special without needing expensive products. If you have slippery hair, try a tiny bit of dry shampoo at the roots before braiding so everything grips better.
Personalize it by adding a small decorative pin near one side, like a star or simple flower clip.
21. Topsy Tail Ponytail

A topsy tail ponytail is quick, cute, and great for days when you don’t want heat. It creates a twisty bump that looks polished even if you’re in a hurry.
Tie your hair into a ponytail, then split the hair above the elastic. Pull the ponytail through that opening so it flips upward and creates a lifted shape. Adjust the bump gently so it sits where you want it for comfort.
This style is perfect for all kinds of hair textures because you can keep it neat or make it more relaxed. For practical staying power, use a strong elastic and add one bobby pin under the base for extra security.
22. Side Part With Two Front Twists

Two front twists can make a simple day feel styled. They also help push hair away from your face without fully changing your look.
Create a side part, then twist two small sections from the front toward the back. Secure the twists together with a pin or tiny elastic near the crown. Let the rest of your hair fall naturally, or add a quick curl at the ends for a soft finish.
This hairstyle is unique because it’s subtle but still noticeable, especially in motion. If your hair is thick, use smaller twists so they lay flatter, and if it’s thin, tease the roots lightly so the twists look fuller.
You can also match the pin color to your scrunchies or watch band for a fun, personal touch that costs basically nothing.