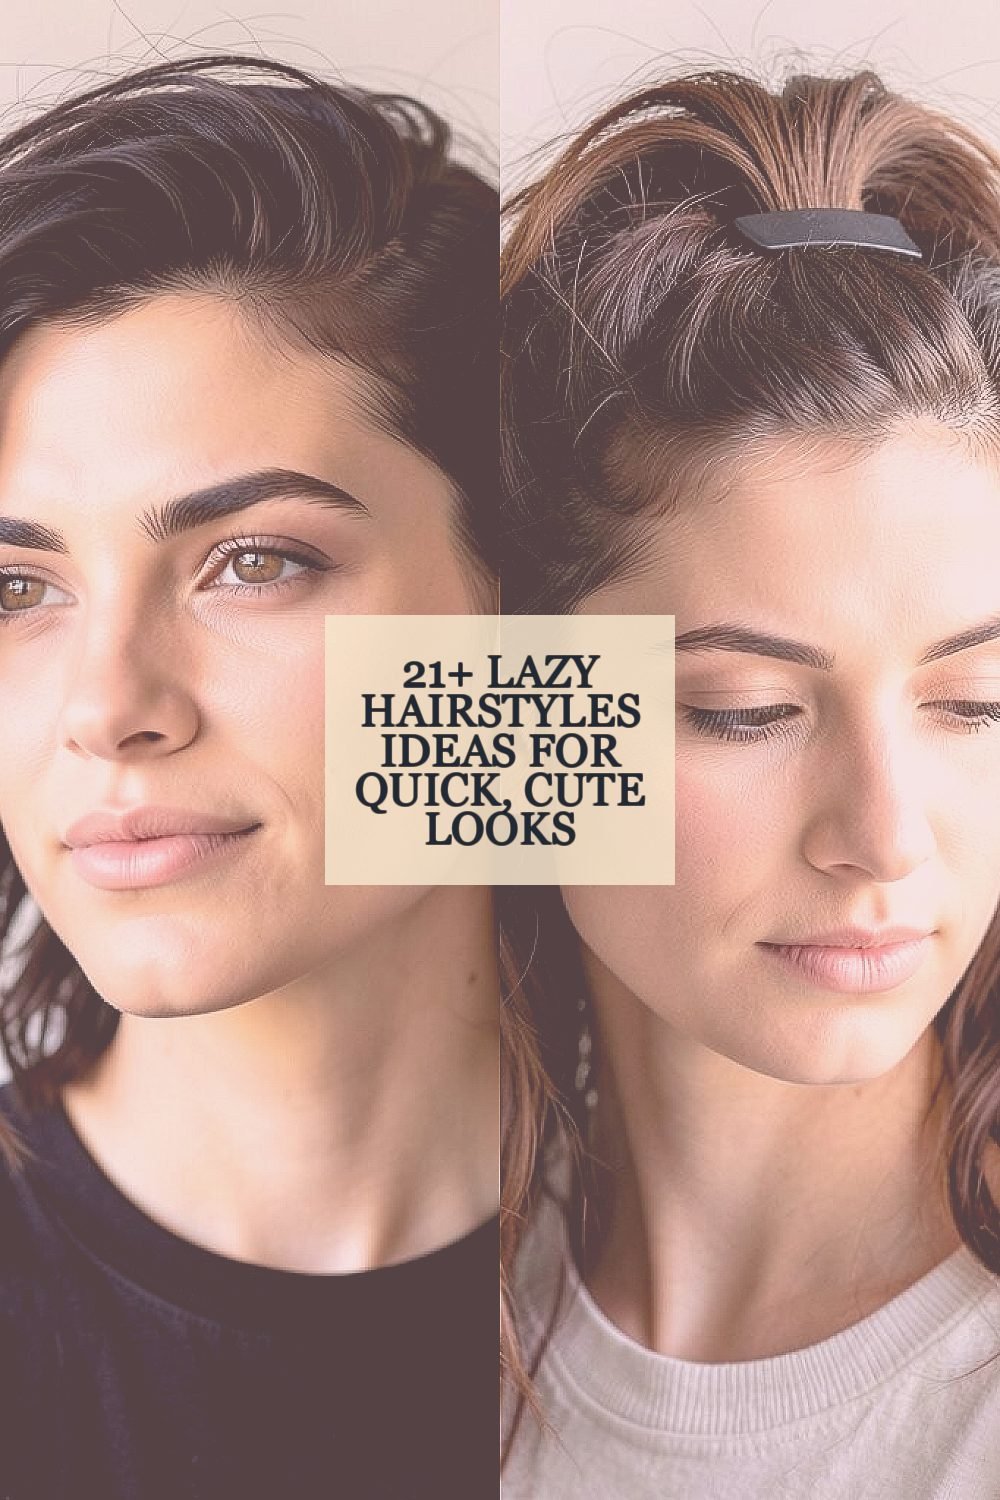
The next time you feel short on time, your hair can still look like you planned it. These styles are easy, flattering, and ready for real life.
Think soft, simple shapes and clever finishing touches that make everything look more polished.
1. Messy Side Part with Sleek-Front Magic
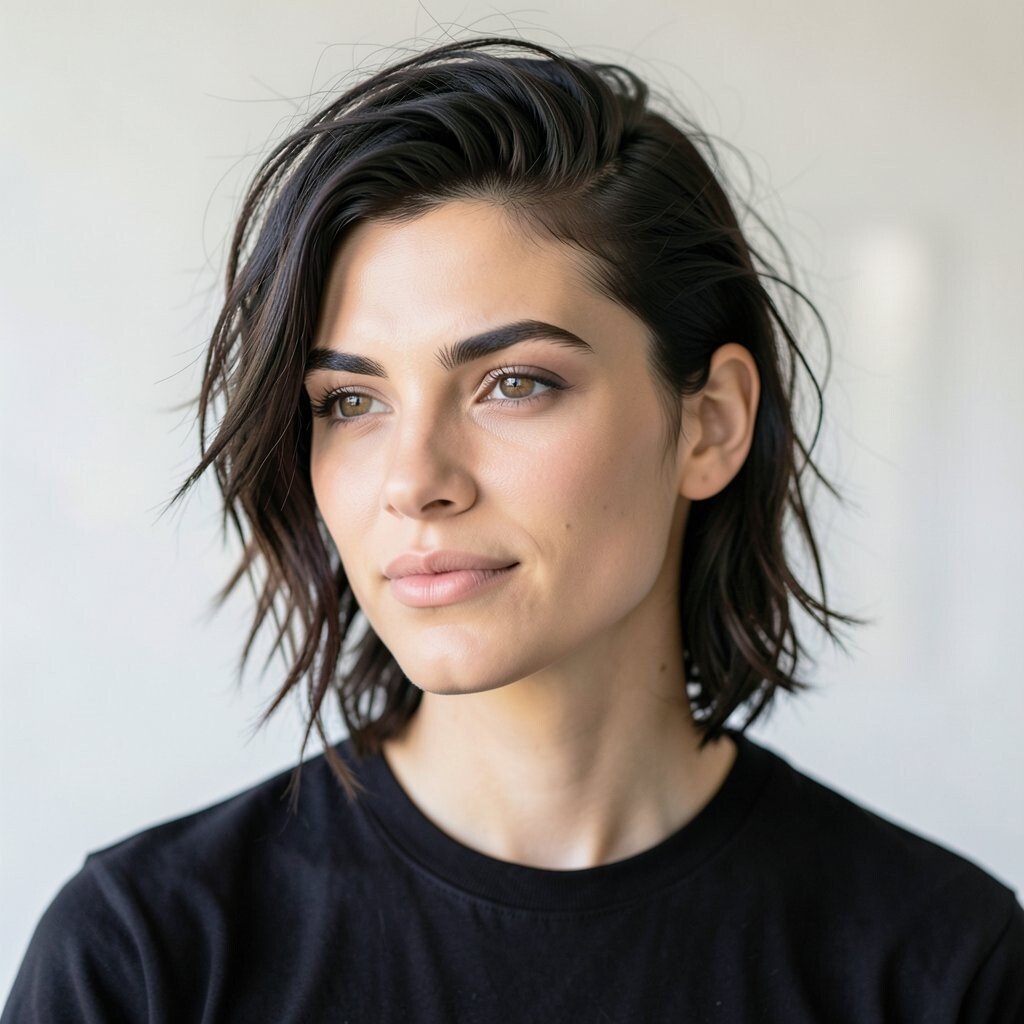
You start with a casual wave or a quick brush-through, then sweep your hair to one side. The front gets a smoother look while the rest stays slightly tousled.
It feels effortless but still looks intentional, especially with a little shine spray on the top. Part it where your hair naturally falls, then tuck just a small section behind your ear. Finish with light hairspray so the side stays put without feeling stiff.
2. Half-Up Clip with Wind-Soft Volume
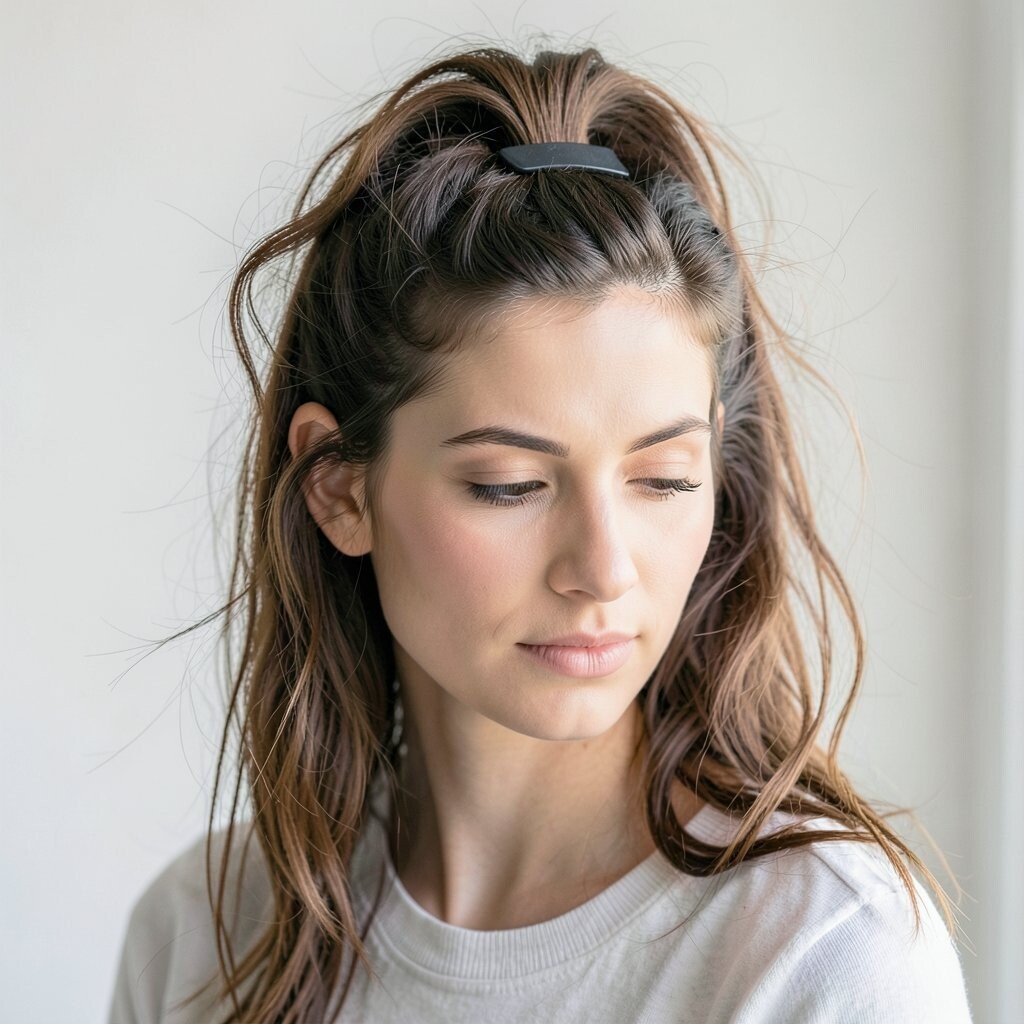
Gather the top half of your hair and secure it with a cute clip near your crown. Let the bottom layers hang loose so they move like they’re airy.
This is great on lazy mornings because you only touch the top. Try it with a claw clip, a ribbon clip, or even a bobby pin set in a cross pattern. For extra lift, gently pull the clip section outward a little, like you’re fluffing a small cloud.
If your hair is fine, use a tiny amount of dry texture spray before clipping. If your hair is thick, keep the clip higher so it doesn’t feel heavy. Current styles favor soft volume, so you’ll be right on trend with this look.
3. Twist-and-Go Low Bun
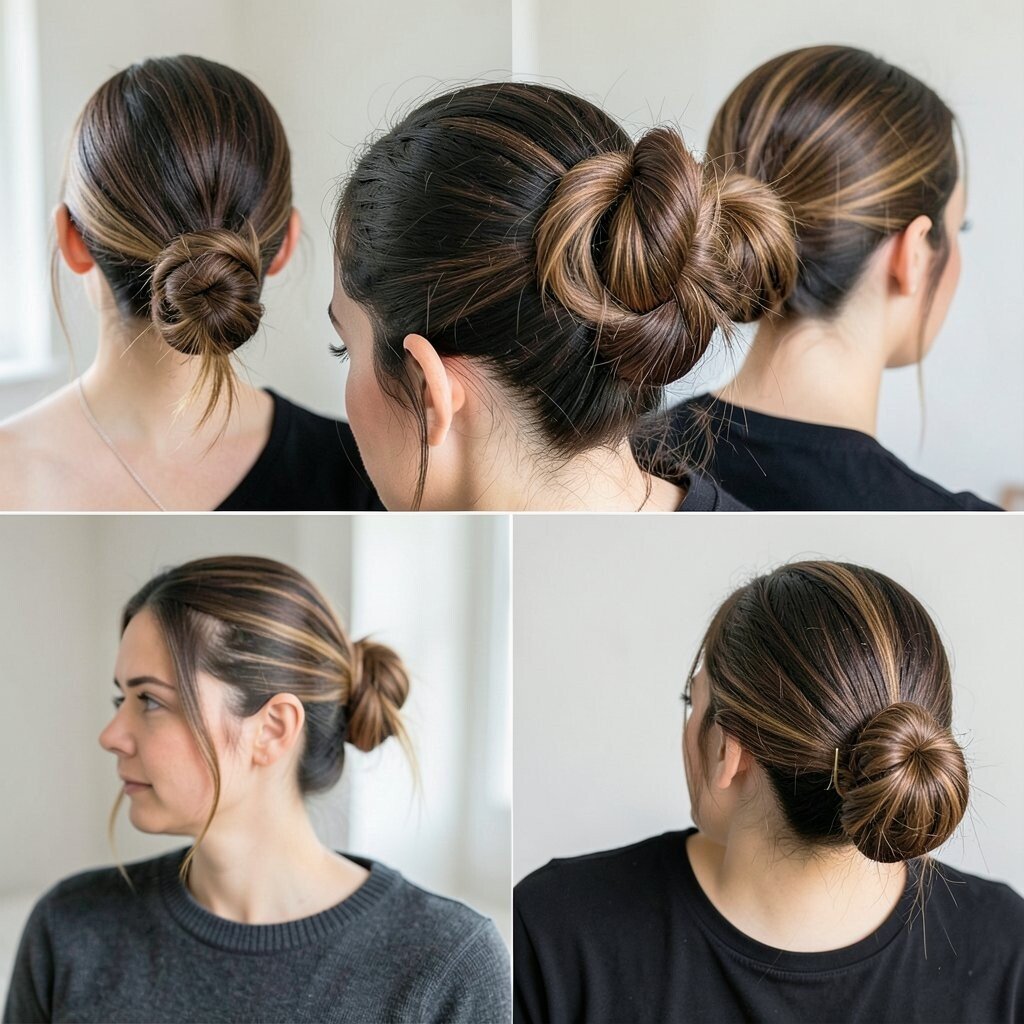
Make a low ponytail, twist it, then wrap the twist into a bun. Secure it with two pins so it holds even if you’re rushing.
The bun looks neat from the front but relaxed from the back, which makes it feel unique. Use a small amount of hair oil on your fingertips to smooth flyaways without making hair greasy.
This style is perfect for days when you want your hair off your neck. Try wrapping a thin strand around the bun to hide the pins and add a polished touch. If you’re using thicker hair ties, consider upgrading to a snag-free elastic for less breakage and less mess.
For personalization, keep the bun centered for a classic vibe or slightly to one side for a playful look.
4. High Ponytail with One Easy Wrap
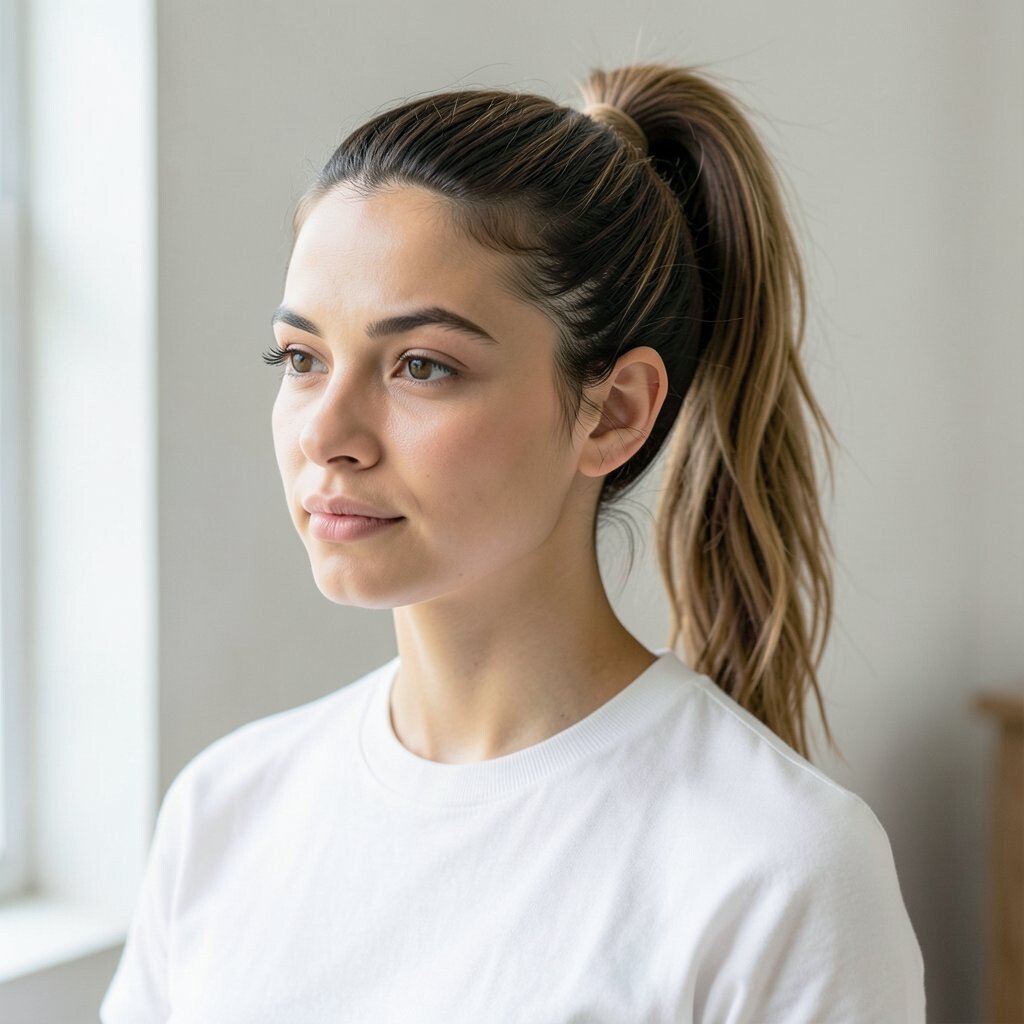
Pull your hair up into a high ponytail and smooth it just enough to look clean. Then take a small strand from the ponytail and wrap it around the elastic.
This instantly makes a basic pony look like a cute outfit accessory. It’s also budget-friendly since you probably have the elastic and pins already.
5. Braided Headband Effect Using Two Front Sections
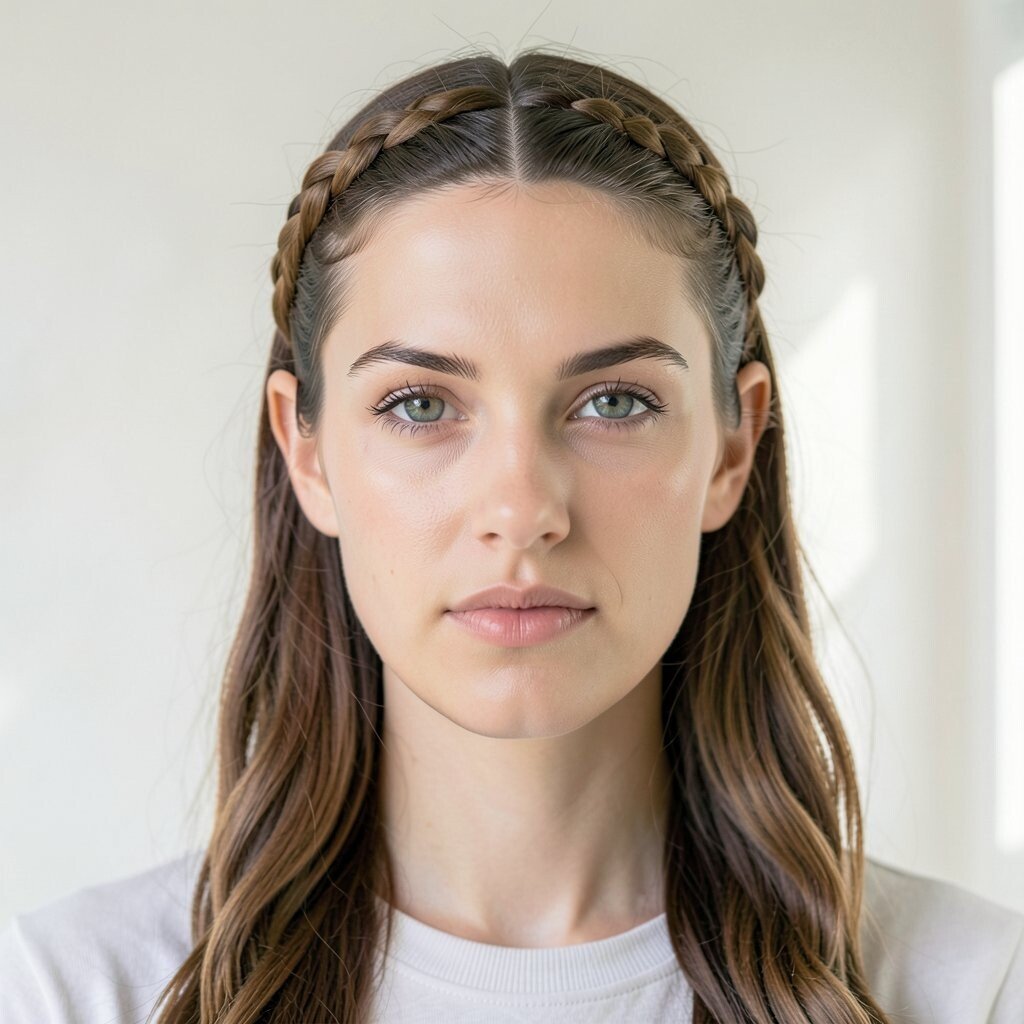
Grab two thin front sections, braid each one lightly, and pin them across like a headband. Your hair stays mostly down, but the front looks styled and sweet.
You get a braided vibe without spending time on a full braid. Keep the braids loose for a softer look, and pin them higher if you want your face to look more open.
For a unique twist, braid with only three quick loops and then secure. If you want personalization, weave a small mini ribbon through the last part of each braid. This also works with hair that’s not perfectly clean because braiding helps hide minor oiliness at the roots.
6. Sleek Half-Twist at the Crown
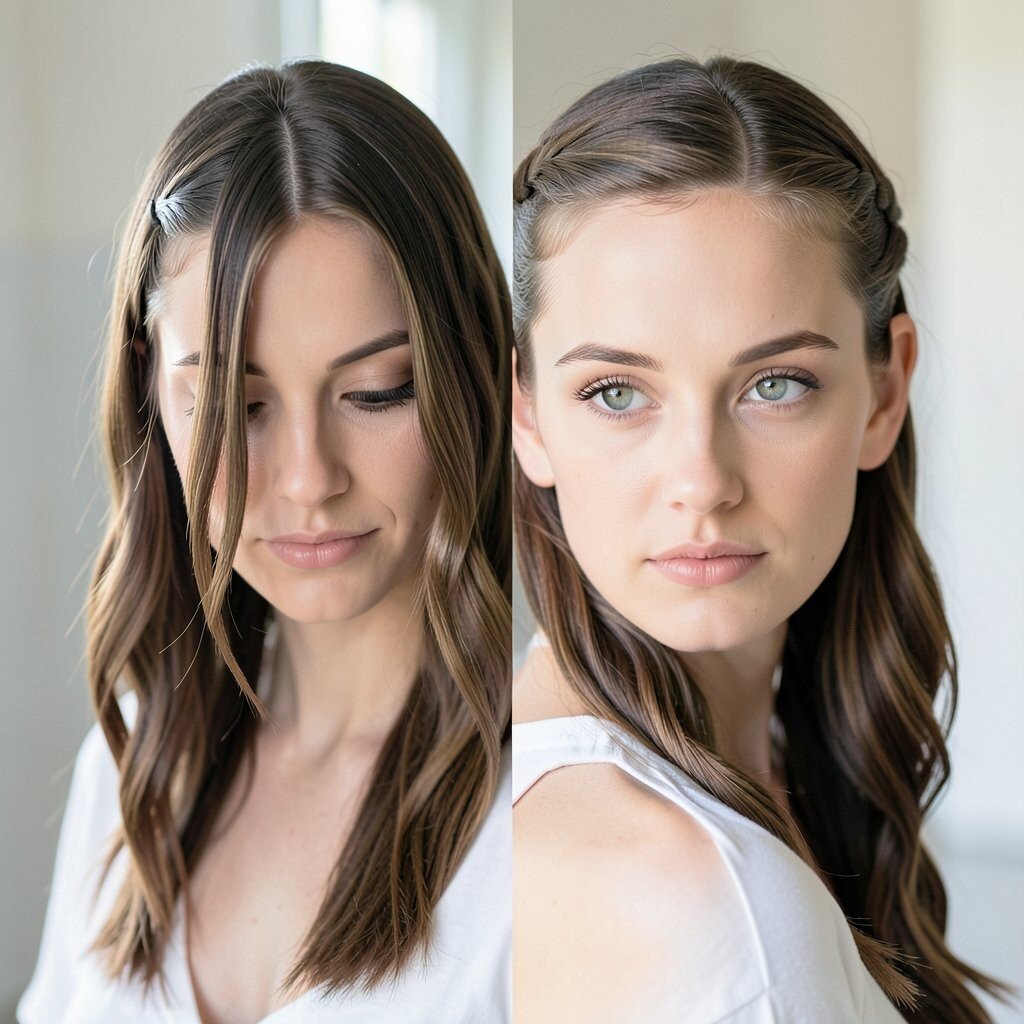
Part your hair slightly off-center, then twist the front near your crown. Pin the twist back so it sits like a little crown detail while the rest stays smooth.
This look frames your face and makes your hair look styled even if you didn’t blow-dry. Use a light gel or styling cream at the twist so it holds through the day.
If you want it trendier, leave a few soft strands loose near your cheeks. Add a tiny clip for shine, but keep it simple so it stays lazy-friendly.
7. Low Ponytail with Soft Flip Ends
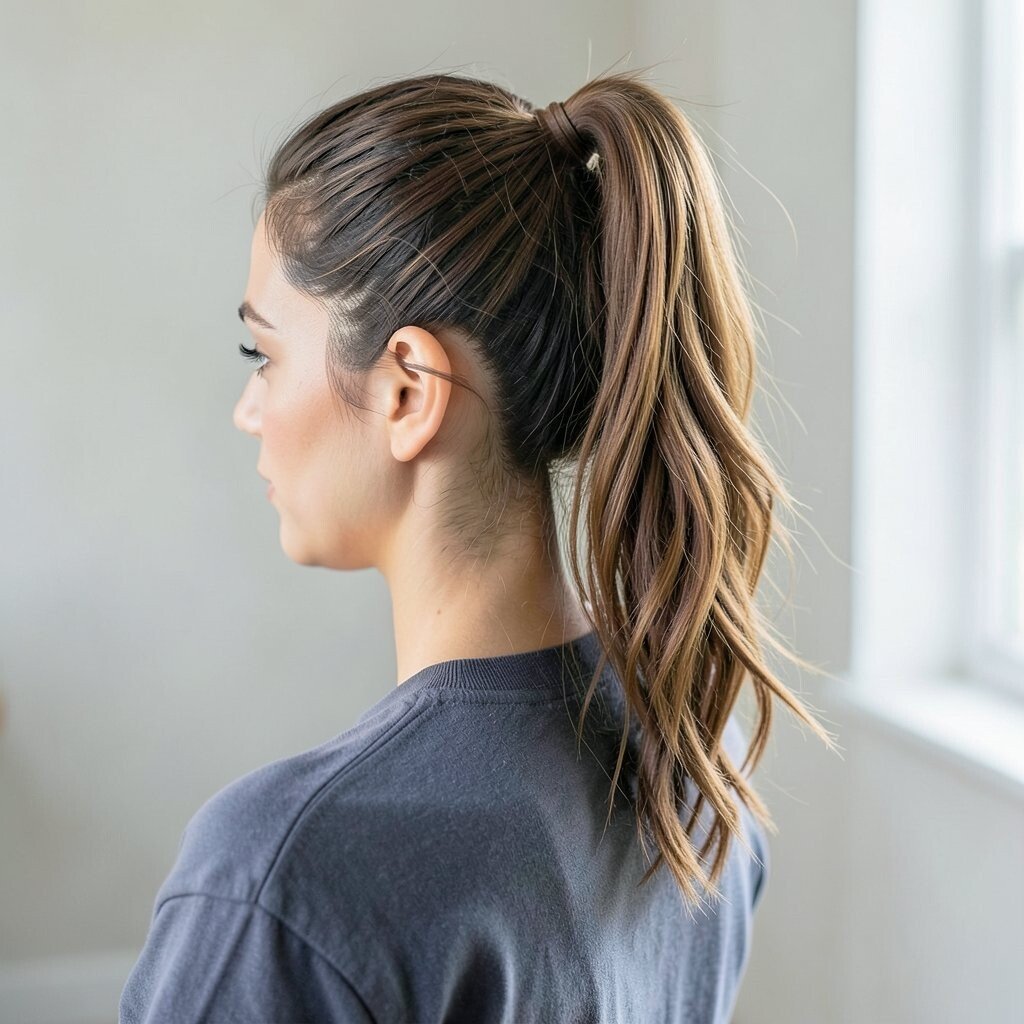
Pull your hair into a low ponytail and tie it snugly at the base of your neck. Then use your fingers to flip the ends outward for a gentle curve.
This gives the ponytail a cute shape instead of a flat one. If you have straight hair, lightly curl or bend the last few inches with a heat tool, then cool it before touching.
8. Bubble Ponytail with Tiny Elastic Rings
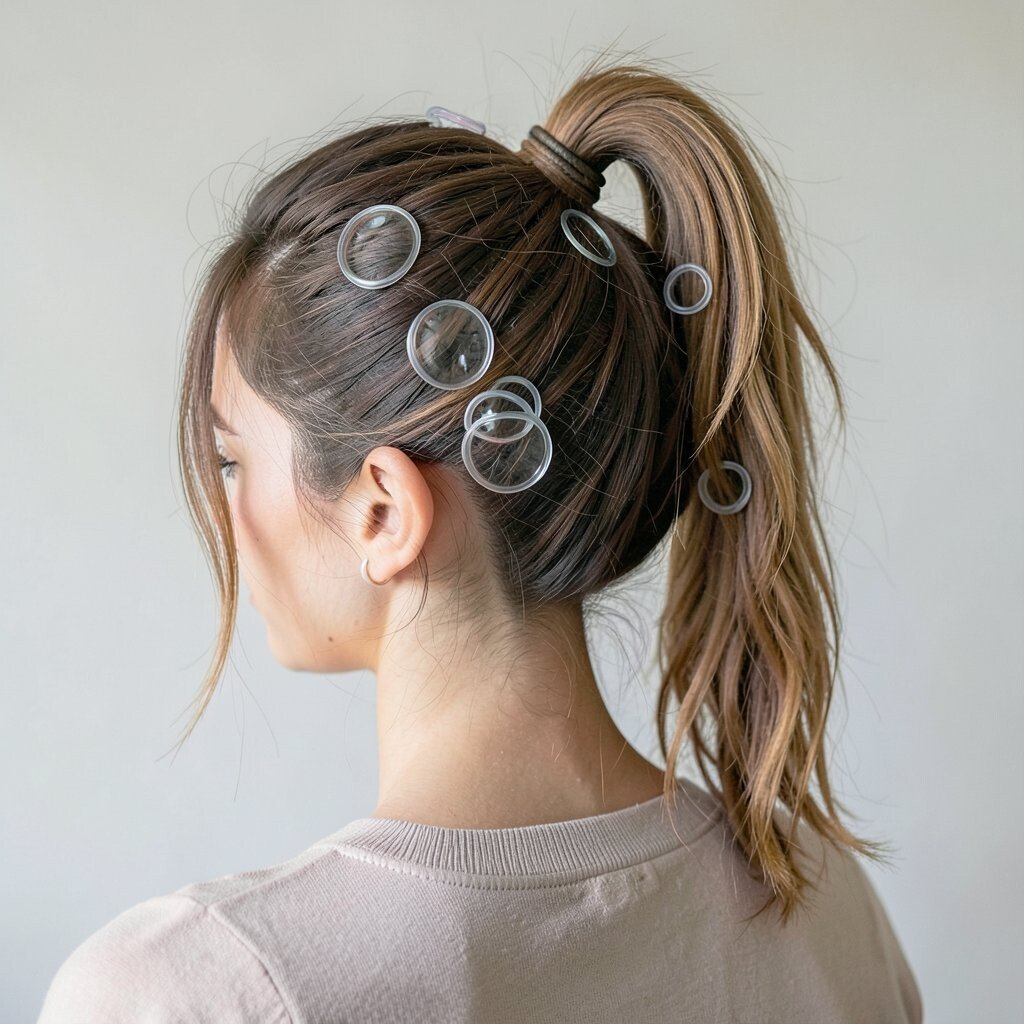
Create a ponytail, then add small elastics at intervals along the length. Each elastic makes a “bubble” shape, like your hair is wearing cute beads.
It looks fun, youthful, and totally doable even when you’re tired. Keep the bubbles slightly uneven for a more natural, trendy effect.
To personalize, add a thin braid through the center before you start placing elastics. For cost considerations, buy elastics in bulk or use snag-free ones so they don’t stretch out fast. This style also hides roots that are due for washing because the bubbles draw attention to the shape.
9. One-Minute Slick Bun with a Loose Fringe
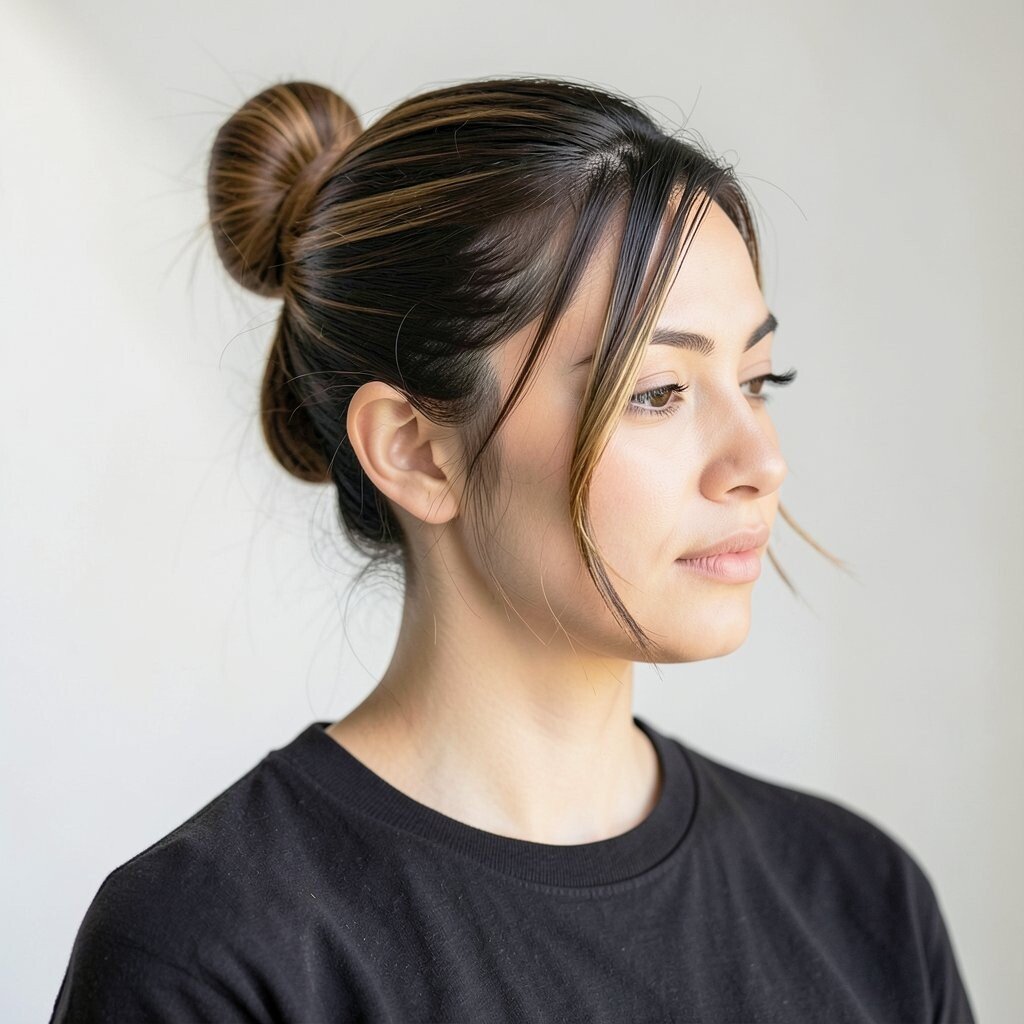
Slick your hair back into a bun, but keep the front fringe a little airy. A few soft waves in the bangs make it look effortless instead of severe.
This is ideal when you want a clean, modern look without much effort. Use a comb to smooth the scalp area, then stop when it looks good and comfortable.
For uniqueness, add a center part even if your hair usually falls sideward. You can also switch up the fringe by tucking a few strands behind one ear. A tiny hair scarf or wrap around the bun edge is a low-cost way to add personality.
10. Loose Twisted Waterfall Shoulders
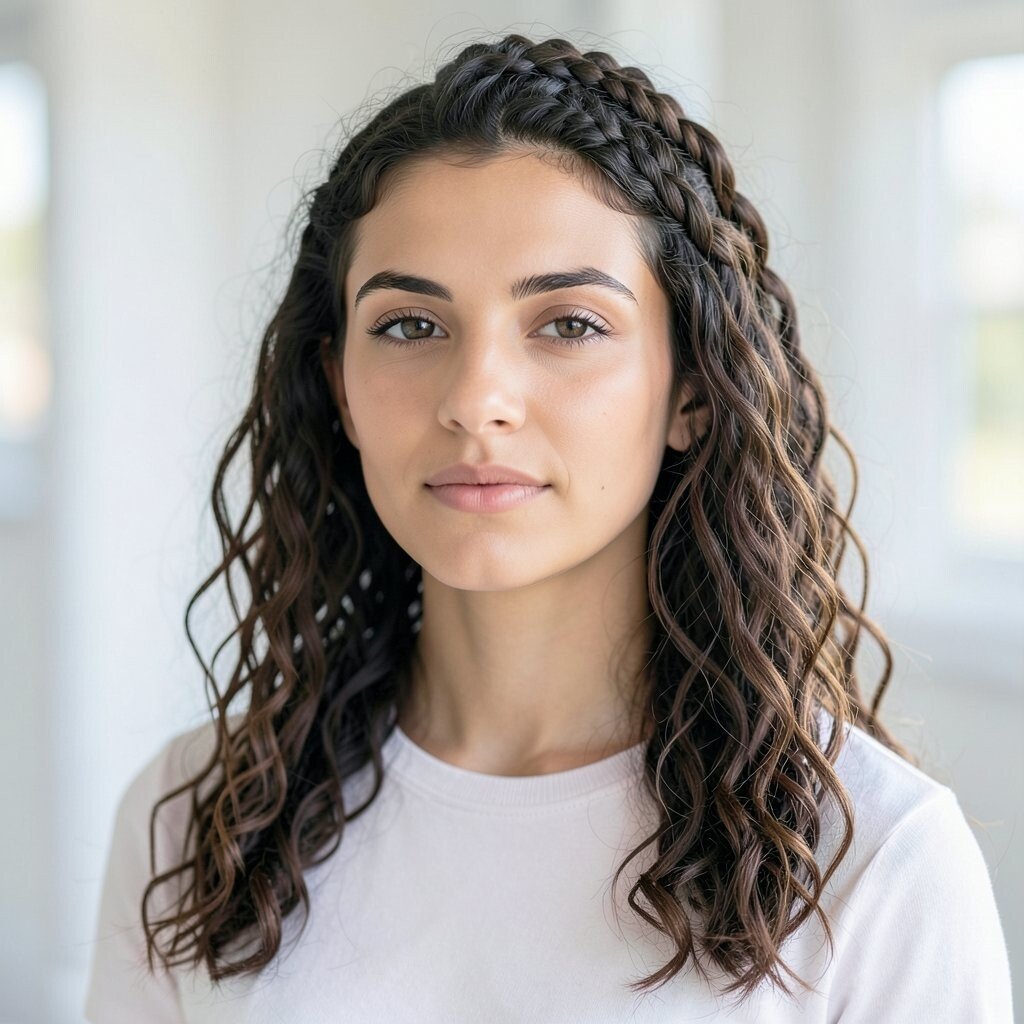
Take a small top section, twist it back, and pin it lightly. Repeat with a second twist from the side so the pieces look like a soft waterfall.
This creates a pretty frame that feels fancy but stays lazy. Leave the rest of your hair free so it looks bouncy and natural.
11. Topsy Tail Ponytail for Instant Volume
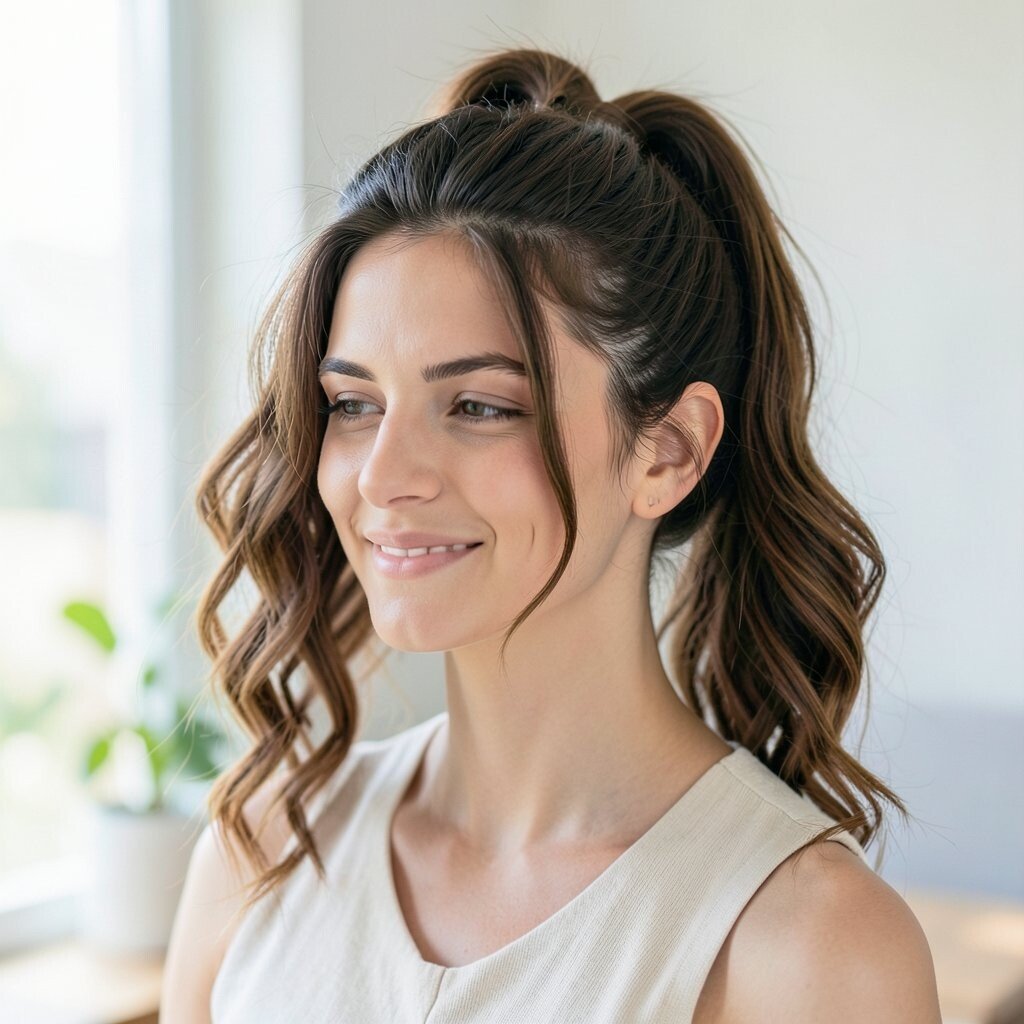
Make a ponytail, then flip the hair up and through the elastic space to create a topsy tail. Smooth the top lightly so it stays neat, and let the ends fall naturally.
It adds shape at the roots and makes your hair look fuller. For personalization, do the topsy tail slightly lower for a casual vibe, or higher for a more playful look.
If you’re worried about hair slipping, add one extra pin at the underside. This style also works on damp hair since the elastic helps guide the shape. Keep an eye on trends since “lift at the top” is still all over social feeds.
You can wear it with straight hair for sleek magic or with soft curls for a bouncy finish.
12. Half-Up Braided Knot
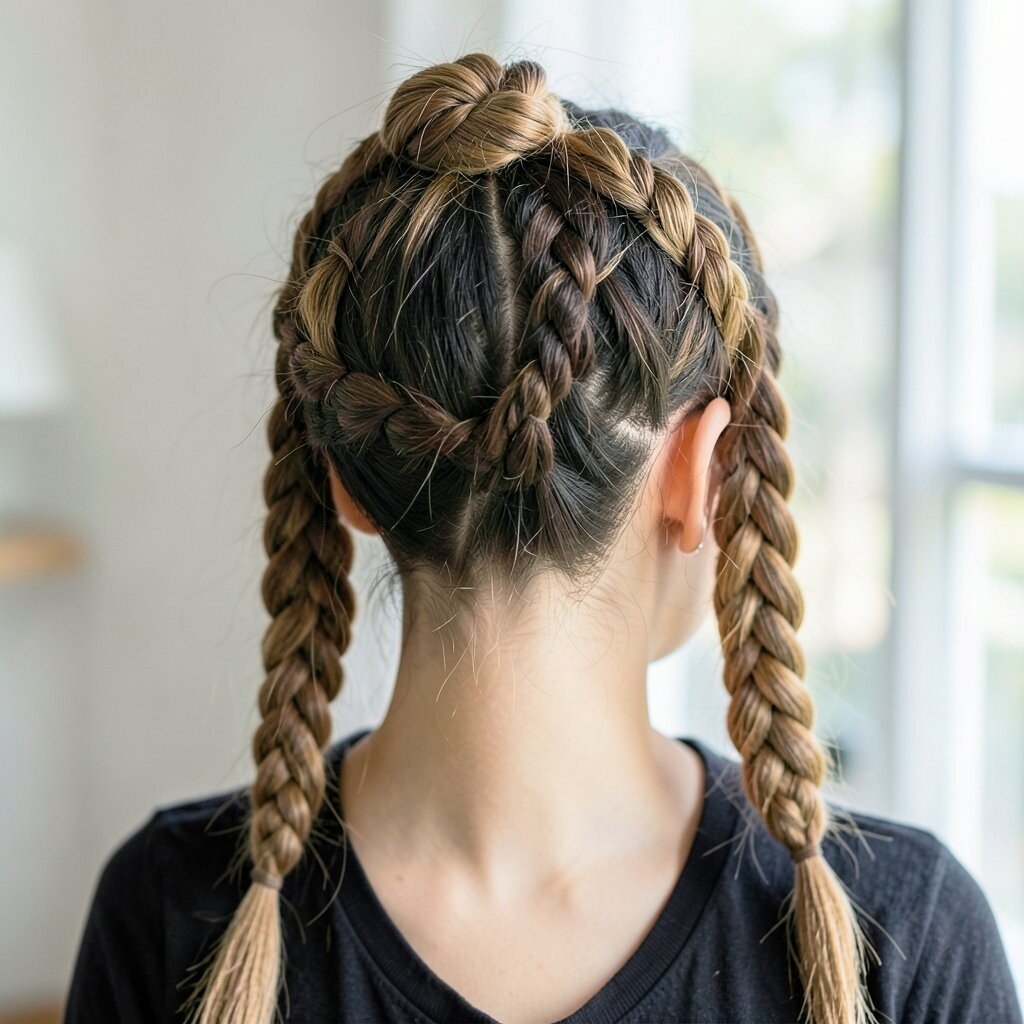
Separate a small top section, braid it loosely, then tie the braid into a mini knot. Pull a few pieces to loosen it so it looks relaxed and sweet.
This style is unique because it mixes the tidy look of a knot with the softness of a braid. It’s also practical since it keeps your face clear while still showing off your hair length.
13. Simple Ribbon Tie for Long Hair Days
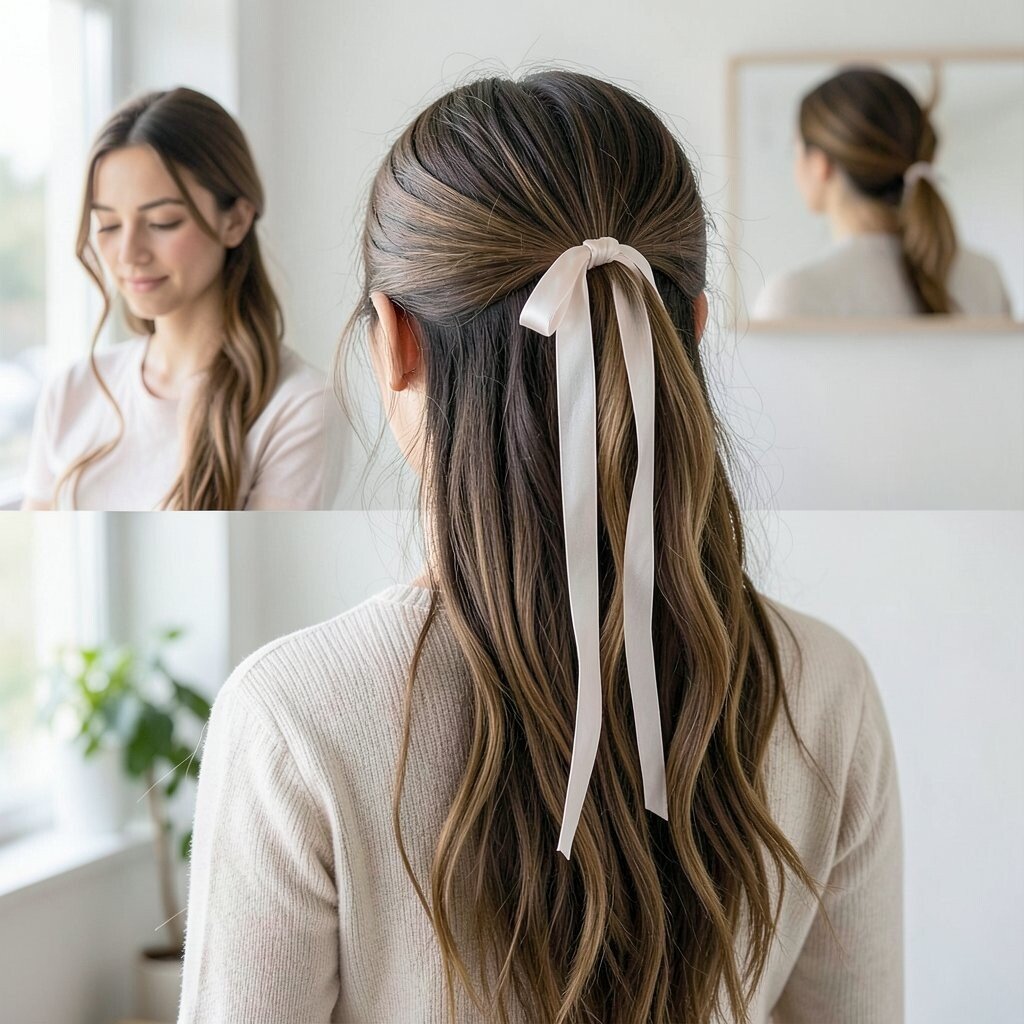
Gather your hair into a low ponytail and tie it with a ribbon instead of a basic elastic. The ribbon adds color and softness instantly.
You get a cute, dressed-up look without styling tools. Choose ribbon that matches your outfit or your mood, like denim-blue for casual days or a warm tone for fall.
For cost considerations, satin ribbons can be reused and moved from hair to bag accessories. If you use thinner ribbon, secure the base with a hidden elastic first so it doesn’t slide.
14. Side Swept Ponytail with Curl-Ready Texture
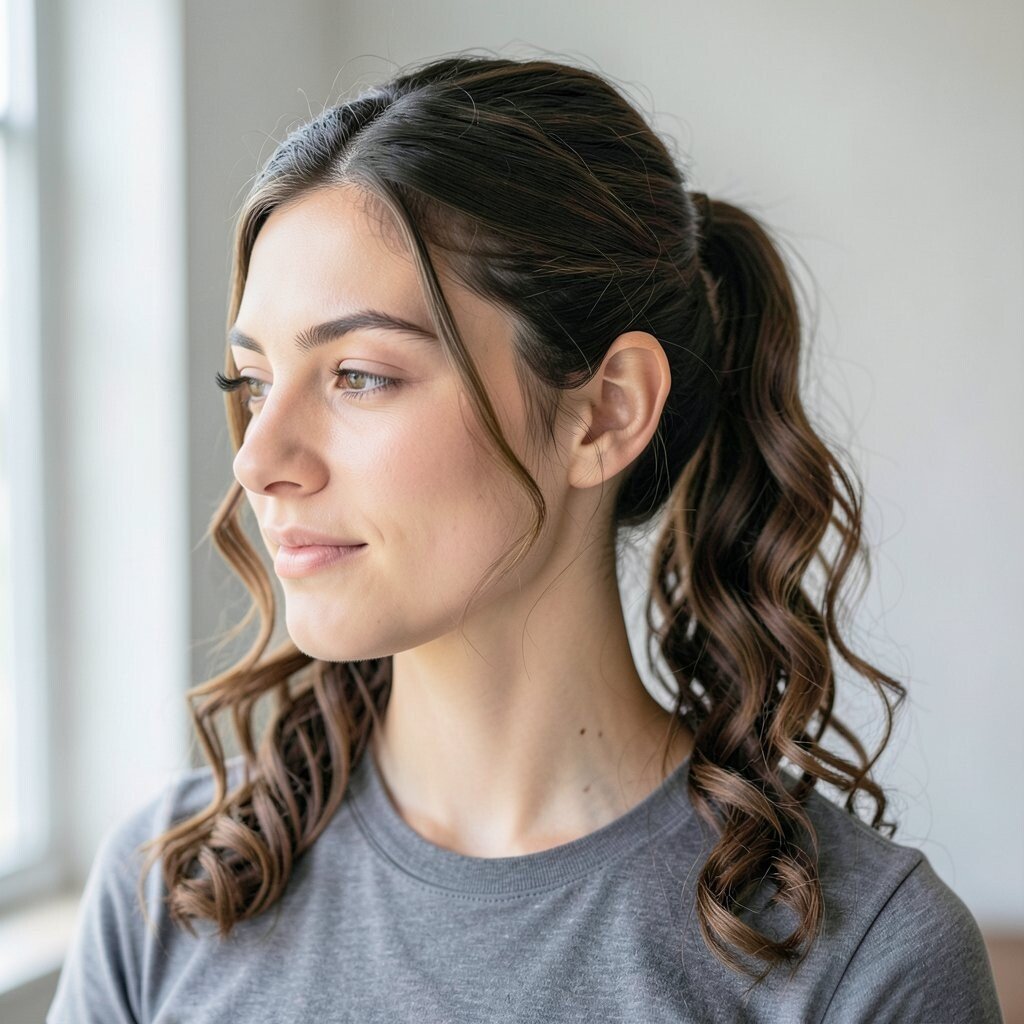
Pull your hair into a side ponytail and smooth the top with a quick brush. Then add a little texture on the ends so they don’t look too flat.
This look is perfect for people who want a fast style that still looks flattering. If your hair is naturally wavy, just gather and go, because texture is already working for you.
15. Faux Curly Knot Using a Simple Donut Bun Sponge
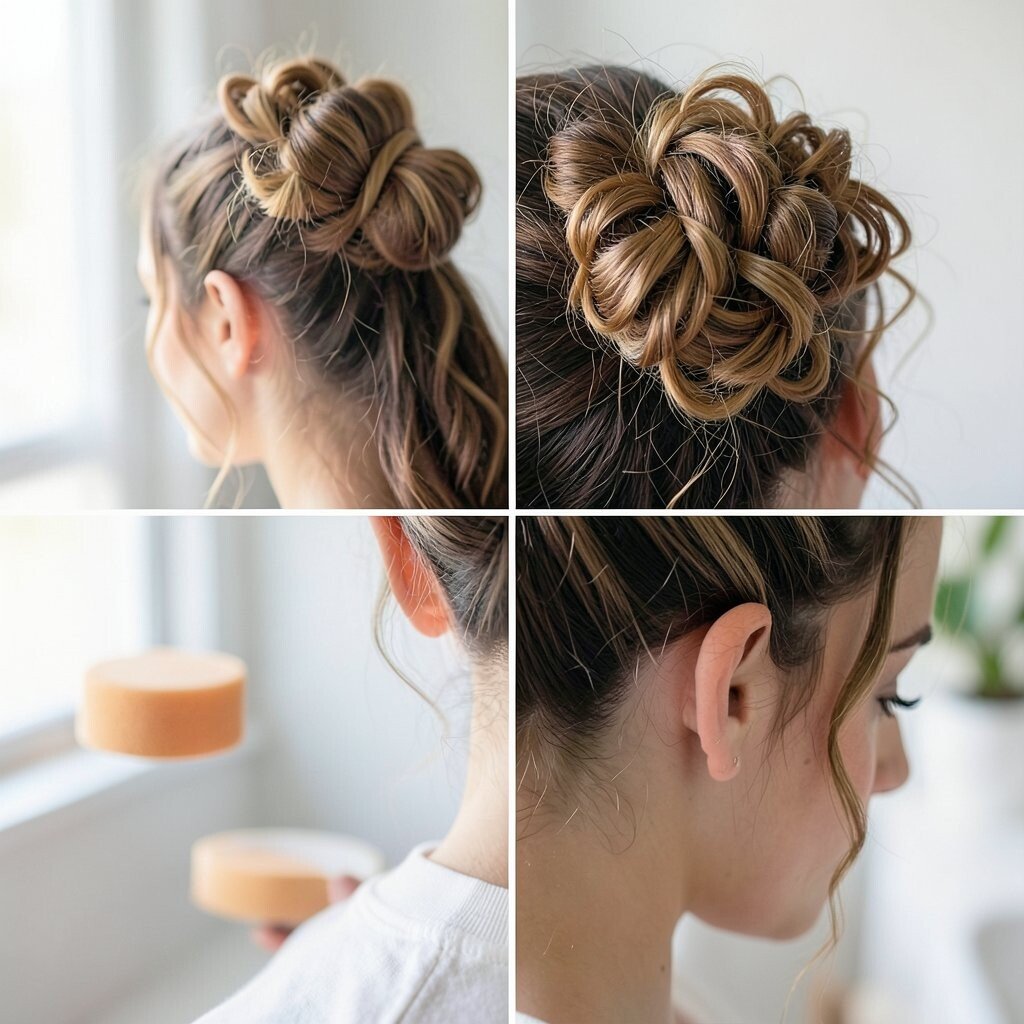
Use a donut bun sponge to create a low bun, then pull loose strands around it to mimic a curly halo. Even without real curls, the shape makes it feel styled.
The result looks fuller than you might expect, which is great for thinner hair days. Slide the sponge on first, then tuck hair around it carefully and secure with pins.
To keep it comfortable, place the bun slightly off-center so it doesn’t feel too tight. For personalization, braid a small strand and wrap it around the bun like a ribbon. This look can be created with affordable tools, and the sponge saves time every time you use it.
16. Crown Braid Lite with One Pinned Loop
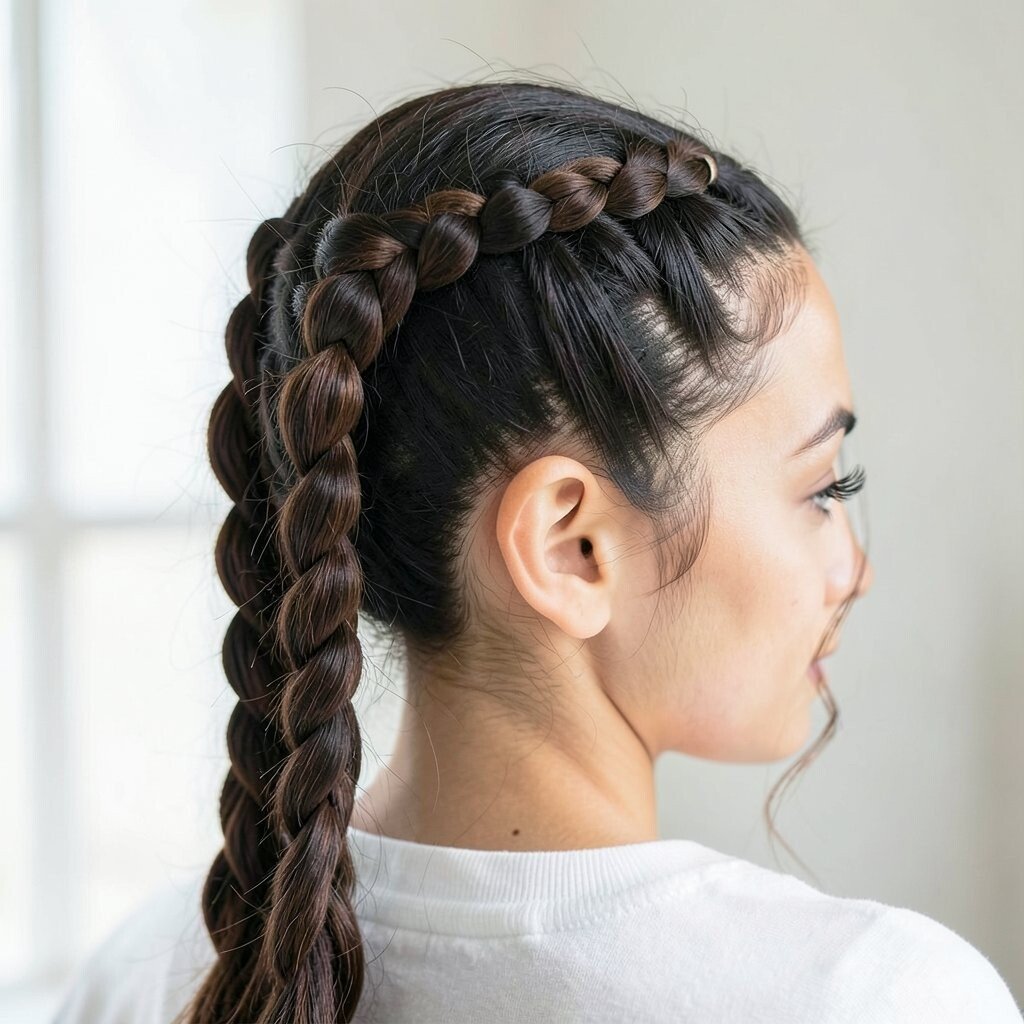
Take a section from one side of your head, braid it loosely, and pin it across your crown. Add a second pin near the other side to hold the braided loop in place.
This gives you a half crown effect without the full commitment of a complete braid. It’s also perfect for hair that’s slightly shorter or layers that won’t behave.
Try it with a slightly messy braid since current styles often lean soft and touchable. Add a tiny hair spray on the braided section so it doesn’t slide when you move your head.
17. Two-Minute Half-Up Twist with Pinwheel Detail
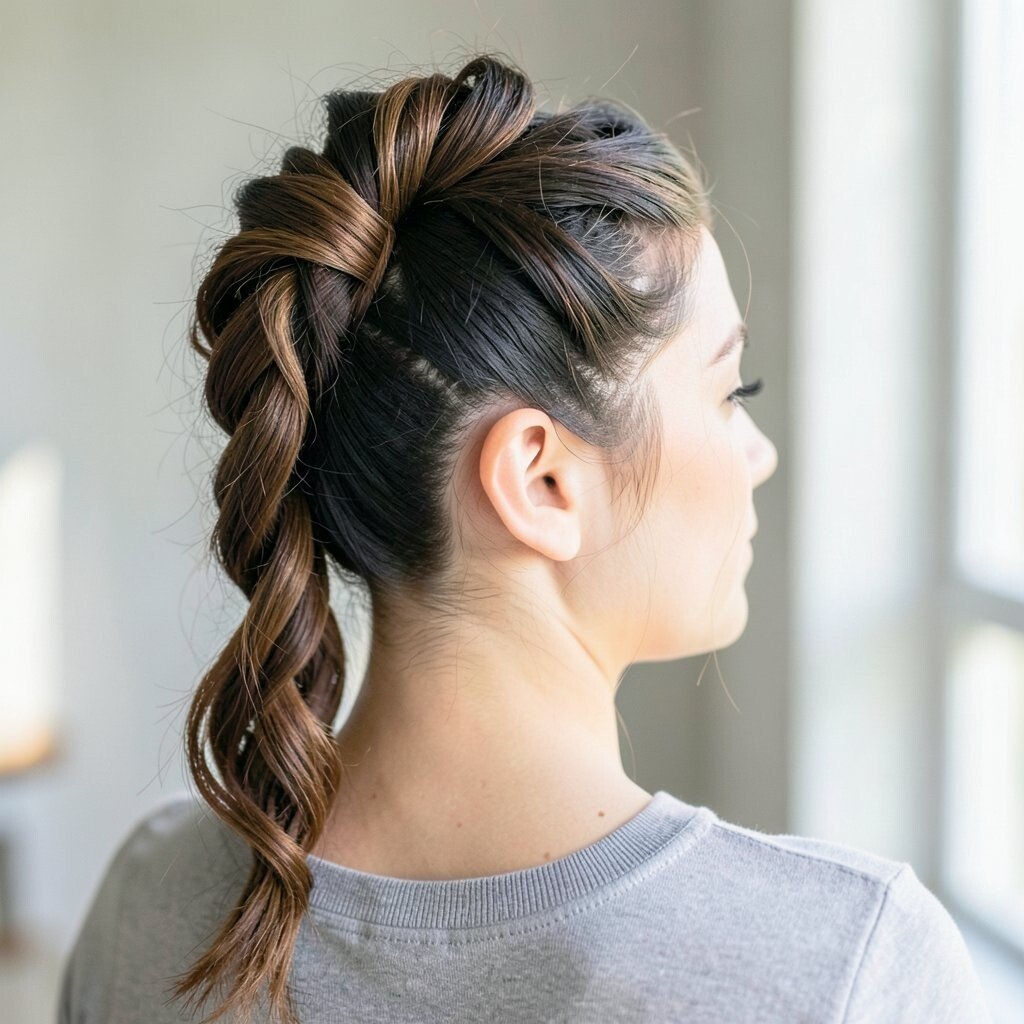
Twist two small sections from either side and pin them into one spot behind your head. Press gently so it looks like a tiny pinwheel made from hair.
The twist keeps hair out of your face while still looking romantic. For personalization, make the twists thinner for a delicate look or thicker for a bolder vibe.
If your hair is slippery, use a tiny bit of mousse at the roots before twisting. This style is low cost because it mostly uses pins, which you can always keep in your bag. Finish by tugging one or two strands lightly for a softer frame.
18. Slick Back Ponytail with Tiny Claw Clip Accent
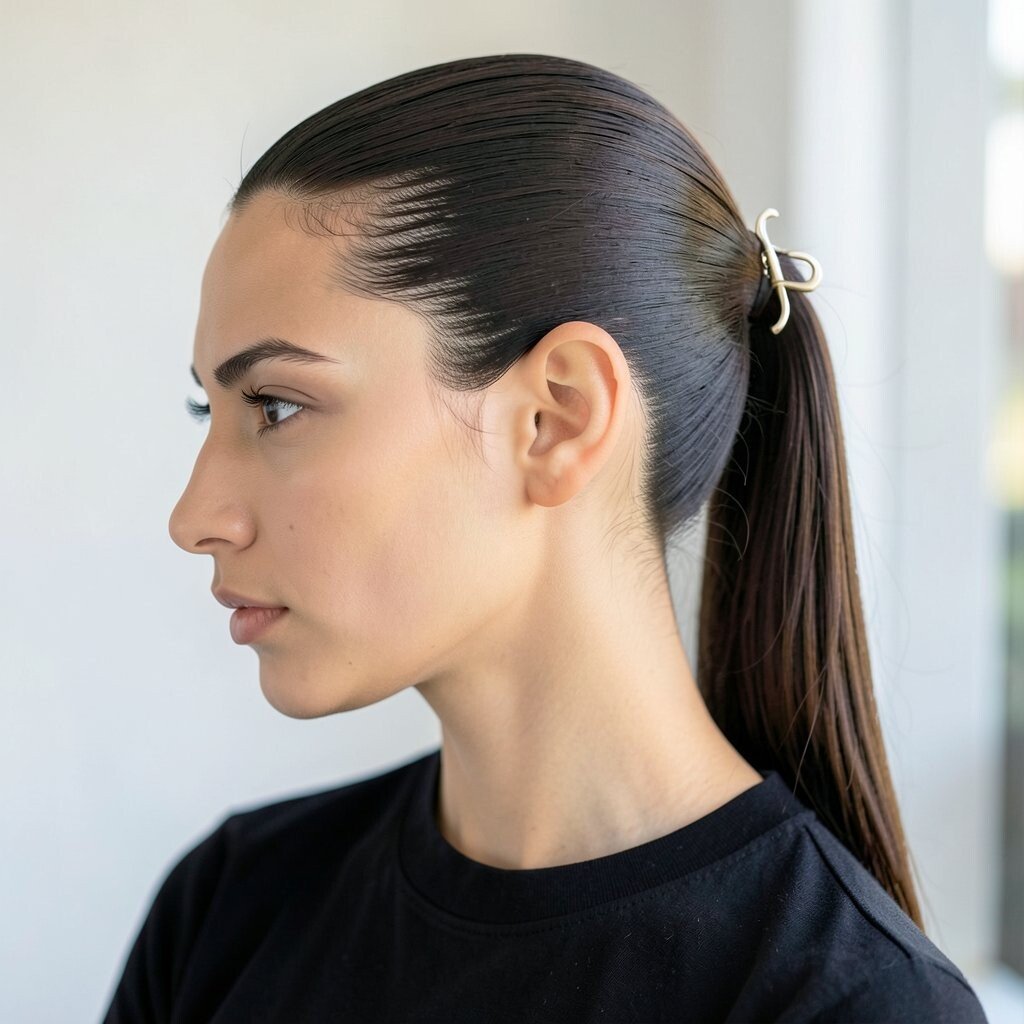
Slick your hair back into a mid ponytail, then add a small claw clip on one side for contrast. The clip breaks up the sleek look and makes it feel styled.
This is a great option for humid days because the slick top keeps things tidy. Choose a claw clip with smooth edges so it grips without snagging.
19. Rag Roll Bun with a Soft, Retro Feel
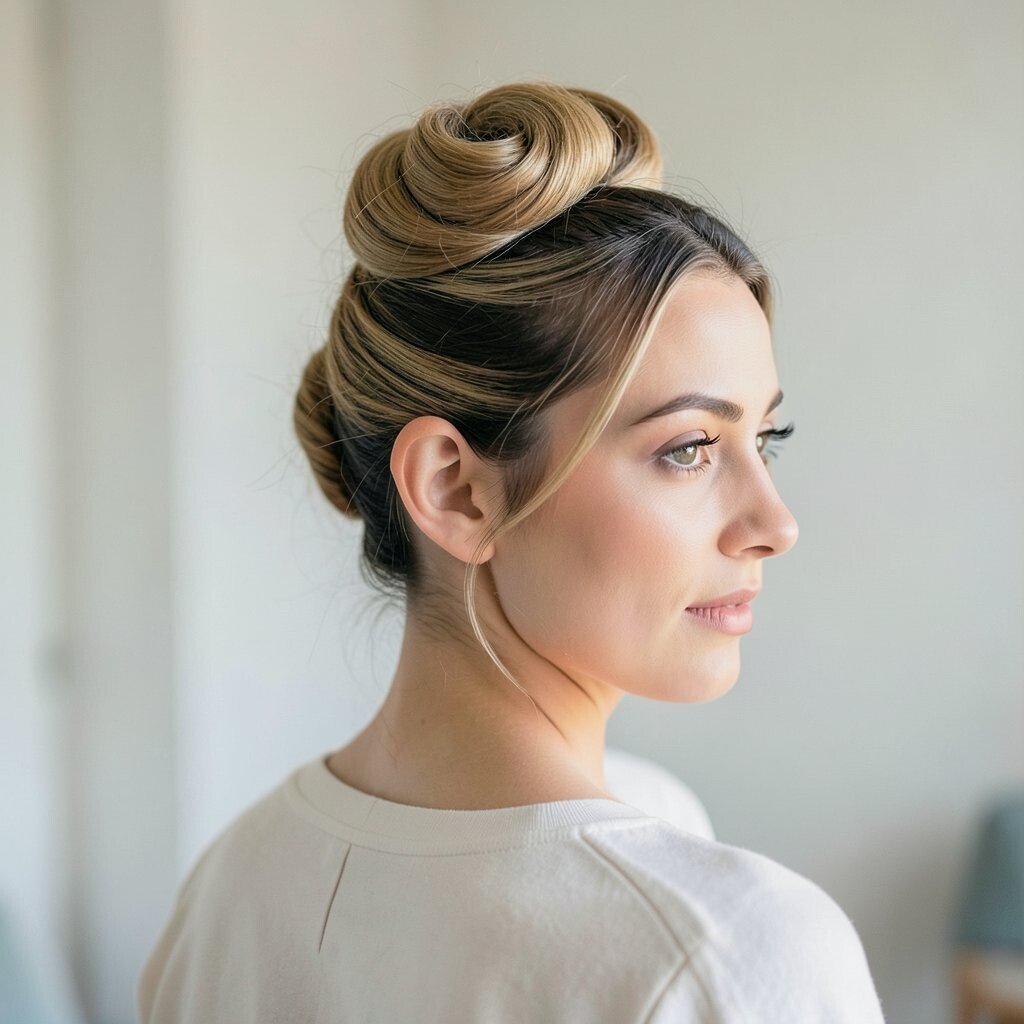
Take the hair at the nape of your neck, roll it loosely upward, and secure the roll with pins. The looser you roll, the more relaxed the shape becomes.
This gives a retro softness that feels unique compared to typical tight buns. Use a little dry shampoo or texturizing spray at the roots if your hair needs grip.
For personalization, let a small piece fall around the ear like a mini curl. Keep a couple of bobby pins handy since rag rolls look best when they’re secure but not too tight. This style also works across hair thicknesses, from fine to very thick, with just a few pin adjustments.
20. Top Knot with Clean Side Part
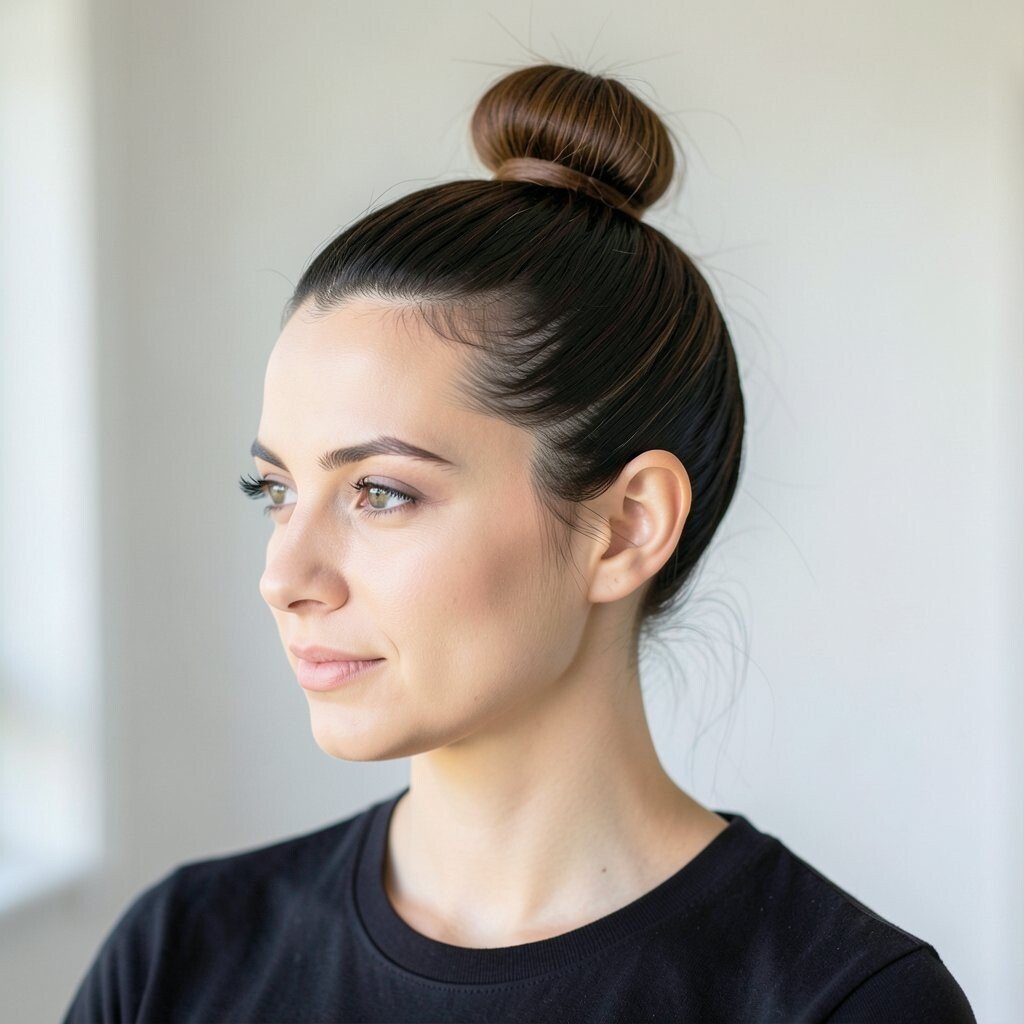
Make a top knot at the crown and keep a clean side part visible in the front. The contrast between the neat part and the casual knot is what makes it cute.
It’s fast, practical, and perfect for days when you want your face to look extra open. If you have bangs, either blend them into the knot for a smooth look or leave them loose for extra charm.
21. Sleek Braided Ponytail with Invisible Pin Hold
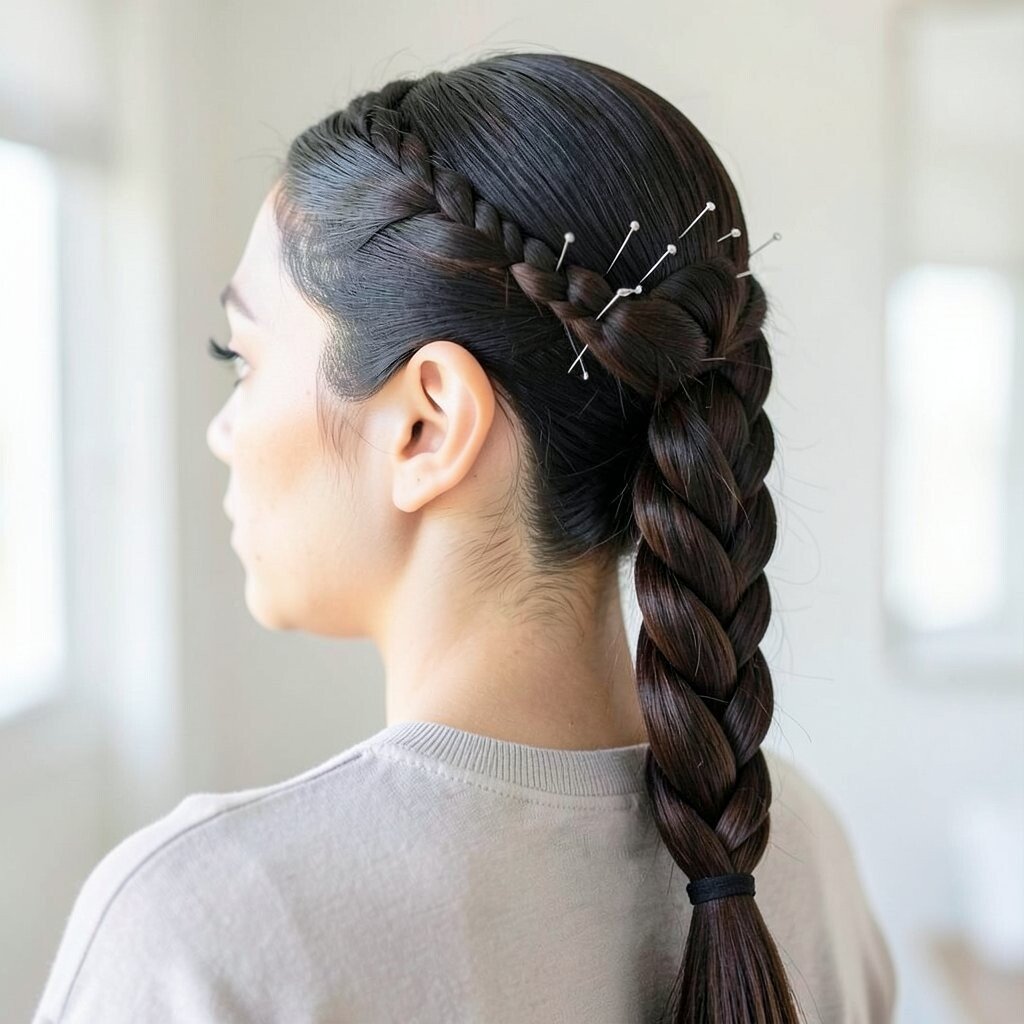
Braid your ponytail, then secure the braid with a tie and a few hidden pins at the base. The braid adds detail while the pinning makes everything stay put.
This is a polished look that still counts as lazy since the braid does the work. For uniqueness, keep the braid slightly thicker by using the full ponytail width instead of tightening too much.
If you want it to look like a current style, keep the braid smooth and slightly shiny. Consider using a lightweight braid spray so the braid looks clean without feeling heavy. It’s also budget-friendly since you mainly need pins, an elastic, and whatever styling product you already own.
22. Scarf-Linked Low Bun for a Fresh Color Pop
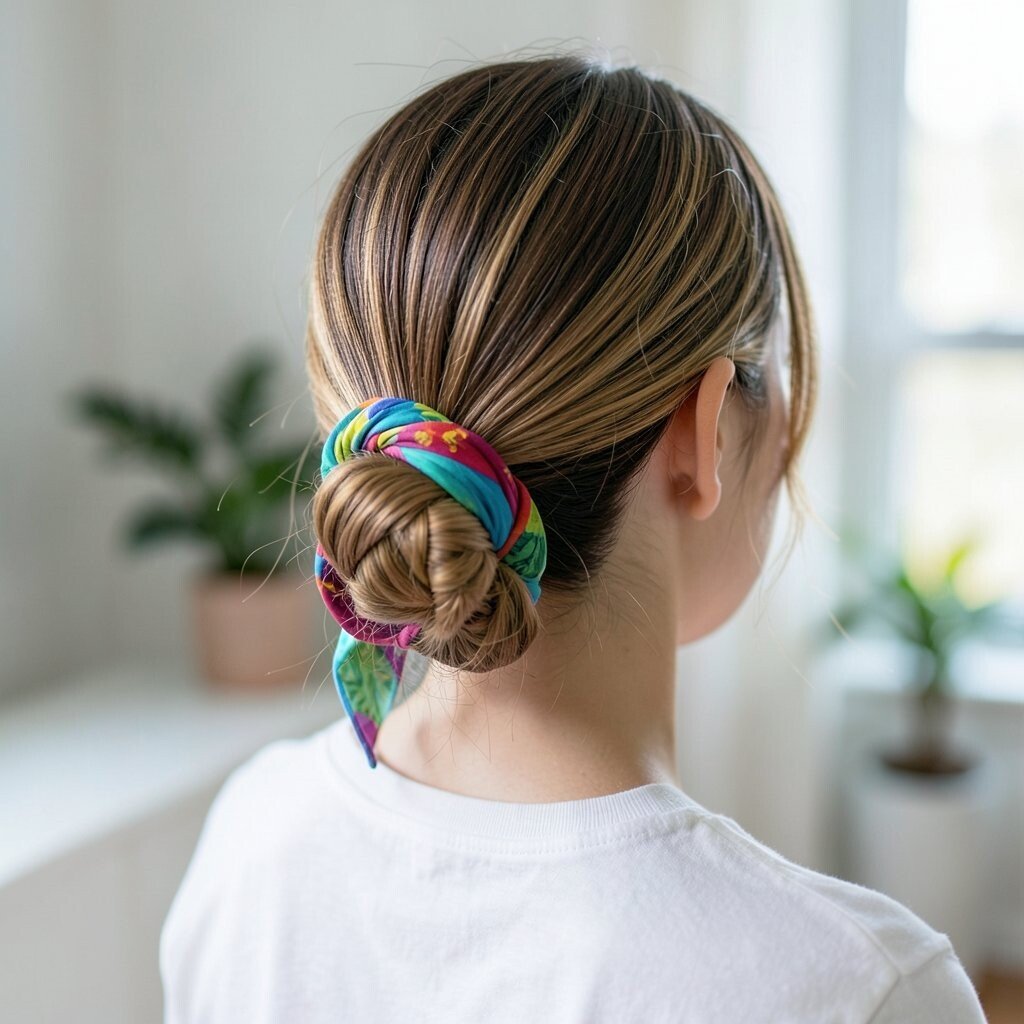
Wrap a scarf around a low bun and tie it loosely at the side for an instant color accent. Even a plain bun looks upgraded when the scarf shows through.
This style is both practical and stylish because the scarf can also help hide flyaways. Choose a scarf pattern that matches your accessories, like small gold dots with jewelry or stripes with casual outfits.
For personalization, try twisting the scarf ends together before tying so the knot looks extra neat. It’s a great low-cost way to refresh your look using something you may already own. Finish by adjusting the bun so the scarf sits centered, then enjoy the cute, cozy vibe all day.
When your hair gets flatter, gently loosen the bun edges with your fingers to bring back shape without redoing anything.