Low ponytails look polished, but they also feel easy and fun. The right style can make your everyday routine feel like a new outfit.
Keep reading for ideas that match your hair texture, your schedule, and the vibe you want today.
1. Sleek Low Pony With Glassy Ends
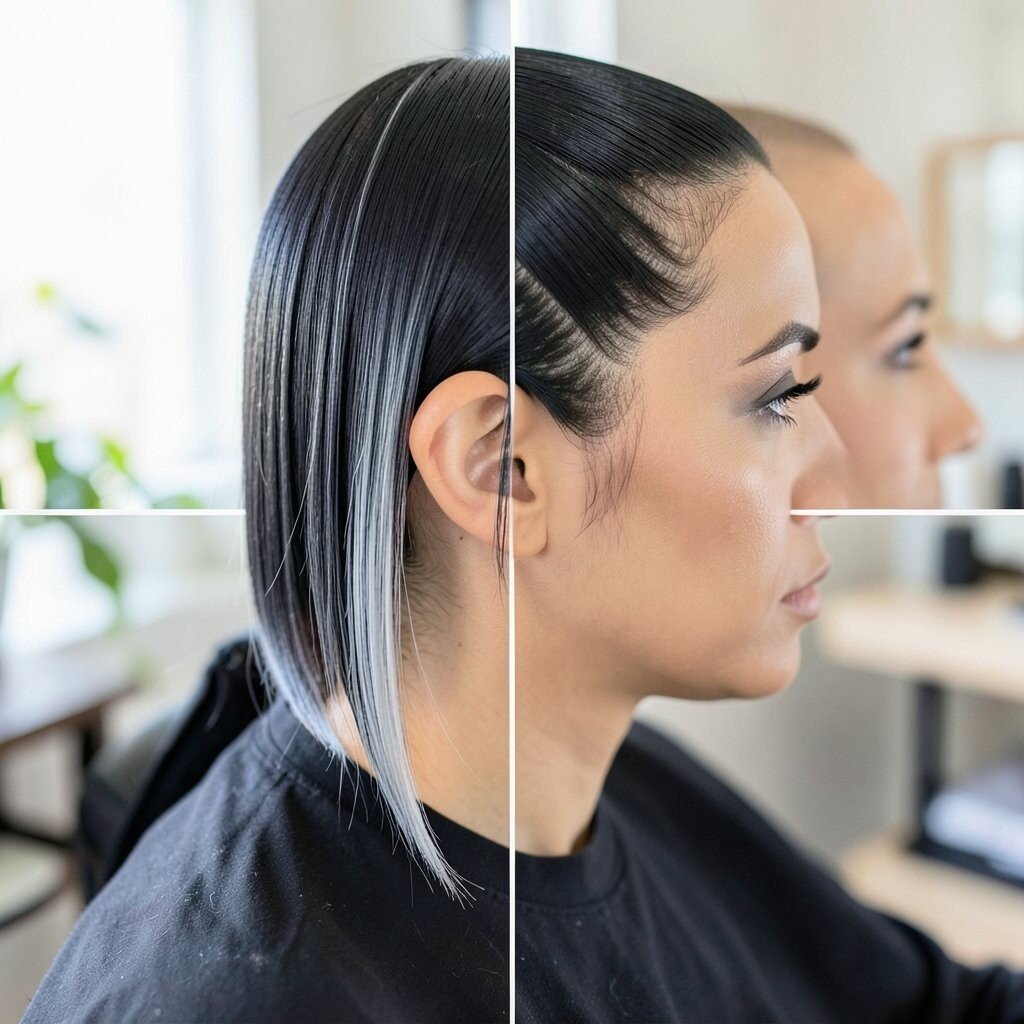
A sleek low pony is all about smooth shine and clean lines. When your hair lays flat from crown to pony, the whole look feels instantly put together.
Use a lightweight smoothing cream on damp hair, then blow-dry in sections for a smooth finish. Gather at the nape, secure with an elastic, and twist the rest of the pony through a second elastic for a neat, rounded shape. Finish with a small amount of hair oil on your palms and press it into the ends for that glossy effect.
2. Soft Textured Low Pony With Face-Frame Layers
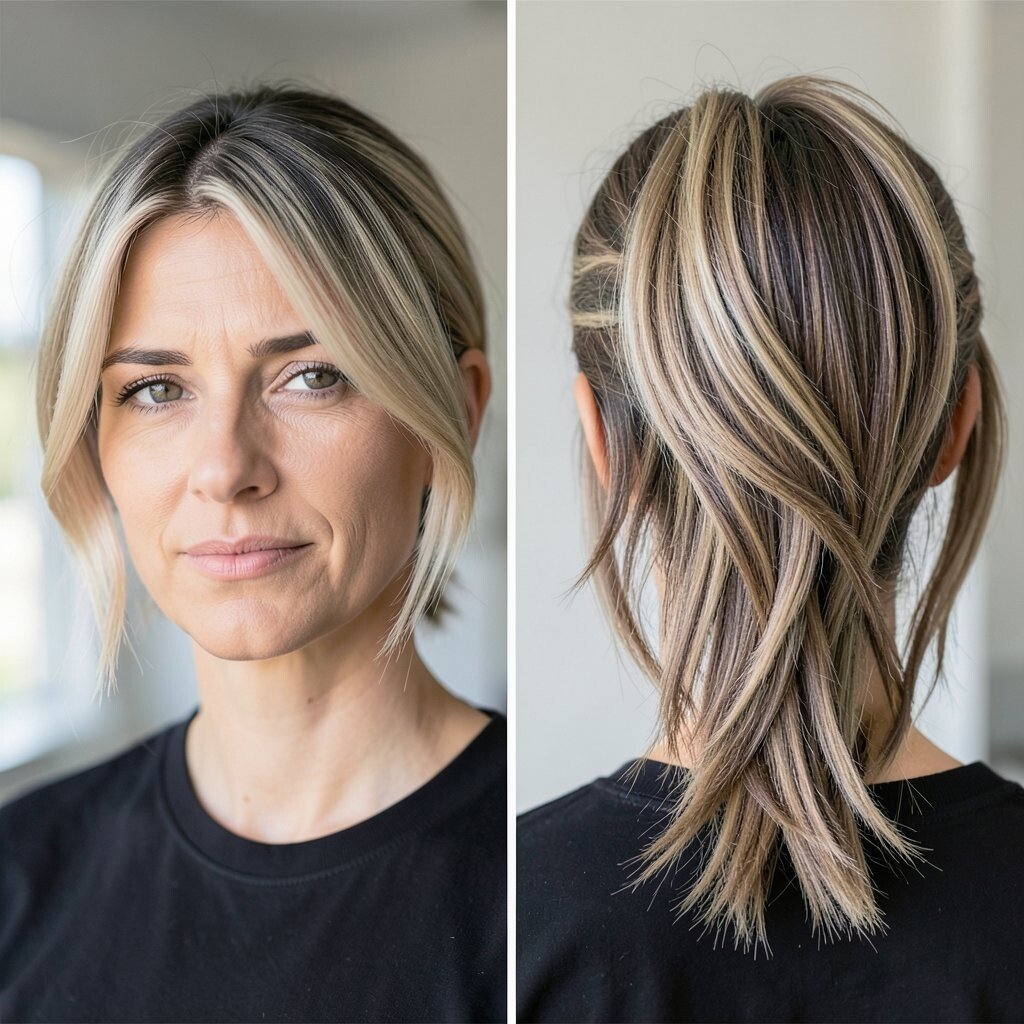
This style balances polish with movement, so it looks great even if your hair isn’t perfectly flat. You’ll see soft texture around the pony and gentle strands near your face.
Start by adding a salt spray or texturizing mousse to mid-lengths before you brush everything back. Leave two thin pieces out at the front, then pin them lightly so they frame your cheekbones. For personalization, make the front pieces thicker for a dramatic look or thinner for a subtle touch.
It also works well for cost-friendly styling since you can skip heat after your initial prep. If you want extra hold without extra products, spritz a bit of hairspray on your brush before you sweep your hair back. This one fits current trends toward soft, lived-in texture that still looks styled.
3. Braided Low Pony With a Crown-Inspired Twist

A braided low pony adds detail without taking forever. You get visible texture on the braid while keeping the pony itself low and elegant.
Create a small twist at the top by splitting the front section and twisting it toward the nape. Then braid the remaining hair loosely, secure it, and wrap a thin strand around the elastic to hide it. Add a gentle tug to the braid to make it look fuller and more airy.
This hairstyle is unique because the twist gives a “crown” feel while the braid stays practical. It’s a great choice when you want something special for events but still want a wearable daily look. For a personalization idea, try a Dutch braid instead of a French braid to make the pattern pop more.
If you’re budgeting, you can use the same elastic you already own plus one styling product like gel or braid cream. A little shine spray on the braid can make it look expensive in photos. Pair it with hoop earrings or a sleek headband for a modern finish.
4. Low Pony With a Half-Up Flip Over the Elastic
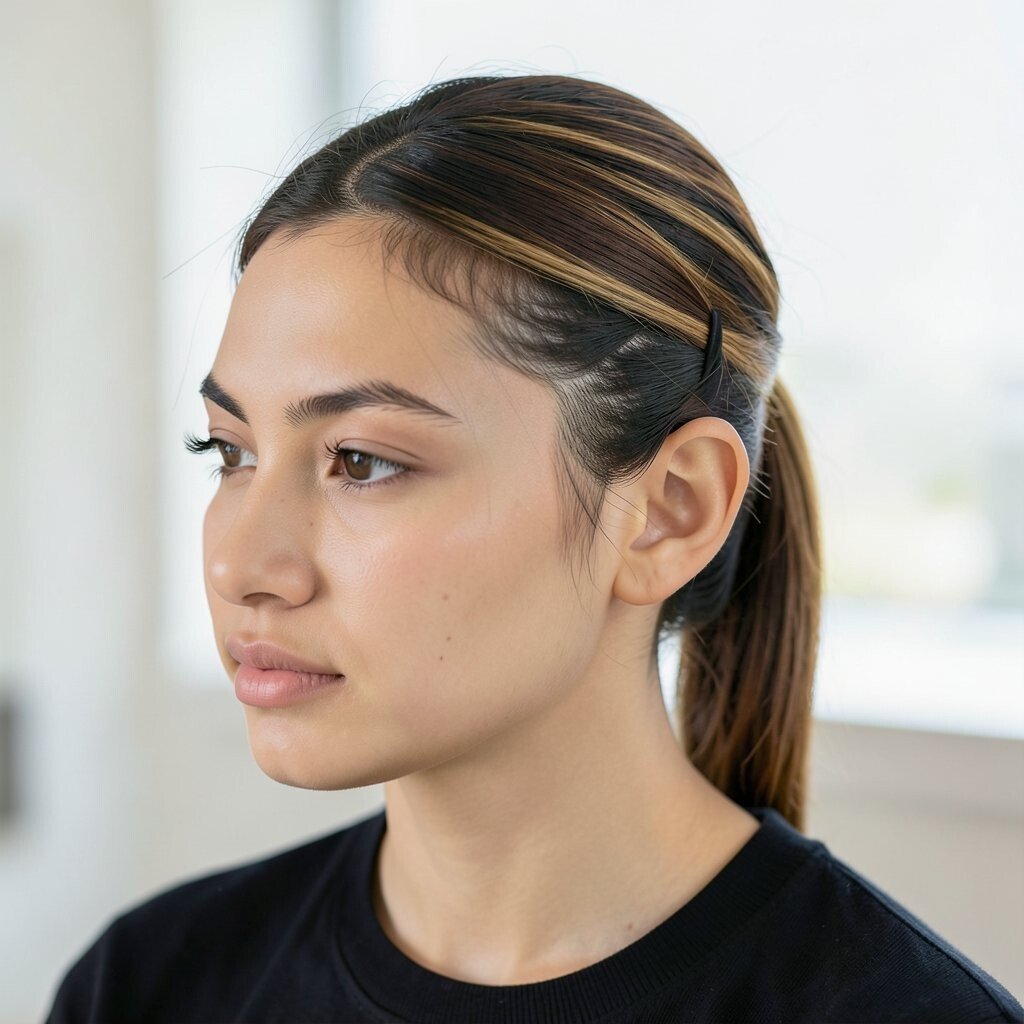
This idea uses the elastic as a design detail, so it’s clever and flattering. Your pony looks bigger at the base because of the flipped section.
Gather your hair low, secure it, and then lift a small band of hair above the pony to flip over the elastic. Pin it in place so the wrapped piece covers the band completely. To personalize, vary the thickness of the flipped band and match it to your face framing layers.
It’s a great option for bad hair days since the flip hides uneven roots. You’ll also get extra lift without using strong teasing, which keeps your hair from feeling rough. If you want a trendier look, keep the flip slightly messy and let a few strands fall naturally.
When cost matters, you can rely on clips and one smoothing spray rather than buying lots of new tools. A quick shine mist on the pony will make it look fresh even if your hair isn’t freshly washed.
5. Wrapped Low Pony With a Ribbon Tie Finish

A ribbon tie turns a simple low pony into something playful and sweet. You’ll notice how the ribbon draws the eye to your pony, even from a distance.
Start with a low pony secured with an elastic, then wrap a ribbon around the base two or three times. Tie a small knot at the side or at the center depending on your vibe. For personalization, choose a ribbon color that matches your outfit or your nails for a coordinated look.
This style stands out because it feels nostalgic but still fits modern styling. It’s also practical for days when you want a pop of color without extra effort. If your hair is fine, choose a wider ribbon to add visual thickness at the base.
Cost-wise, ribbons are usually affordable and you can reuse them across multiple outfits. Keep the ribbon from slipping by adding a tiny dab of gel on the elastic before wrapping. For a trend check, bows and ribbon details have been popping up again in everyday hairstyles, especially for brunch and weekend events.
6. Low Pony With Bubble Segments
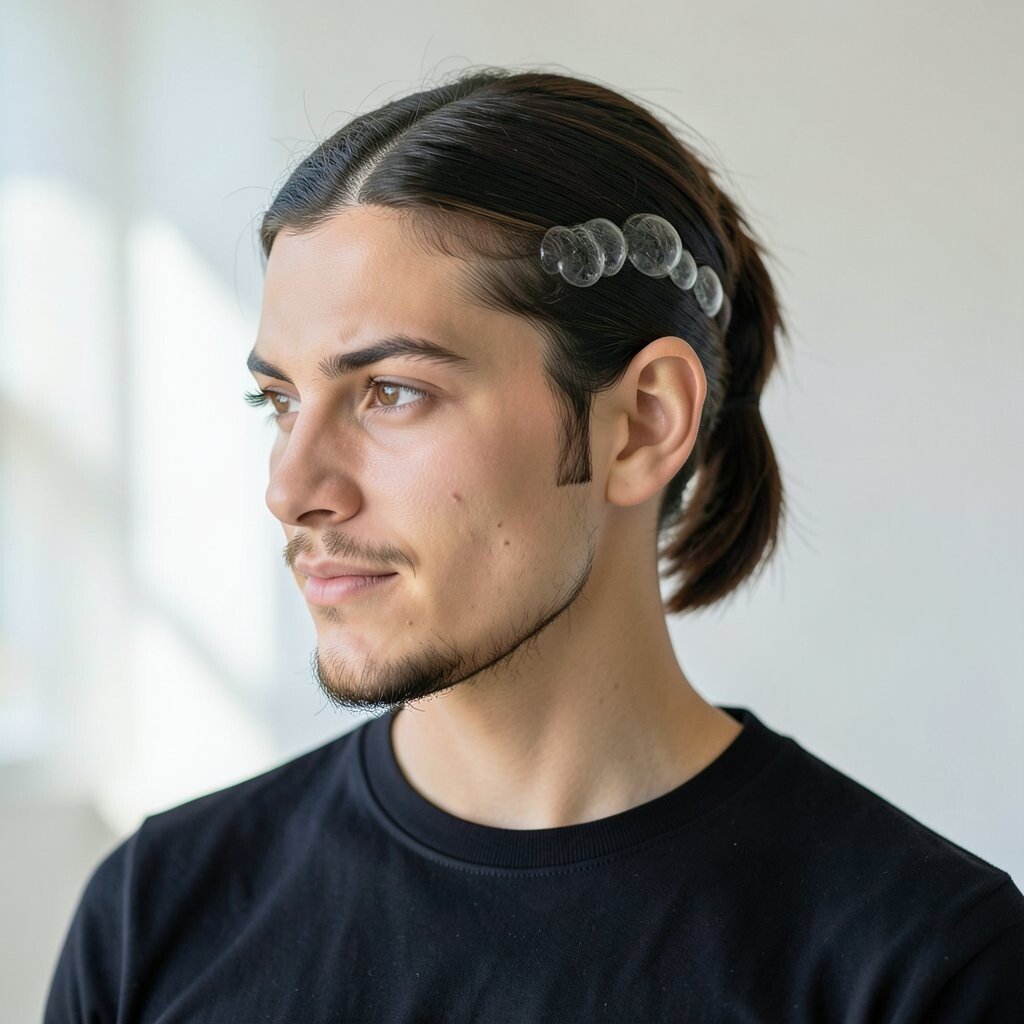
Bubble low ponies look fun and a little bit retro in the best way. You can see round “bubbles” spaced along the pony, which makes even straight hair look lively.
After you secure a low pony, add small elastics along the length, spacing them evenly. Use your fingers to gently loosen each section so the bubbles look full instead of tight. If you want a cleaner look, use smaller elastics and keep the bubbles tight; for a softer look, loosen them more.
This hairstyle is especially helpful if your hair is thin because the bubble shape creates more volume. It’s also a quick way to make a low pony feel new without changing your base routine. For personalization, add one bubble near the base only, or keep the bubbles close together for a sleek, modern pattern.
7. Low Pony With Soft Curl-Coated Lengths
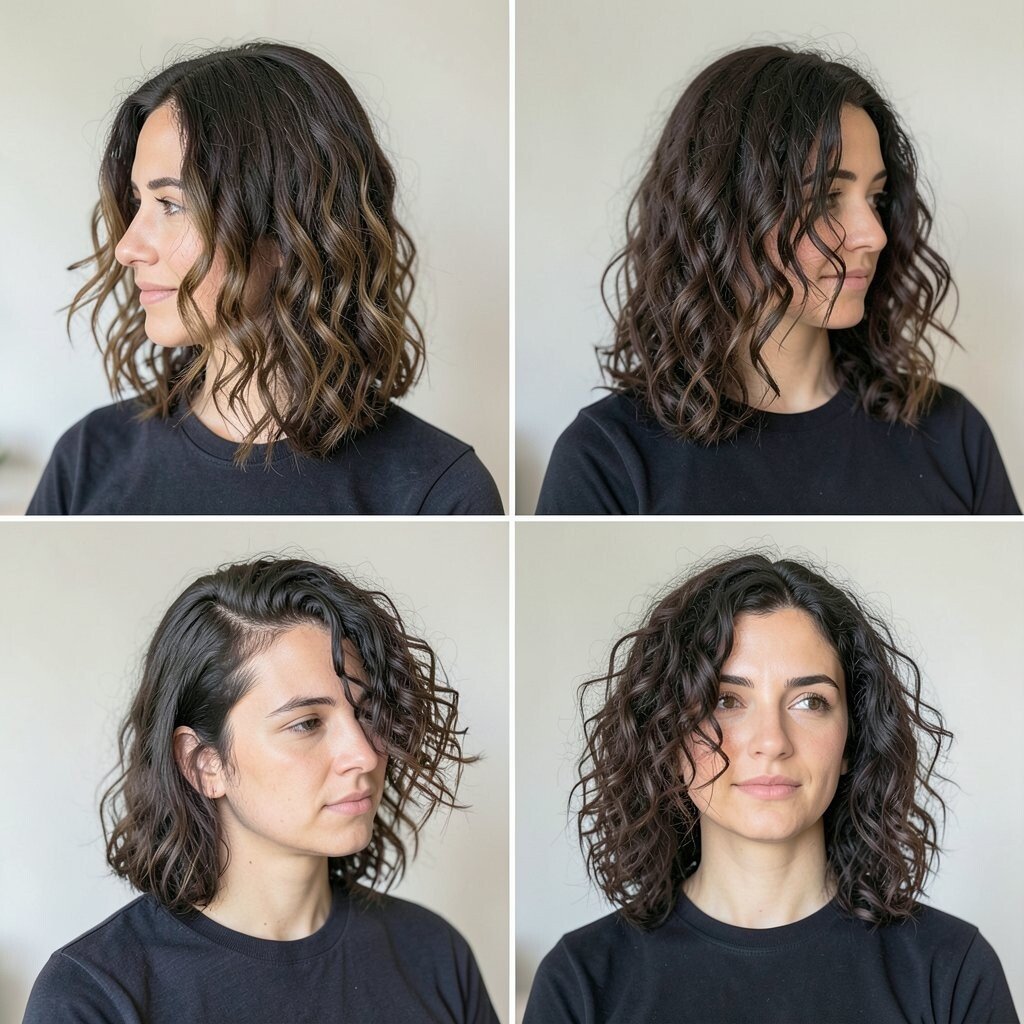
Adding curls to the length makes a low pony feel romantic and alive. The curls also help your pony look fuller, even if you have less hair.
Set your pony hair with a curling wand or hot rollers before gathering, then brush only lightly so the curl pattern stays. Gather low, secure gently, and let the curls fall over your shoulder or stay tucked. To personalize, choose bigger curls for a breezy look or tighter curls for a bouncier effect.
You’ll benefit from a style that looks fancy without requiring constant touching up. Since the curls hold shape, you don’t need heavy gel or repeated heat later in the day. Consider using a curl cream first to reduce frizz and keep the ends from drying out.
This is a current favorite for people who want that soft, glossy curl vibe that looks great in natural lighting. If you’re watching costs, you can use a single styling product like leave-in conditioner to boost curl definition.
8. Twisted Low Pony With a Knot at the Nape

This style feels artsy and polished because it uses twists to build shape. The knot at the nape creates a focal point that looks detailed but still practical.
Start by sectioning hair into two parts and twisting each side toward the center. When the twists meet at the nape, cross them over and secure with a pin or elastic. Smooth any flyaways and tuck the ends under so they stay hidden.
Its uniqueness comes from that knotted gathering point, which gives a “crafted” look. It’s great for workdays because it keeps your hair off your neck without feeling tight. For personalization, make the twists chunkier for volume or more delicate for a refined finish.
Cost considerations are simple here since you only need hair pins and a light hold product if desired. If your hair is slippery, use a small amount of mousse before twisting to improve grip. You’ll get a look that feels like effort even when it’s quick to do.
9. Low Pony With a Side-Swept Volume Start

Side volume makes your low pony look styled from the moment it comes into view. Instead of a flat base, you get a lifted, sweeping start near your part.
Create a side part and smooth the hair back while lifting the roots with a blow-dry or a quick brush. Gather at the nape slightly off-center and secure. Then gently pull up a few strands near the crown to add softness and dimension.
This hairstyle is helpful if you want a flattering silhouette without using heavy rollers. It also gives a friendly, updated look that matches popular trends toward airy volume. For personalization, keep the pony centered for a classic feel or angle it more for a playful asymmetry.
To manage cost, use heat only at the roots and rely on a budget-friendly hairspray for hold. A tiny bit of sheen spray on the pony will make the whole look look fresh in photos.
10. Low Pony With a Chignon-Style Wrap
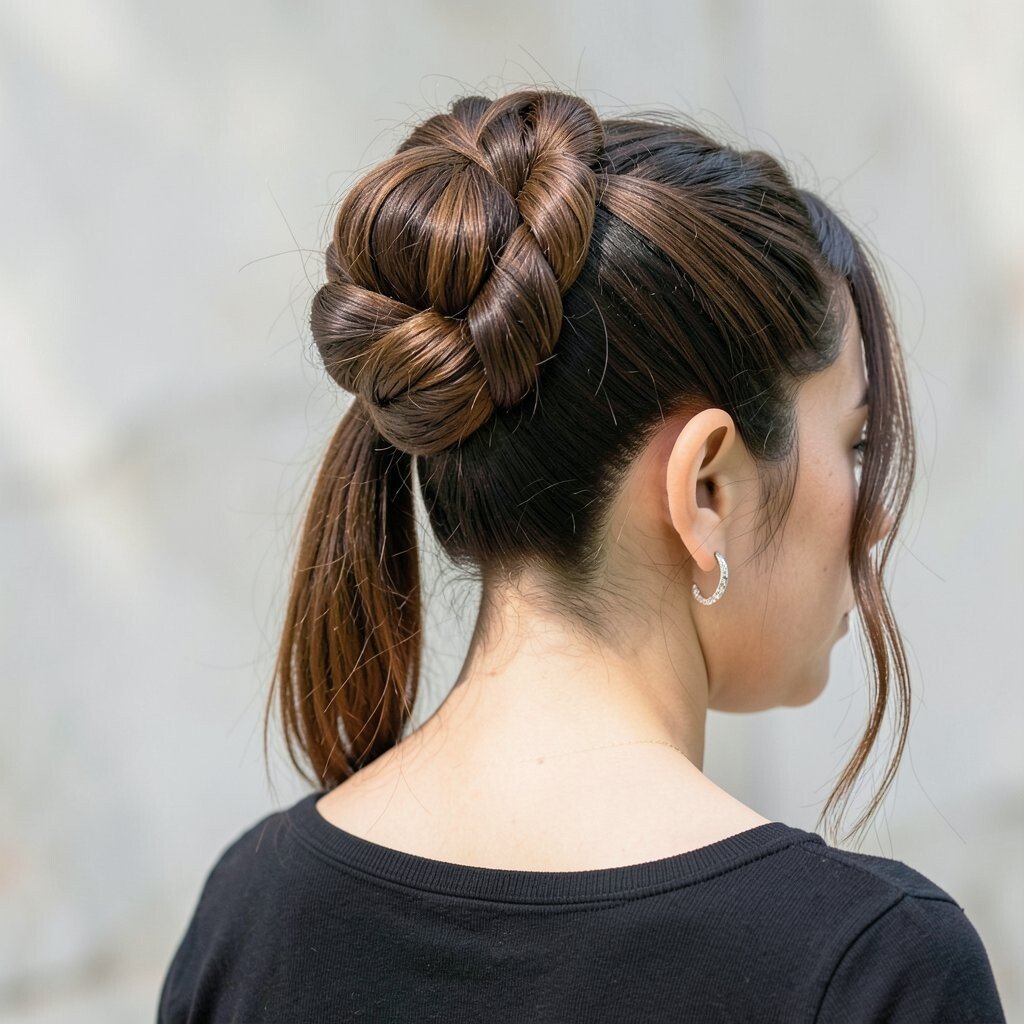
A chignon-style wrap gives you that elegant bun feeling, even though the pony is lower. You get a neat finish that works for dressier days or special evenings.
Secure hair at the nape, then twist the pony and wrap it around the base like a small bun. Use pins to keep it in place, and tuck loose ends underneath. For personalization, wrap it tighter for a sleek vibe or looser for a soft, relaxed look.
One benefit is that it keeps your hair secure, so it’s great for events where you don’t want to adjust all day. It’s also a good choice if you want a hairstyle that looks polished without being complicated. Add a thin scarf wrap or a decorative pin for a unique touch.
If you’re thinking about cost, you can get a high-end look with only pins and a light styling cream. A little hairspray around the wrap helps it stay smooth and neat.
11. Low Pony With Mini Braids Running Along the Hairline

Mini braids at the front make your pony look detailed while still staying low and easy. You get a sweet, textured path that makes the style feel special.
Create two to four tiny braids along the hairline, then gather the rest into a low pony. Secure and then smooth the pony so it blends with the braids. For personalization, make the braids wider for a bold look or keep them narrow for a delicate finish.
This is a unique option when you want a “styled” look but don’t want to braid your whole head. It’s also great for hiding uneven layers because the pony and braids guide the eye. Use a small amount of braid cream to keep the tiny sections looking neat.
Cost-wise, you can do this with just elastics and a little product you already have. If your hair is thick, smaller braids may take longer, but the result looks gorgeous. Add a shine mist to the pony to keep it looking healthy and photo-ready.
12. Low Pony With a Sleek Middle Part and Hidden Pins

A middle part plus a sleek pony creates a clean, classy shape. It’s the kind of hairstyle that looks sharp with blazers, sweaters, and simple tops.
Use a comb to make a crisp middle part, then brush hair straight back to the nape. Secure the pony and hide the pins under the pony wrap if you need extra hold. To personalize, keep the pony tight for a polished vibe or let it slightly loosen for a softer finish.
You’ll benefit from the clean structure, since it frames your face evenly and keeps hair off your neck. It’s also helpful if your hair tends to tangle, because the sleek routine keeps everything aligned. For a trend-forward look, add a slight wave at the ends for contrast while keeping the base smooth.
13. Low Pony With a Ladder Braid Accent

A ladder braid accent is a fun way to add interest without doing a full braid. You get step-like segments that look intricate but can be managed with the right rhythm.
Start with a low pony base, then take a small section from the front and braid it using a ladder pattern. Secure the braid with a small elastic and tuck the end back into the pony. For personalization, choose how big the accent section is and whether it sits on top or near the side.
This hairstyle stands out because it gives you “wow” texture while keeping most of your hair simple. It’s also practical since the braid stays contained and won’t get in your face. Use a bit of styling gel on the accent section so it stays defined and neat through the day.
Cost considerations are minimal since the main tools are elastics and pins. If you want extra hold, finish with a light hairspray that won’t feel sticky. This kind of detail fits current trends toward playful, graphic hair styling.
14. Low Pony With a Scarf Wrapped Base

Wrapping a scarf around your low pony is an instant style upgrade. It makes the base look thicker and adds color without changing your hair routine much.
After you secure a low pony, tie a scarf around the elastic so the knot sits slightly to one side. Tuck the ends under or wrap them around for a neat finish. For personalization, try a satin scarf for a glossy look or a cotton scarf for a softer matte vibe.
This option is unique because the scarf can match your mood, from sporty to fancy. It also helps keep the pony secure if you use the scarf knot snugly. You’ll love it on windy days because it helps prevent flyaways from escaping.
Cost-wise, you may already own a scarf, which makes this idea budget-friendly. Choose a scarf pattern that ties into your outfit colors, and your hairstyle will look styled even when you keep everything else simple.
15. Low Pony With a Bubble Crown at the Back

This style adds volume where you want it, right at the back of the pony. The bubbles create a rounded shape that feels modern and playful.
Gather hair into a low pony, then add small elastics starting near the top of the pony and spacing them down the length. Gently pull each bubble outward to form a soft crown effect. If you want a more subtle look, only create two or three bubbles near the base.
It’s a great benefit if you want your hair to look thicker without using heavy extensions. The shape also helps the pony stand out on camera and in bright light. For personalization, use clear elastics for a hidden look or match elastics to your hair color for a seamless style.
16. Low Pony With a Ribbed Texture Using a Comb Method
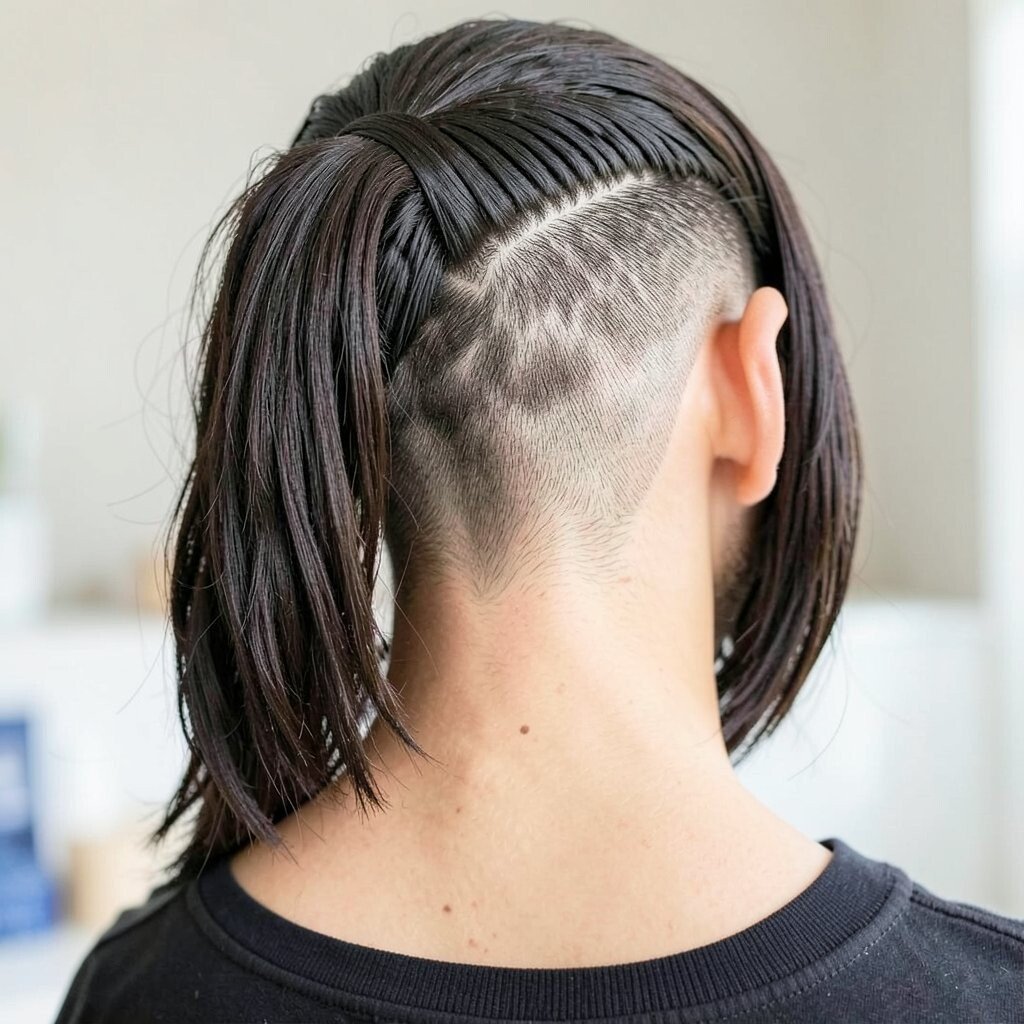
Ribbed texture gives your low pony a sleek, modern finish. You’ll notice the gentle lines that show up when hair is combed and set correctly.
Start with damp hair and apply a light mousse or styling cream. Use a comb to create small sections and gently press the comb through to form ridges, then let it set while your hair dries. After gathering into a low pony, smooth the base and let the textured ridges show in the pony length.
This idea is unique because it looks graphic without needing braids or curls. It’s also practical since the method can work with minimal heat and reduces constant styling. For personalization, make the ridges finer for a delicate effect or larger for a bold, fashion-forward look.
Cost considerations are easy since you may only need a basic comb, clips, and one styling product. A quick spritz of hairspray after you gather helps the texture stay visible all day. This fits trends that celebrate texture and clean patterning.
17. Low Pony With a Faux Bang Sweep

Faux bangs inside a low pony is a clever way to change your look without cutting anything. It frames your face and adds an instant “new hairstyle” feeling.
Take a front section and sweep it across the forehead, then pin it in place while you gather the rest into a low pony. Smooth the remaining hair and secure it, then adjust the faux bang shape so it looks natural. For personalization, keep the faux bang thin and wispy or thicker and more dramatic.
You’ll benefit from extra face-framing even if your hair is growing out from a previous cut. It’s also great for styling on days when you want something fresh but you don’t want to use a lot of heat. Use a light texturizing spray on the faux bang section so it bends and holds its shape.
18. Low Pony With a Ladder-Loop Half Twist Behind the Elastic
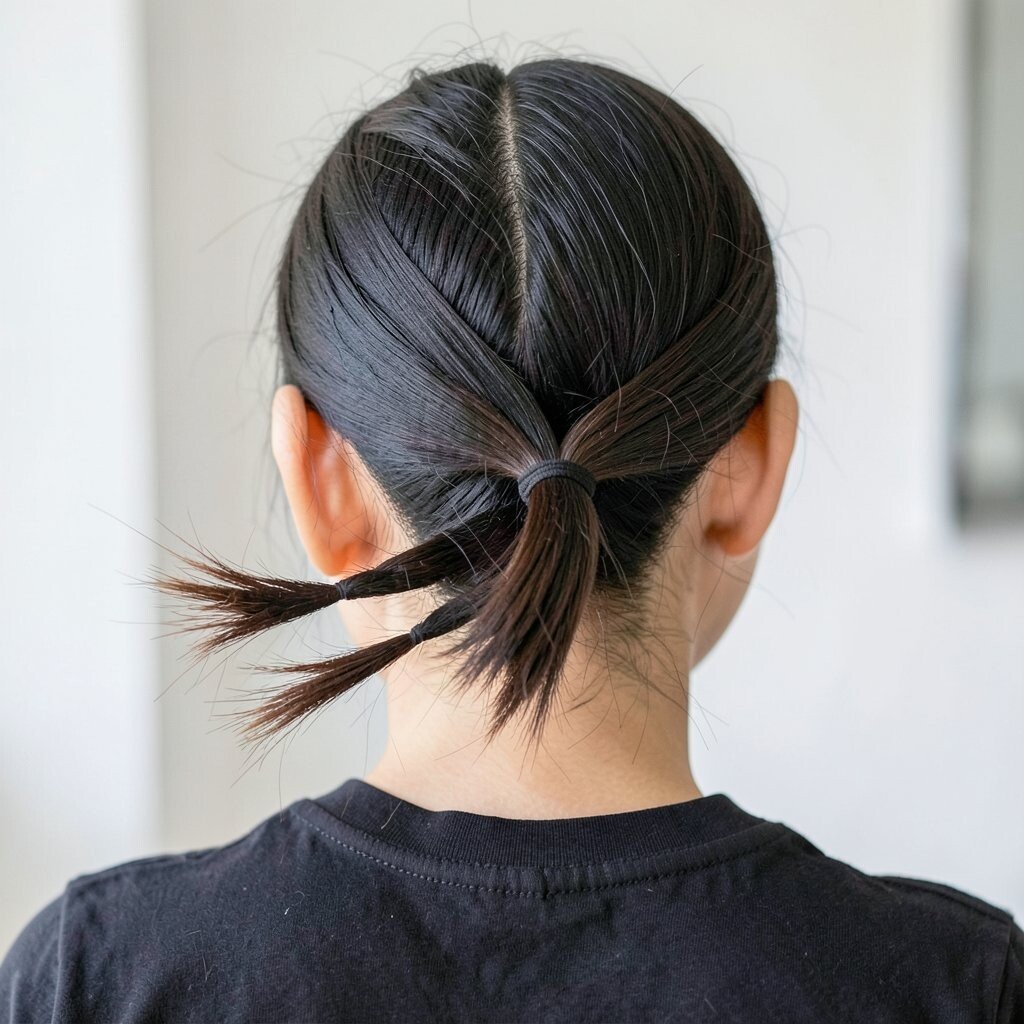
This low pony uses a hidden twist loop to create a neat, built-in detail. The result looks like you spent more time styling, even if you didn’t.
Secure hair at the nape, then take a small section from the pony and loop it around the elastic. Instead of tucking it straight down, twist it once and tuck, then pin to hold. For personalization, make the loop more prominent with thicker hair or keep it smaller for a subtle finish.
The uniqueness here is how the detail sits behind the elastic, so it’s visible only when you move. It’s practical because it helps keep the pony base snug, reducing slipping. If your hair is fine, a little grip product at the elastic area will make the loop hold better.
Cost considerations are simple since you only need pins and elastic support. Finish with a smoothing serum on the outer layer for a polished look that matches current trends toward sleek-but-detailed hair.
19. Low Pony With a Lace-Braid Side Drop
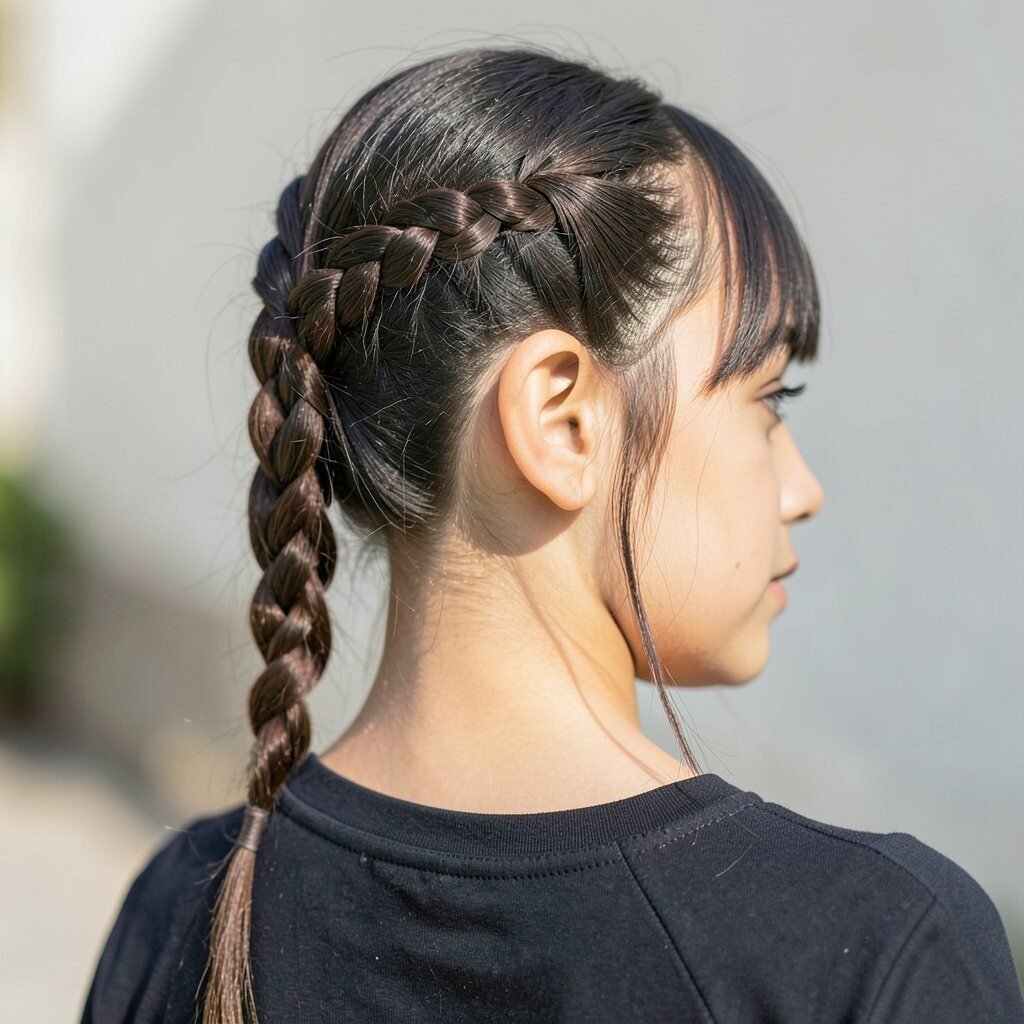
A lace-braid side drop adds a gentle, romantic texture while keeping the pony low. You get a soft braided strand that drapes across the shoulder for extra charm.
Start with a low pony, then take a small side section and braid it in a lace pattern. Secure the braid and let it hang from one side, then tuck the end back into the pony if you want a cleaner look. For personalization, choose the side that matches your part and adjust the drop length for your comfort.
This style is beneficial because it adds movement without making your whole hairstyle complicated. It also stands out for photos since the side braid creates a clear visual line. If you want a trendier finish, keep the braid slightly airy by loosening it gently after securing.
Cost-wise, it’s budget-friendly since braid elastics and pins are usually all you need. Use a light hairspray to keep the braid strands from frizzing in humid weather. The overall vibe feels current, feminine, and easy to wear.
20. Low Pony With a Velvet Bow and Micro Texture

A velvet bow at the base makes your low pony feel cozy and stylish. The soft texture contrast between smooth hair and a fabric bow looks extra flattering.
Add micro texture to the pony with a tiny amount of texturizing powder or dry shampoo on the roots and mid-lengths. Gather hair low, secure, and then attach a velvet bow right at the elastic. For personalization, choose a bow color that either matches your outfit or adds a bold contrast you love.
This hairstyle is unique because the bow creates a focal point while the micro texture keeps everything from looking too flat. You’ll benefit from the way texture helps your pony stay lively and photogenic. Cost considerations are friendly since velvet bows are often available in packs or seasonal sets.
To keep it comfortable, choose a smaller bow for thick hair so it doesn’t feel heavy. A quick mist of hairspray on the pony helps control flyaways without ruining the soft finish. This look fits current trends toward tactile details and warm, stylish accessories.