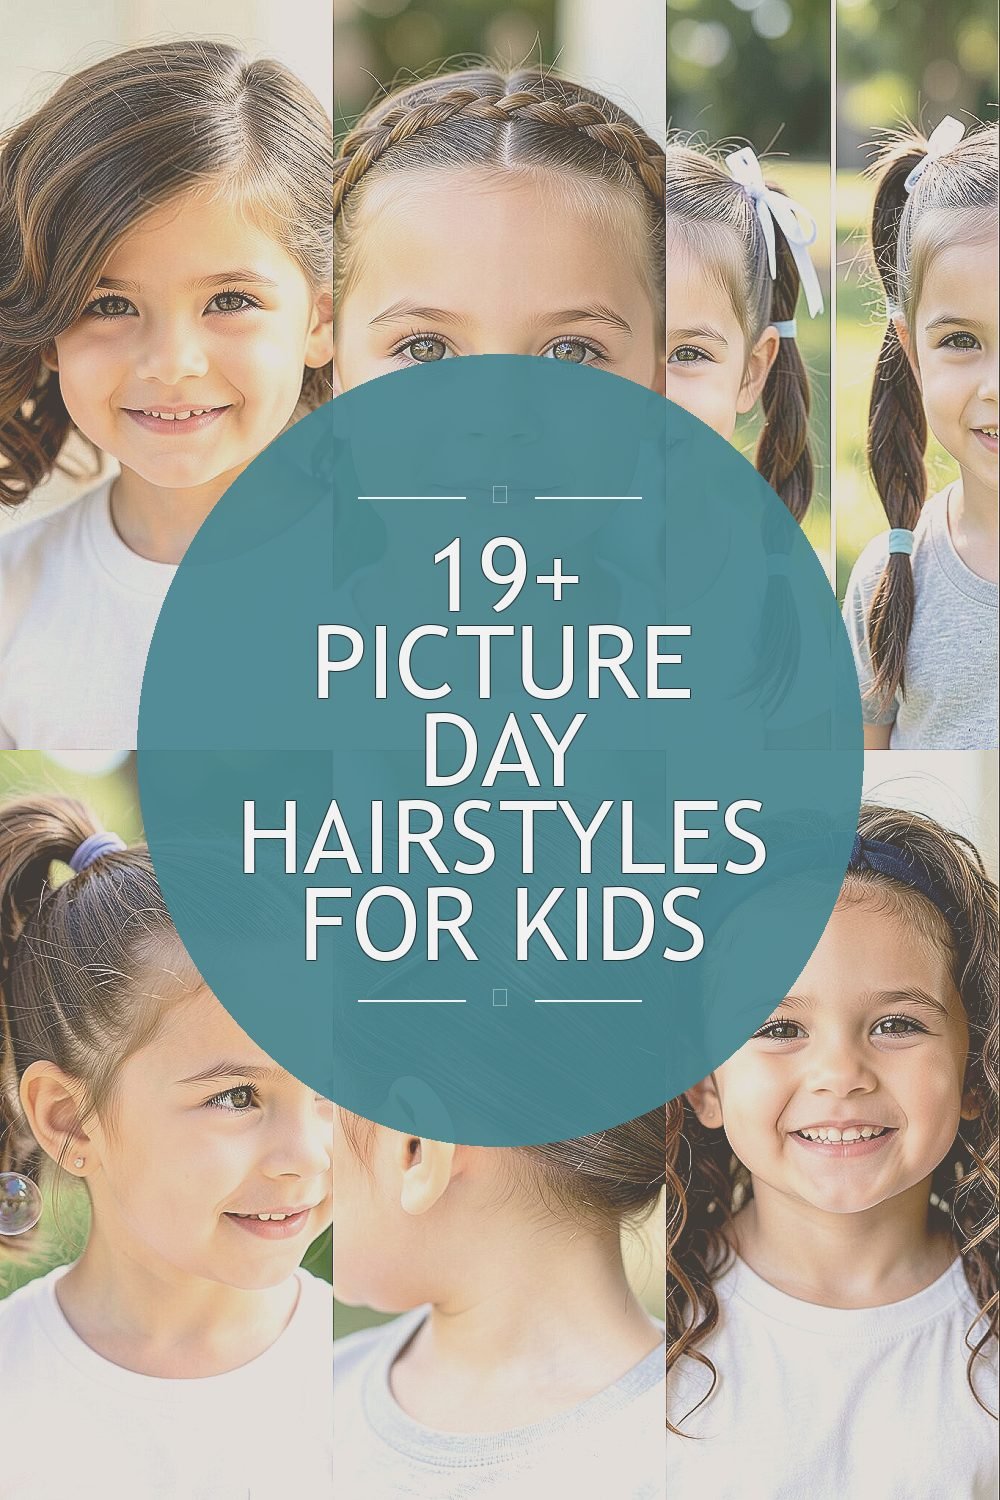
The camera day jitters are real, but great hair can make everything feel calmer. These kid-friendly styles are made for comfort, cute photos, and easy mornings.
Pick what fits your child’s hair type and personality, then tailor it with tiny tweaks. Each idea below includes practical details so you can style with confidence, not stress.
1. Classic Side-Part With a Soft Curl
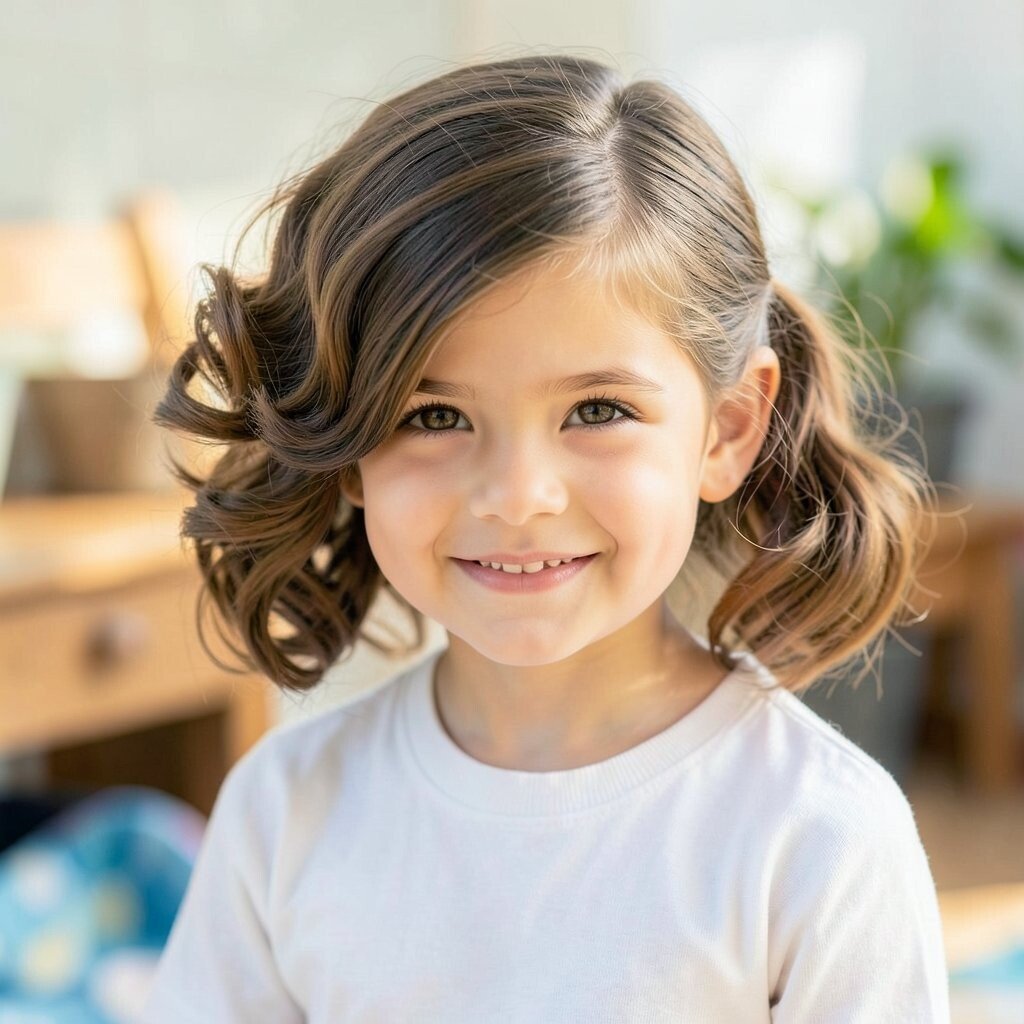
Start with a clean side part and a gentle curl at the ends, so the shape frames the face. In photos, the shine and direction of the curl look polished without being stiff.
To keep it comfy, use a lightweight styling cream and comb the part carefully before adding the curl. For extra hold, tuck the very front hair slightly behind one ear and smooth the top with a soft brush. This style feels special because it looks “done” while still letting your child move freely.
2. Braided Crown Headband
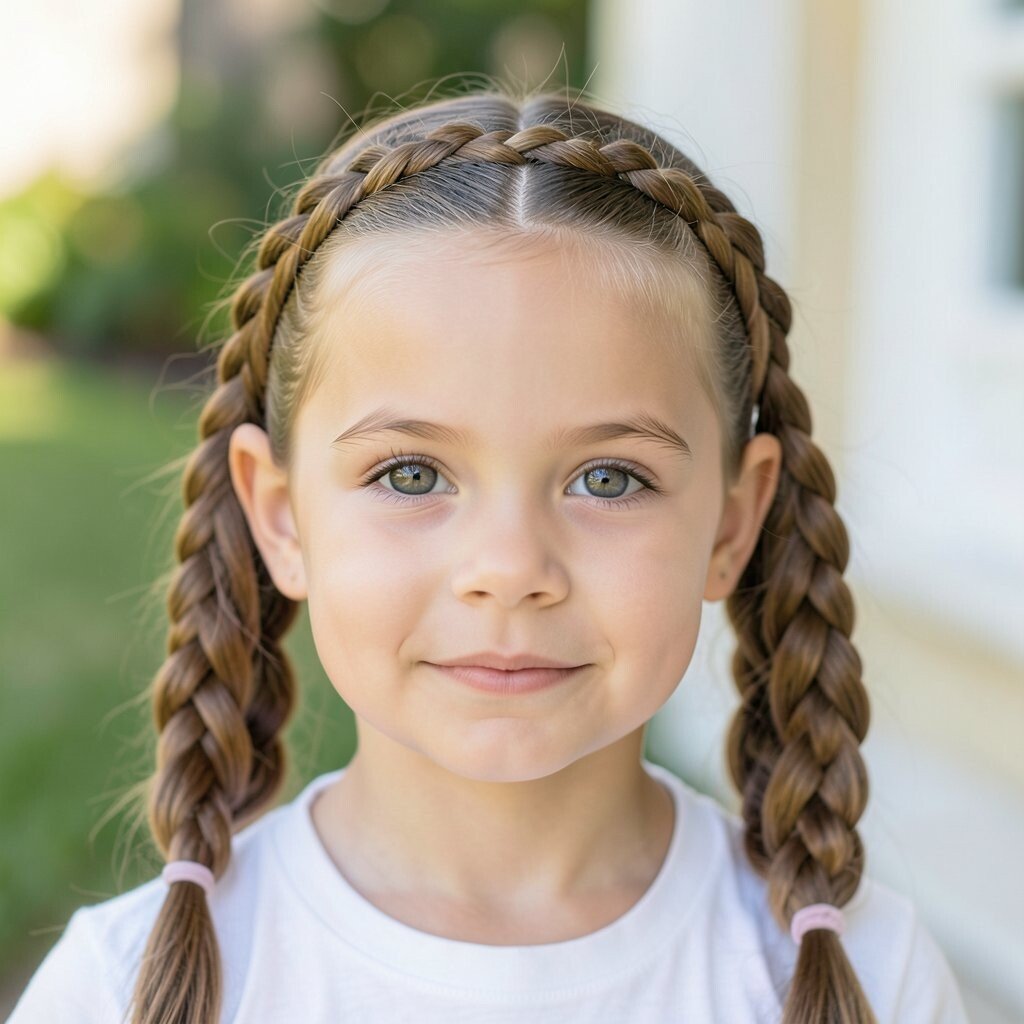
This style looks like a tiny crown made from braids, with the braids resting across the forehead. The visual effect is sweet and regal, and it keeps hair out of the eyes.
Part the hair into two sections and create small braids near each ear, then bring them together at the back. Secure with a matching elastic, and gently loosen the braid loops for a fuller look. It’s unique in every photo, especially when the braid texture catches the light.
If your child has short hair, use mini braids only along the hairline and finish with a soft headband. For cost, you can rely on a few elastics and bobby pins you already have, with no expensive tools needed.
3. Half-Up Pigtails With Ribbon Ties
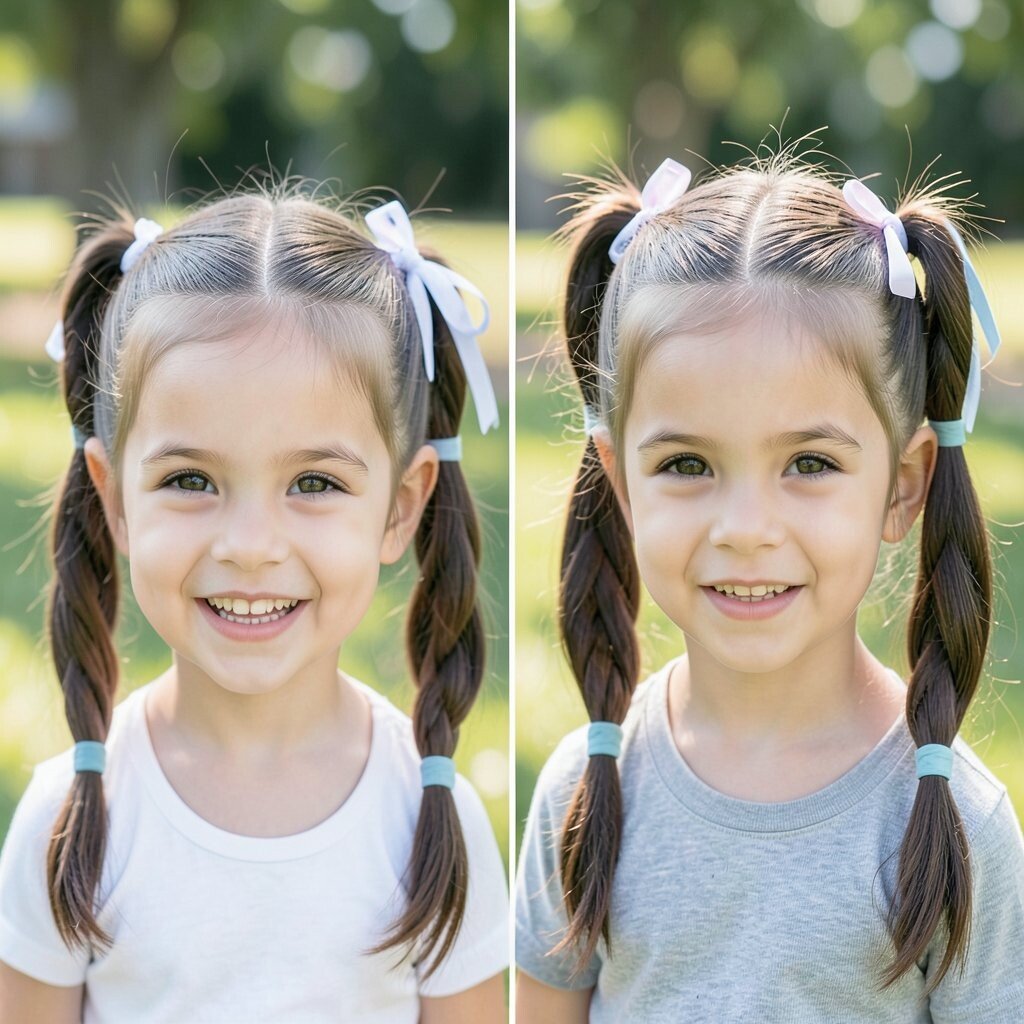
Half-up pigtails are bright, playful, and easy to spot in a school photo. The ribbons add charm and help the hairstyle feel like a celebration.
Gather the top half of the hair into two pigtails and secure them with elastic bands, then tie a ribbon around each tie. Leave the bottom hair loose for movement, and lightly brush it to avoid flyaways. This option works especially well for kids who don’t love their whole head being pinned down.
Choose a ribbon color that matches the outfit, like navy, teal, or a cheerful pattern. For personalization, swap satin ribbon for a braided ribbon so the texture shows up clearly in pictures.
If your child’s hair tangles, apply a tiny amount of detangling spray before styling so it feels smoother all day.
4. Bubble Ponytail With Three Mini Bubbles
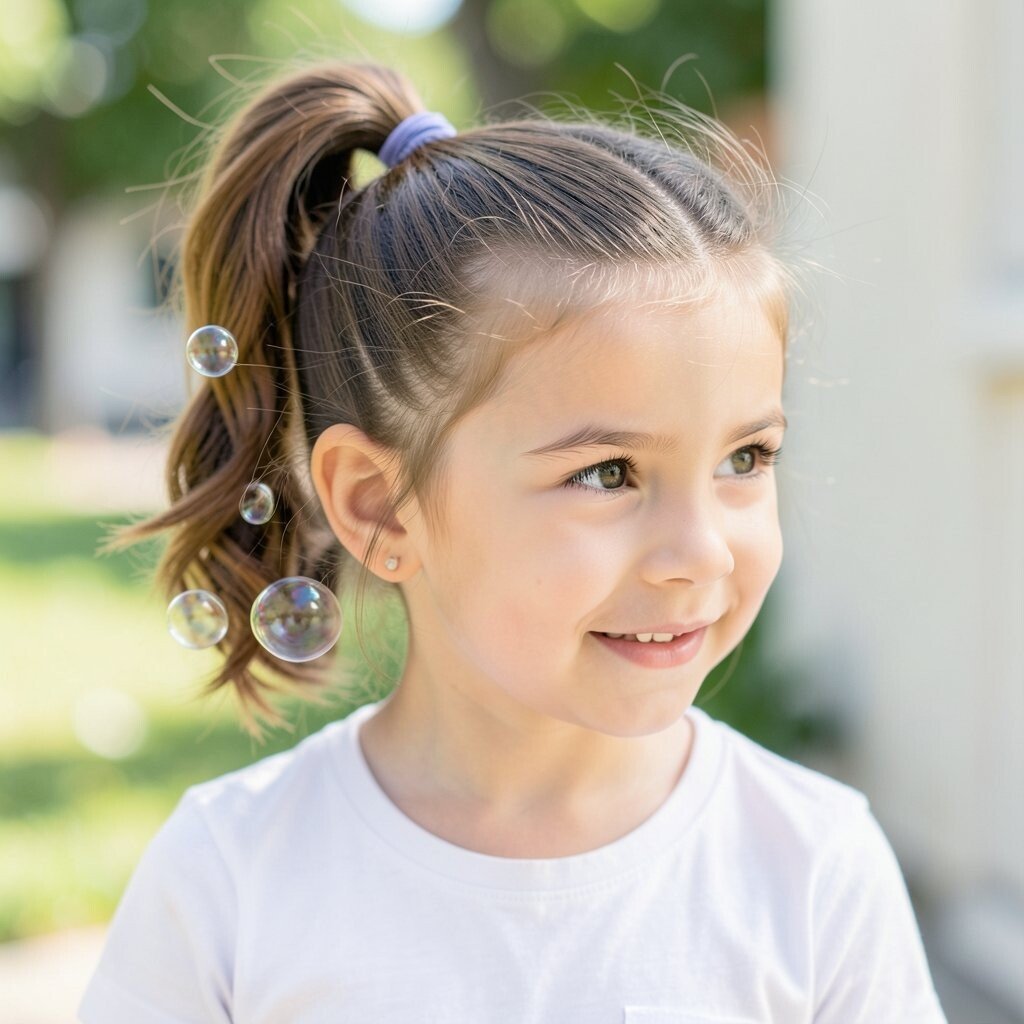
A bubble ponytail creates rounded “puffs” along the hair, giving a fun, bouncy look. In photos, the bubbles stand out like little highlights, especially against darker hair.
Start with a ponytail at the desired height, then secure tiny elastics evenly down the length to form bubble segments. Use your fingers to fluff each bubble so it looks full and intentional rather than flat. Finish with a light mist of hairspray or styling gel to keep everything neat through the morning.
5. Smooth Low Bun With a Side Clip
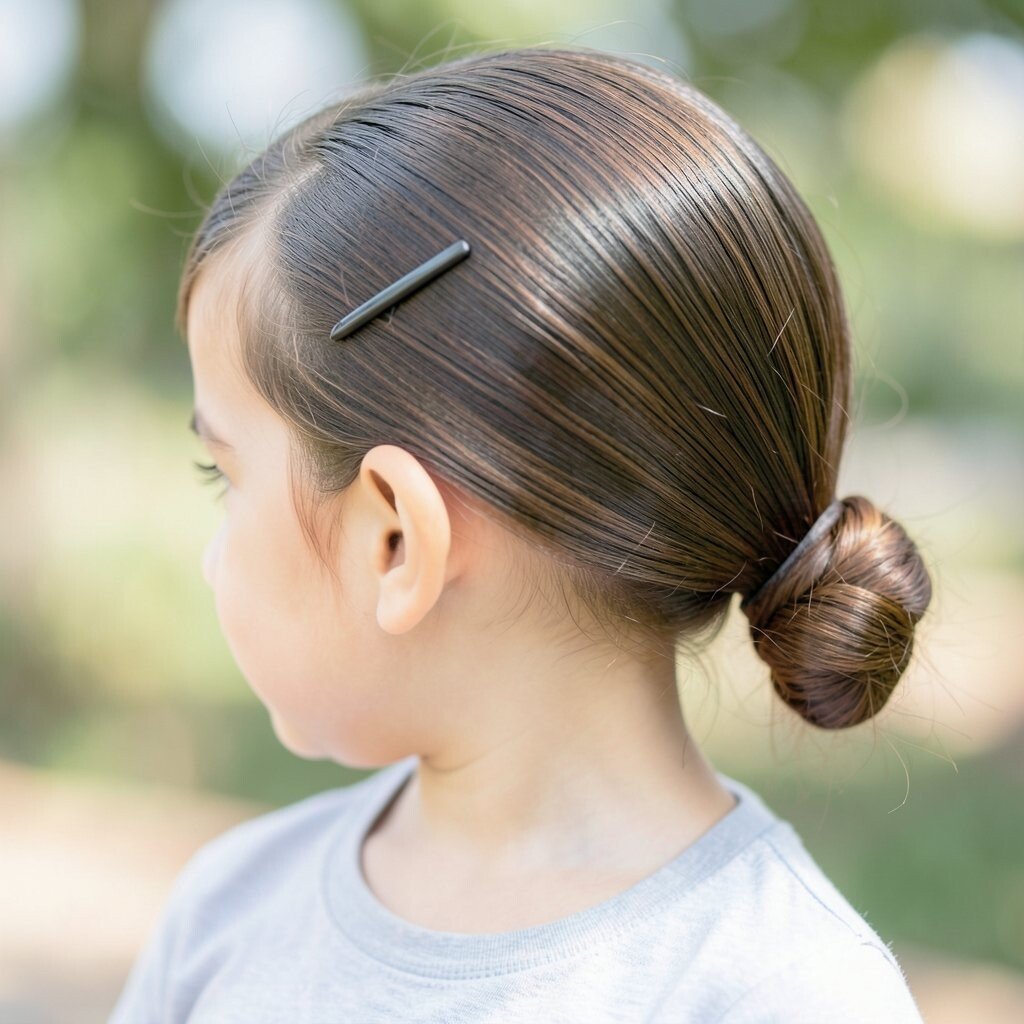
A smooth low bun feels classy and calm, like a neat bow for your hair. The side clip adds personality without extra work, and it photographs beautifully from every angle.
Gather hair into a low ponytail, twist it into a bun, and pin it in place. Then tuck a decorative clip near the side of the bun, letting part of the clip show for a clear focal point in pictures. Keep edges sleek with a small amount of gel or smoothing cream.
For cost, a simple claw clip or sparkly bobby-pin set is usually enough, and it can be reused for parties too. If your child has fine hair, add a thin bun filler sock to create fuller volume.
6. Messy Textured Waves With a Headband
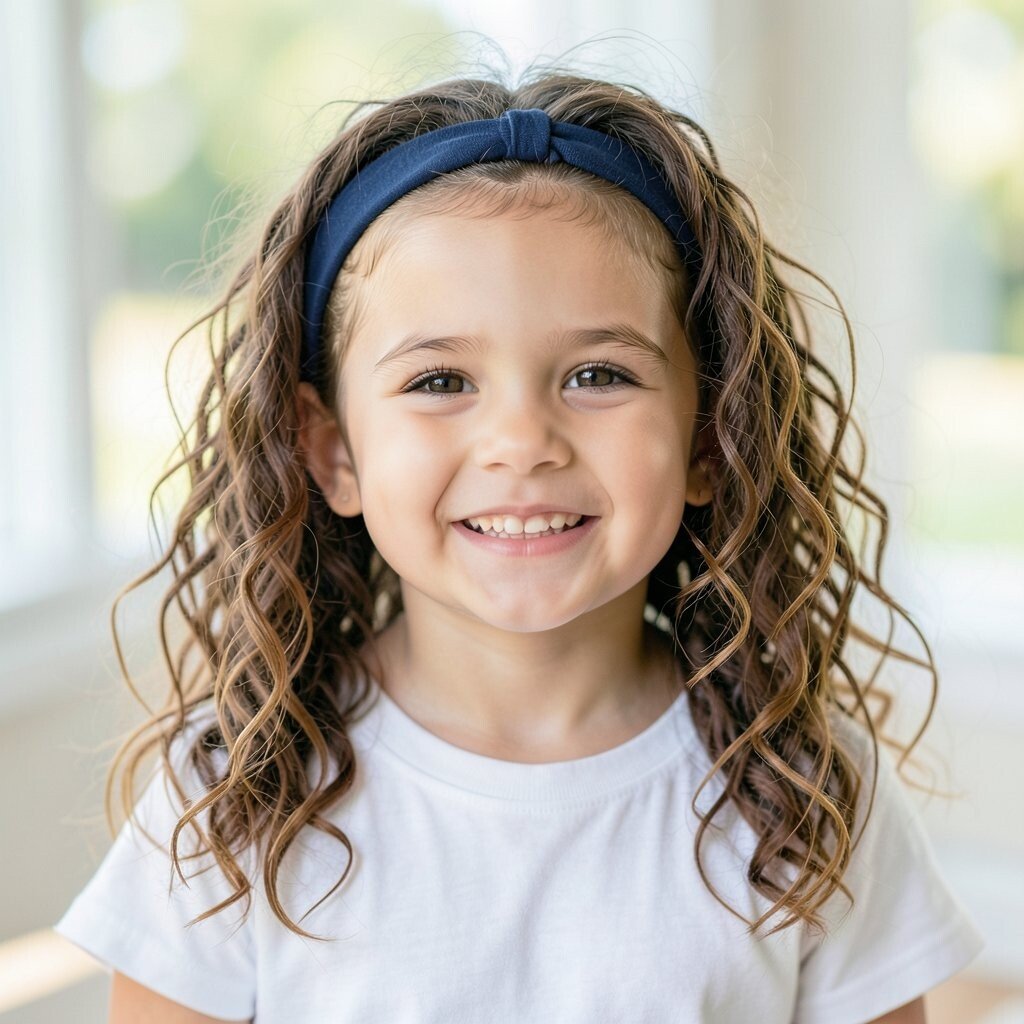
Not every picture needs a perfectly polished look, and messy waves can still look adorable. A cozy headband helps the style look intentional while keeping flyaways under control.
Spritz damp hair with a leave-in conditioner, then twist small sections and let them air-dry or blow-dry gently. Once dry, loosen the twists and use your hands to create soft waves. Add a stretchy headband so the waves frame the face in a flattering way.
This style is unique because the texture gives depth, which shows up nicely in daylight photos. It also costs little since you’re mostly using water, conditioner, and a headband you can wash and reuse.
For personalization, choose a headband with a theme color, like pastel flowers or a subtle glitter edge that matches the school outfit.
7. Two French Braids Ending in Low Puffs
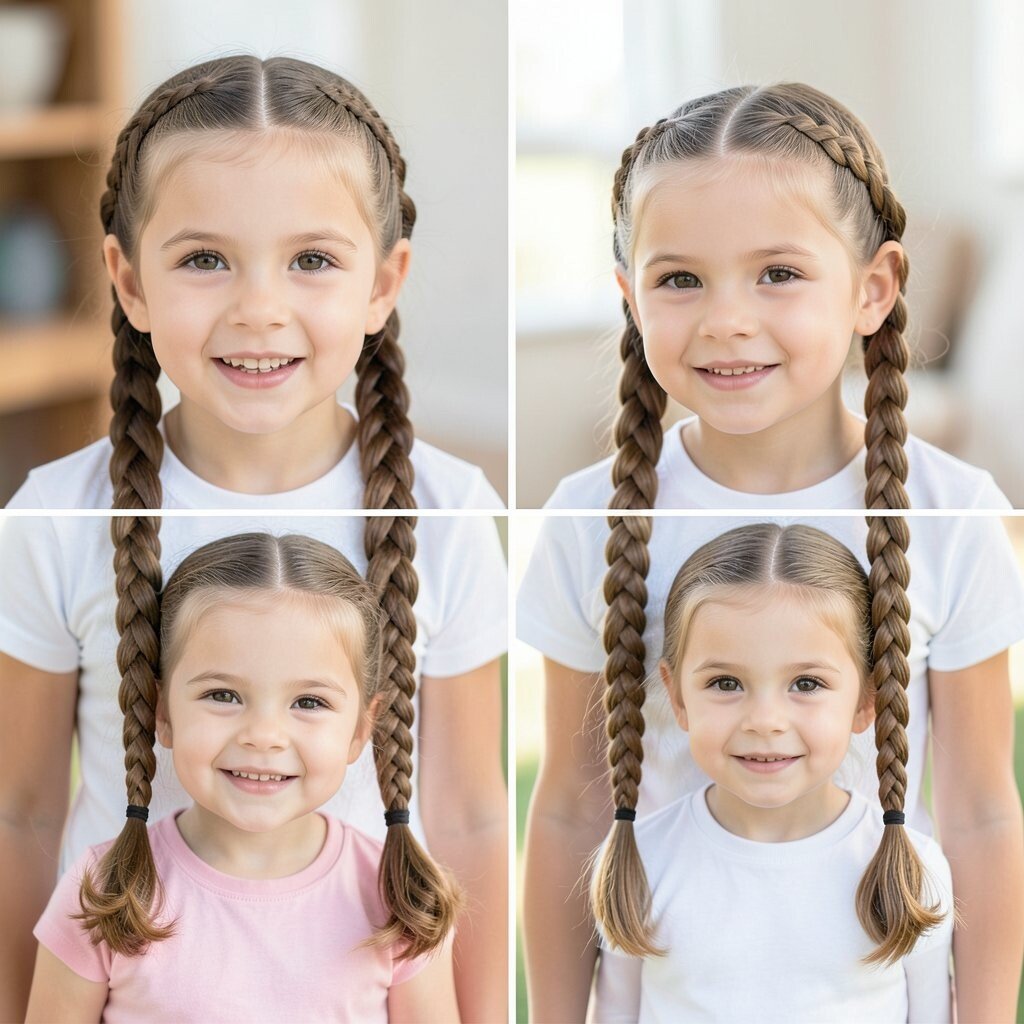
Two French braids look timeless, and the low puffs at the ends add a playful finish. The style keeps hair secure and helps prevent tangles during long school days.
Create French braids from the hairline down, then stop before the ends and secure each braid with an elastic. After that, gather the remaining hair into a small puff or mini bun and pin it. The visual is balanced, and it feels unique because the ends look extra cute in photos.
For practical comfort, use softer elastics to avoid tight pulling and choose a pin that sits flat. If your child’s hair is very thick, braid in slightly larger sections so the braids feel comfortable rather than bulky.
8. Top Knot With a Matching Bow
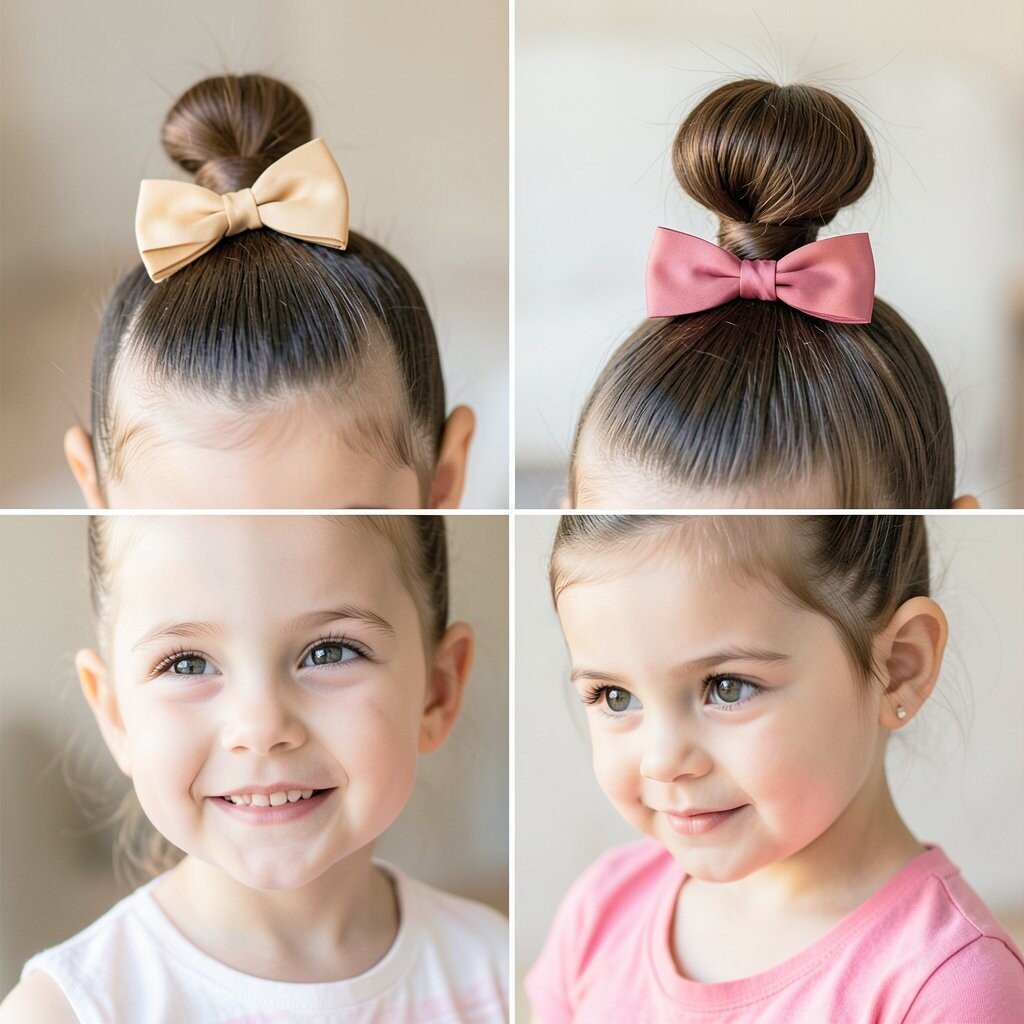
A top knot with a bow is quick, stylish, and perfect for kids who like their hair out of their face. From the front of the photo, the knot gives height while the bow adds a sweet finishing touch.
Brush hair into a high ponytail, twist it into a bun, and secure with pins or an elastic wrap. Tie a bow around the bun base, and smooth any bumps with a little hair gel on a soft brush. This hairstyle feels special because it looks like a “fashion” moment, not just a routine ponytail.
9. Twisted Side Braid Over One Shoulder
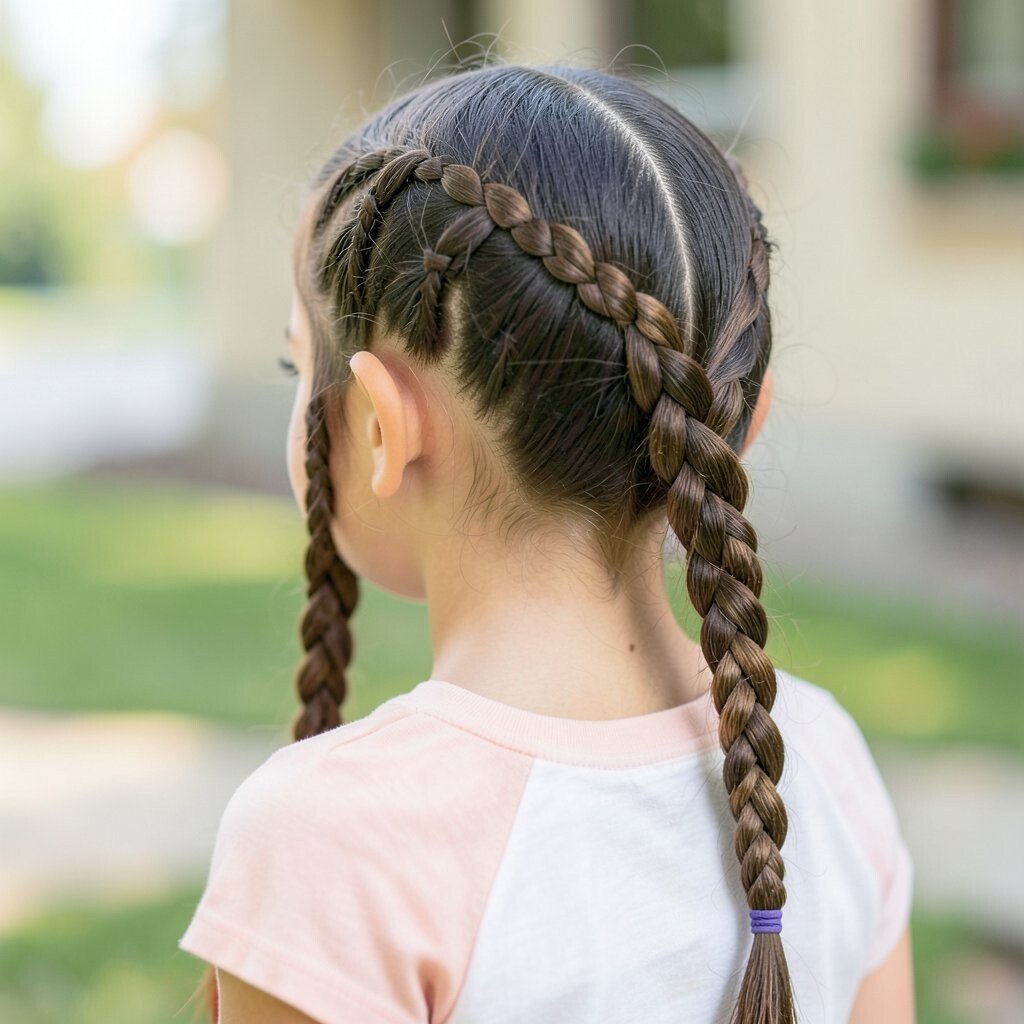
This style sweeps hair to one side, making the photo feel extra dynamic and pretty. The twisted braid looks fancy but stays manageable all morning.
Part hair to the side, then take two sections and twist them together as you braid downward. Every few inches, add a small piece from the side so the twist stays snug near the scalp. Secure the end with an elastic, then gently pull the braid to give it a fuller look.
For personalization, choose a small charm pin at the braid end or a tiny ribbon tied into the elastic. Keep cost low by using basic accessories and focusing on neat twisting rather than buying new tools.
If your child has shorter hair, secure the braid closer to the shoulder and tuck the ends with pins so they don’t pop out.
10. Curls in a Half-Up Clip With Back Comb
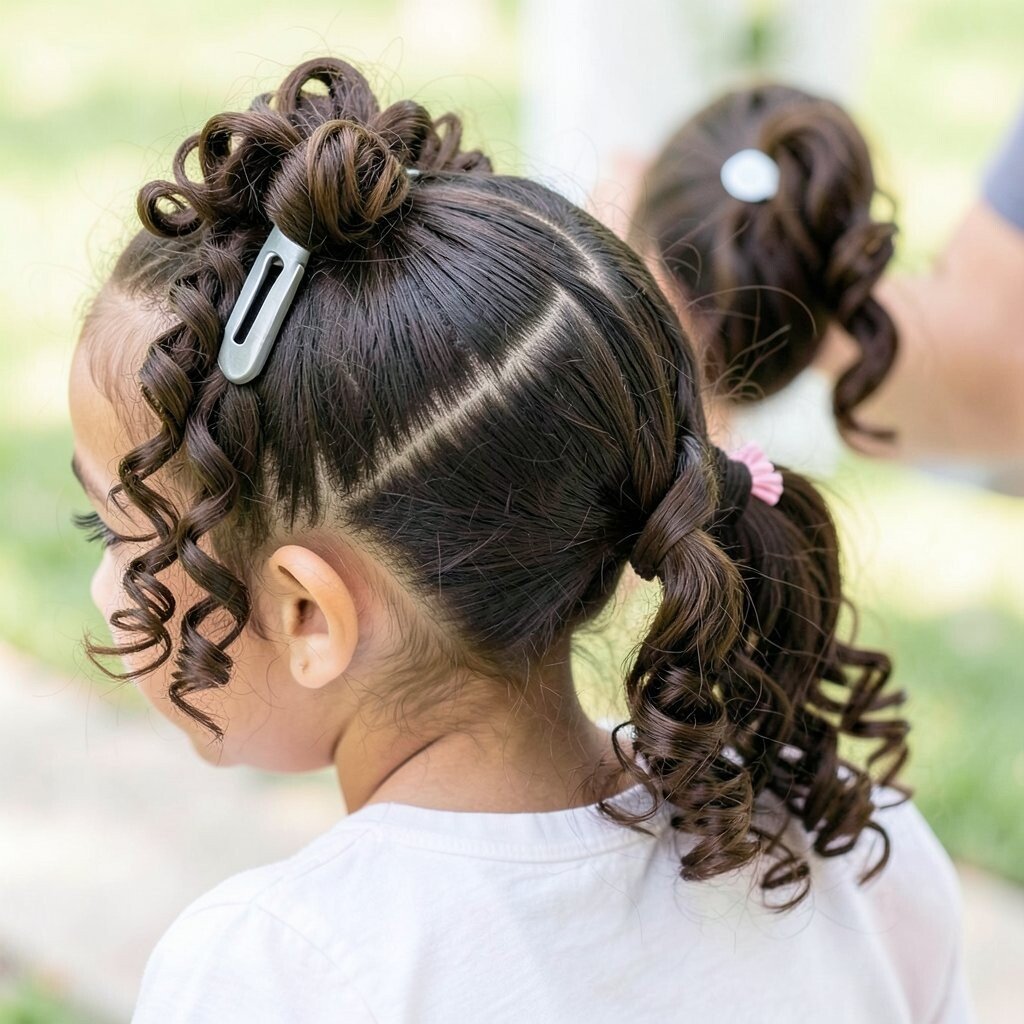
When curls are left to shine, pictures look lively and full of character. A half-up clip keeps the crown area tidy without squishing the curl pattern.
Use a curling cream or curl-friendly moisturizer, then shape curls by finger twisting for extra definition. Clip the top half with a decorative clip, and gently back comb just a little at the roots for volume. This makes the style look “camera ready” while keeping curls bouncy.
For practical results, avoid heavy hairspray so the curls stay soft and touchable. If you’re styling on a dry morning, mist hair lightly with water so curls can reset and clump nicely.
Choose a clip that matches the outfit color so the picture looks coordinated and intentional.
11. Micro Braids Into a Low Ponytail
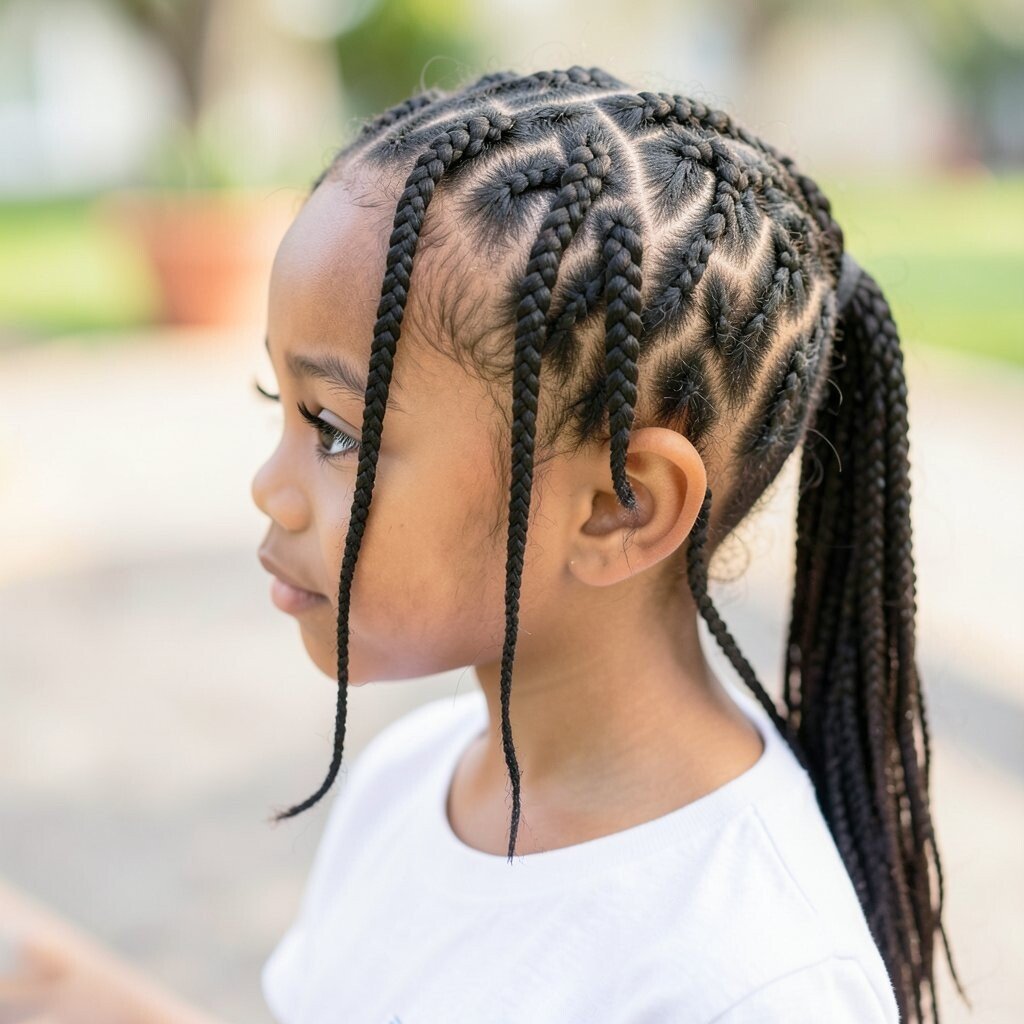
Micro braids look detailed and eye-catching, and they hold well during the school day. Even in a quick photo, the tiny sections make the hair look neat and uniquely styled.
Separate the hair into small sections, braid each one, then gather them into a low ponytail. Use an elastic that won’t snag the braid ends and a smooth brush to keep the outer layer clean. This style is especially great for kids who need hair to stay put for photos and beyond.
Because micro braids can take time, consider doing them only on the top layer and leaving the bottom hair in loose waves. For cost, basic elastics and a small pack of hair rings are usually enough, and you can reuse them for later styling.
12. Straight Hair With a Center-Slicked Finish
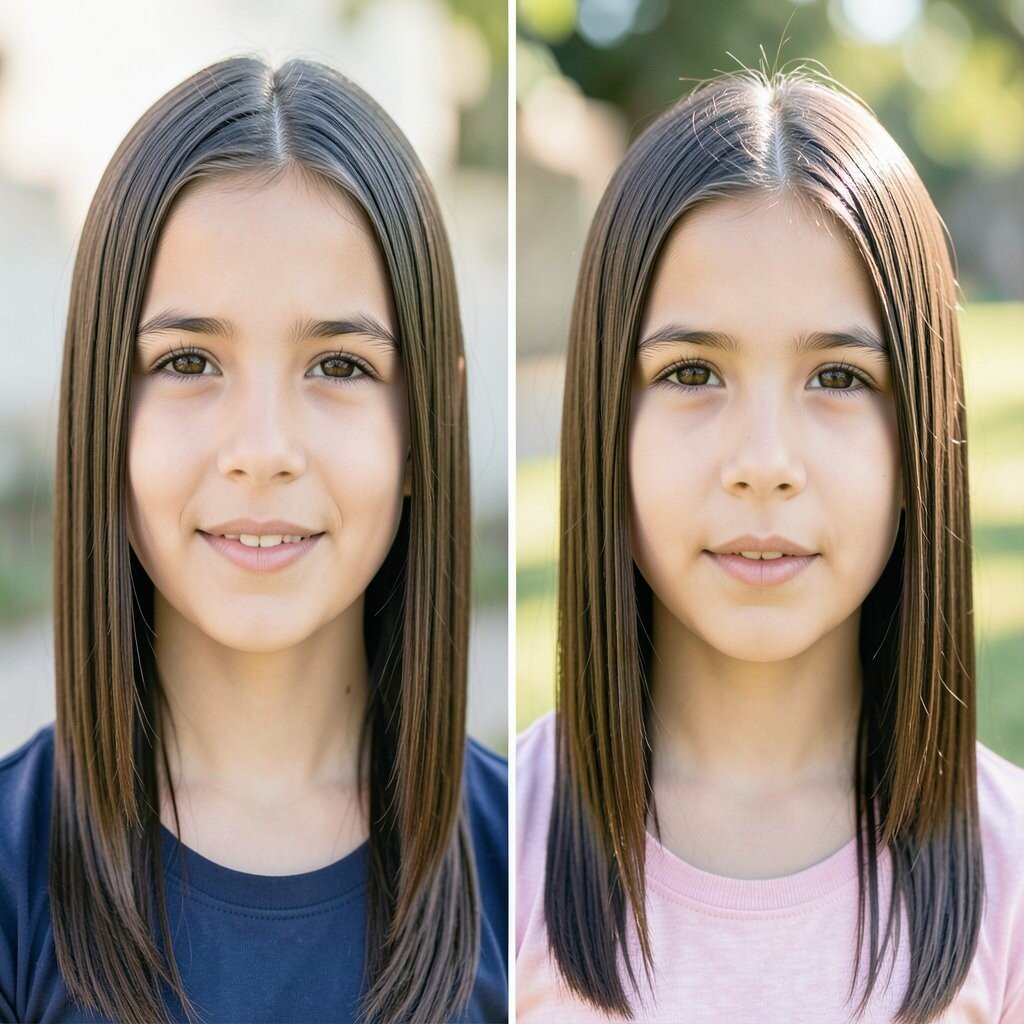
If your child has straight hair, a center-slicked style can look super sleek in photos. The even shine gives a clean look and makes the face stand out clearly.
Part the hair in the middle and apply a smoothing serum from roots to ends. Use a fine-tooth comb to guide the hair down, then lightly press any flyaways with a soft brush. This hairstyle feels unique because it looks modern while still being simple.
For personalization, add a thin decorative headband or a few sparkly bobby pins near the crown. Cost stays low since smoothing product and a comb are the main tools.
13. Side Ponytail With Braided Wrap
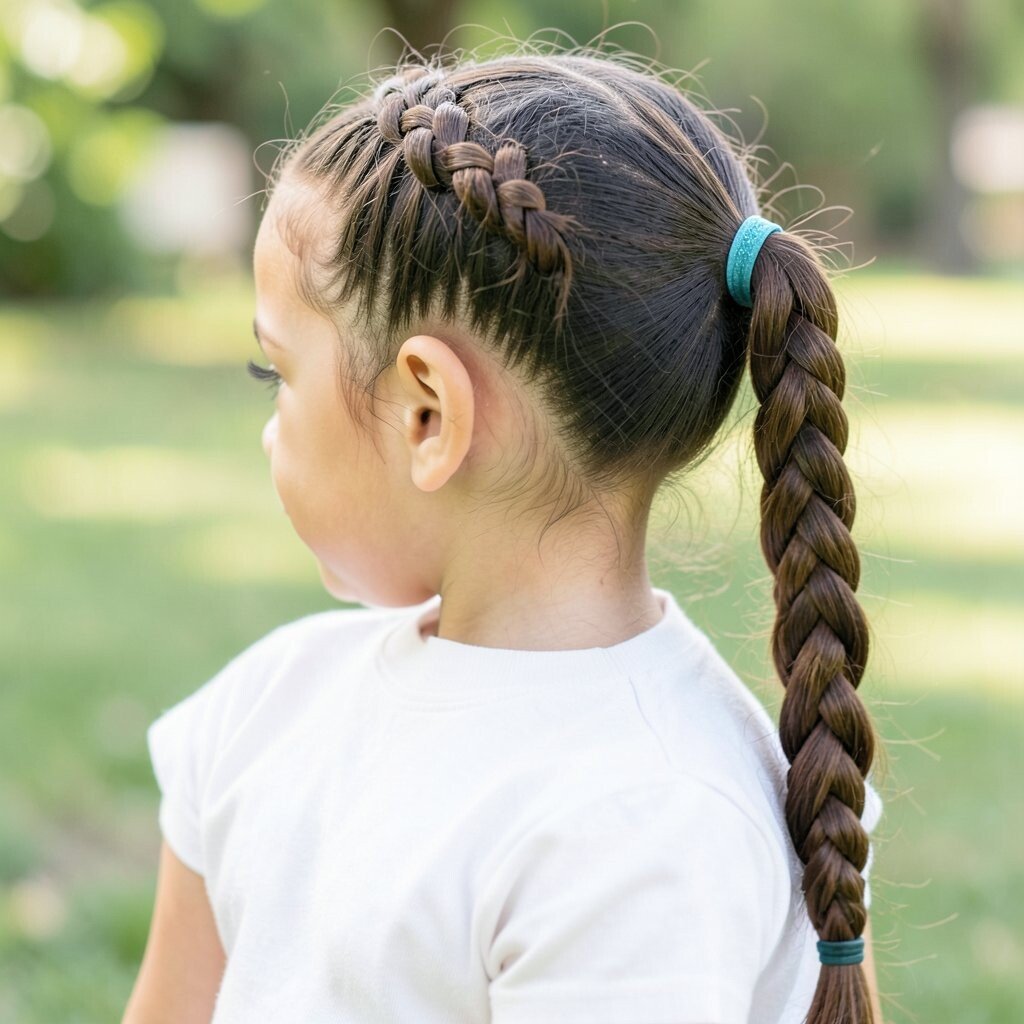
A side ponytail looks sporty and cute, and the braided wrap makes it feel more special. The wrap adds texture that stands out in photos, especially in bright light.
Pull hair into a side ponytail and secure with an elastic, then take a small strand from the ponytail base. Braid that strand and wrap it around the elastic to hide it, securing the end with a bobby pin. Keep the braid slightly loose so it looks soft rather than tight.
This option is great for active kids because it keeps hair controlled while still looking fun. If you want personalization, match the strand color with a ribbon or choose a small gold pin for a fancy touch.
When cost matters, use just elastics and a couple of pins, and you’ll still get a high-impact look.
14. Ribbon-Stuffed French Twist
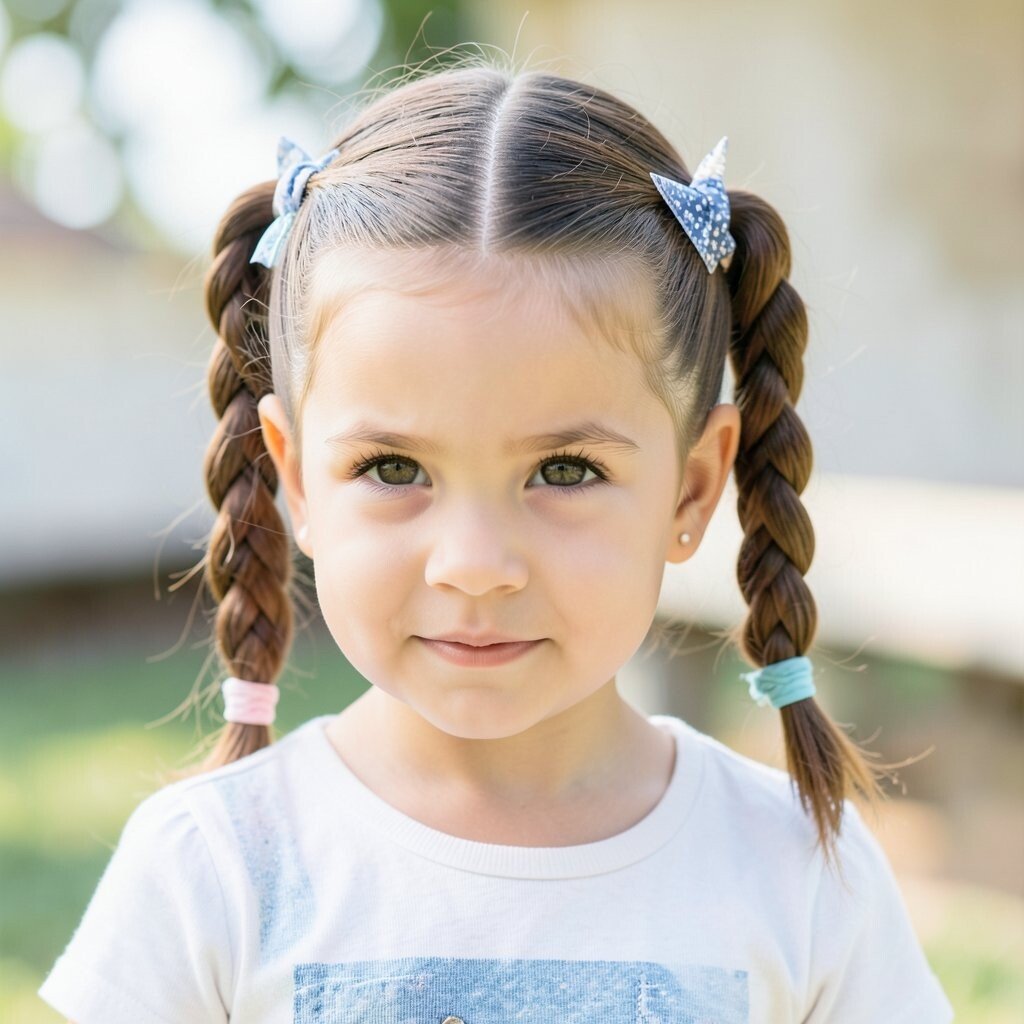
A French twist with ribbon adds a classic look with a playful pop. The ribbon creates a visible detail that photographs beautifully even from a distance.
Gather hair into a twist at the back of the head, pin it securely, and tuck the ribbon into the twist as you work. Let the ribbon ends peek out near the side so they frame the bun in the photo. Use a light hold spray so everything stays in place without stiffness.
For personalization, pick a ribbon that matches your child’s outfit accessories, like shoes or a hair accessory. This style can feel higher cost than it is, but most families can do it with a few bobby pins and one ribbon.
If your child doesn’t like pin pressure, use fewer pins and make the twist slightly looser so it feels gentle.
15. Half-Up Dutch Braids With Curtain Bang Feel
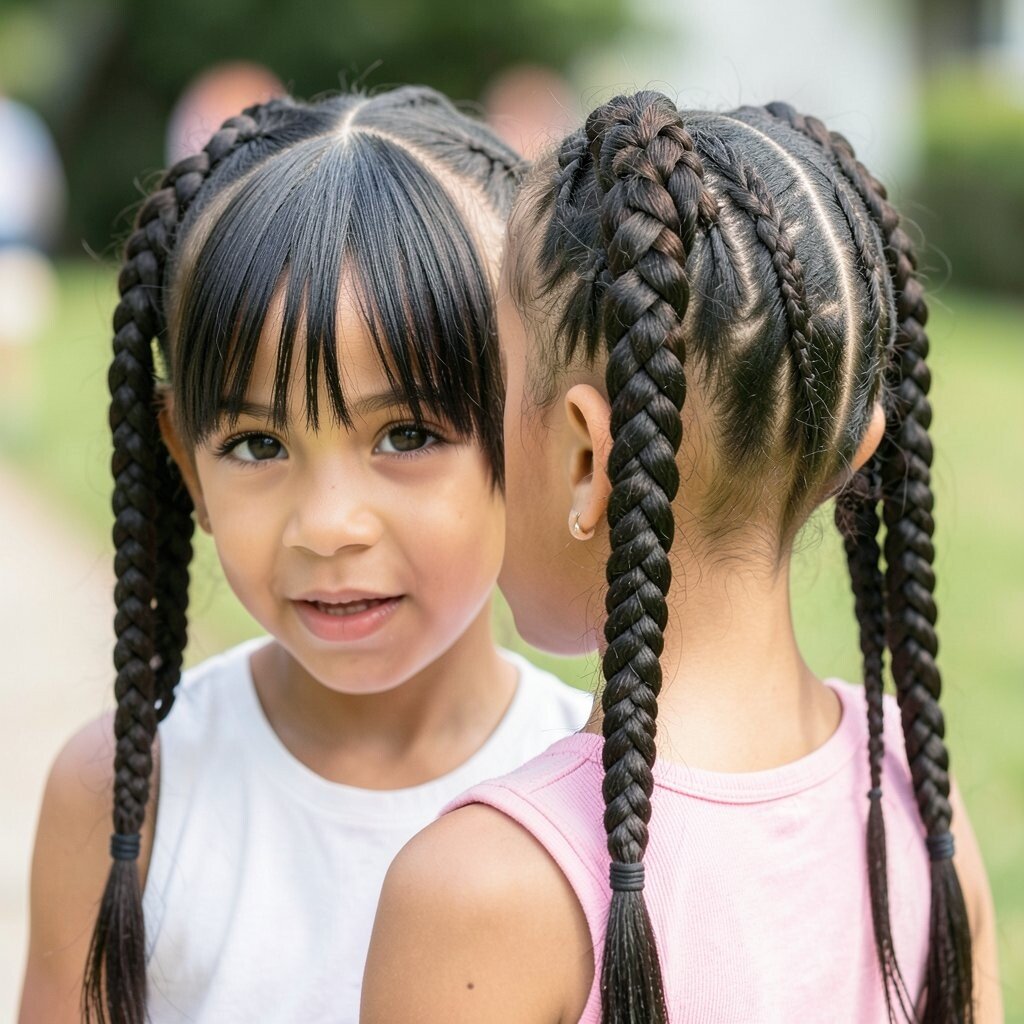
Half-up Dutch braids give a bold, sporty look while still leaving hair to fall naturally. The curtain-bang effect from the front pieces makes the photo feel styled without being heavy.
Take two sections from the front and braid them Dutch-style along the sides, moving toward the back. Stop at the top and secure, then let the remaining hair hang down. Smooth the front pieces so they fall like soft curtains around the face.
This hairstyle is unique because it mixes structured braids with soft, loose hair. For practical tips, braid with medium tension to avoid pulling and use a small amount of shine serum for neat front sections.
To keep costs down, choose a simple elastic set and skip fancy tools, focusing on clean braid lines.
16. Ponytail With a Knotted Elastic Accent
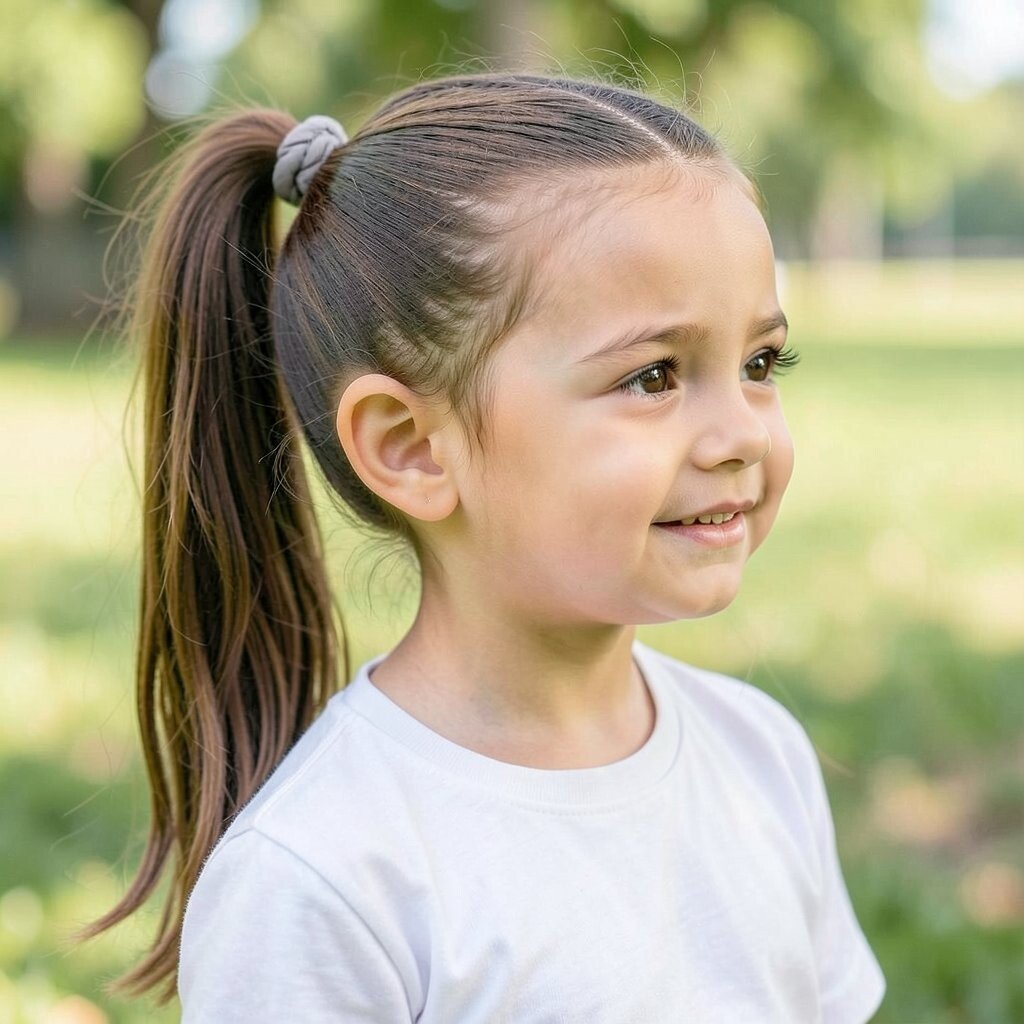
This ponytail idea uses a simple trick to make a basic style look designer. The knotted elastic accent adds dimension and keeps the ponytail from looking plain in photos.
Brush hair into a smooth ponytail and secure it with an elastic. Then take another small elastic or a thin ribbon and tie it in a knot around the ponytail base, wrapping once more for a secure hold. Fluff the top slightly for volume and smooth the sides for a tidy look.
Personalize it by using bright colors for younger kids or subtle metallic for older kids. Cost is usually minimal since elastics and ribbon are affordable and easy to find.
This style works well for straight hair and wavy hair, giving a consistent “neat” appearance in school lighting.
17. Side-Swept Bangs With Two Pin Curls
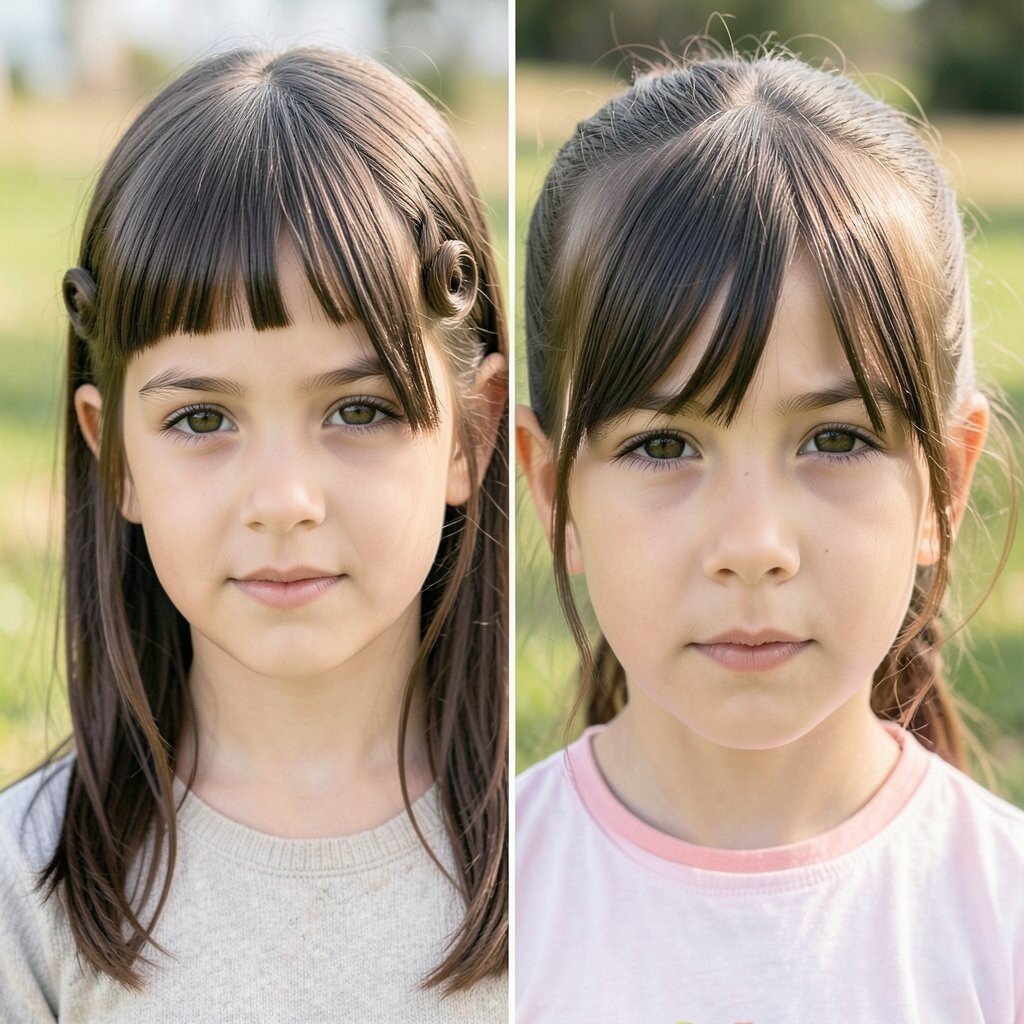
Pin curls are an old-school trick that can look adorable in picture day photos. Two tiny curls near the front add a vintage touch without requiring full curl training.
Apply a little mousse to damp hair, then twist two small front sections into pin curls near the part. Secure each curl with a bobby pin and let it set while you get ready. Once you release the pins, you’ll get gentle waves that look sweet and controlled.
This hairstyle is unique because it frames the face and makes the hair look like it has extra shape. For practicality, use pins that are easy to remove and avoid setting too tight so it stays comfortable.
Cost considerations are simple since mousse, bobby pins, and a small comb are usually all you need.
18. Curly Puff at the Crown With Shaped Sides
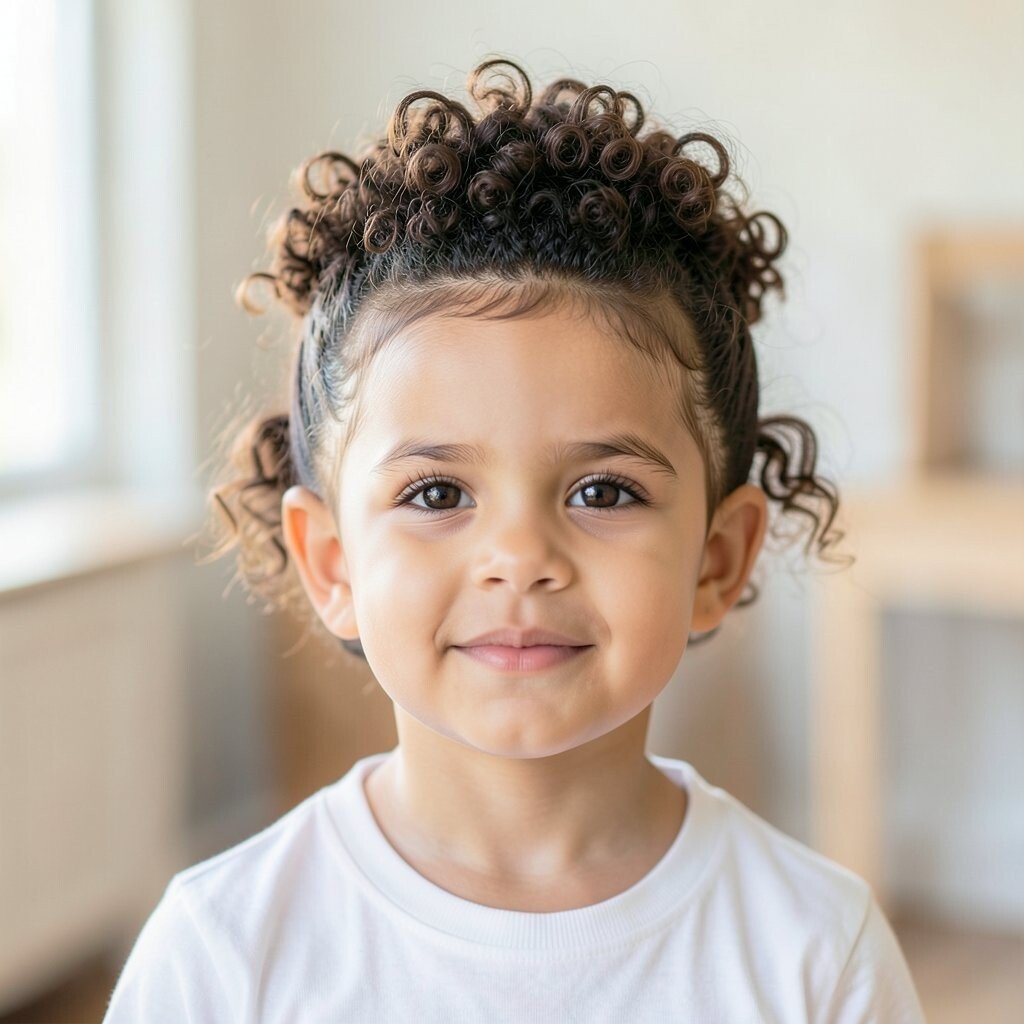
If your child has curly hair, a crown puff can look bold and photo-ready. The shaped sides help the puff look intentional instead of random.
Gather the curls at the crown and secure into a mini puff with an elastic. Shape the sides by smoothing them with curl cream and lightly pressing curls into place. This creates a clean outline that helps the photo look neat even if curls naturally bounce.
For personalization, add a headband across the top or a small scarf tied around the puff base. This is a trendy look right now because natural texture is celebrated, and it works for many hair types.
To keep costs manageable, focus on one good curl cream and use elastics you already own.
19. Straight Hair Ponytail With Textured Ends and a Charm Pin
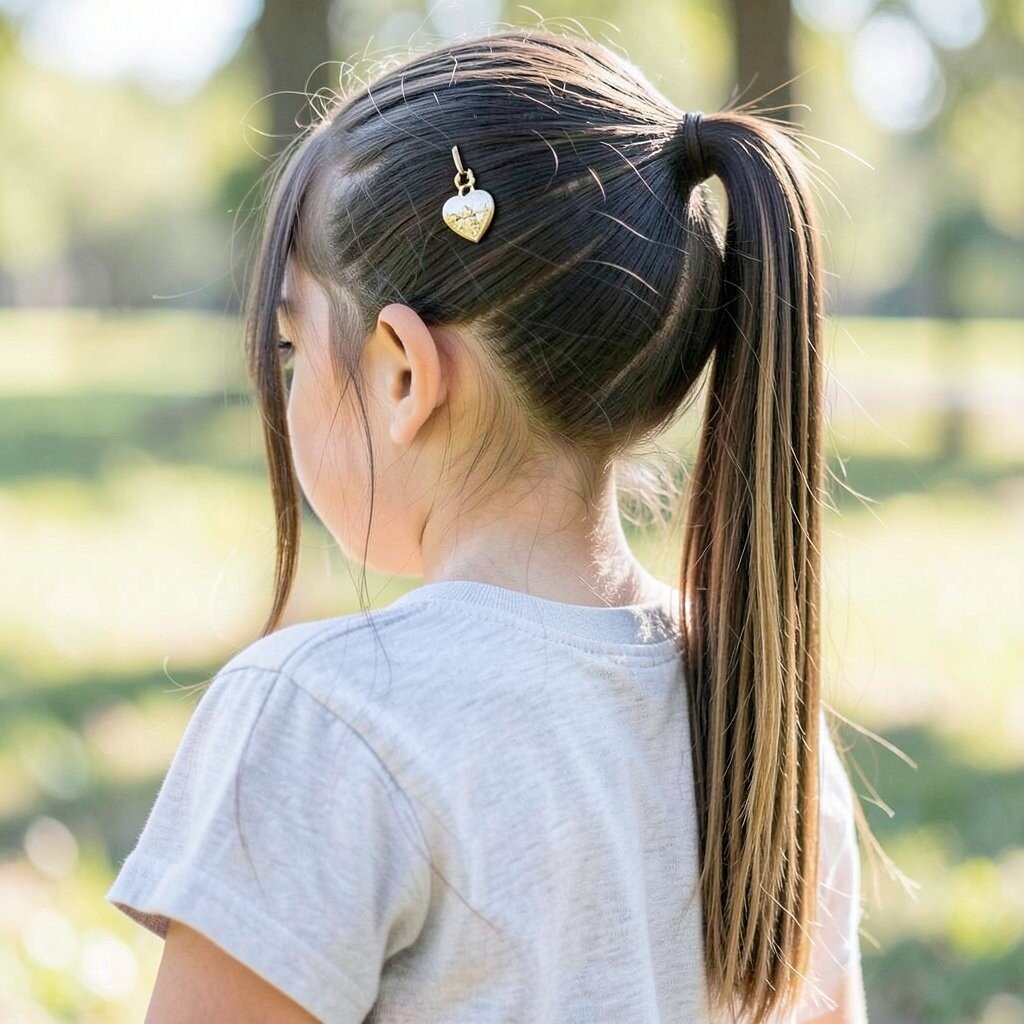
A ponytail with textured ends looks polished at the roots and playful at the tips. In photos, the ends catch light and give the hairstyle a lively, modern feel.
Brush hair into a ponytail and smooth the top for a clean start. For texture, run a small amount of styling gel through the ends and lightly twist them so they look airy rather than heavy. Add a charm pin near the ponytail base for a unique sparkle.
This style is great for kids who want their hair out of their face but still want it to feel fun. Keep cost low by choosing a single charm pin or a clip that can be reused for other events.
Personalize it with the charm theme, like stars, hearts, or a favorite animal, so the style feels like your child.
20. Loose Low Braid With a Flower Crown Clip
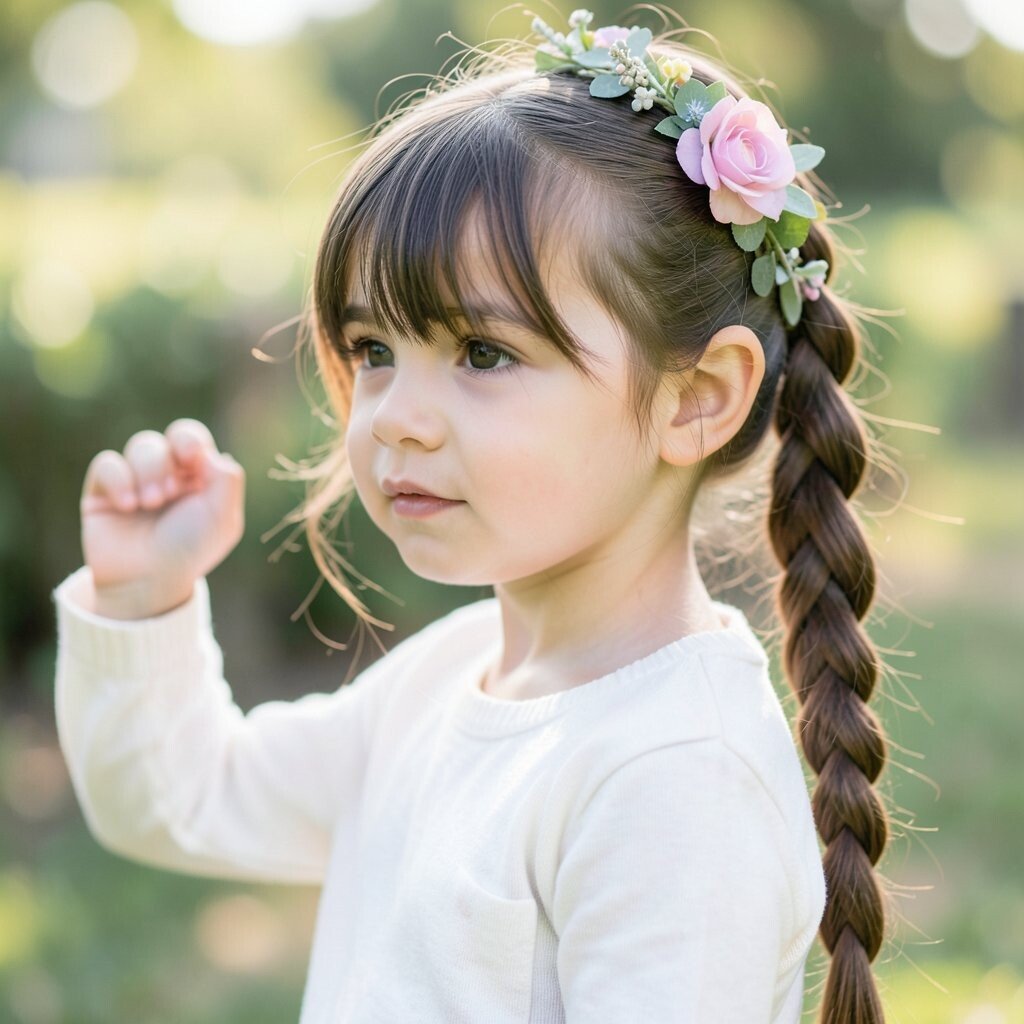
A loose low braid is relaxed, sweet, and extremely photo-friendly. The braid stays tidy, while the looseness gives a soft, romantic look.
Gather hair into a low ponytail, then braid and secure with an elastic. Gently pull the braid edges apart to make it look thicker and more natural in pictures. Add a flower crown clip on top or near the side so the hairstyle matches spring vibes and cute outfits.
This option feels unique because the looseness makes it look like a natural hairstyle rather than a tight one. For practical tips, detangle before braiding and use a light smoothing spray so the braid line looks clean.
Cost-wise, a flower clip is often the only “extra” item, and you can reuse it for birthdays, photos, and seasonal events.
If your child has very fine hair, add a small amount of volumizing mousse at the roots so the braid looks full and balanced.