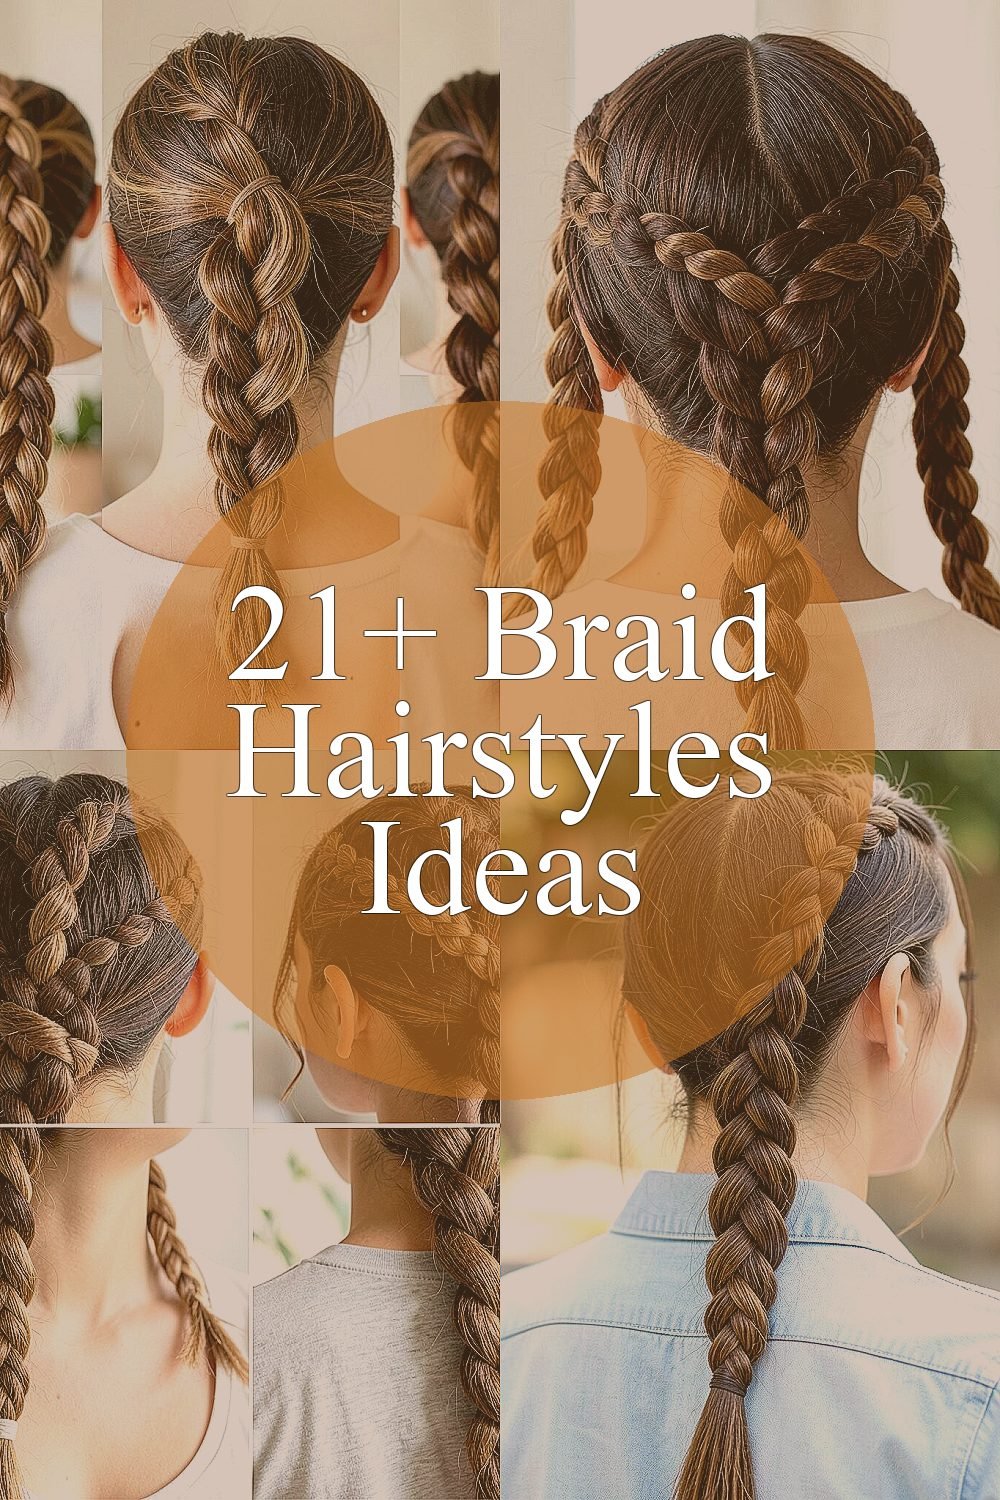
Your hair can look brand new without changing a thing about your day. Braids add style, comfort, and a little bit of magic in minutes.
1. Half-Up Waterfall Braid
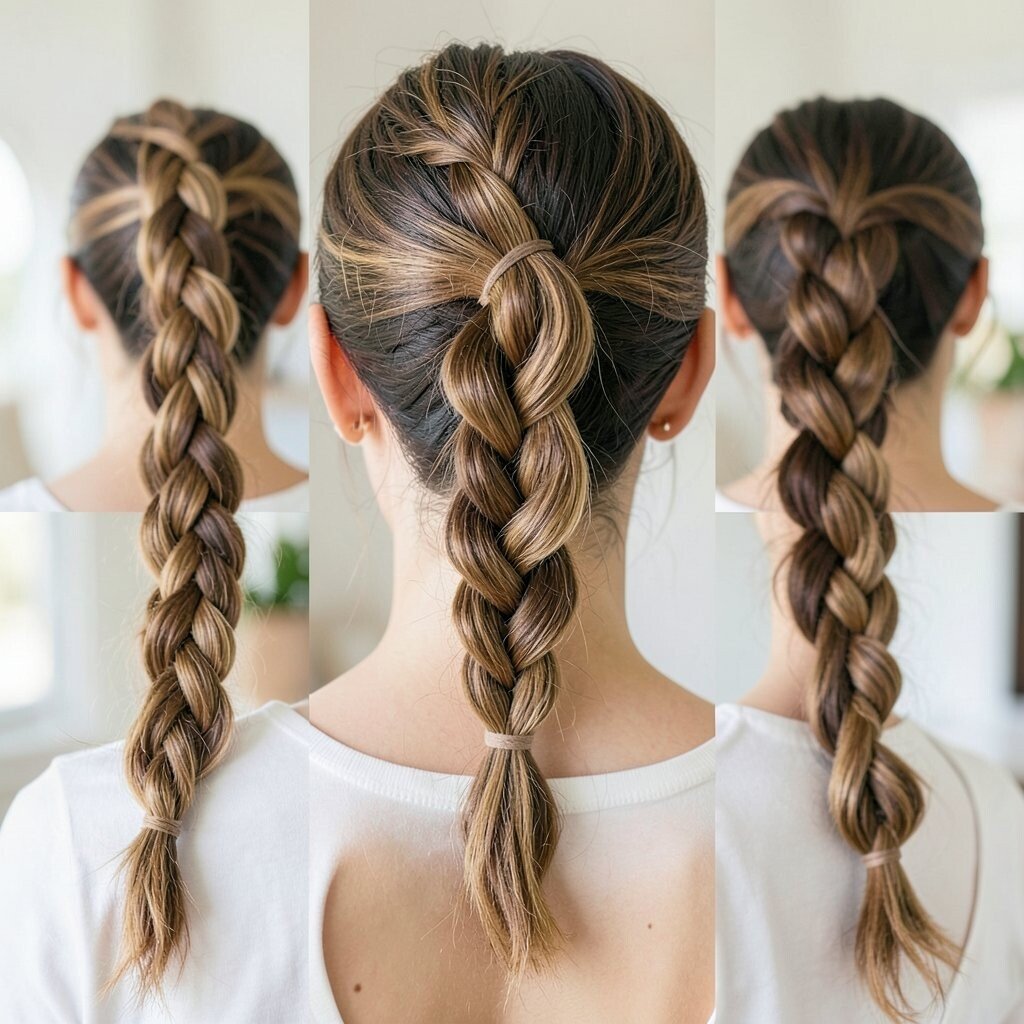
Start with a clean, slightly grippy texture so the braid holds without feeling stiff. Create a side part, then braid a section from the front and let strands flow downward like ribbons.
This style looks soft and pretty, especially on long hair where the “waterfall” effect shows clearly. It keeps hair off your face while still letting you wear your length loose. For a modern finish, try a loose fishtail blend at the end and add a small claw clip for extra comfort.
2. Classic Three-Strand Crown Braid
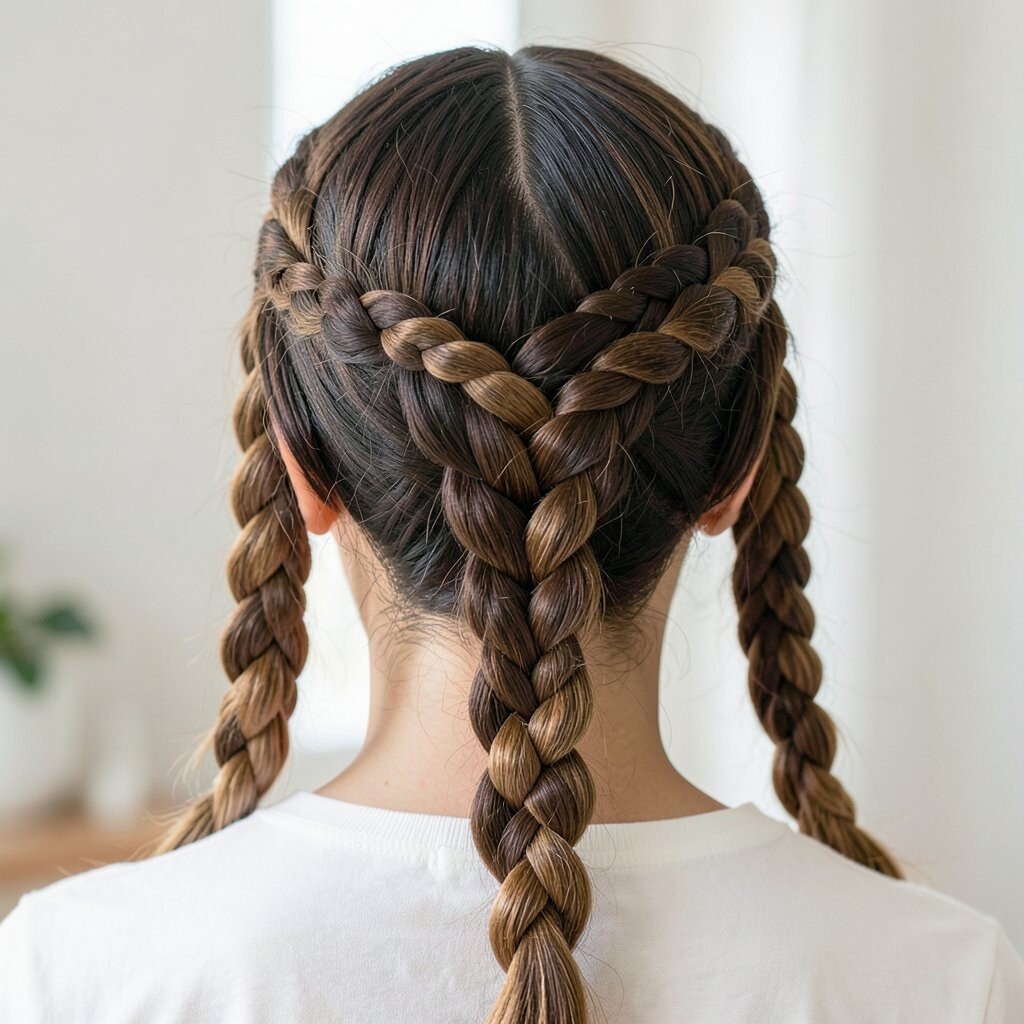
Part your hair down the middle, then braid two sections and pin them around the head. Use gentle tension so the crown stays even and doesn’t pull at your scalp.
This look frames your face and helps hair stay in place through a busy day. It is great for school mornings, work meetings, or weekend errands when you want a polished vibe without constant touch-ups. Add baby hairs lightly with a soft brush for a neat edge, or keep it natural for an airy feel.
To personalize, choose a center part for elegance or a zigzag part for a playful twist. If your hair is fine, tease the roots slightly before braiding so the crown appears fuller. For budget-friendly styling, a spray bottle and a few bobby pins are often all you need.
3. Chunky Rope Braid With a Side Twist
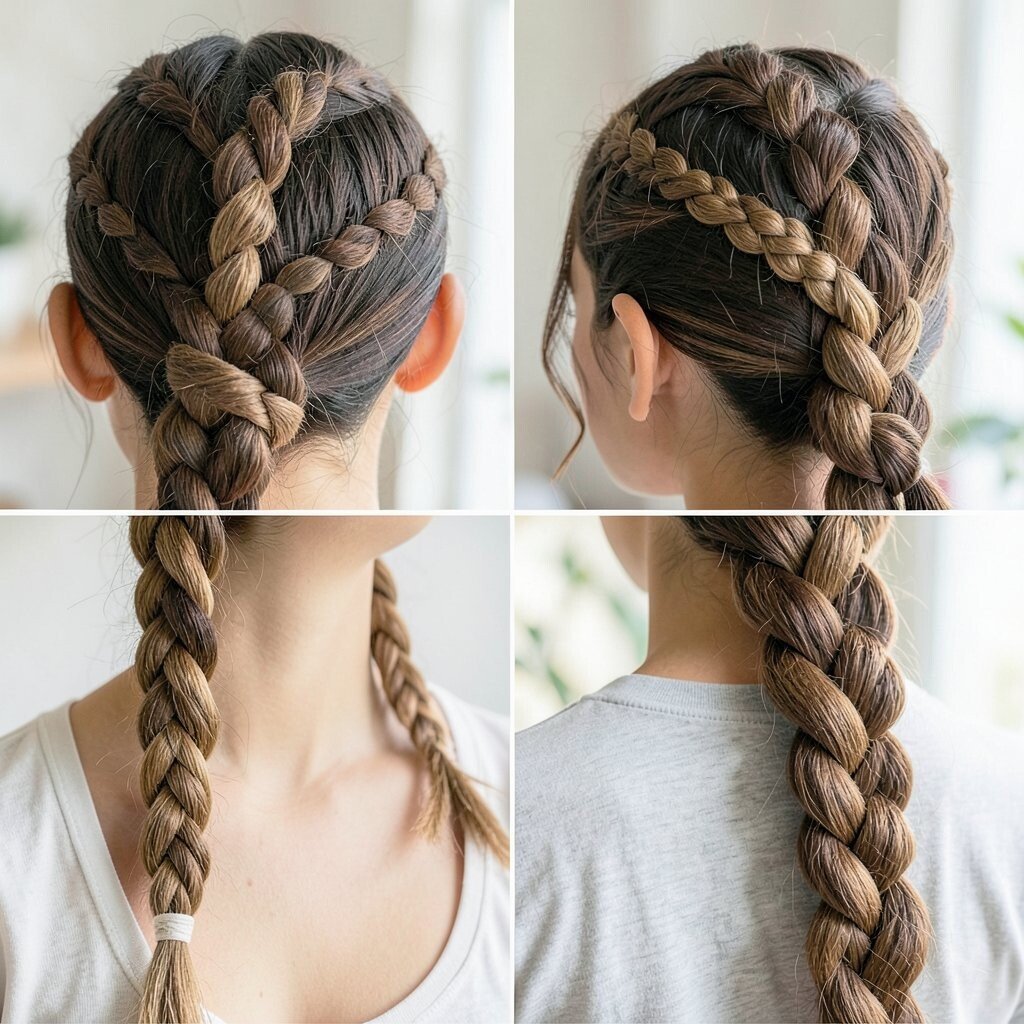
Gather hair to one side and divide it into two even sections. Twist each section the same direction, then wrap them together in the opposite direction like a rope.
This braid stands out because the chunky texture looks bold and confident. It also helps keep tangles under control since the twist pattern is secure. If you want a trendier look, leave the braid slightly looser and pin it low with one statement pin.
For personalization, add a ribbon, wrap a small scarf at the base, or braid in a thin strand near the front for a face-framing effect. On thicker hair, use bigger sections so it doesn’t feel too tight. On shorter hair, try starting the braid higher so it still shows clearly in photos.
When it comes to cost, you can get the look with hair elastics and styling cream, no extra gadgets required. A small amount of shine serum on the twists makes everything look extra finished. Finish by lightly tugging the rope braid to create that chunky, “done” texture.
4. French Braid Ponytail
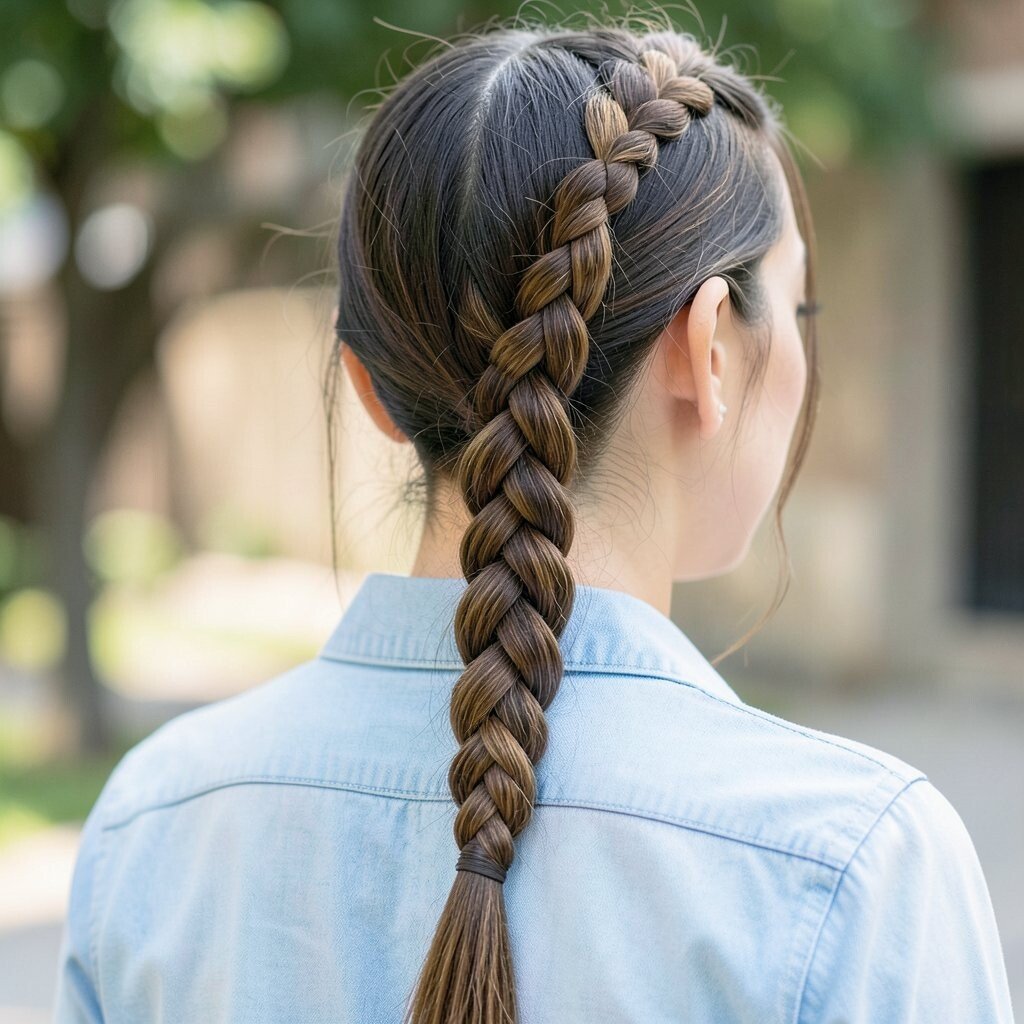
Begin a French braid at the crown, adding hair as you move down. When you reach the nape, braid until you’re out of loose hair, then secure with a band.
Roll the remaining braid into a ponytail bun shape or keep it as a long braid that swings. This style is loved because it keeps hair tidy, reduces flyaways, and feels athletic without losing femininity. For practical comfort, tie it with a soft elastic and use a few pins at the crown to prevent slipping.
5. Dutch Braid Space Buns
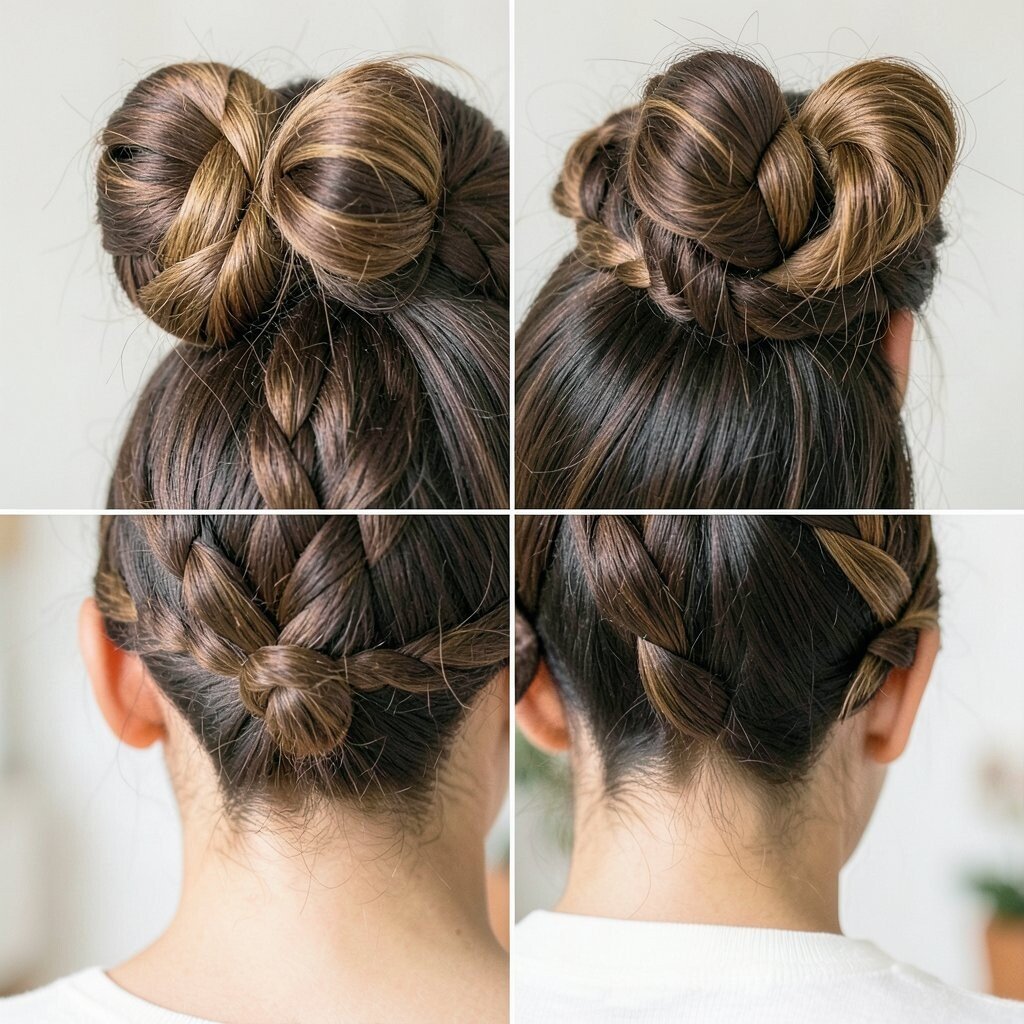
Part your hair into two sections, then create Dutch braids by crossing strands under. Keep the braids thick, and stop a few inches before the ends so you can form buns easily.
Twist each braid into a mini bun and pin it in place for that fun, lifted look. The upside-down braid pattern gives a bold shape that looks especially cute with hoodies, dresses, or casual streetwear. To make it feel current, leave one thin braid strand framing the face.
For personalization, choose tight buns for a sleek feel or pull the braid slightly to make it look fluffy. If your hair is slippery, apply a light mousse before braiding. This is one of those styles that doesn’t cost much since you’re mostly using elastics and bobby pins.
6. Fishtail Side Braid
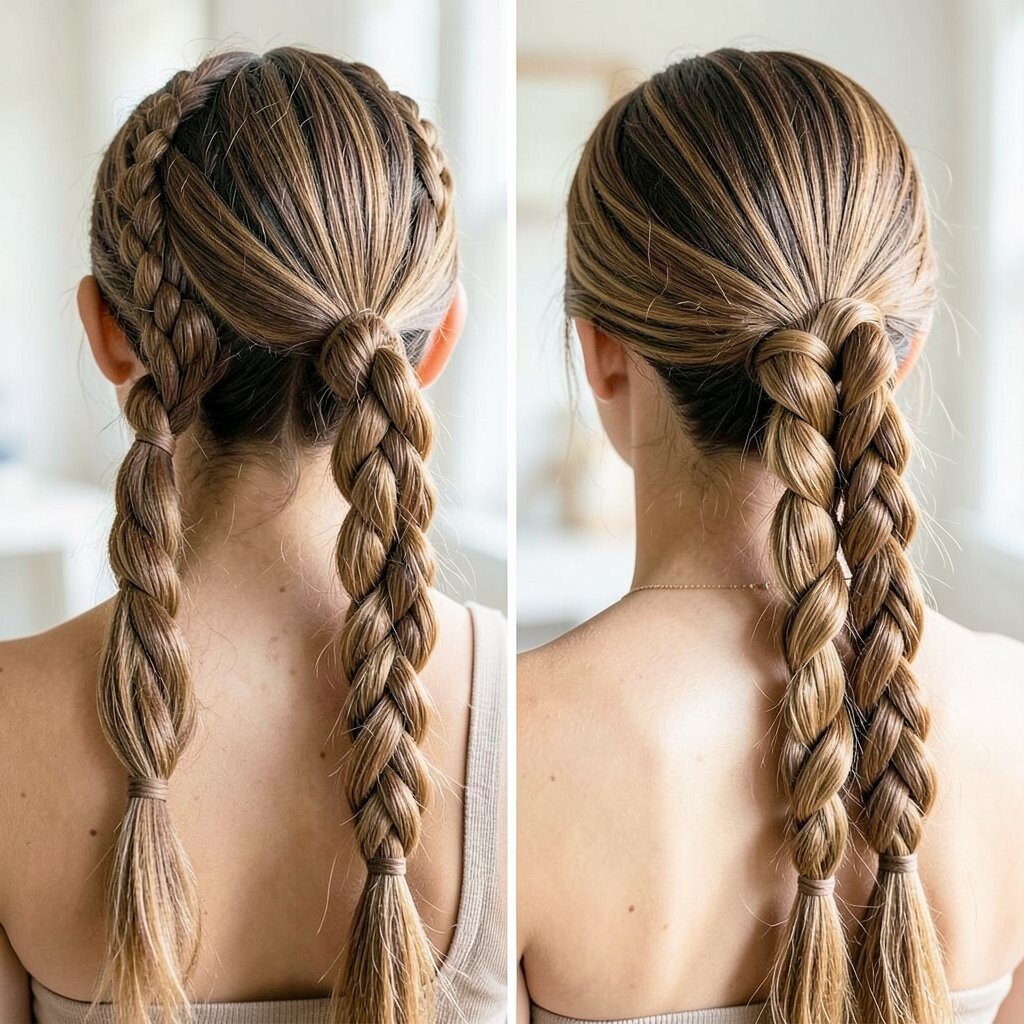
Gather hair to one side and split it into two sections. Take tiny strands from the outer edge and cross them into the opposite side, repeating until you reach the ends.
This braid looks delicate but strong, which is why it’s popular for both everyday wear and special events. It also gives movement because the pattern creates natural texture. For a modern look, tug gently on the braid after finishing so it looks wider and more “lacy” instead of narrow.
7. Braided Headband With Loose Waves
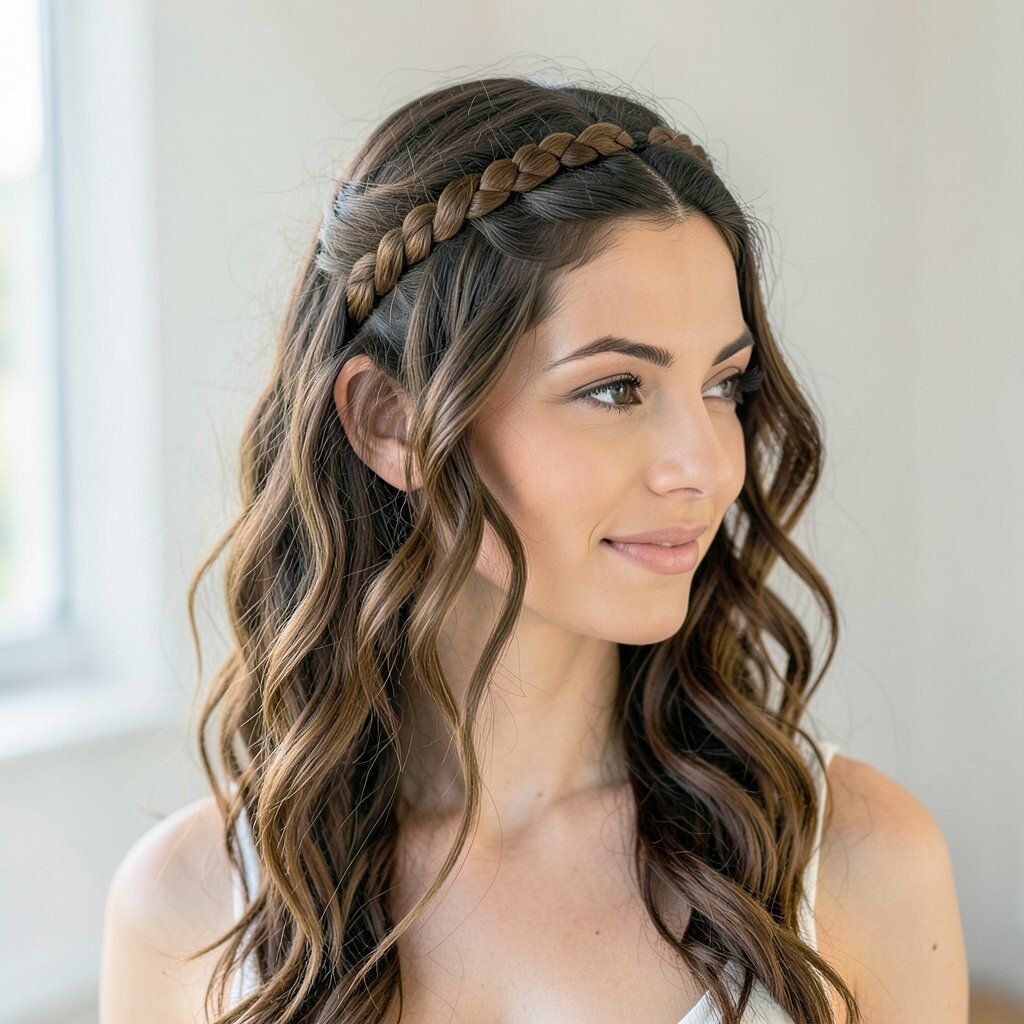
Create a thin braid along one side of your head, then wrap it across like a headband. Pin it behind your ear and keep the rest of your hair loose and wavy.
This hairstyle is perfect when you want braids without committing to a full updo. The braided band adds structure, while the waves keep everything soft. For personalization, use a micro braid for a cute, delicate feel, or make it wider for a bold head-turner look.
If you have curly hair, embrace your texture and let the braid sit slightly apart from your curls for a natural finish. A light hairspray helps hold the headband in place through windy days. For cost considerations, a flexible styling gel and a few pins can be enough.
8. Lace Braid Ponytail
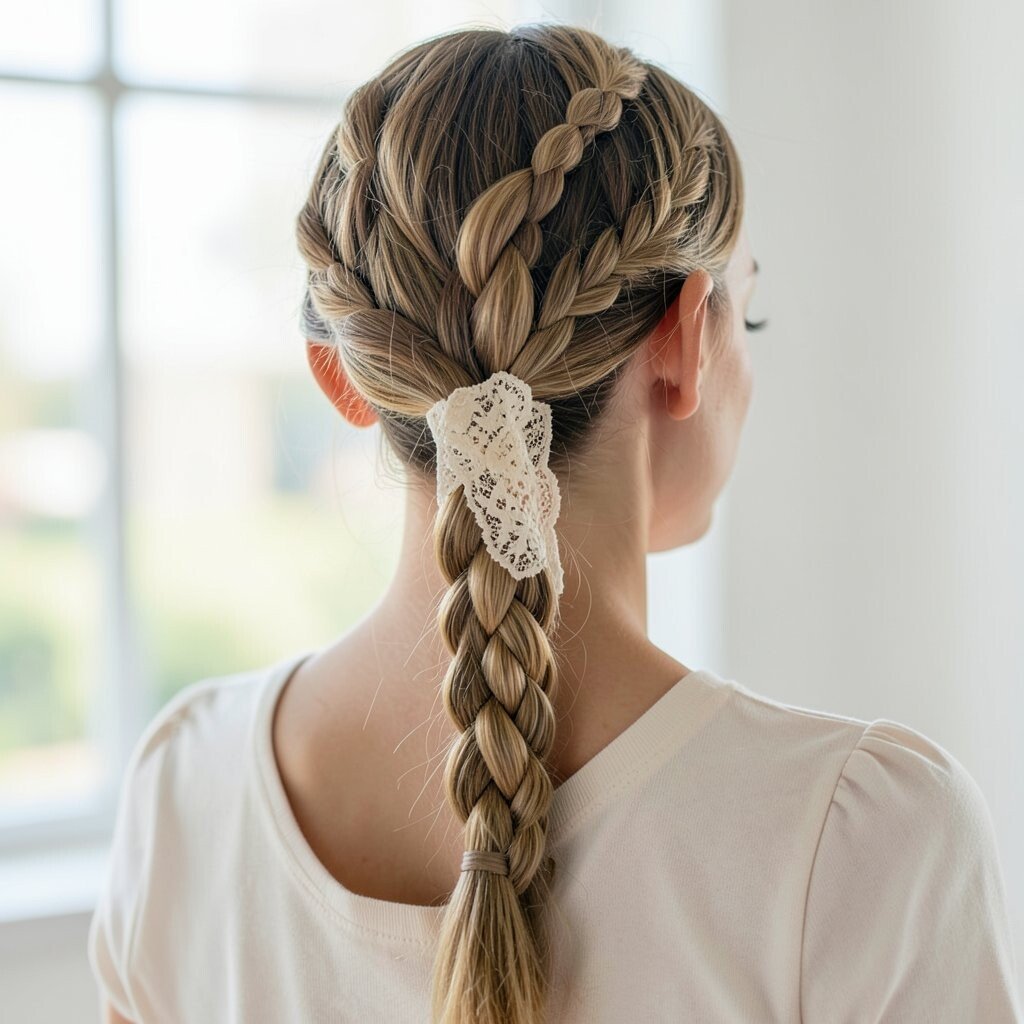
Start with a high ponytail, then braid small sections into a lace-like pattern around the base. Create openings by pulling a little section through each crossing as you go.
The result looks intricate while still being practical for busy mornings. It keeps your ponytail secure and turns a simple hairstyle into something that looks styled. Personalize by adding a ribbon wrap at the elastic and finishing with a gentle mist of shine spray.
9. Crown Twist Braid (Braided Updo Hybrid)
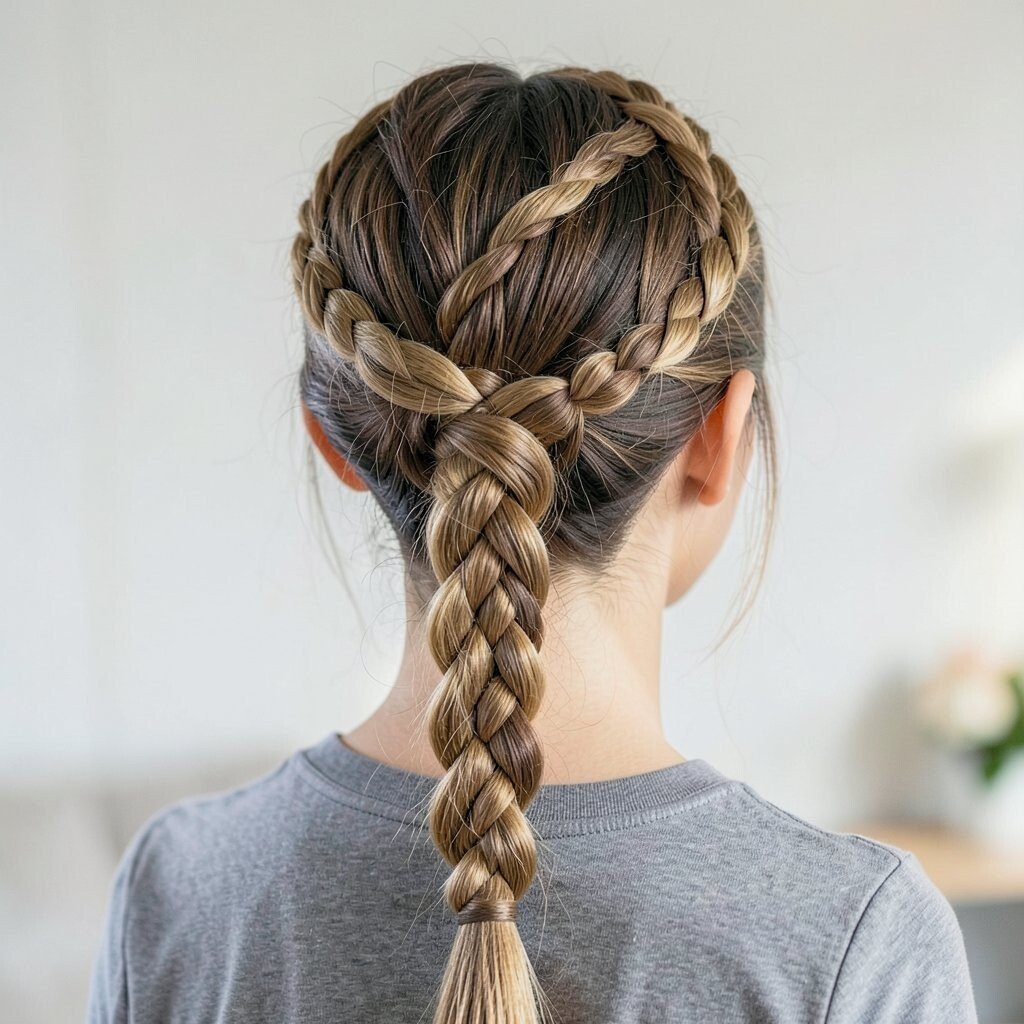
Take two front sections and twist them backward, crossing them over each other. Once the twists meet at the back, continue by braiding them into a crown.
This hybrid style feels unique because it blends twists and braids into one continuous shape. It’s especially flattering for medium to long hair since the crown looks fuller. For practical tips, secure the base with bobby pins in an X pattern for extra hold without bulk.
If your hair is fine, lightly backcomb the crown area before starting. For cost, you don’t need any special tools, just a comb, pins, and a good hair elastic. Add a small hair accessory to the side for a photo-ready moment.
To keep it trendy, leave the crown slightly loose and airy instead of pulling everything super tight. That softer finish looks great in current braid styles that focus on texture. Finish by smoothing the top with a tiny amount of cream so it feels polished.
10. Double Waterfall Braids
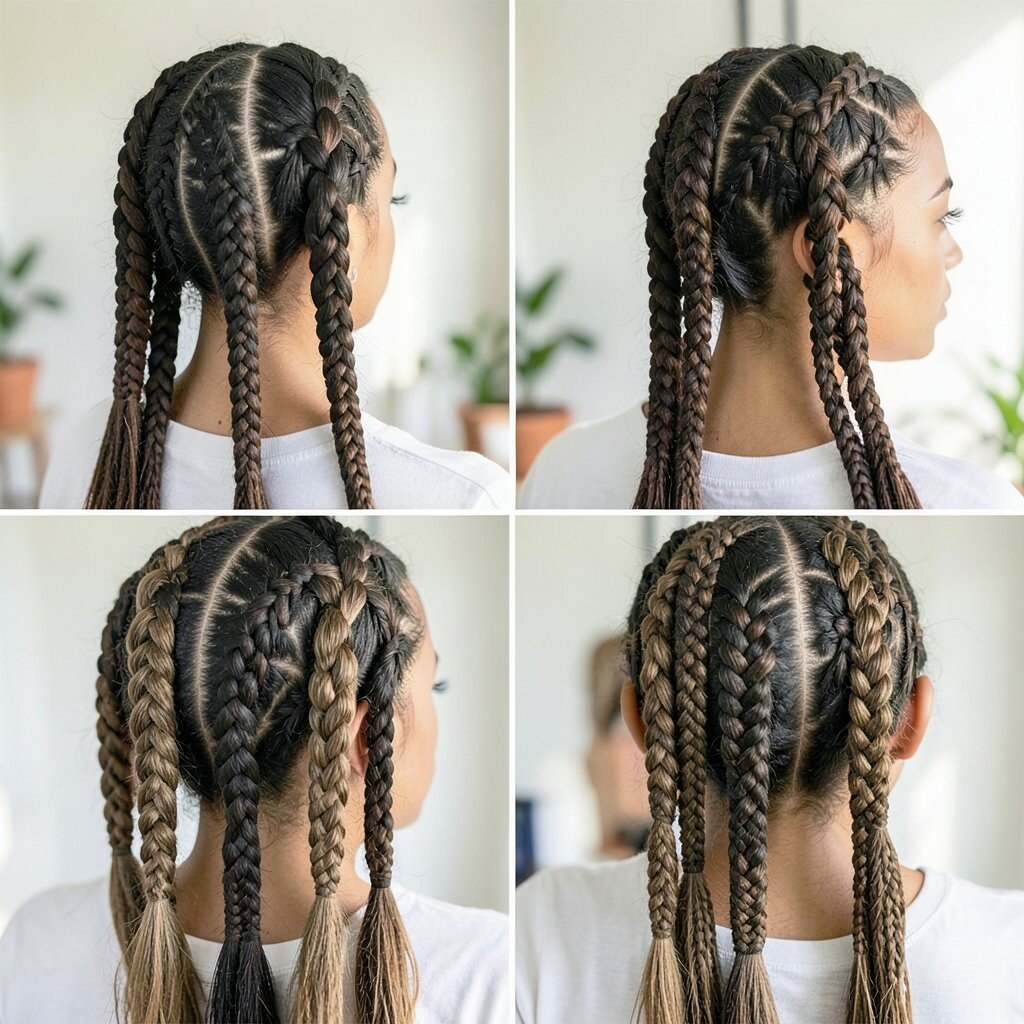
Part your hair in the center and create two waterfall braids, one on each side. Start near the temples and let strands fall down as you braid forward-to-back.
This look doubles the wow factor while staying gentle and elegant. It’s a beautiful choice for dates, events, and even casual weekends when you want your hair to feel special. For personalization, vary the width of each braid so one side looks slightly chunkier and more playful.
11. Three-Braid Tucked Low Bun
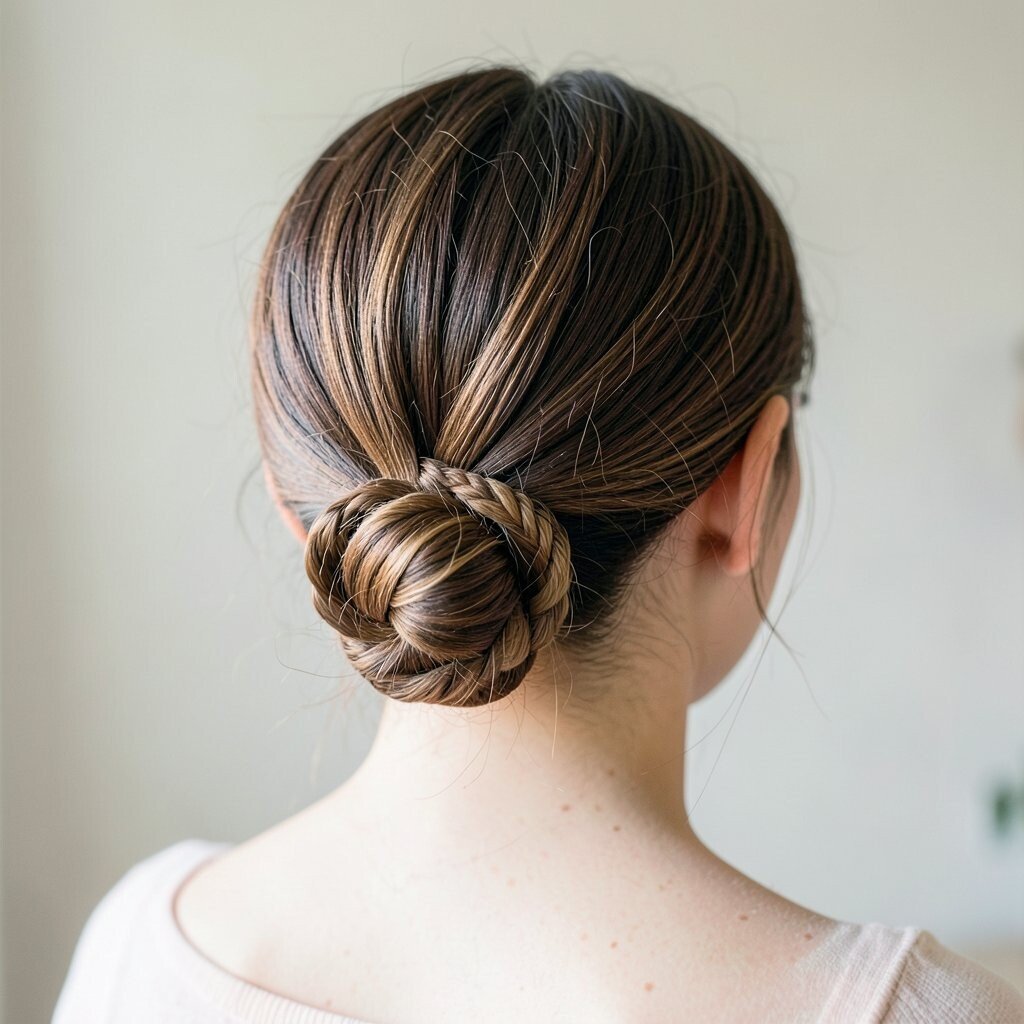
Braid three smaller sections across the front or crown, then tuck them into a low bun. Secure with pins so the braids hold the bun in place like natural anchors.
This style feels timeless but updated because the front looks detailed while the back stays simple. It’s a great option when you want a tidy updo that won’t get in your way. To personalize, choose a braided pattern that matches your mood, such as a regular three-strand braid or a mini Dutch section for extra texture.
If your hair is thick, keep the bun slightly loose for comfort so you don’t feel stretched. For fine hair, add a small bit of teasing at the roots before pinning. This is budget-friendly since the only supplies are elastics, pins, and whatever styling product you already own.
12. Braided Bangs With a Sleek Ponytail
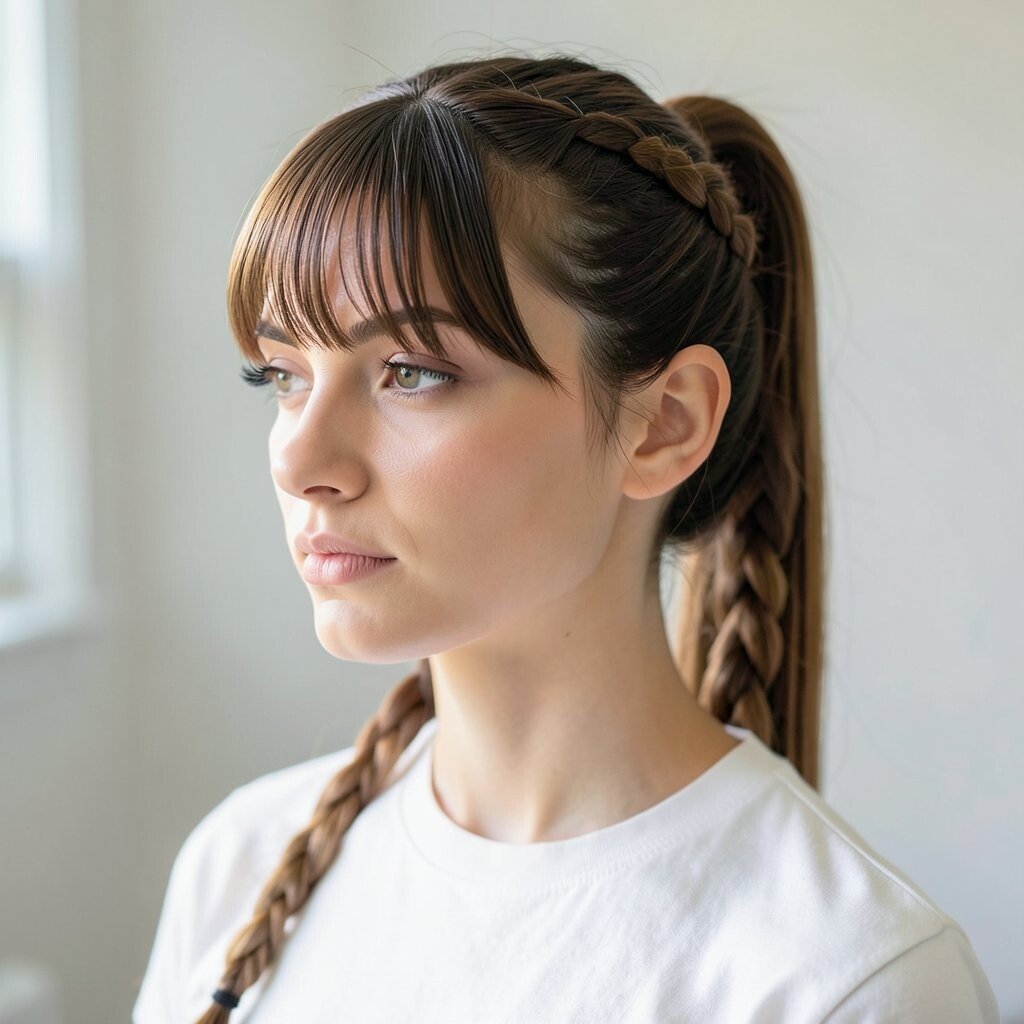
Create a tiny braid where your bangs would fall, then connect it into a sleek ponytail. Smooth the rest of your hair so the braid looks like a clean detail line.
The braided bangs give a stylish “edge” without needing a full braid overhaul. This combo works well when you want something school-friendly, office-friendly, or gym-friendly with a pretty finish. For practical tips, use a bit of gel or smoothing cream so flyaways don’t ruin the sleek look.
Personalize by making the braid thicker for a statement or thinner for a subtle charm. If you’re following current trends, consider adding a glossy finish and a tight ponytail with a ribbon wrap. Cost stays low because you can use a styling gel and a hair band you already have.
To make it feel more glam, wrap a small strand of hair around the elastic and pin it. That simple touch makes even a basic ponytail look designer.
13. Side Dutch Braid Over One Shoulder
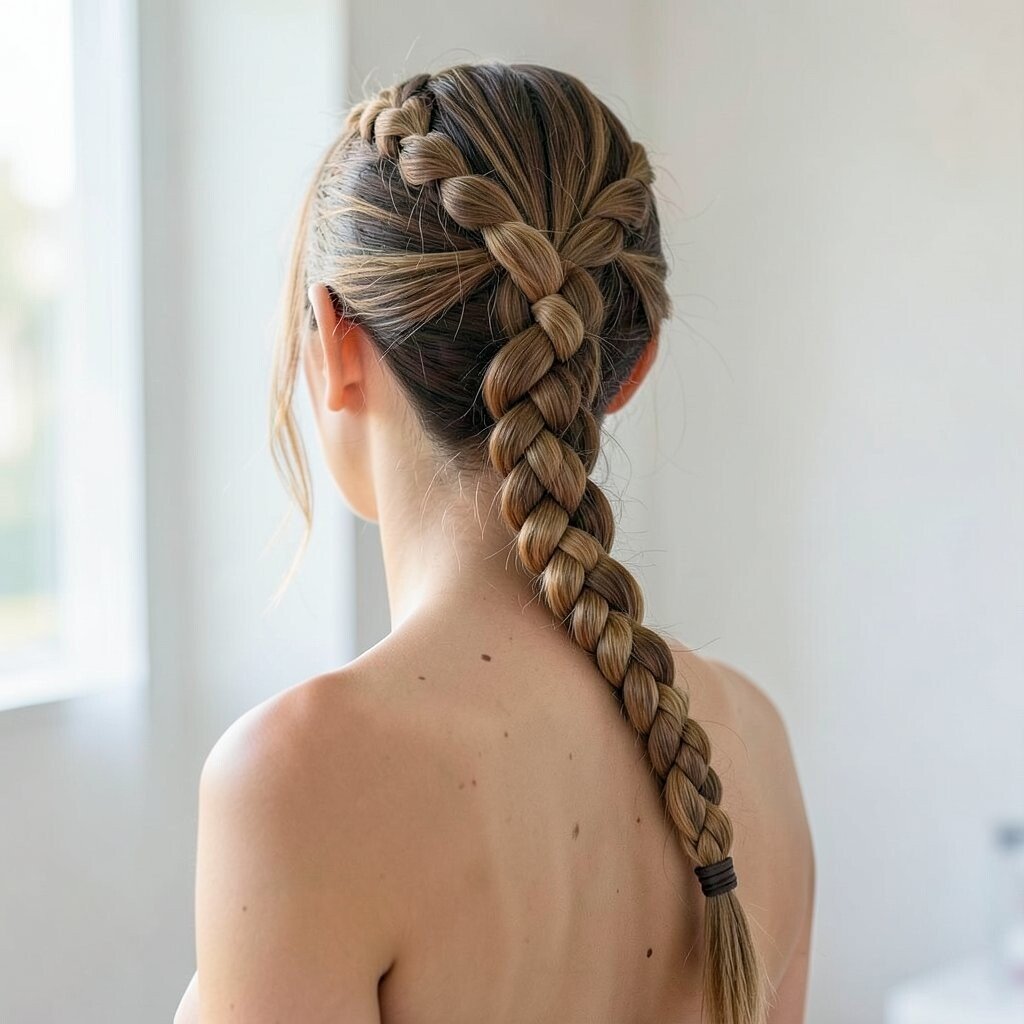
Start a Dutch braid on one side and braid down toward the shoulder. As you move, add small sections consistently so the braid stays clean and even.
This style is fun because it creates a dramatic diagonal line that looks great in motion. It’s also practical since the braid can act like a “hair manager” during windy days. For personalization, braid slightly looser for a softer vibe or keep it tight for a sporty look.
14. Milkmaid Braid With a Middle Part
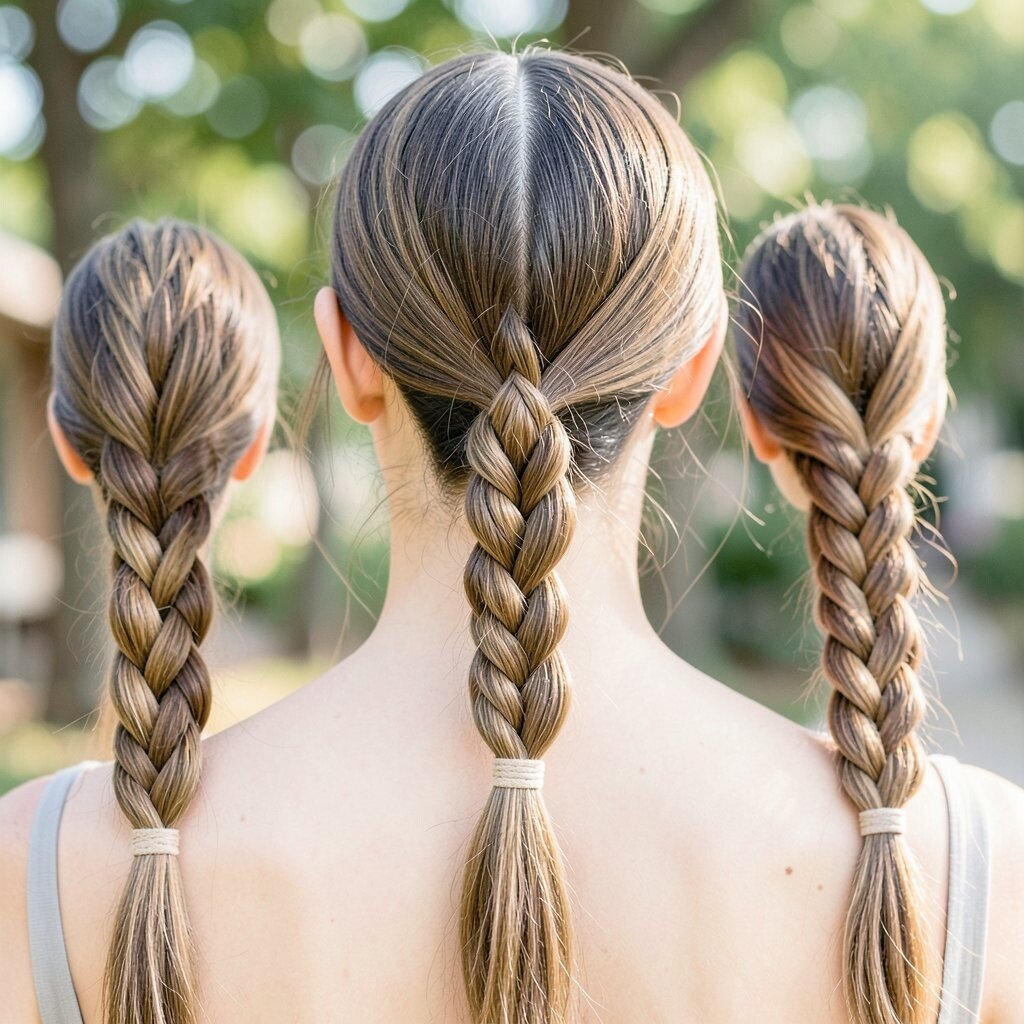
Part the hair down the middle, then braid two sections and place them over the head like a halo. Pin each braid so the shape stays centered and doesn’t slide.
This style looks romantic and strong at the same time, which is why it keeps coming back in current trends. It’s a lovely pick for weddings, brunch, or any day you want a sweet, classic mood. Add a small flower clip or metallic pin to make it feel more special without changing the whole hairstyle.
For practical tips, use a soft elastic at the end first, then hide it under the braid. If your hair is short, make two braids that start slightly higher and pin the ends near the crown. Cost is low since most of the magic is created by braiding technique and good pin placement.
15. Spiral Braided Bun (Twist-Braid Coiled Style)
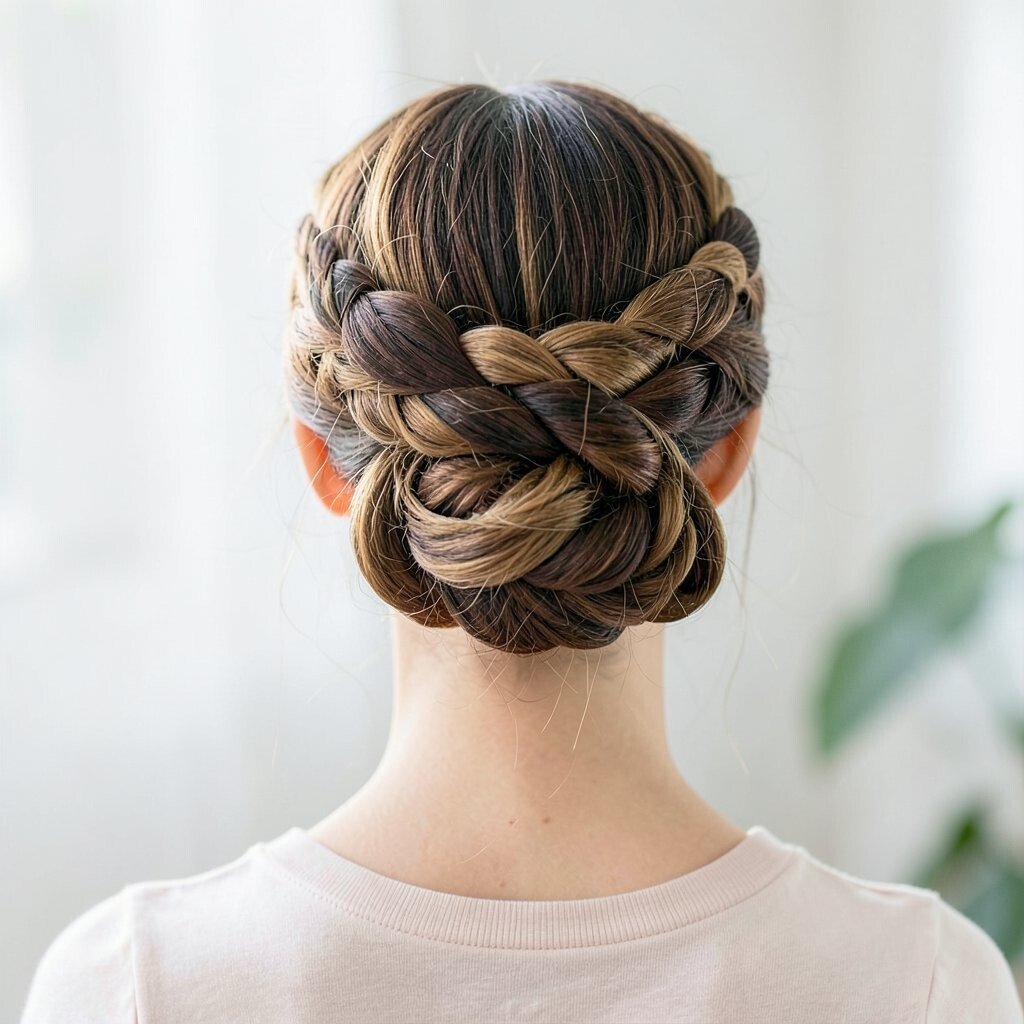
Divide hair into a few sections and twist each one as if making small rope braids. Coil the twisted pieces around each other to form a round spiral bun.
This braid hairstyle feels unique because it looks like a swirl sculpture rather than a standard bun. It also lasts longer since the twists hold their shape. For personalization, vary the number of coils to make it looser and bigger, or keep it compact for a neat look.
If you have long hair, this style looks amazing because the spiral has room to show. Use a light hold spray to keep the coils from loosening, especially if you’re in heat or humidity. For budget considerations, you’ll likely only need elastics, pins, and a styling product you already use.
To keep it comfortable, place pins away from the scalp pressure points and secure the bun at multiple spots. That helps your style feel secure without feeling painful.
16. Mini Braids Channeled Into a Side Braid
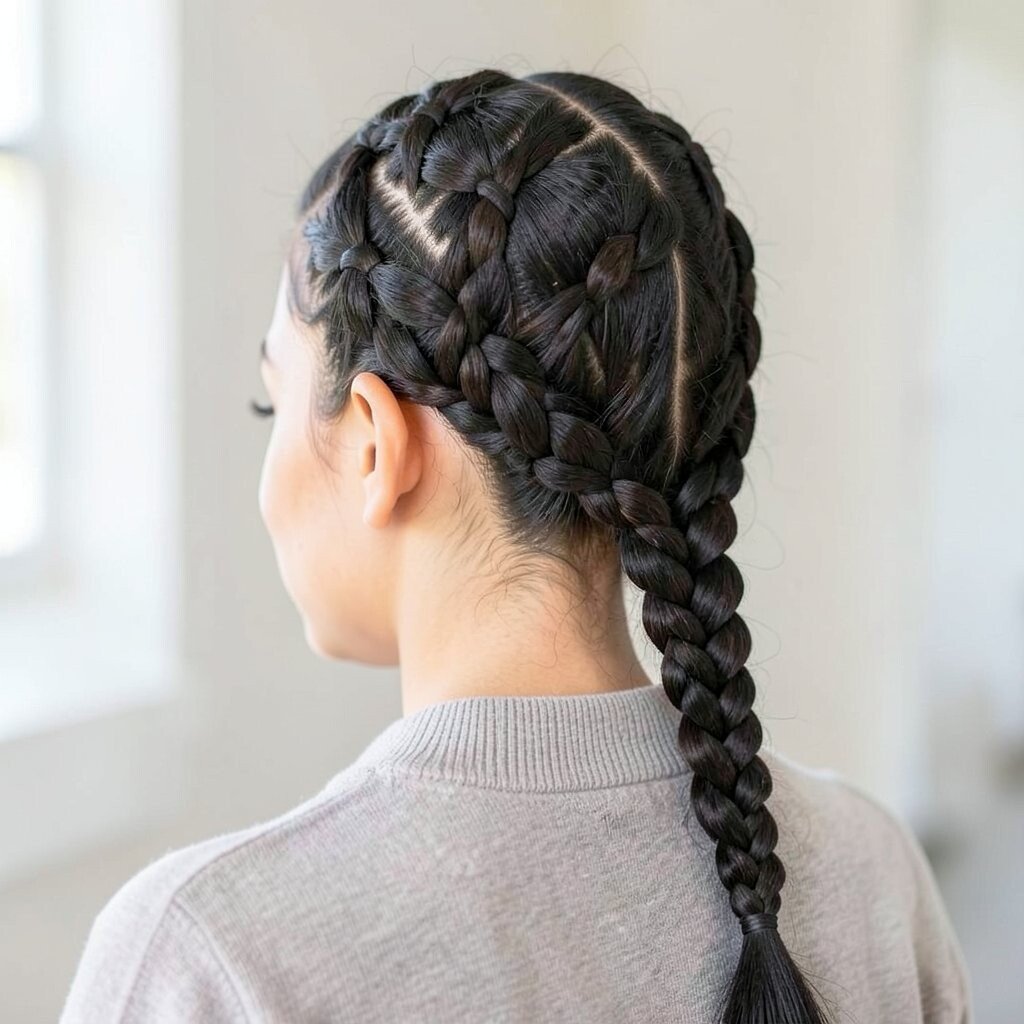
Create several tiny braids along the top or front, then gather them into one bigger braid. This gives you a layered look that feels detailed even when you only took a short amount of time.
This style is visually interesting because it mixes micro texture with a bold final braid shape. It also helps keep hair from tangling at the crown. Personalize by choosing a diagonal section pattern and matching the braid thickness to your hair volume.
For practical tips, use smaller elastics only where needed so you don’t add bulk. If your hair is fine, keep the mini braids slightly looser for more body. If your hair is thick, keep the mini sections smaller so you can still blend them smoothly into the main braid.
17. Dutch Braid Upward Into a High Clip
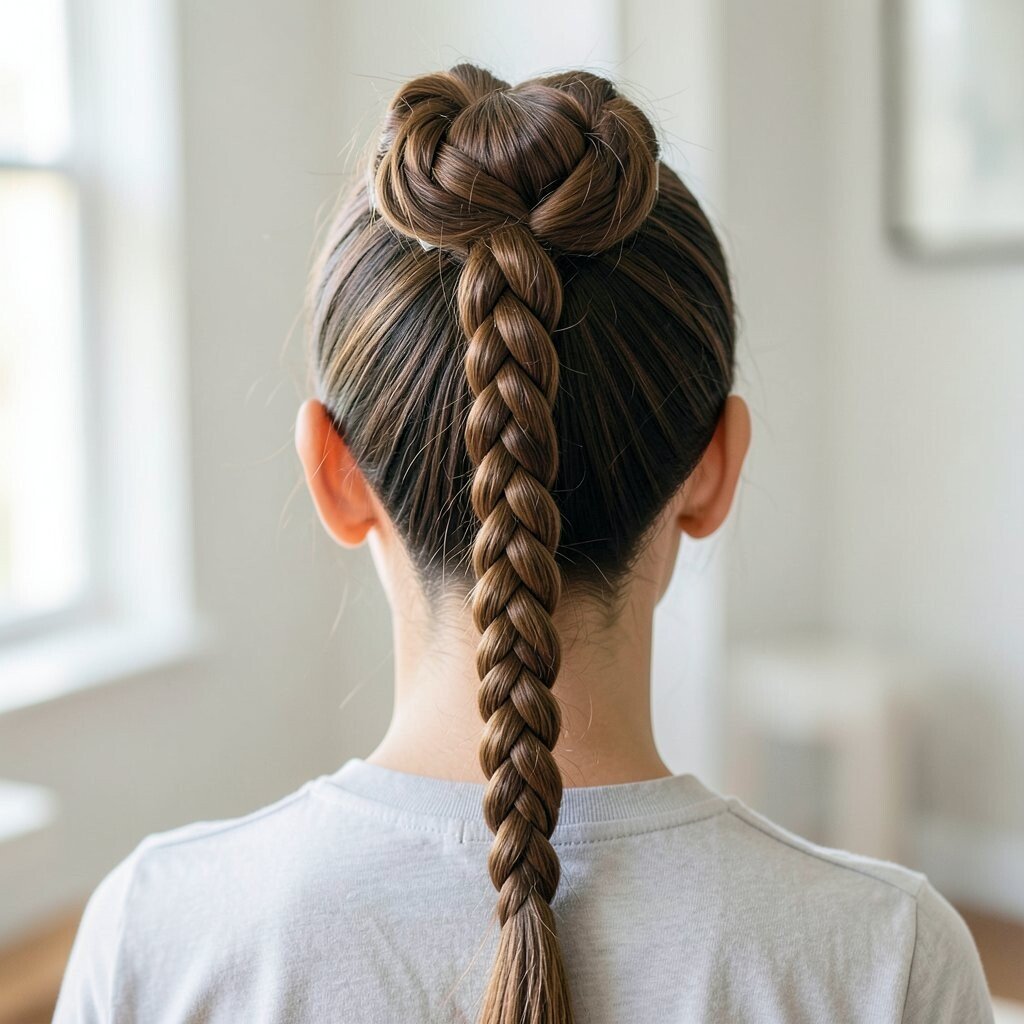
Start a Dutch braid at the front and braid upward toward the crown. Instead of stopping at the nape, keep adding hair until you reach the top, then secure with a clip.
This playful design looks modern because the braid direction feels unexpected. It’s also practical if you like keeping your hair off your neck but still want a braid statement. For personalization, use a velvet claw clip for a soft, trendy finish or a simple barrette for a clean look.
To make it look intentional, tuck the ends neatly and smooth any bumps on top with your fingers. This hairstyle works well with medium and long hair, but you can adapt it by braiding shorter sections closer together. Cost stays reasonable since clips are reusable and pins are simple staples.
18. Simple Braided Bun With a Loose Front Strand
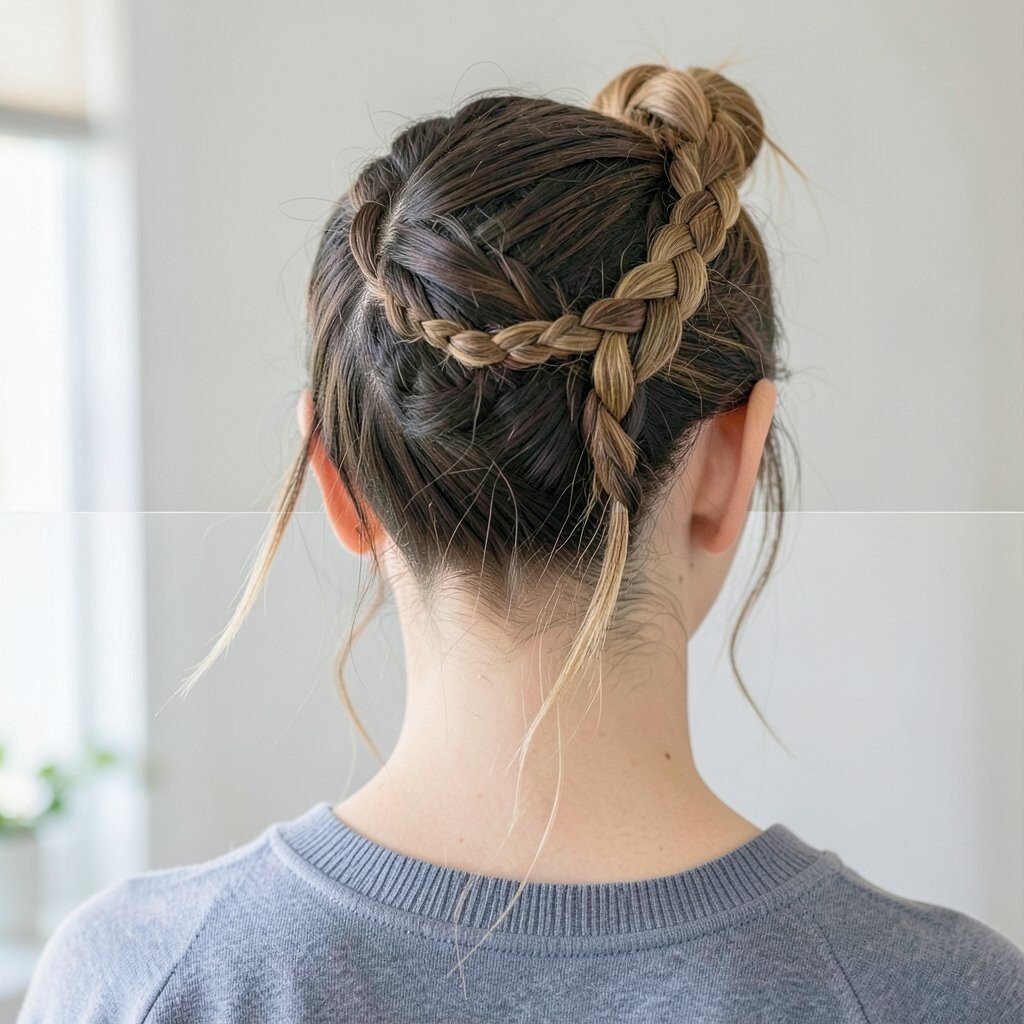
Braid hair into a basic three-strand braid, then wrap it into a bun at the back of your head. Leave one thin front strand loose so the style feels effortless.
This is one of those everyday braid hairstyles that still feels styled. The loose strand adds softness and makes the bun less “too perfect.” For personalization, make the loose strand curly, straight, or lightly waved so it matches your overall hair texture.
Practical comfort matters, so secure the bun with pins in a way that doesn’t pull. Add a tiny bit of shine product to the braid so it looks healthy and fresh. If you want it to look current, pull the bun slightly apart at the edges for a soft, airy finish.
19. Braided Crown With a Knotted Low Ponytail
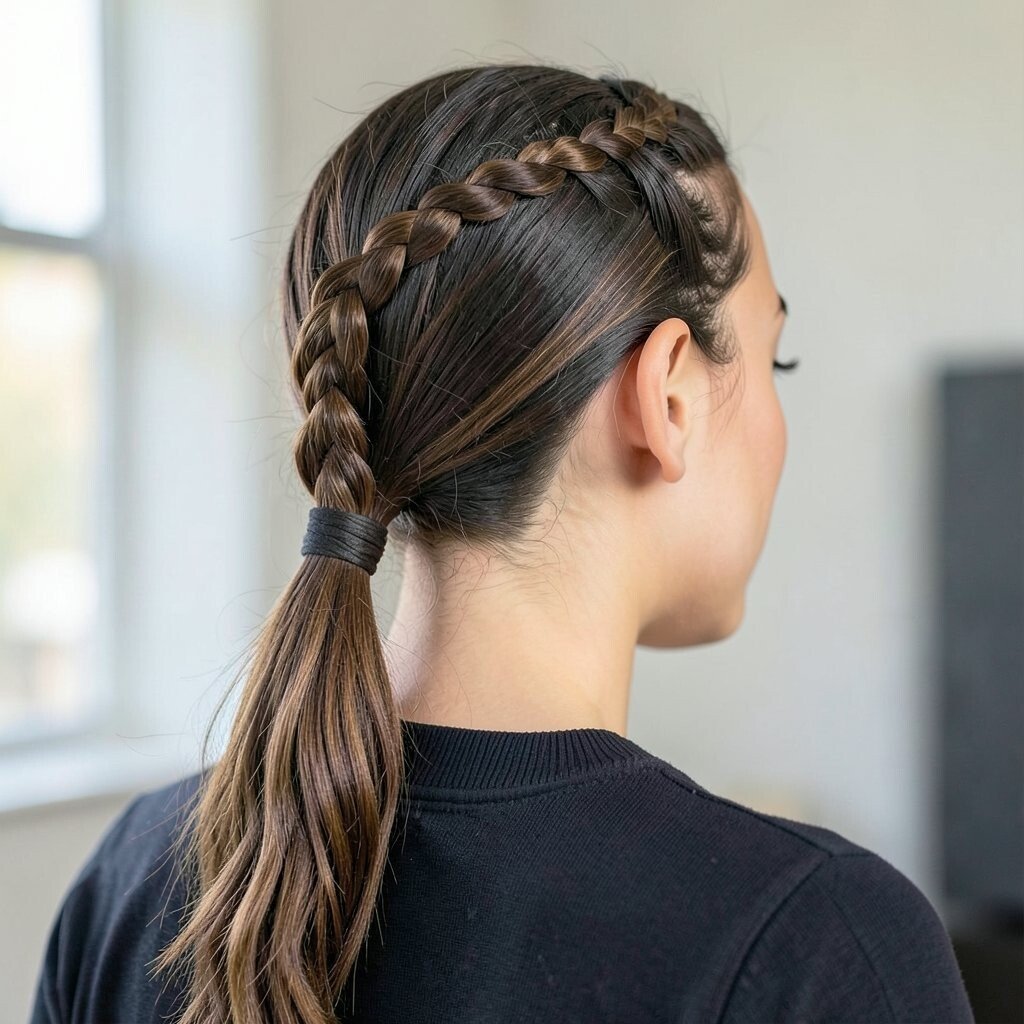
Make a crown braid around the top and sides, then gather the remaining hair into a low ponytail. Before tying, twist the ponytail once and secure it so it forms a gentle knot shape.
This style stands out because it combines a delicate crown with a twisty ponytail finish. It’s great for days when you want your hair to look fancy but still feel practical. Personalize by adding a small bow at the knot or using a hair scarf for extra color.
For practical tips, pin the crown braid tightly at the back so it doesn’t shift as you move. If your hair is thick, use two elastics, one for the base and one to hold the knot area. Cost considerations are easy here since you can achieve the look with just elastics, pins, and optional accessories.
20. Scarf-Threaded Braid (Color Pop Style)
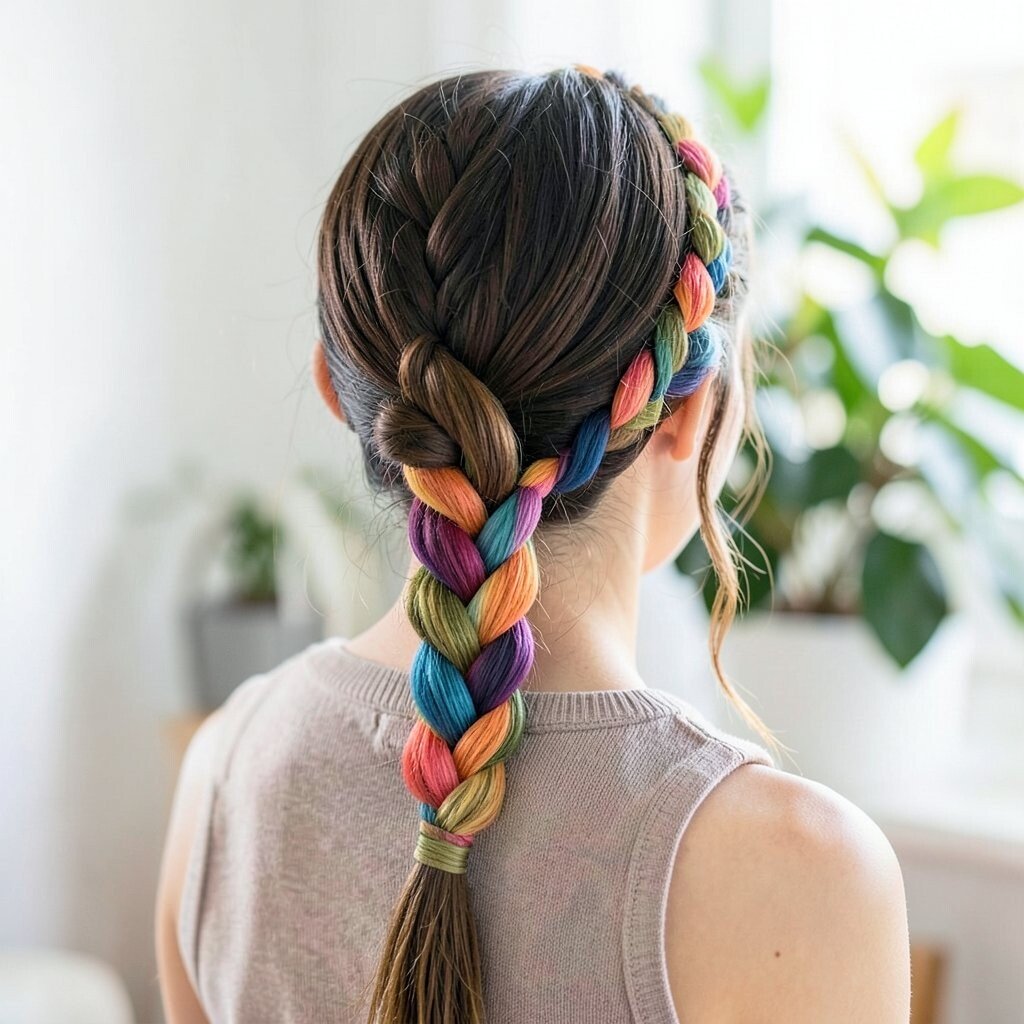
Thread a thin scarf ribbon into a braid near the front and keep it running through as you braid. Tie the scarf ends or tuck them in for a secure finish.
This is a fun way to add color without dyeing your hair, which makes it a favorite for seasonal looks. The braid pattern holds the scarf in place, and the result looks trendy in a way that feels playful. For personalization, choose colors that match your outfit or pick a neutral scarf for a clean, elegant vibe.
On practical days, use a fabric that won’t slip too easily, and secure it tightly at the start. If you’re attending an event, mist a bit of hairspray around the scarf so it blends smoothly with the braid. This hairstyle can fit any budget since a scarf is affordable and often reusable for many looks.
To keep the braid looking neat, braid with medium tension and avoid pulling the scarf too tight. That helps it look smooth and bright rather than wrinkled.
21. Reverse Mermaid Braid With Tapered Ends
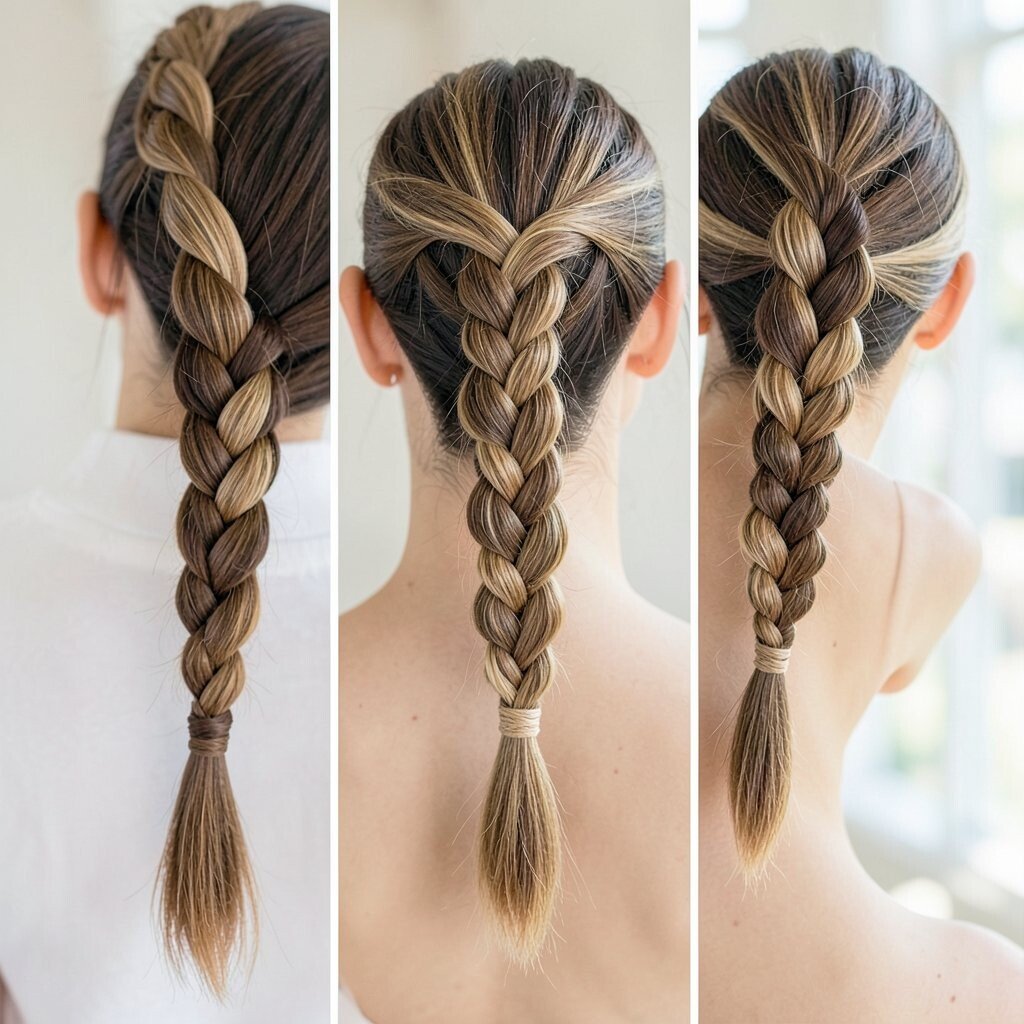
Create a braid that starts like a classic braid but works through your hair in a “reverse” pattern, keeping strands tucked closer to the head. As you reach the lower section, taper by using slightly smaller pieces so it narrows toward the ends.
This hairstyle feels unique because the tucked start gives a sleek look, while the taper adds drama. It’s also a great option for long hair since the tapered ends show off length and shine. For personalization, curl just the last few inches and let them blend into the tapered braid.
Practical tips make a big difference here, so keep your strand sections consistent for the cleanest effect. If your hair is frizzy, apply a light anti-frizz cream before braiding. Cost is minimal since the main tool is your technique, plus basic styling products.
22. Braided Faux Bangs Into a Low Chignon
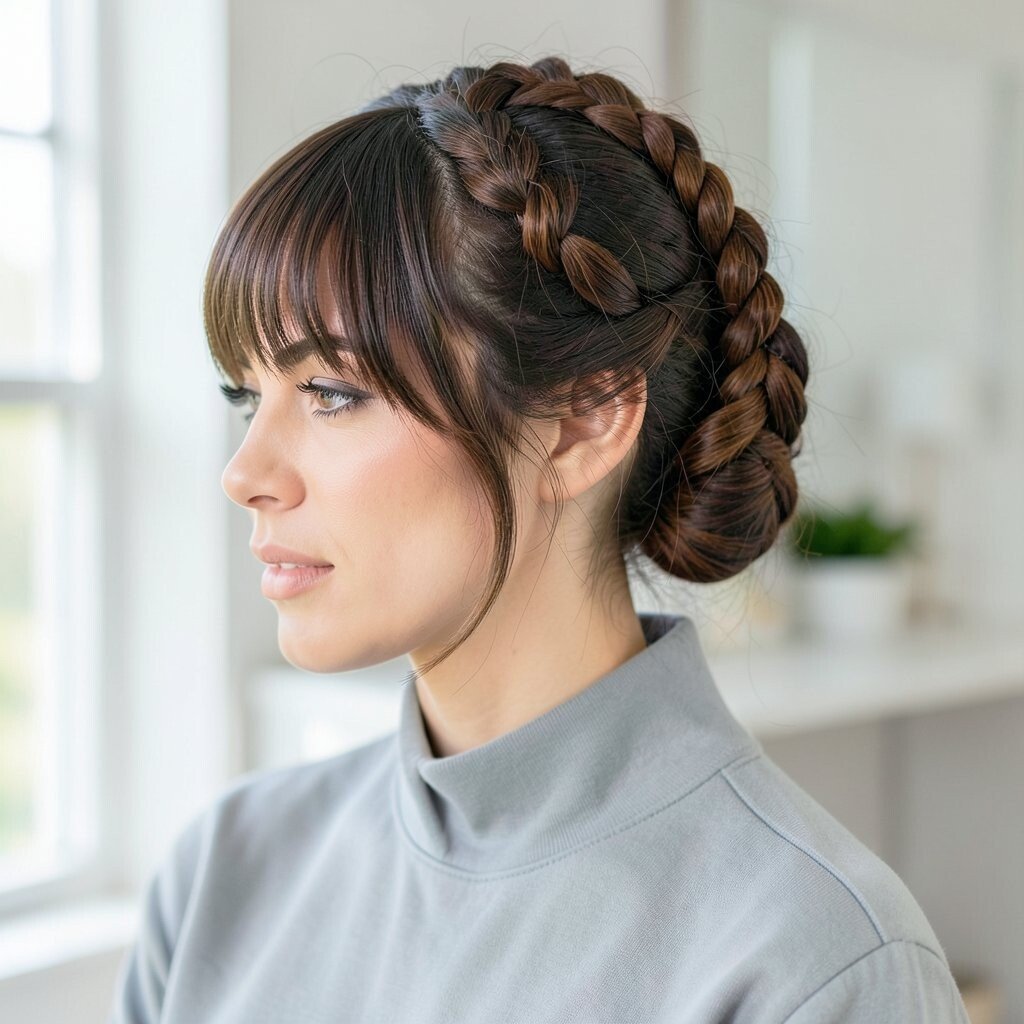
Create two small braids across the front like faux bangs, then pin them to the top of your head. Gather the rest into a low chignon and secure with pins.
This look is charming because it frames the face and gives the illusion of bangs without cutting hair. It’s also practical since the chignon keeps hair comfortable and out of the way. For personalization, adjust the braid height so the faux bangs sit higher for a lifted look or lower for a softer frame.
To keep it current, add subtle texture to the chignon and avoid making it too tight and shiny. A light hold spray helps pins stay in place, especially if your hair is fine. For budget considerations, you can create the entire style with pins, a comb, and a simple elastic plus whatever styling cream you already trust.
If you want extra polish, tuck the braid ends neatly into the chignon and smooth any stray hairs with a damp finger.