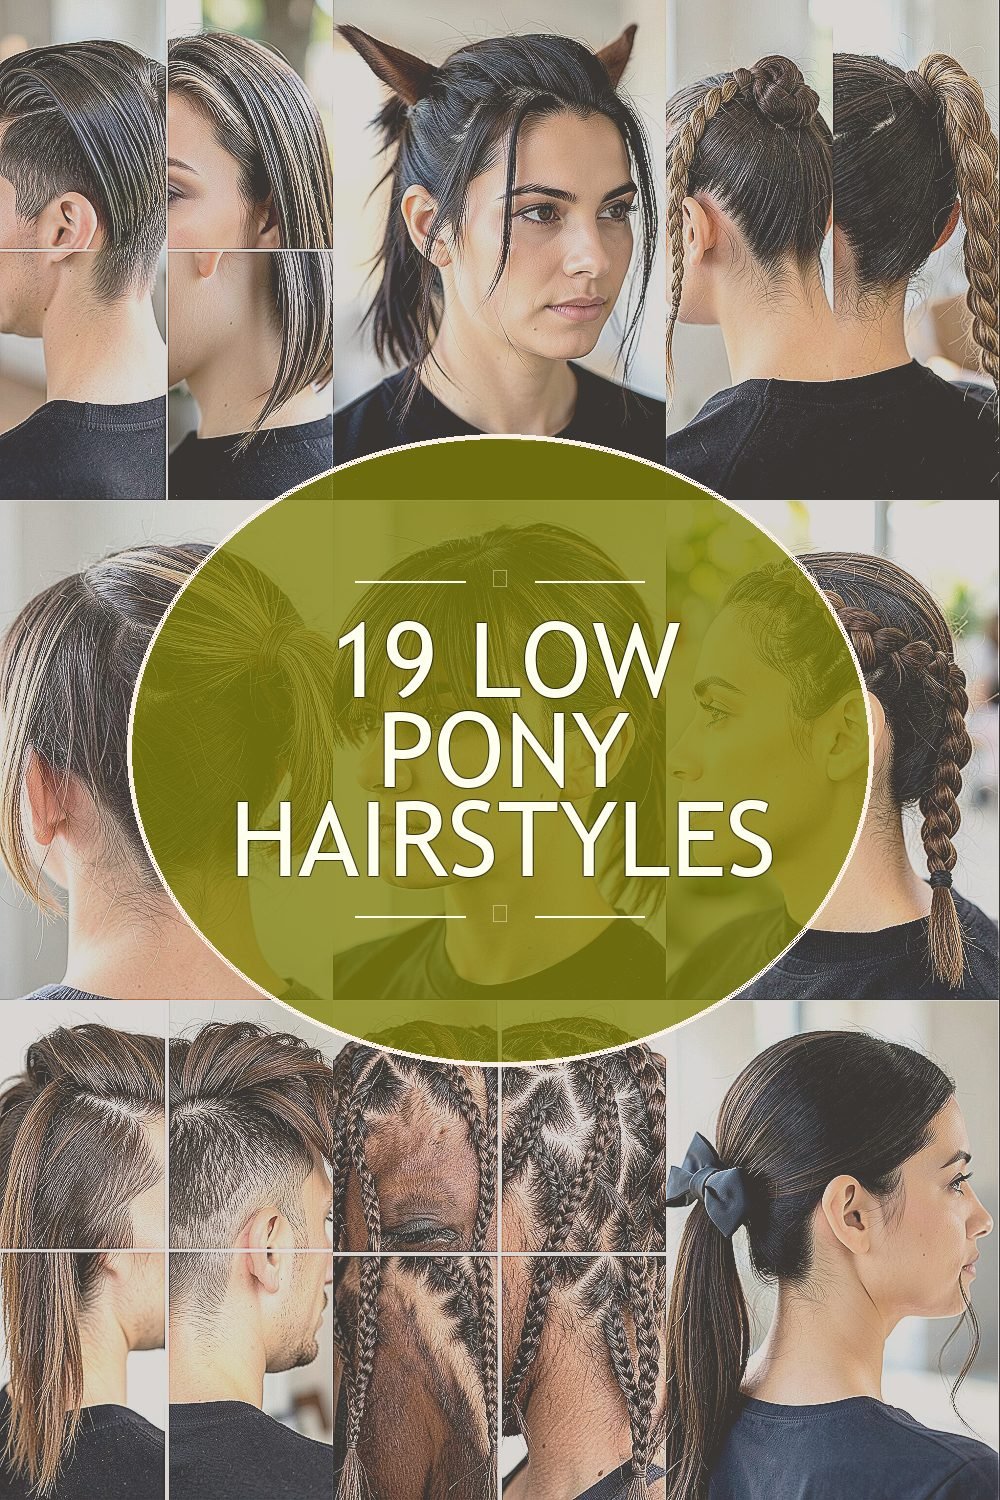
Low ponytails look polished even when you’re rushing out the door. They also give you room to show off your style without the fuss.
From sleek and glossy to soft and airy, these looks fit everyday life and special plans alike.
1. Sleek Low Pony With Glassy Finish
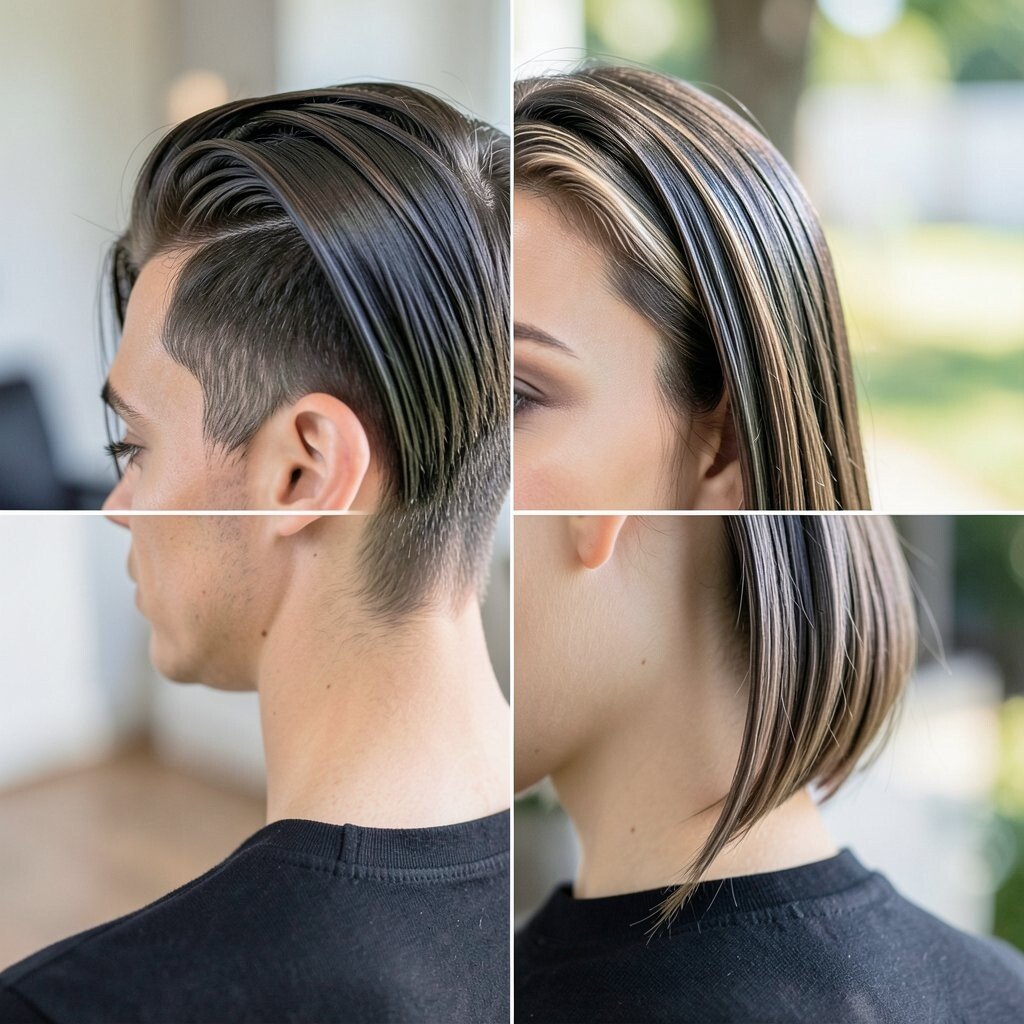
Start with damp hair and smooth everything down toward the nape. Use a fine-tooth comb to press out flyaways, then secure the pony with an elastic that blends into your hair color.
This style looks like you stepped out of a salon, especially when the strands shine under light. It’s great for work days, interviews, and events where you want a neat shape that lasts.
For a fresh effect, add a glossy serum to the mid-lengths and ends, then mist a light shine spray over the final brush-through. If you want personalization, wrap a thin strand around the elastic for a cleaner finish, or tuck in a single bobby pin slightly off-center for an intentional detail.
If your hair is thick, section it first and brush from roots to ends so it stays sleek instead of bulky. If your hair is fine, use a smoothing cream sparingly and keep the pony slightly looser to avoid a flat look.
2. Low Pony With Face-Framing Tendrils
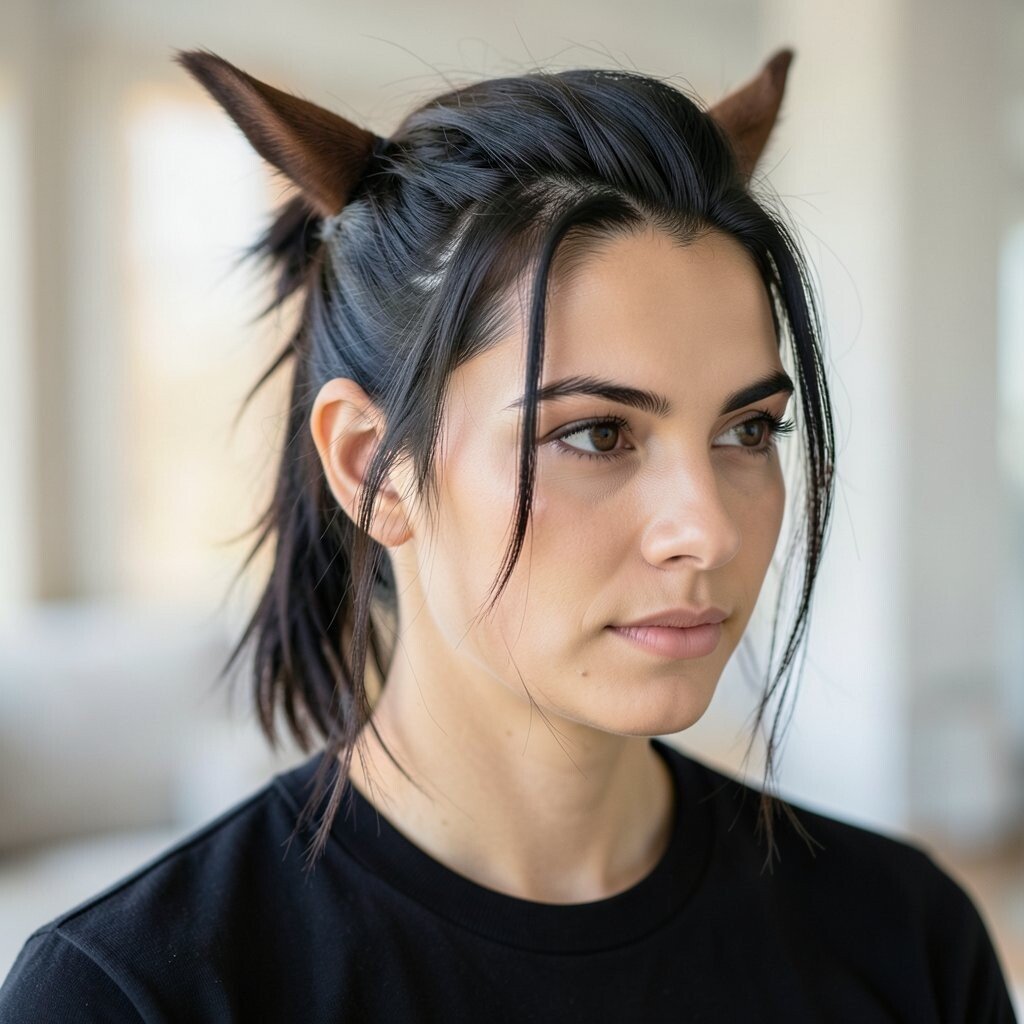
Pull your hair into a low pony and leave two soft strands near your face. After you tie it, curl those pieces lightly or bend them with your fingers for an easy, lived-in vibe.
This look makes your face look brighter because the pieces sit around your cheekbones. It’s also a smart option if you want movement without losing the tidy feel of a pony.
To keep the tendrils in place, spritz them with a flexible hold spray before styling. For personalization, try parting your hair slightly off to the side, then let the tendrils follow that angle for a natural frame.
If you have curly hair, you can embrace your texture by leaving the front pieces more defined than the rest. For cost considerations, you can skip expensive tools and use a hair-friendly curling wand or even a braid for soft waves.
3. Twisted Low Pony With a Wrapped Knot
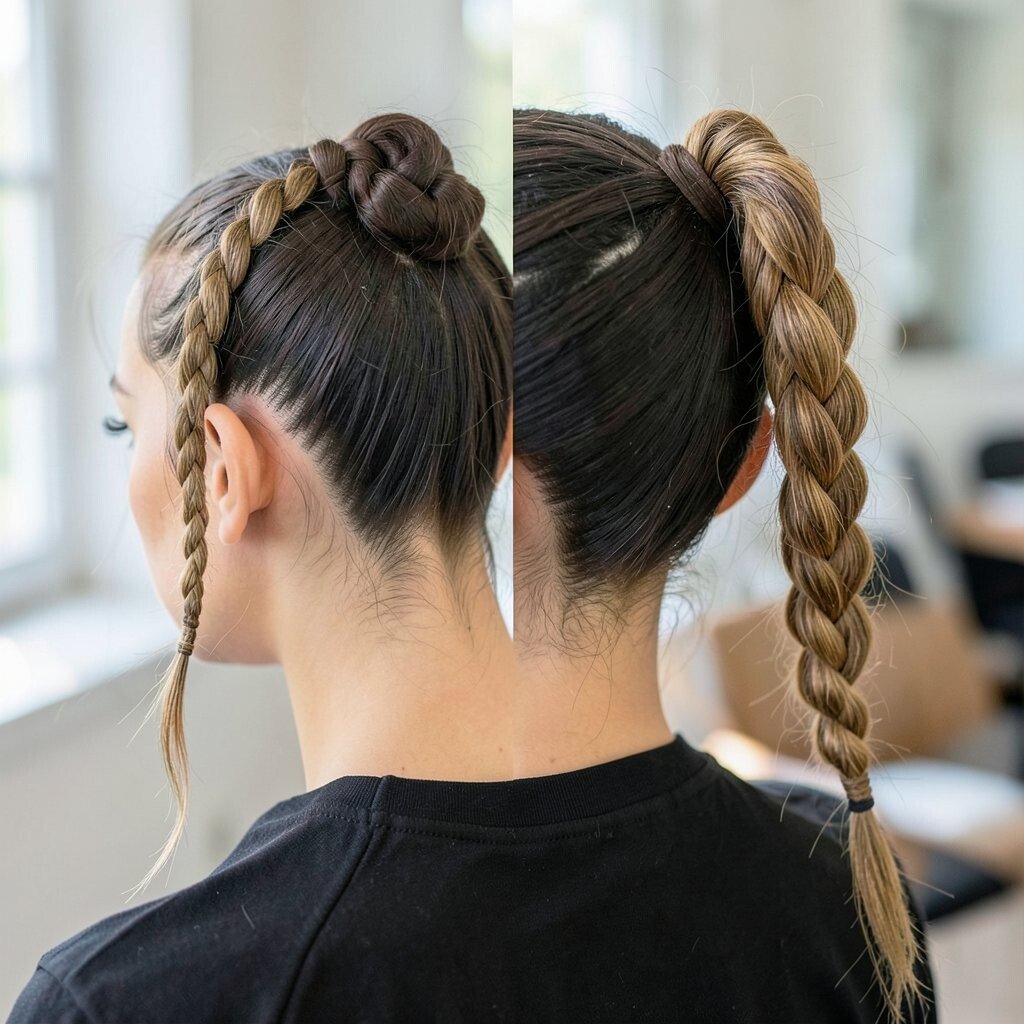
Gather your hair at the low back of your head, then twist a small section from one side. Wrap that twist around the elastic like a mini crown, and pin it down so it feels secure but not stiff.
The twisted knot gives a raised, fancy look while staying wearable for daily life. It’s especially unique if you want a style that looks thoughtful in photos and real in motion.
For practical results, make the twists tighter near the elastic and slightly looser at the ends. Use two bobby pins on opposite sides to anchor everything, so it won’t slip when you move.
If you’re personalizing for your outfit, match the direction of the twists to your earrings or neckline. A top that’s structured often looks amazing with tighter twists, while a flowy outfit pairs well with softer, looser wrapping.
To keep frizz down, use a tiny amount of gel on the twist only, not the whole pony. This helps keep the pony flexible and prevents buildup.
4. Soft Bubble Low Pony
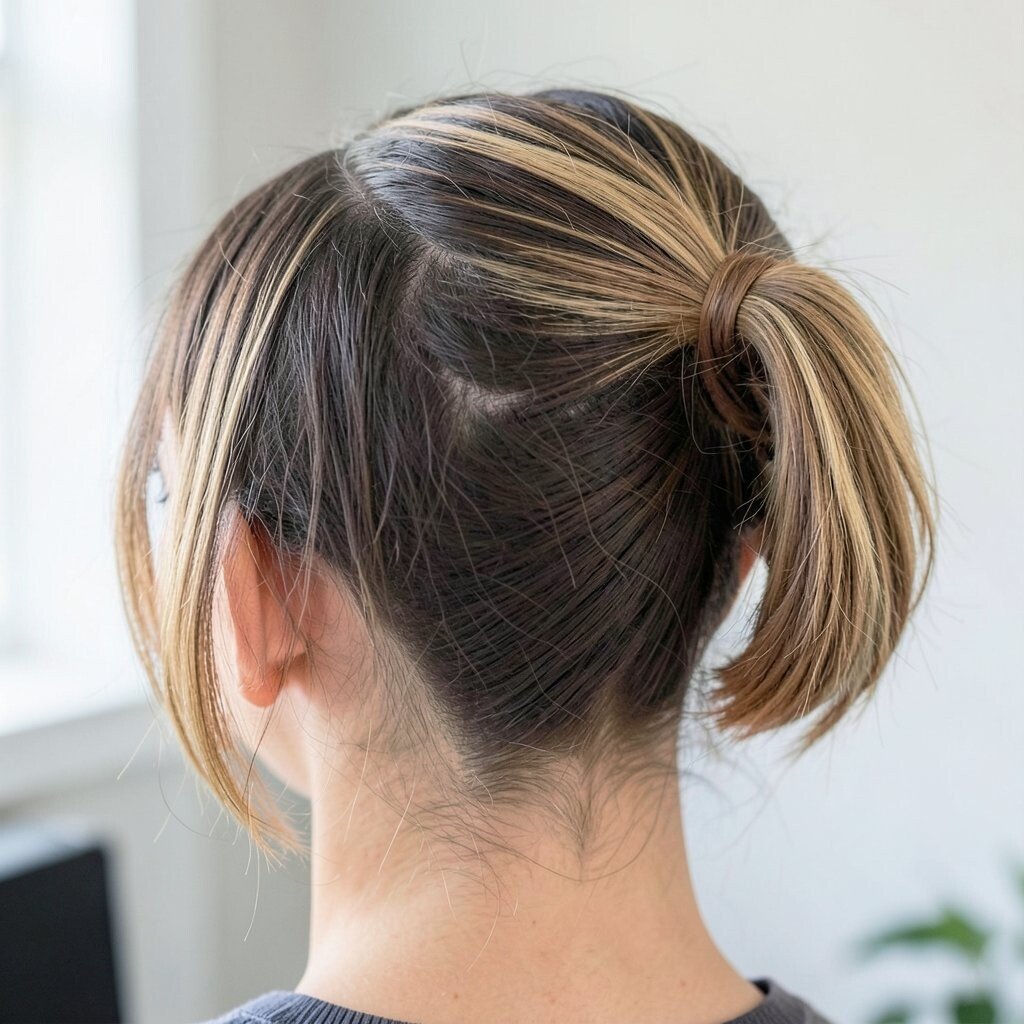
Secure your low pony as usual, then pull small sections of hair through the elastic at even spacing. This creates bubble shapes that look playful and modern without needing complicated tools.
The benefit is instant texture and a “done” look that still feels light. It’s ideal when you want something fun for weekends, casual dates, or a day with friends.
When you tie each bubble, keep the pony smooth between elastics so the bubbles look clean. If your hair is very slippery, use slightly thicker elastics and tighten them gently.
Personalize it by choosing the bubble count you like, or by adding one extra bubble near the middle for a balanced look. For cost, you can use mini elastics you already have at home, and the style works even with simple hair extensions if you want more length.
Keep your hair looking fresh by using dry shampoo at the roots if your hair feels flat. The added grip helps the bubbles hold their shape longer.
5. Low Pony With a Side-Swept Fringe Effect
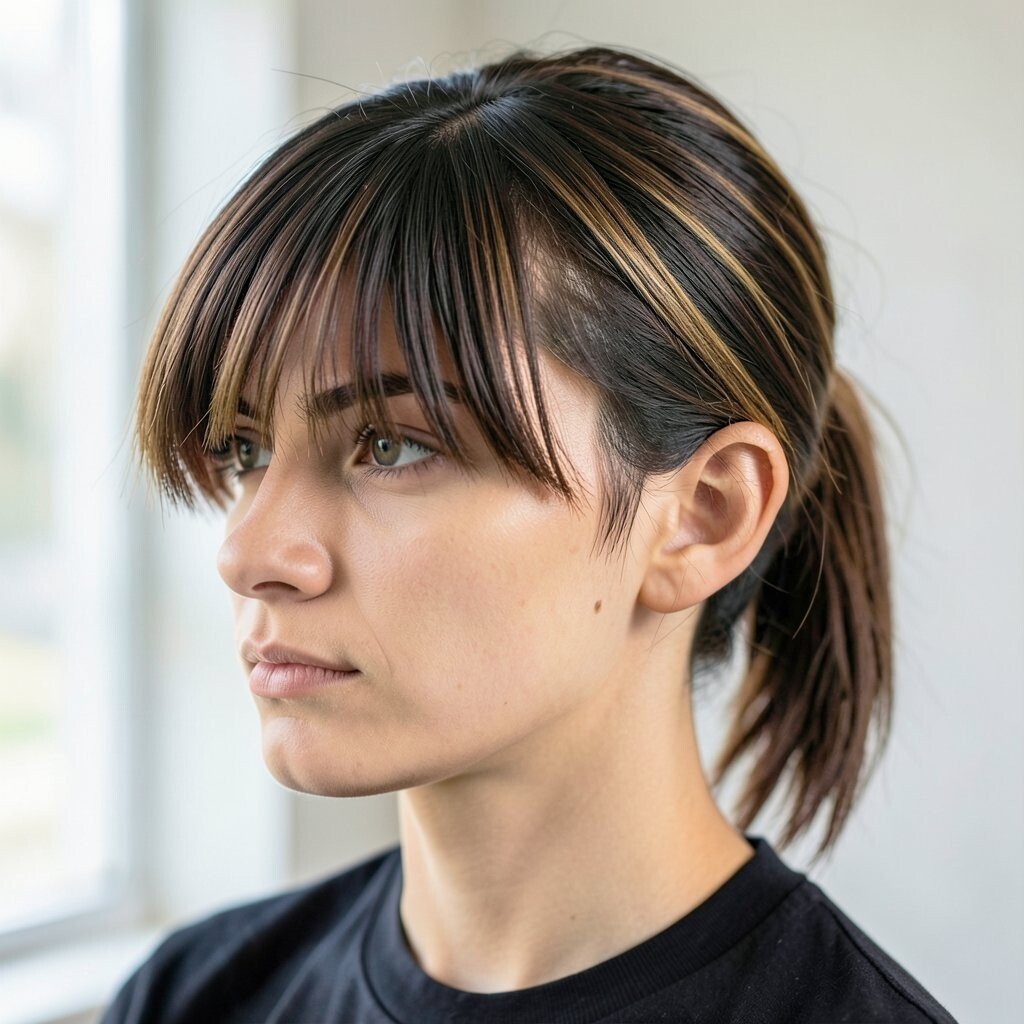
Create your low pony, then sweep a small portion of hair across your forehead. Pin it in place with bobby pins hidden under the pony’s top layer so it feels smooth and intentional.
This hairstyle gives you the look of a fringe without cutting hair. It’s great for changing your style on the fly while still keeping your face open and bright.
To style it smoothly, lightly dampen the front section and use a brush to guide it into position. For personalization, match the sweep direction to your natural part so it feels effortless.
If you have fine hair, use a lightweight mousse on the front so it doesn’t collapse. If you have thick hair, press the front section flat first, then add a tiny amount of cream for hold.
6. Braided Low Pony With a Single Plait
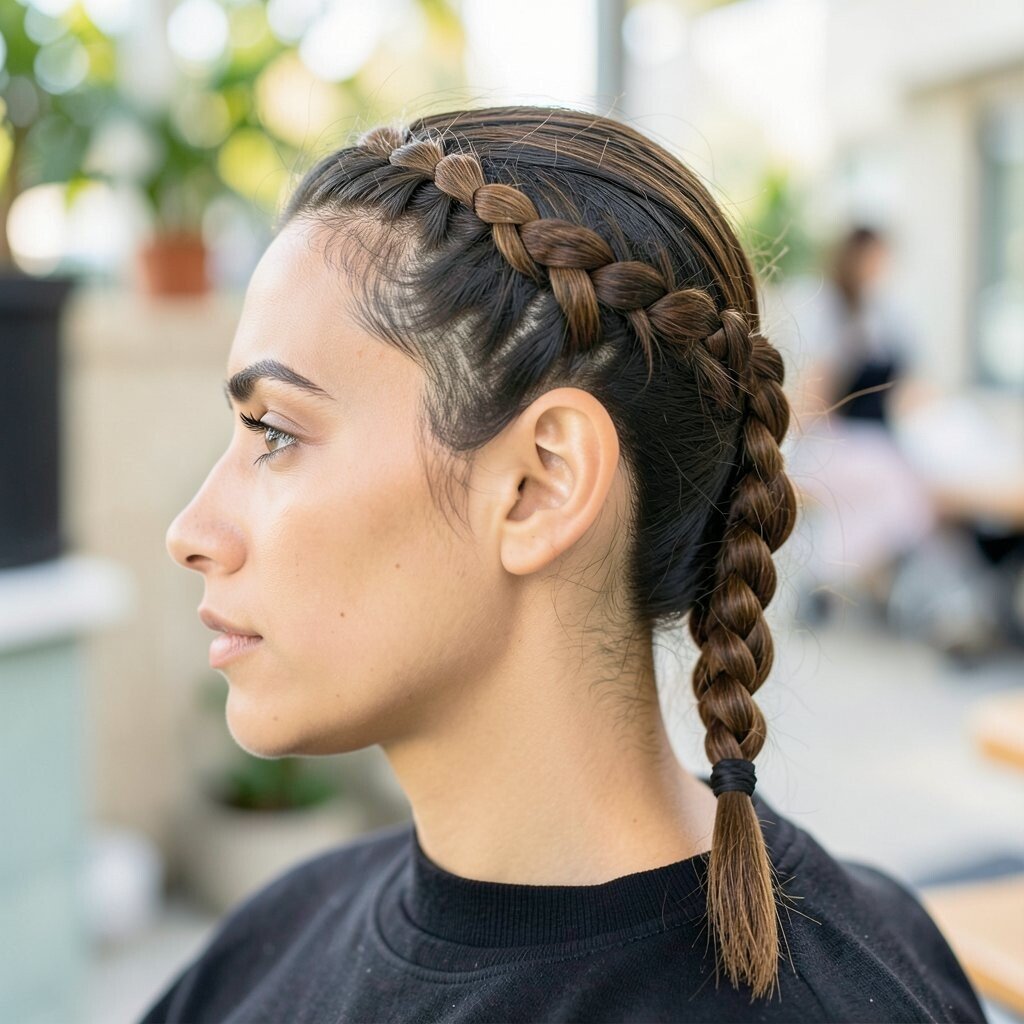
Start by tying a low pony, then braid the pony as a single plait from top to ends. Secure with a small elastic and gently tug at the braid to add a bit of volume.
A braid adds texture and uniqueness while keeping the whole style practical. It works for school, errands, and long days when you want your hair to stay put.
For a fresh twist, braid with only the outer edges at first, then merge fully once the braid is established. That makes the braid look more dimensional and less uniform.
If you want cost-friendly options, use a pre-made braid extension only when you need extra length. You can also do a quick braid in the morning instead of buying new styling products.
To personalize, choose a thin ribbon to wrap at the elastic, or add a hair clip that matches your bag or shoes.
7. Low Pony With Hidden Crown Volume
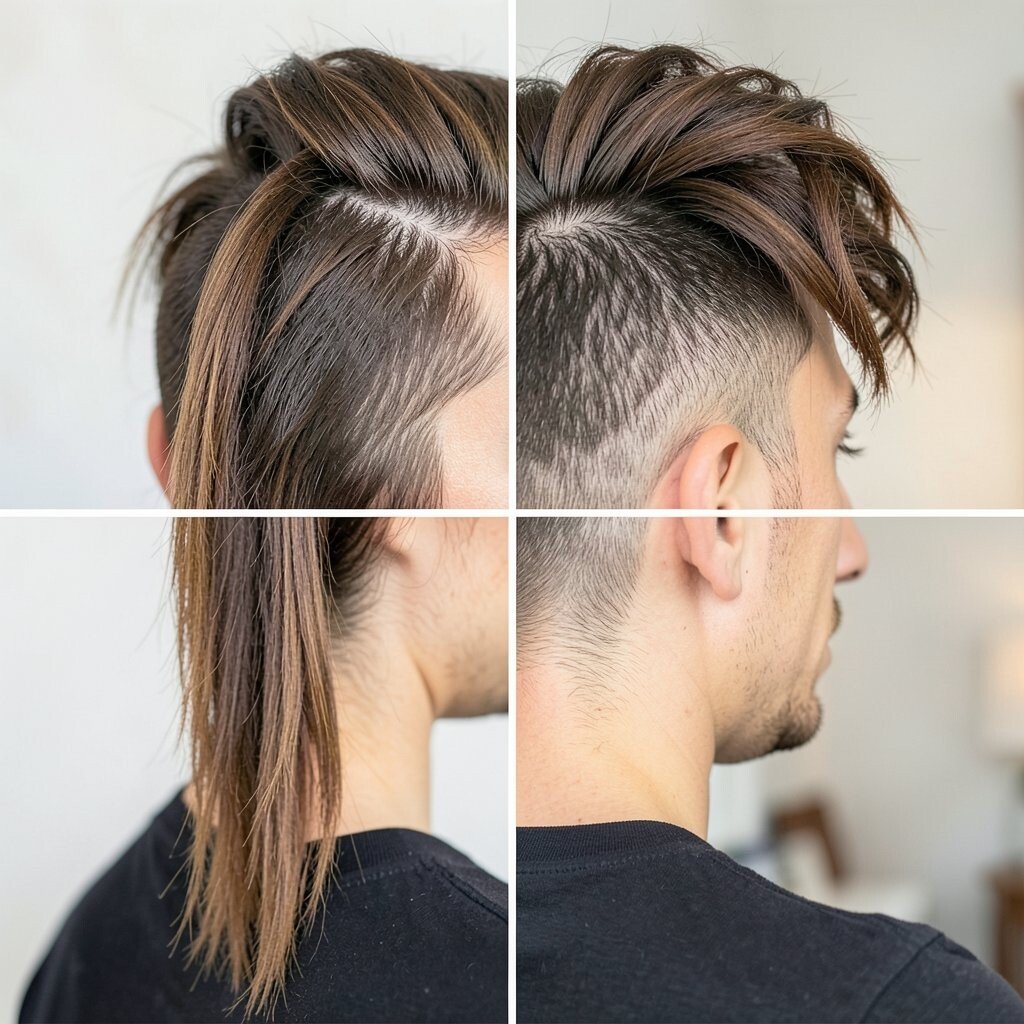
Gather your hair into a low pony, but before tying, create gentle lift at the crown. You can do this by teasing only the roots slightly and then smoothing the top layer over it.
This gives you the benefit of a fuller silhouette while the pony stays low and neat. It’s a smart choice for anyone who wants their hair to look thicker in photos.
Keep it practical by using a soft brush to blend the tease so you don’t see harsh bumps. Finish with a light mist of hairspray to help the crown volume stay steady.
For personalization, keep the pony sleek for a formal vibe or let the ends wave for a casual look. If your hair is naturally curly, embrace your texture and use the lift only at the top before tying.
To reduce product buildup, use the lightest spray you can and focus it on the crown area.
8. Micro-Braided Low Pony Rows
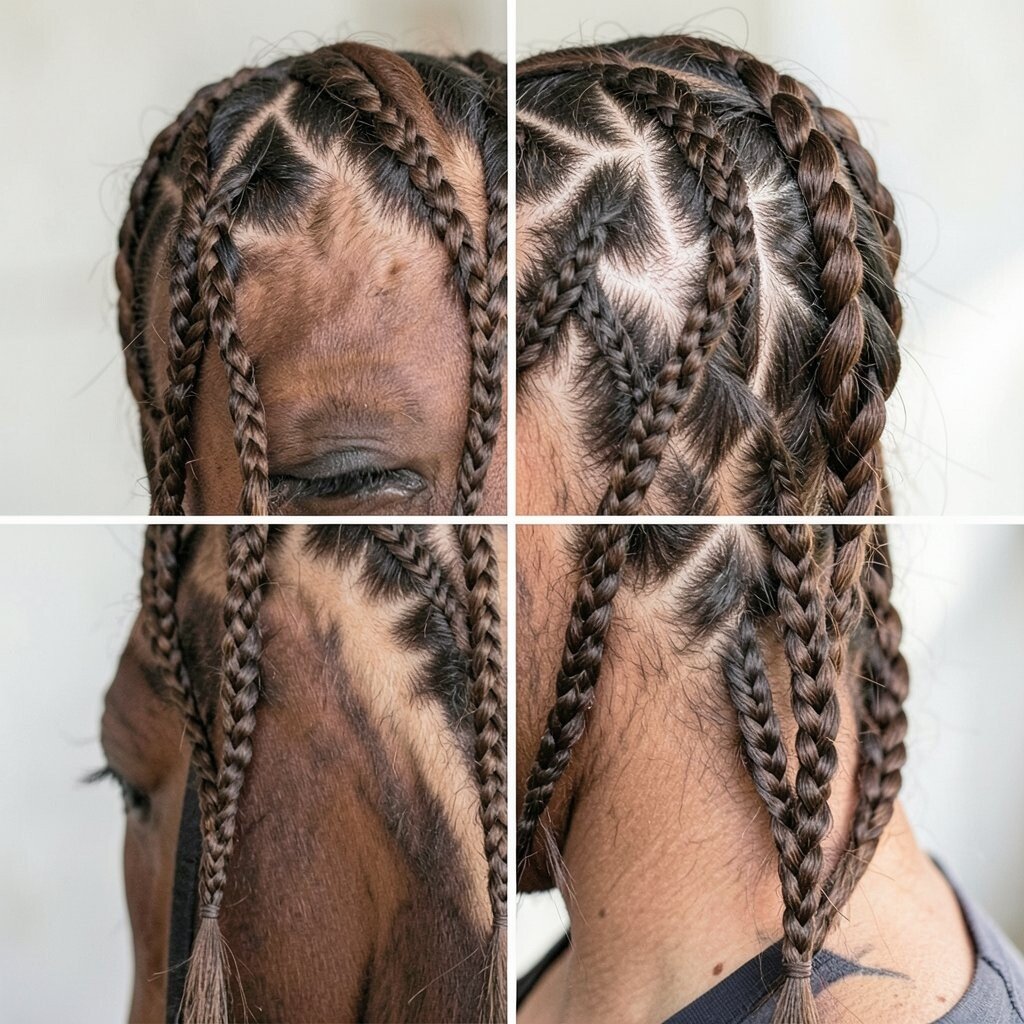
Make a low pony, then add tiny braids along the top layer before you secure everything. Even a few micro-braids can make the style feel detailed and current.
This look is unique because it adds pattern without taking hours. It’s also helpful when you want a pony that still feels interesting even on simple days.
For practical styling, keep the micro-braids small and consistent, then braid only through the top section so the pony remains comfortable. Pin any loose ends neatly before you finish with the elastic.
Personalize it by matching the braid pattern to your part line, like following a diagonal for a modern look. If you have less time, you can do two or three micro-braids instead of a full row.
Cost considerations are friendly here since you only need a few elastics and your regular styling products. A small hair gel or edge control can help the tiny braids stay tidy.
9. Low Pony With a High-End Bow Wrap
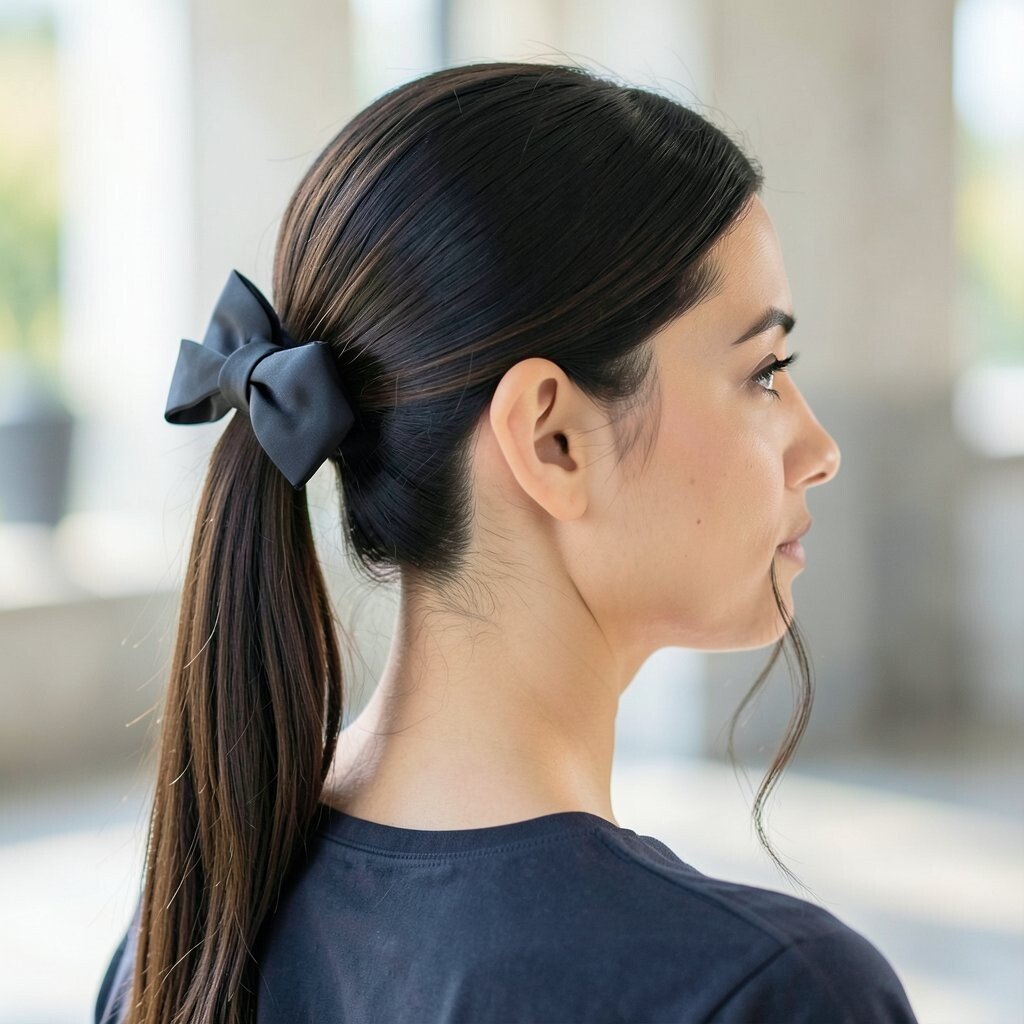
Secure a low pony and wrap a ribbon around the elastic. Tie the ribbon into a bow at the back or side, then fluff the ribbon ends so they look airy.
This hairstyle adds charm and uniqueness in seconds. It also works for birthdays, holidays, and even everyday outfits when you want a little extra brightness.
To keep the bow from sliding, pin the ribbon’s knot just under the pony’s top layer. Choose a ribbon fabric that won’t tangle easily, like satin blends or smooth polyester.
Personalize it with colors that match your hair accessories or outfit mood. A neutral ribbon looks classy, while a bold color can make the pony feel trendy and fun.
If you want cost-effective options, use a small ribbon you already have from gifts or craft stores. You can also recycle a scarf strip by cutting it into a ribbon width and hemming or tying ends.
10. Low Pony With Soft Waves and Root Lift
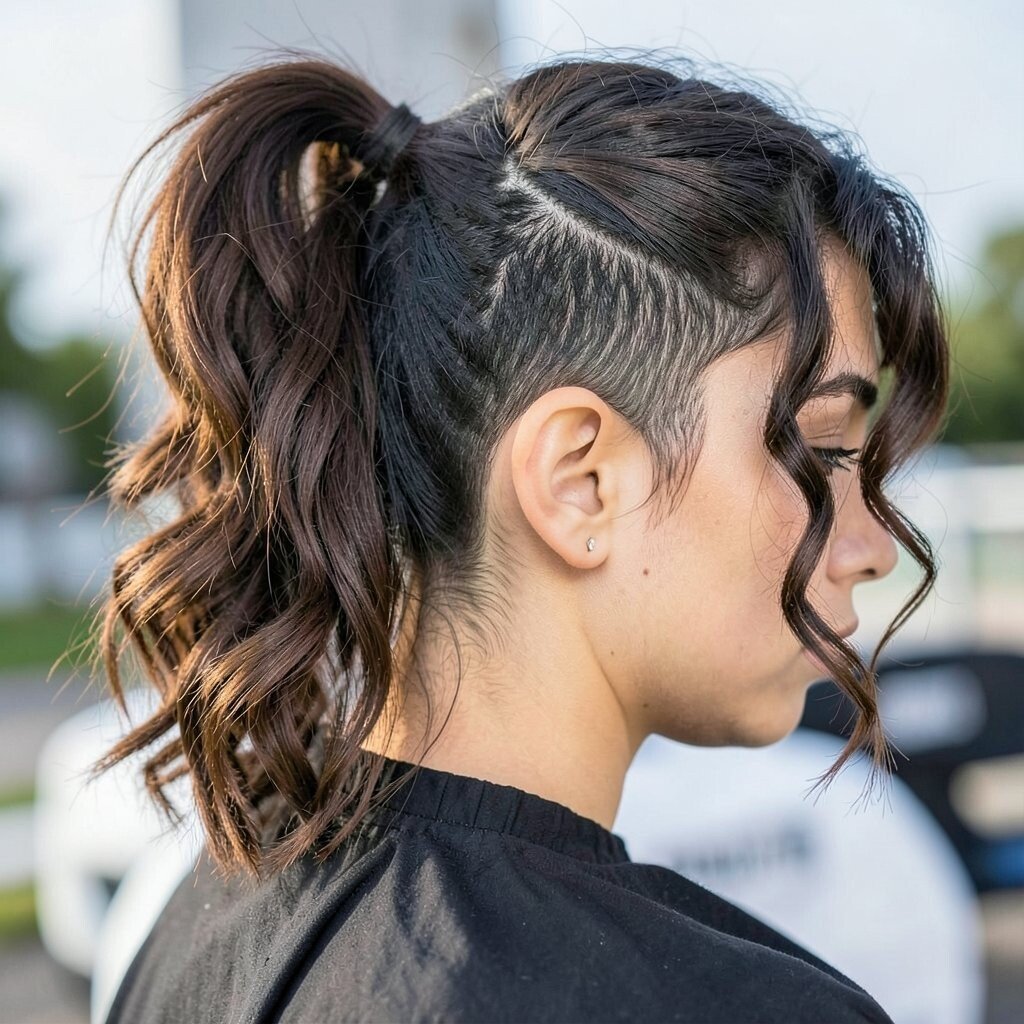
Secure a low pony loosely, then curl or wave the ends for a relaxed finish. For root lift, lightly tease the top roots before tying, then smooth the surface so it looks polished.
The benefit is a pony that looks romantic and dimensional while staying easy. It’s perfect when you want movement without looking messy.
For practical tips, use a heat protectant if you’re using a curling iron. Then, after curling, let the waves cool before brushing them out with your fingers for softer texture.
Personalize the vibe by choosing tight waves for a glam look or loose waves for a casual feel. If your hair is short, you can curl a small extension piece and blend it into the pony for extra length.
Cost considerations matter less here because you can use inexpensive tools like a simple wand or rollers. Styling spray and heat protectant are usually the biggest essentials, and they last a long time.
11. Low Pony With a Sleek Side Part
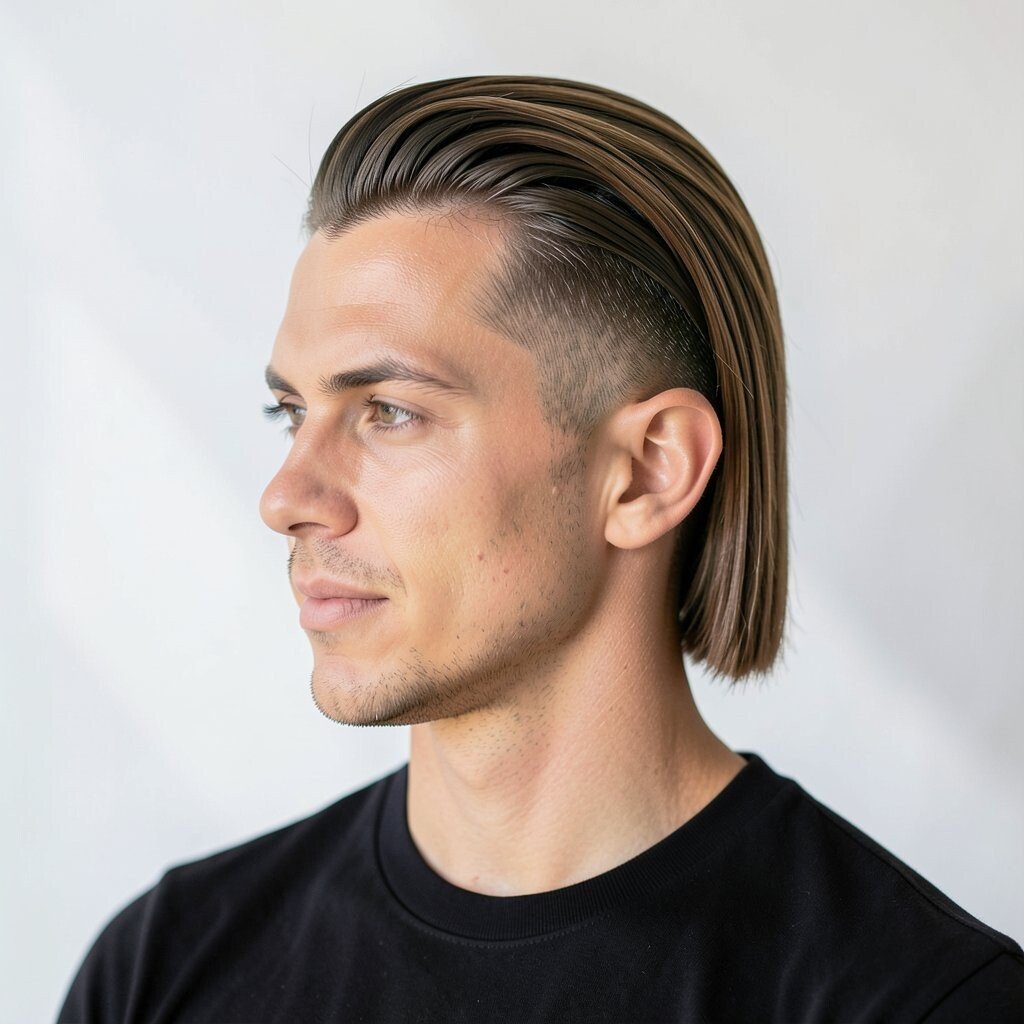
Make a sharp side part, then pull hair into a low pony that follows the line. Brush the pony smooth and keep the sides neat so the part shows clearly.
This look feels modern and clean, with the benefit of highlighting your face shape. It’s also a great option if you love the look of a polished blowout but want less upkeep.
To keep it fresh, use a tail comb to refine the part and smooth the hair near the ear. Add a tiny bit of styling cream only where your hair tends to puff up.
Personalize with a subtle under-layer tuck if your hair is thick, so it stays flat. If your hair is fine, keep the pony slightly off-center so it doesn’t look too flat.
When you’re aiming for current trends, this sleek, side-parted finish pairs well with minimal makeup and statement earrings.
12. Low Pony With a Half-Up Ribbon Illusion
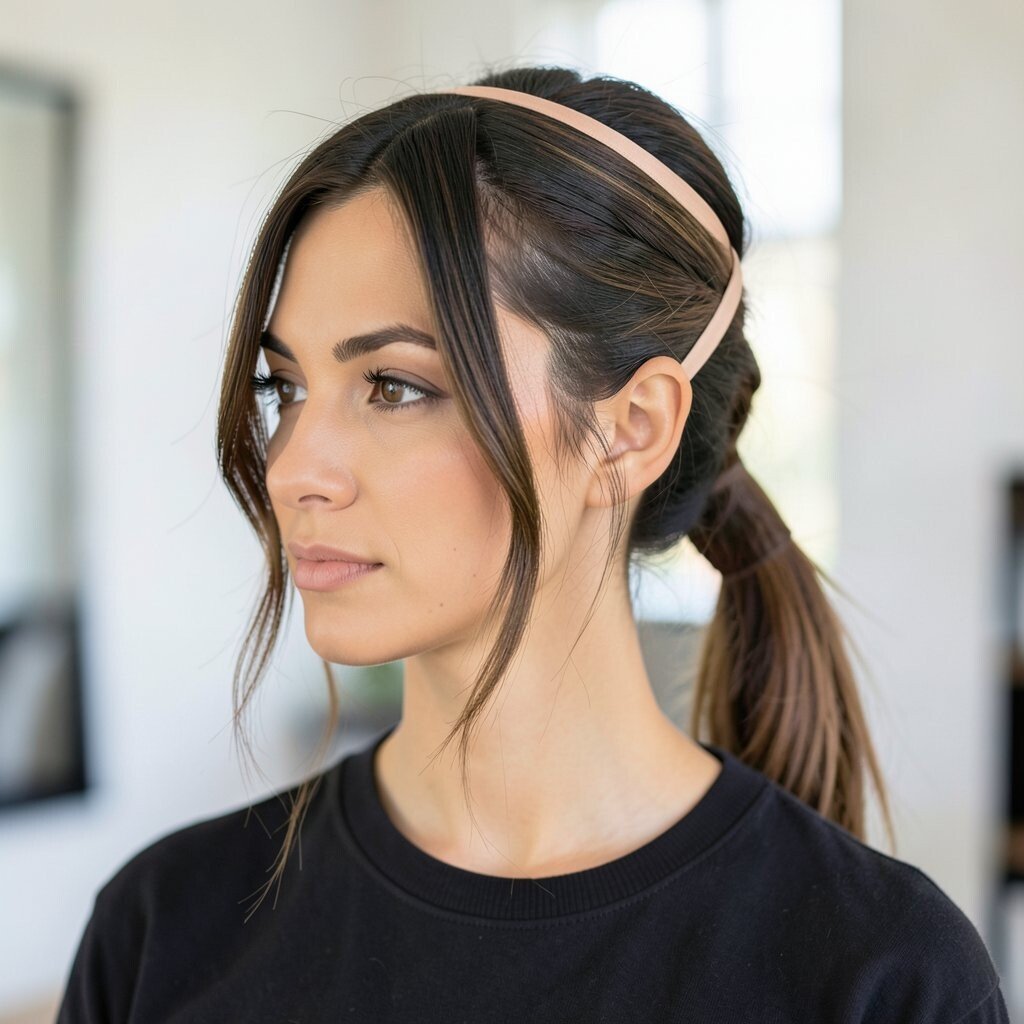
Pull your hair into a low pony, but take a small front section and twist it backward before securing. Once it’s tied, wrap a thin ribbon over the elastic to create a neat illusion that looks like a half-up style.
The benefit is a layered, interesting look that still takes only a few minutes. It’s unique because it blends a soft front twist with a decorative wrap.
For practical tips, keep the front twist flat and smooth so it doesn’t add bulk under the ribbon. Use bobby pins for hold, and tuck them so they disappear under the pony’s top layer.
Personalize by using a ribbon color that matches your outfit theme, like warm tones for fall days or cool tones for summer. If you prefer no ribbon, swap it for a matching scrunchie that sits at the elastic.
Cost-wise, ribbon packs are usually affordable, and you’ll wear them for many styles beyond the pony.
13. Low Pony With a Knotted Over-Under Wrap
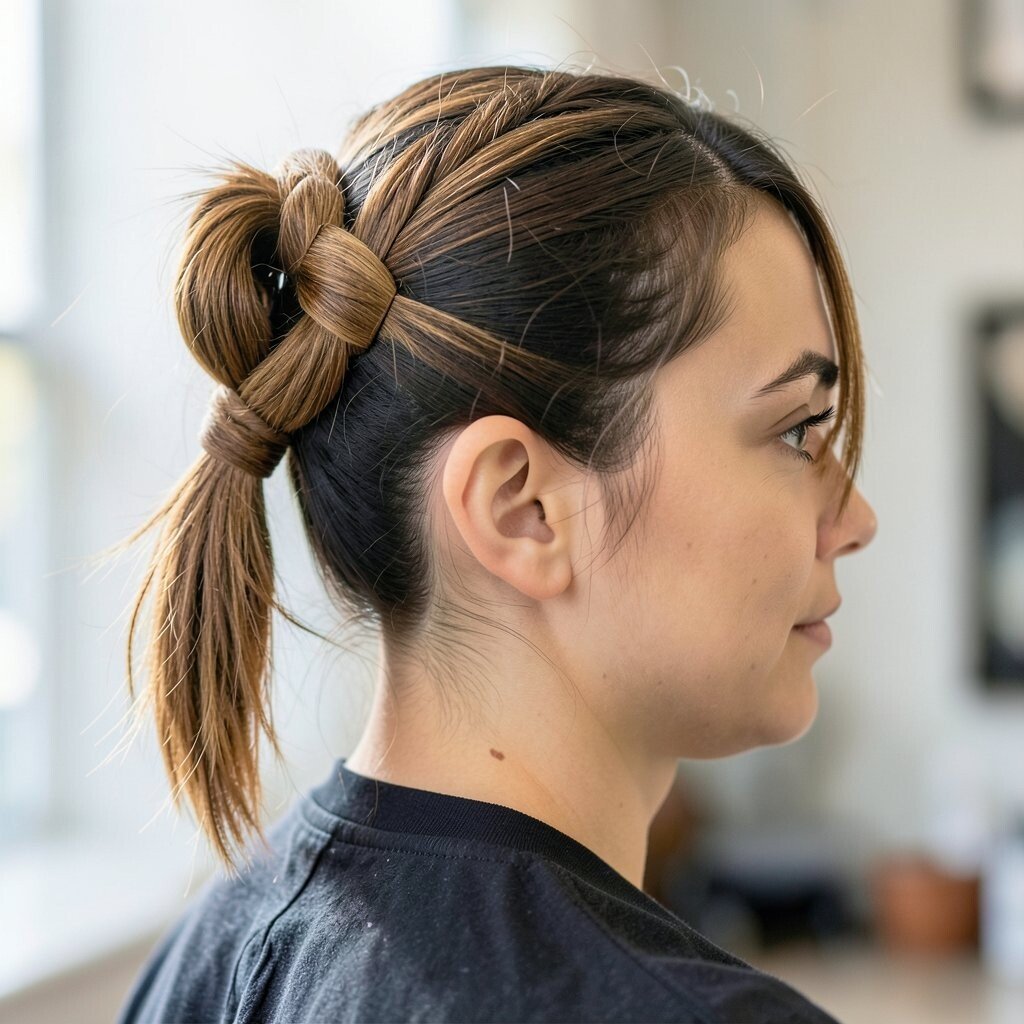
Tie your low pony, then divide the pony into two sections. Twist one section under the other and wrap it around the elastic like a knot, then pin to secure.
This creates a more architectural look than a simple wrap and feels really unique. It’s also great for hiding elastics and making the pony look expensive.
For practical styling, keep the knot tight near the elastic and loosen the ends so they flow naturally. Use a light spray to help the pins stay put, especially on slippery hair.
Personalize it by adding a small accessory pin, like a pearl or metallic clip, right where the knot meets. If you have curly hair, let the ends keep their pattern for a softer, more playful version.
If you’re worried about time, practice the knot once on a quiet morning and then you’ll repeat it quickly later.
14. Low Pony With a Braided Crown at the Back
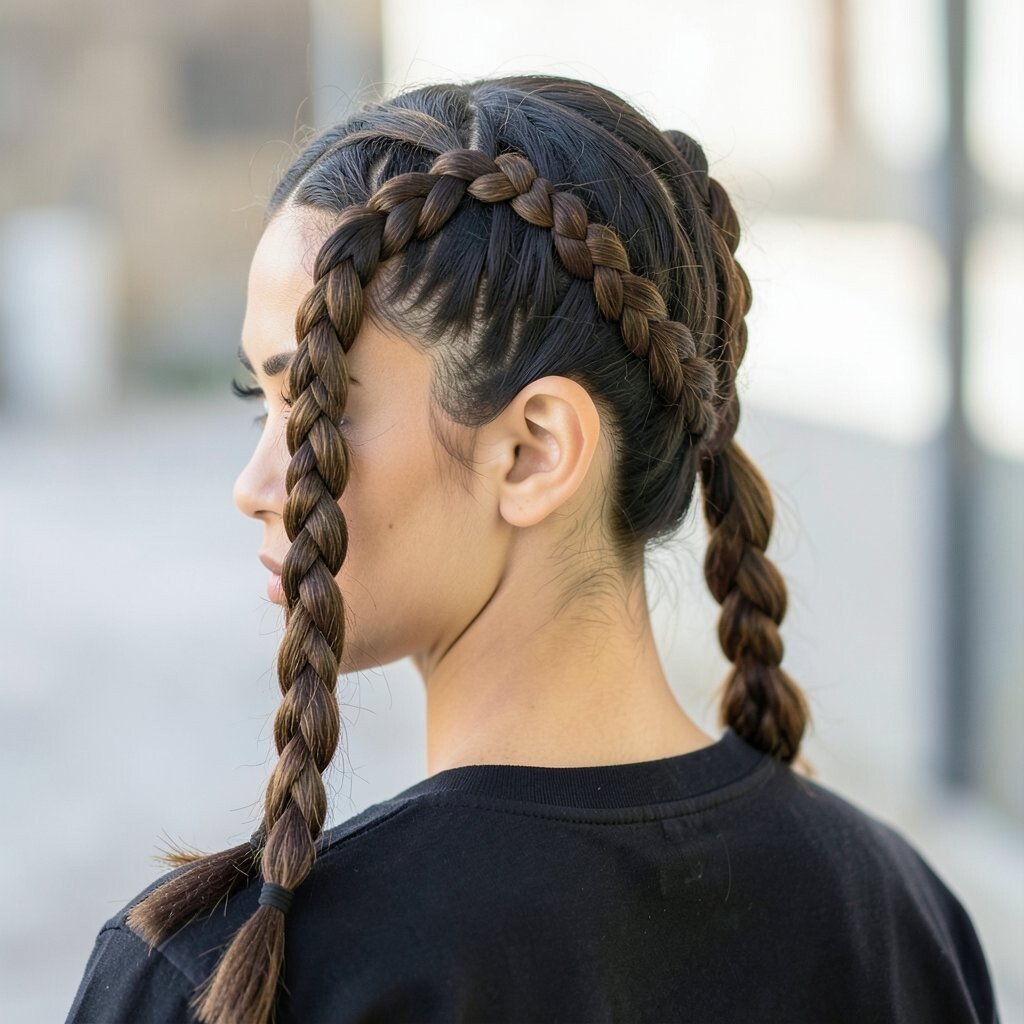
Create a low pony, but first braid a thin crown-like section across the back. Secure that braid into the pony so it becomes the main design instead of just a detail.
This style looks special from every angle and gives a uniqueness that’s easy to spot in photos. It also helps keep the top layer smooth because the braid naturally holds hair in place.
For practical tips, keep the braid snug enough to stay flat, but not so tight that it hurts. If you want extra comfort, tug gently at the braid once it’s secured so it doesn’t pull the scalp.
Personalize by using a slightly wider braid section for a bold look, or keep it narrow for a subtle finish. If you like current trends, this crown-braid vibe works beautifully with sleek outfits and also with casual knits.
Cost considerations are simple since you only need elastics and your regular hair tools. You can even skip fancy products and just use a smoothing cream for a neat hold.
15. Low Pony With Bubble Crown and Tapered Ends
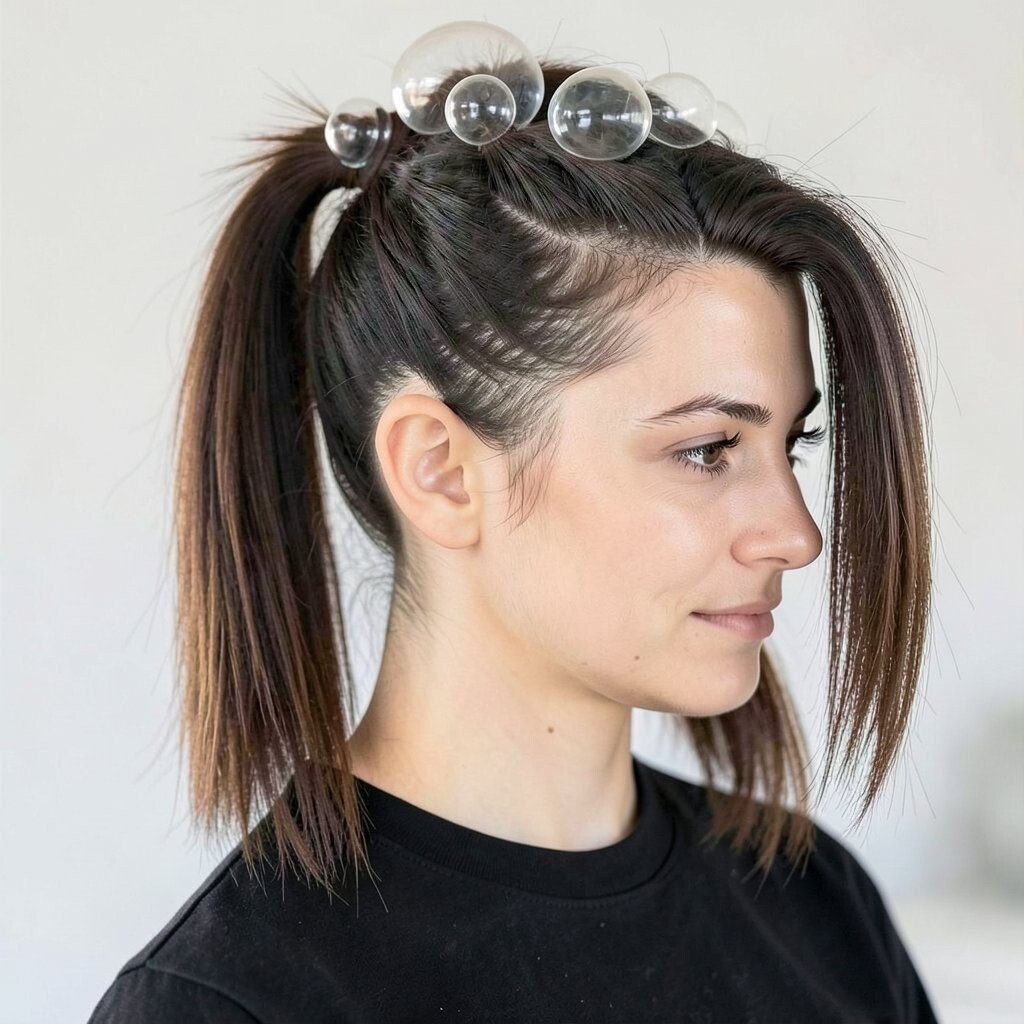
Tie a low pony, then add mini elastics along the length to create a bubble crown effect. Finish by gently tapering the ends, either by smoothing them or lightly brushing them to blend the shape.
The benefit is a pony that looks fun and styled while still feeling practical. It’s unique because the bubbles add dimension without needing a complicated braid pattern.
For practical styling, keep the bubbles slightly closer near the top and more spaced as you go down for a tapered look. This makes the pony feel balanced instead of heavy.
Personalize by adding one accent color elastic for a playful moment, or by keeping everything hair-toned for a clean finish. If your hair is short, use a pony extension and attach it with a comb so the bubbles have something to grip.
Cost-wise, extensions can be optional, and the style still works on natural hair length too. If you buy elastics in a variety pack, you’ll have plenty for this and other hairstyles.
16. Low Pony With a Feathered Finish and Soft Fringe
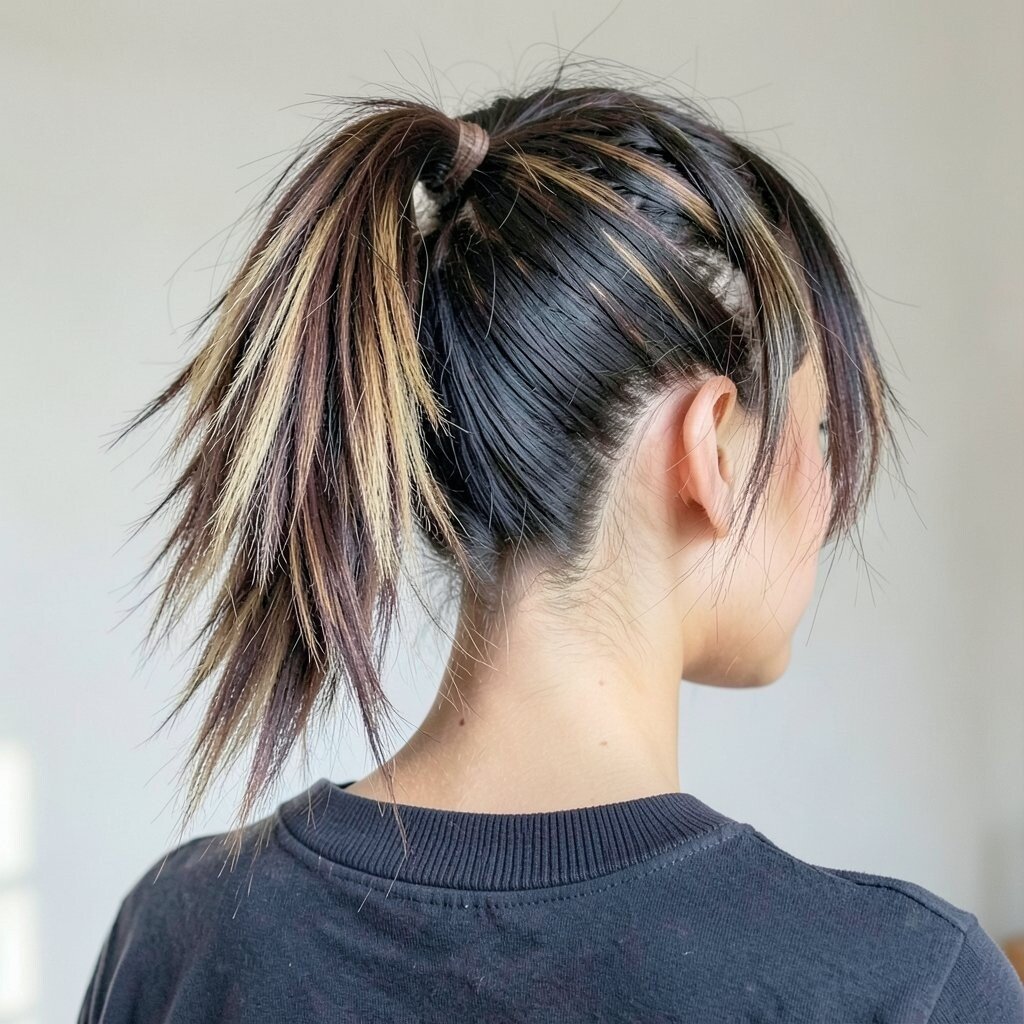
Brush the hair into a low pony and keep the top sleek, then add feathered softness to the ends. You can do this by curling lightly and then separating the curls with your fingers.
This look gives a light, airy feel that looks great with casual outfits. The benefit is that your hair moves nicely, even if the pony is secure at the back.
Personalize the look by deciding how much fringe softness you want at the front. A gentle side fringe effect works for a sweet vibe, while a more defined front curl looks glam.
For practical tips, avoid over-brushing after curling because you want the ends to stay textured. A small amount of hair oil on the tips can help the feathering look shiny instead of dry.
If you’re styling for a humid day, use a humidity-resistant spray to keep the ends from puffing up.
17. Low Pony With a Wrapped-Scrunchie Vintage Twist
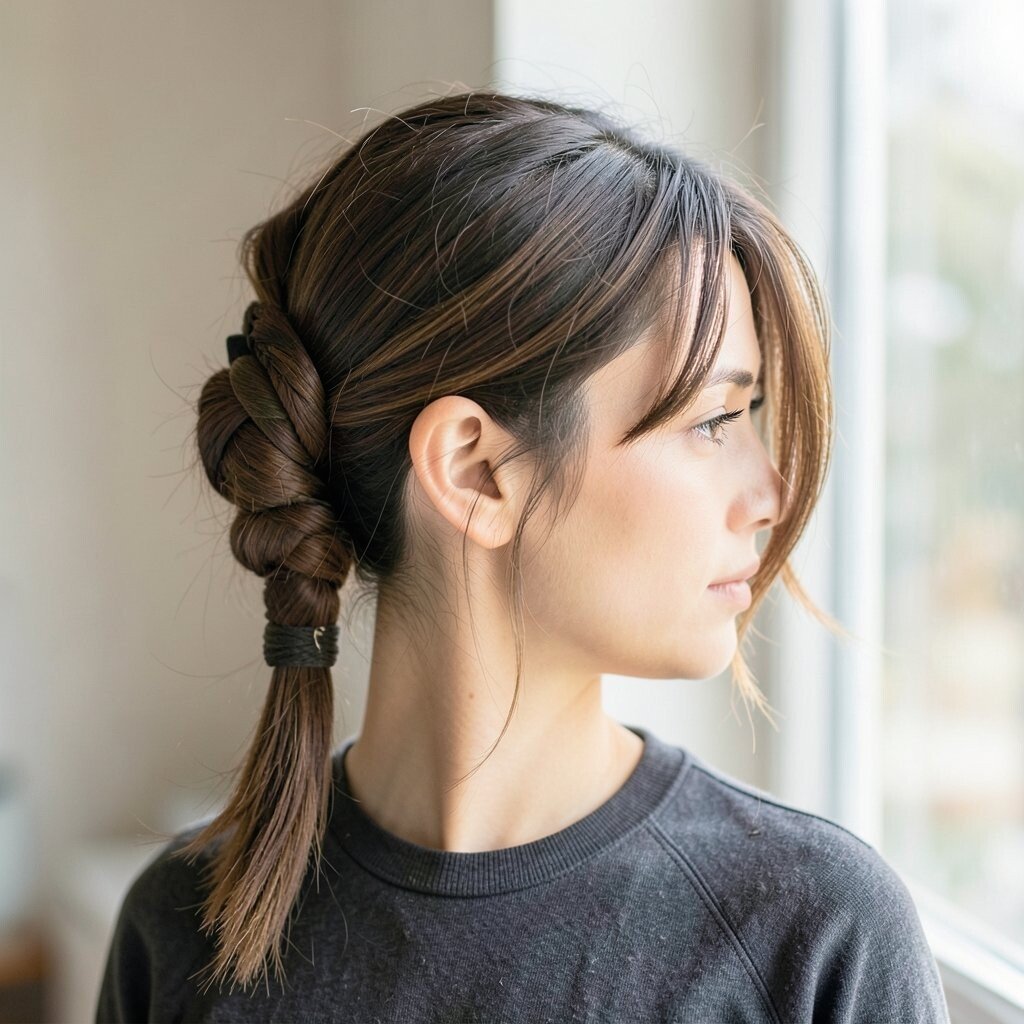
Gather hair into a low pony and secure it with a medium scrunchie for a softer grip than a standard elastic. Then wrap a thin strand around the scrunchie so it looks intentional and polished.
This hairstyle brings a vintage twist because the scrunchie gives a retro softness. The uniqueness is in the contrast between the soft tie and the smooth wrapped detail.
For practical tips, keep the strand wrap thin and pin it securely so it doesn’t slip. If you want a cleaner look, smooth the base of the pony with a brush before wrapping.
Personalize by adding a small clip at the back, like a barrette, to echo the scrunchie vibe. If your hair is very straight, a quick curl at the ends can make this look feel fresh and updated.
Cost considerations are great since scrunchies are affordable and often last a long time. You can also reuse old scrunchies by washing them carefully if they’ve become a little stiff.
18. Low Pony With a Ladder Braid Texture
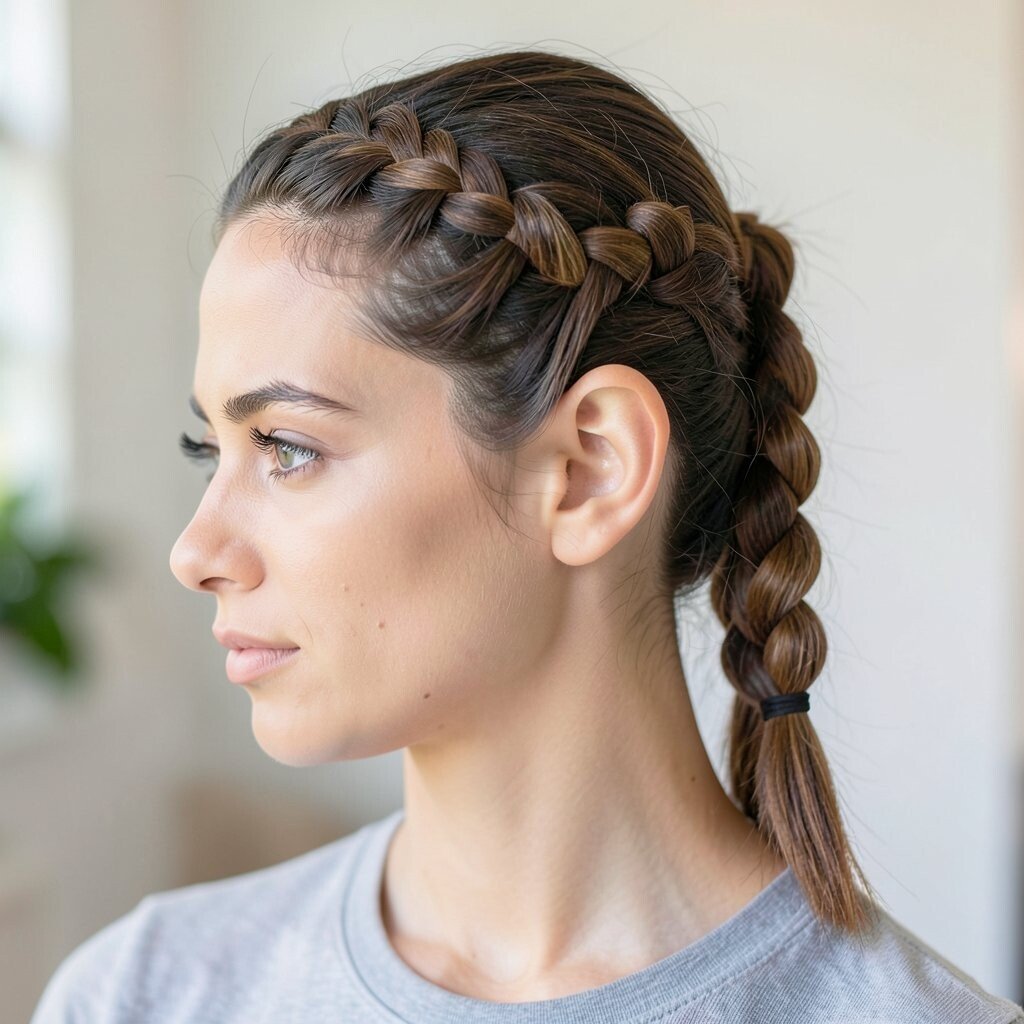
Tie your hair low, then create a ladder braid by doing small sections and leaving tiny loops as you go. The braid looks patterned, like tiny steps, and it stands out without being overly dramatic.
The benefit is that the texture stays interesting even if your pony is simple. It’s also unique enough for events while still practical for regular days.
For practical styling, use a light gel or cream to help the braid hold its shape, then use elastics only at key points. Tug gently after each section so the ladder effect is visible but not too bulky.
Personalize by pairing the braid with a straight finish for a sleek look, or with waves at the ends for a softer style. If you’re aiming for a trendy feel, ladder braids are a fun alternative to basic plaits.
Cost-wise, the braid needs no expensive tools, just elastics and patience. If you’re learning, practice on a day off and then repeat once you get the rhythm.
19. Low Pony With a Twisted Waterfall Top Layer
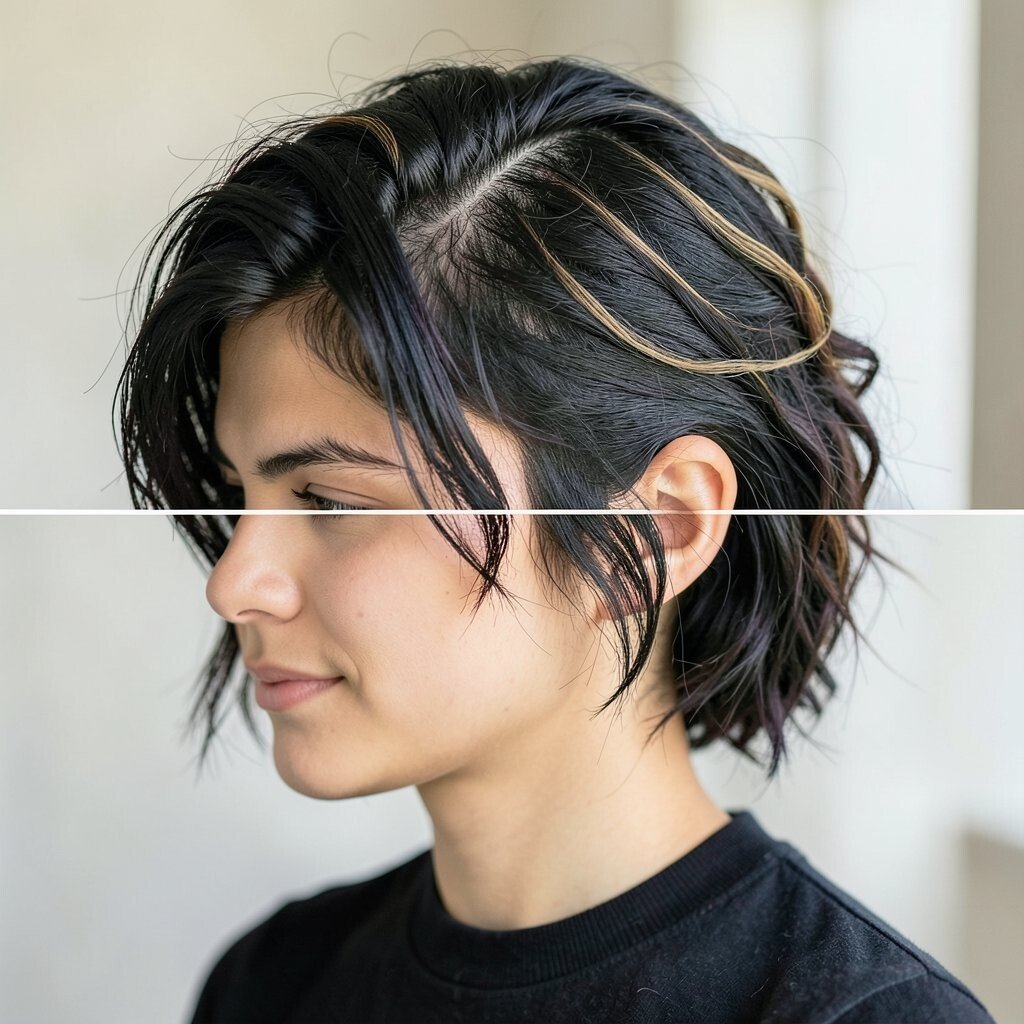
Start by tying your low pony, but keep the top layer partially flowing so it looks like a waterfall over the pony. Take two small sections near the front, twist them, and let them fall over the tied base before pinning.
This style gives a graceful, layered look that still feels secure. The benefit is that you get movement around your crown while the pony keeps the rest of your hair tidy.
For practical tips, pin each twist lightly and check the view from the front and side so it frames your face nicely. If you have thicker hair, use smaller sections for a more even waterfall effect.
Personalize it by curling only the front waterfall pieces for extra glow or leaving them straight for a modern vibe. For cost considerations, you don’t need extensions since the waterfall illusion creates visual length on its own.
To keep it looking fresh all day, carry a mini brush and smooth any flyaways quickly. A light mist of hairspray over the pinned area helps the twists stay in place without making hair feel stiff.