Your hair can look effortless and styled at the same time. With the right wave pattern, every morning can feel like a fresh start.
1. Beachy S-Shape Waves With a Side Part
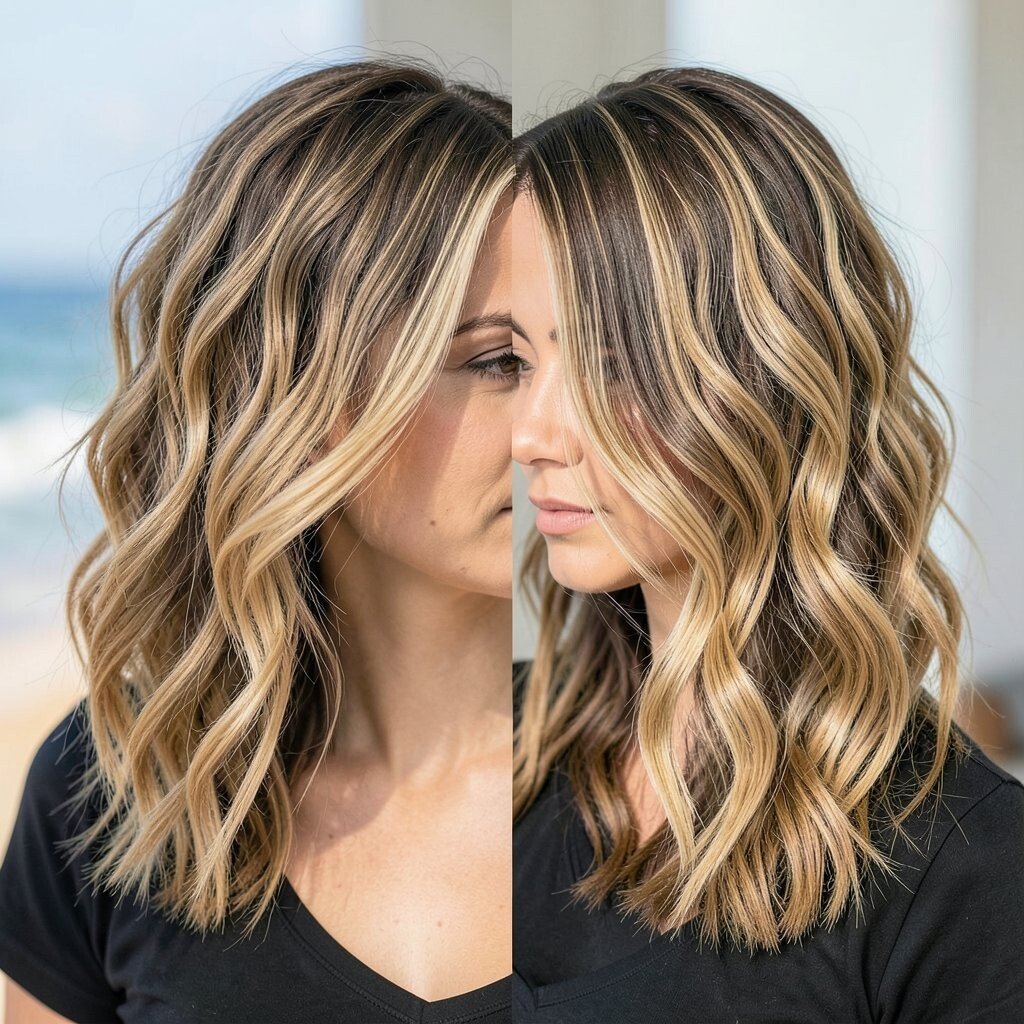
Picture your hair falling in soft curves that look like ocean air brushed through it. A side part makes the waves feel extra visible, especially around the crown and temples.
To get this look, start with damp hair and add a light mousse, then twist small sections loosely and let them dry. Finish by scrunching with your hands to keep the pattern airy instead of flat. For shine, run a tiny amount of serum over the outer layer only, not the scalp.
2. Loose Curtain Waves With Face-Framing Layers
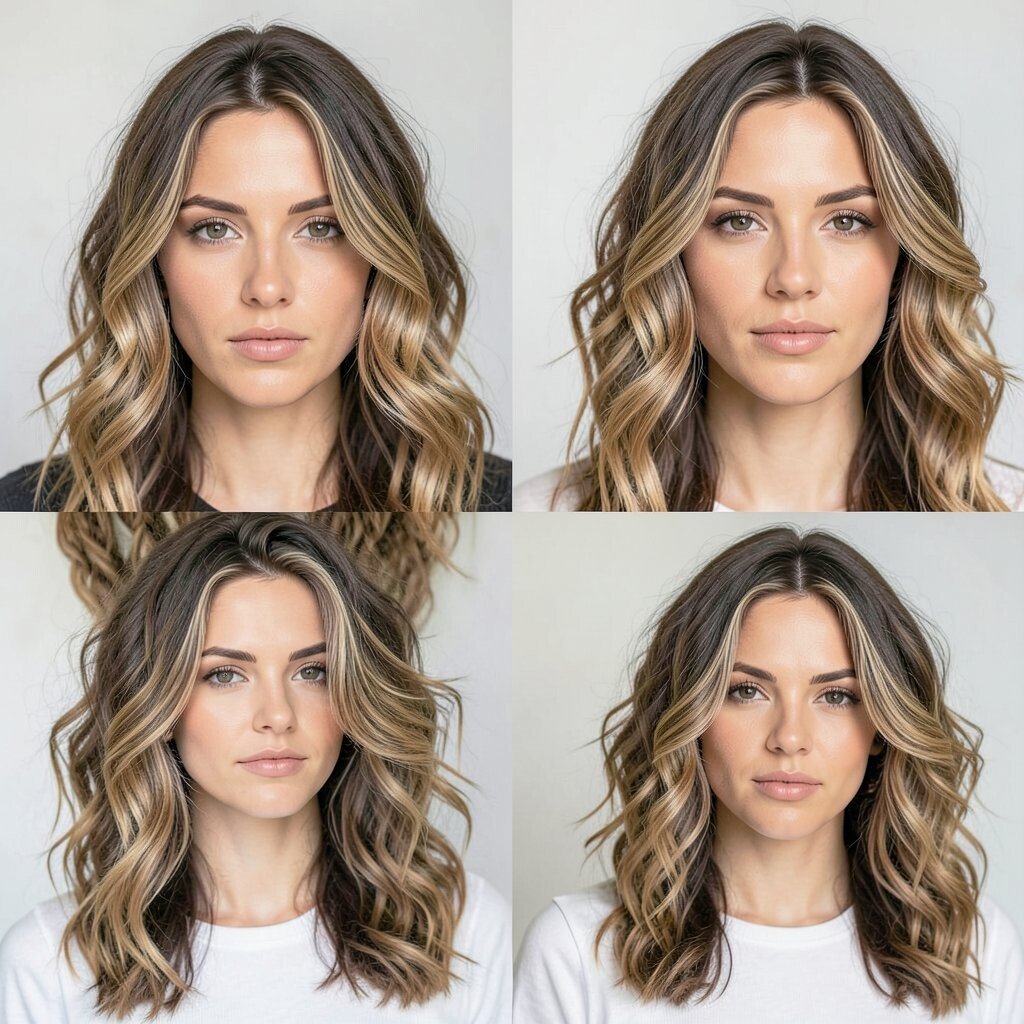
Your hair should look like it’s gently framing your cheeks with calm, flowing movement. The middle part makes the waves fall in two swooping curtains that catch the light.
Use a curling iron or wand with a bigger barrel for relaxed bends, then brush them out with a wide-tooth comb. If your hair is thicker, you can set the bends with a cool shot and let them cool before touching. This style also helps soften strong jawlines and makes everyday looks feel more polished.
Try this personalization by varying the start point of each wave, placing some curls closer to the roots for lift. For a natural finish, alternate the direction of wraps so the waves don’t look too uniform. If you’re on a budget, you can do this with flexible rollers at night instead of heat tools.
3. Heatless Twisted Rope Waves
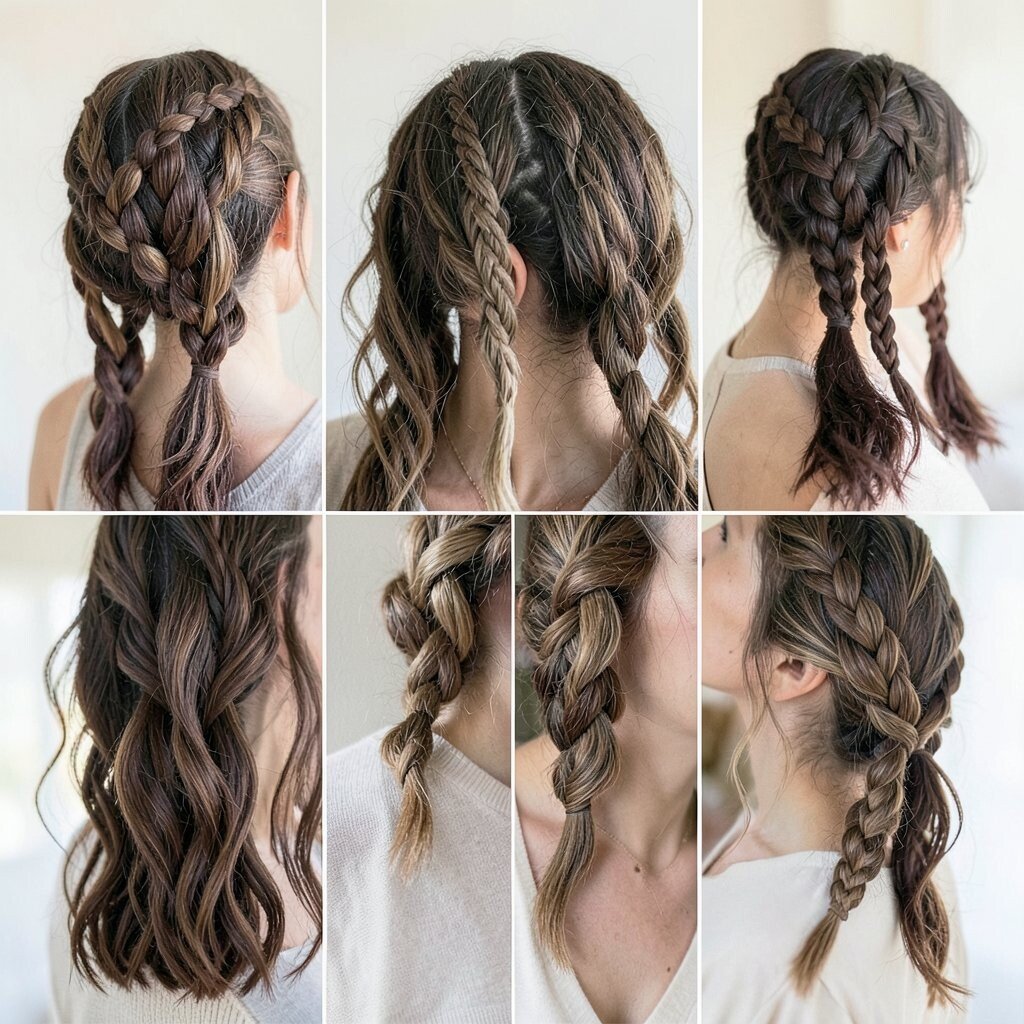
Imagine rope-like waves that look neat yet relaxed, with definition that lasts longer than you’d expect. They’re perfect when you want visible texture without crunchy hair.
Grab two-strand sections, twist them like a rope, then secure them with soft ties. After drying or overnight resting, unravel carefully and shake your roots for volume. You’ll get a wave pattern that looks custom because the twists create slightly different bends each time.
If your hair tends to frizz, apply a smoothing cream before twisting and use a satin scarf at night. For personalization, adjust section size to go from subtle waves to more noticeable curves. Low-cost beauty wins here too, since you can use items you already own like hair ties and a scarf.
4. Modern Shag Waves With Tousled Volume
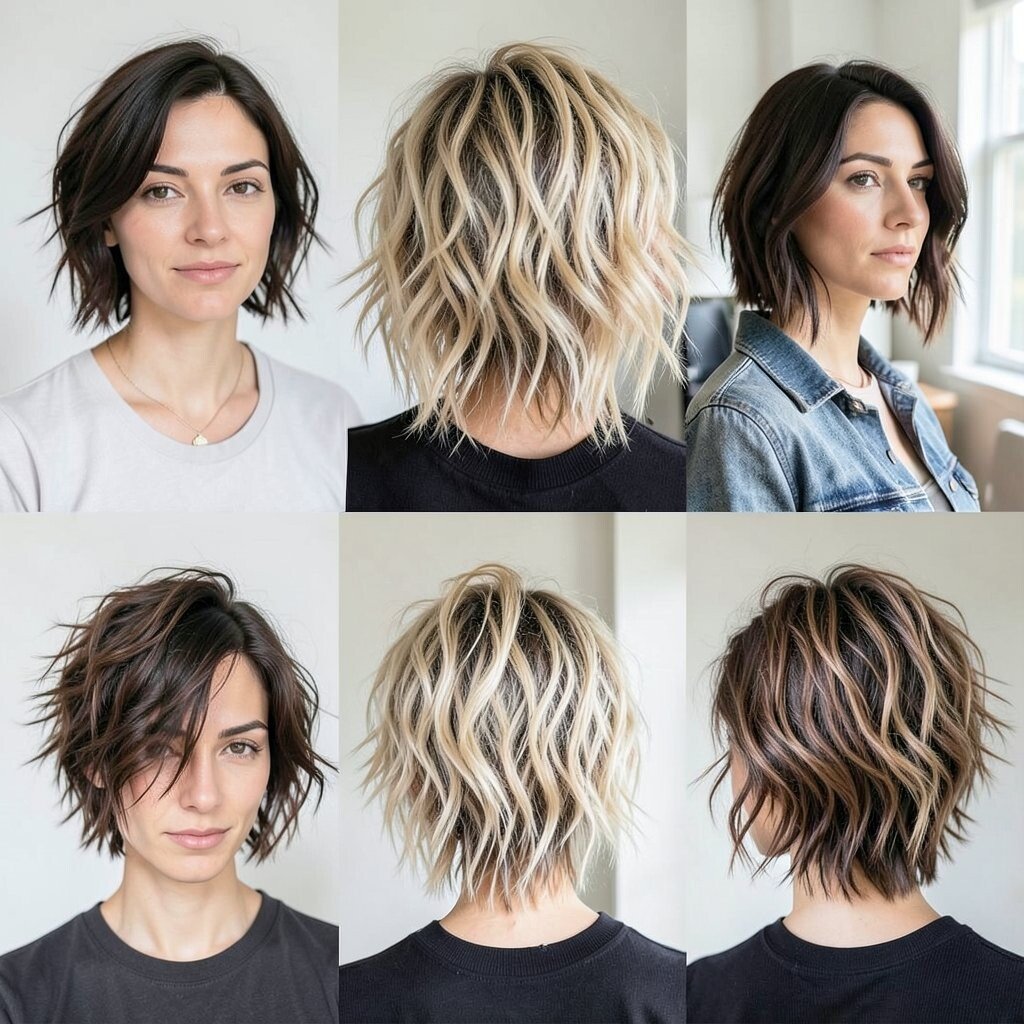
Think of a shag cut vibe but made wearable with waves that look airy instead of messy. The layers create natural movement, and the waves bounce around like they have their own rhythm.
Start with a root-lifting spray, then create loose waves using a wand while leaving the ends slightly softer. Add texture with a matte styling paste, focusing on mid-lengths and tips. This hairstyle is especially flattering for medium to thick hair because layers help the waves move without weighing everything down.
5. Soft Spiral Waves for a Glam Day
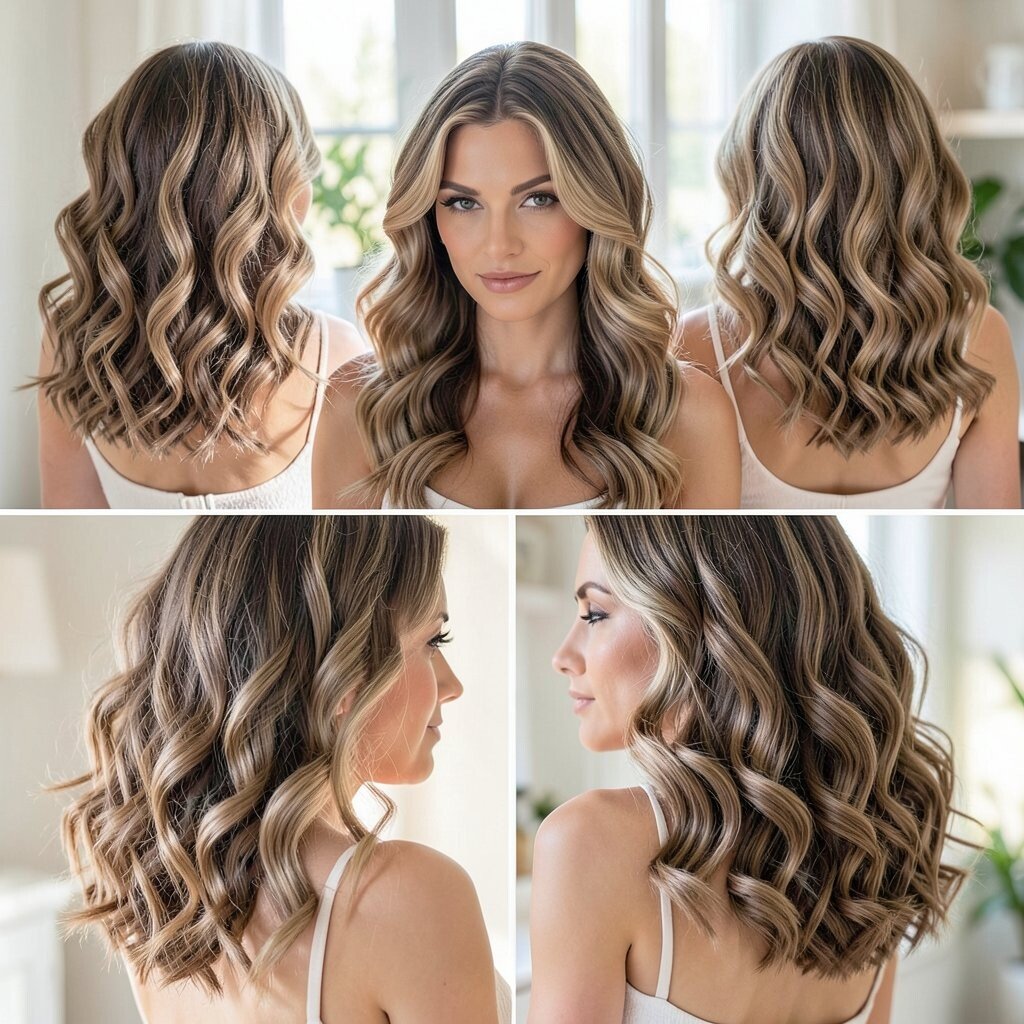
Spiral waves add that wow factor while still feeling smooth and touchable. When the curls loosen a bit, they create a ribbon effect that looks fancy in photos.
Wrap sections around a medium-barrel tool, then hold each wave for a short moment for a consistent pattern. Let them cool, then gently separate strands with your fingers so the spirals turn into flowing waves. This helps your style look fuller and more dynamic, not overly tight.
Personalize it by choosing where the spirals start, like beginning lower for a softer crown. If you want a trend-forward look, keep the top slightly more lifted than the ends for a modern silhouette. For cost considerations, rotating between heat and heatless sets through the week can help reduce tool time while keeping results.
6. Vintage Finger-Wave Inspired Waves
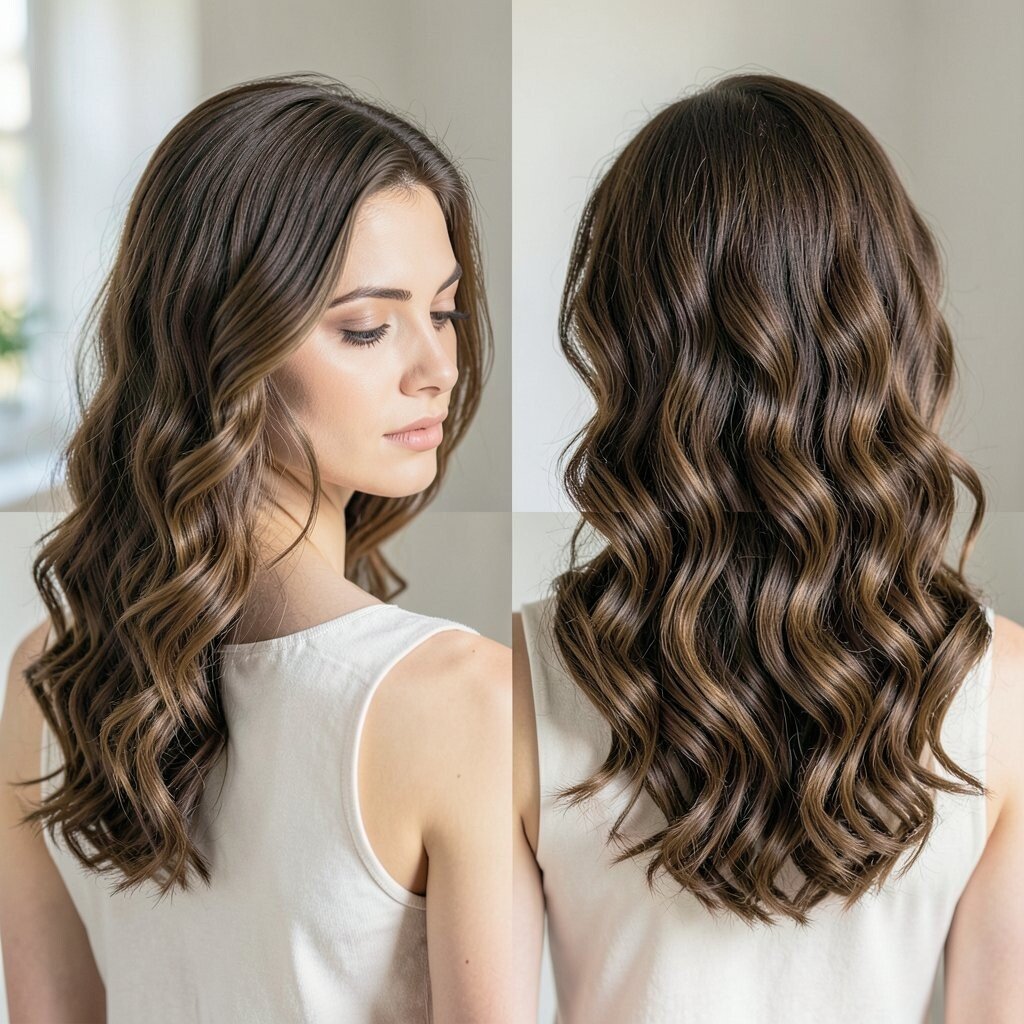
Picture bold, sculpted waves that feel like old-school glam without needing a full vintage event. Even a lighter version of finger-wave styling can look striking and elegant.
Work on damp hair with a strong hold gel, then use your fingers or the back of a comb to guide shallow waves. Set them in place with clips while they dry, then remove carefully to reveal defined curves. The benefit is that the wave pattern holds well and looks intentional, even when you’re heading out quickly.
For a fresh twist, combine vintage waves with a soft, modern blow-dry so the texture looks airy rather than heavy. If your hair is fine, use fewer sections so the waves look smoother and less stringy. This style can be low-cost too since you can rely on gel and clips instead of expensive tools.
7. Half-Up Wavy Top Knot With Texture
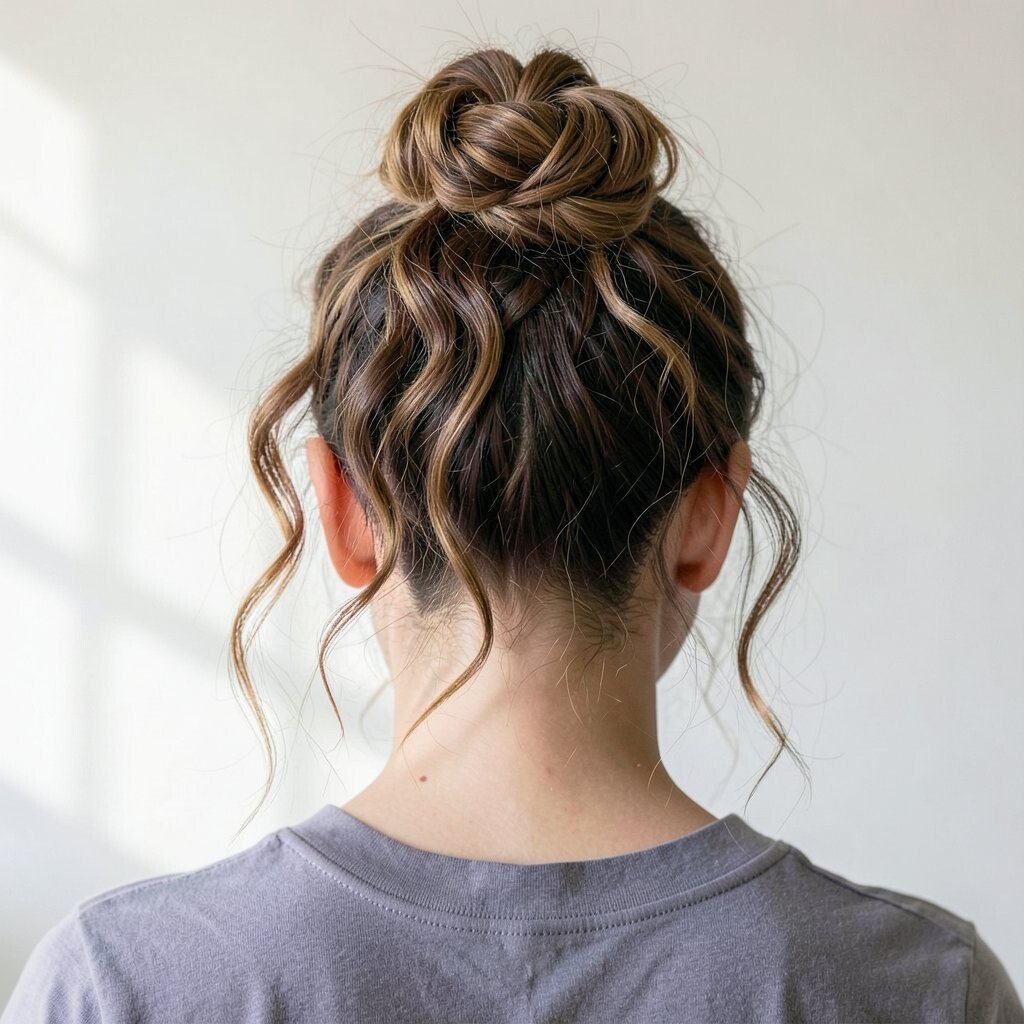
Your waves can look playful and stylish at the same time with a half-up top knot. Loose bends at the bottom add movement, while the top gathers the shape like a cute bow.
Create waves first, then pull the top half back and twist it into a knot or bun. Leave face-framing pieces out so the hairstyle feels soft and not too strict. This gives you benefits like keeping hair off your forehead and making your waves stand out more clearly.
Personalize it by adding a tiny claw clip underneath for extra hold, or by leaving the sides slightly looser for a relaxed feel. For current trends, half-up styles stay popular because they work for brunch, work, and nights out with minimal effort. If you’re watching costs, you can use a scarf tie or hair donut substitute instead of buying new accessories.
8. Sunkissed Wavy Layers With Brushed-Out Texture
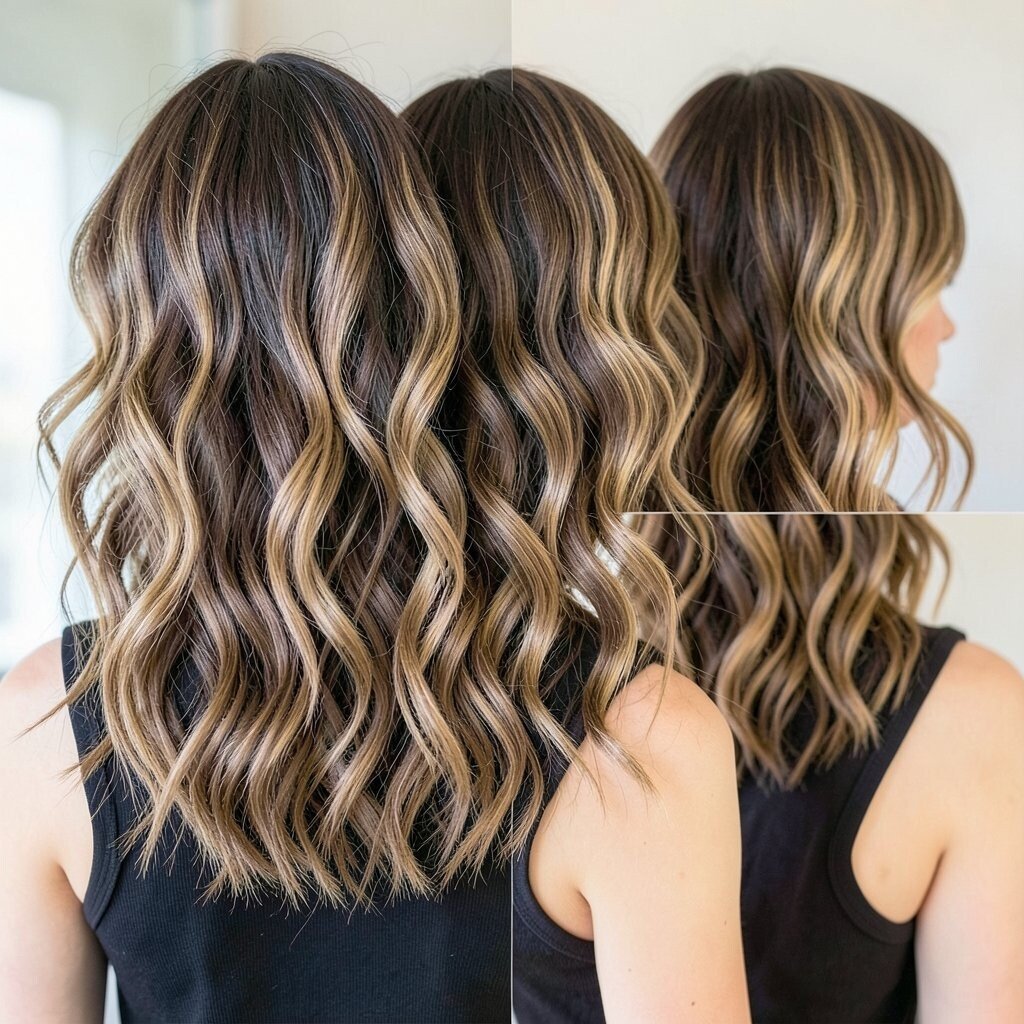
Think of sunlit waves that look gentle, like your hair got a natural highlight breeze. Brushing the waves out creates a soft texture that moves with you instead of staying stiff.
After curling with a smaller barrel, brush through and lightly mist with a flexible hold spray. This keeps the wave pattern visible while making the hair look smoother and more natural. The benefit is a style that looks polished without requiring constant touch-ups.
For personalization, focus the brushing more on the ends for a lighter feel, and keep the top slightly more defined. If you want extra visual dimension, pair this with face-framing highlights or a balayage look. Cost-wise, you can get the brushed-out effect with basic tools and a budget spray, then invest more only if you want better results over time.
9. Wavy Ponytail With a Knotted Crown
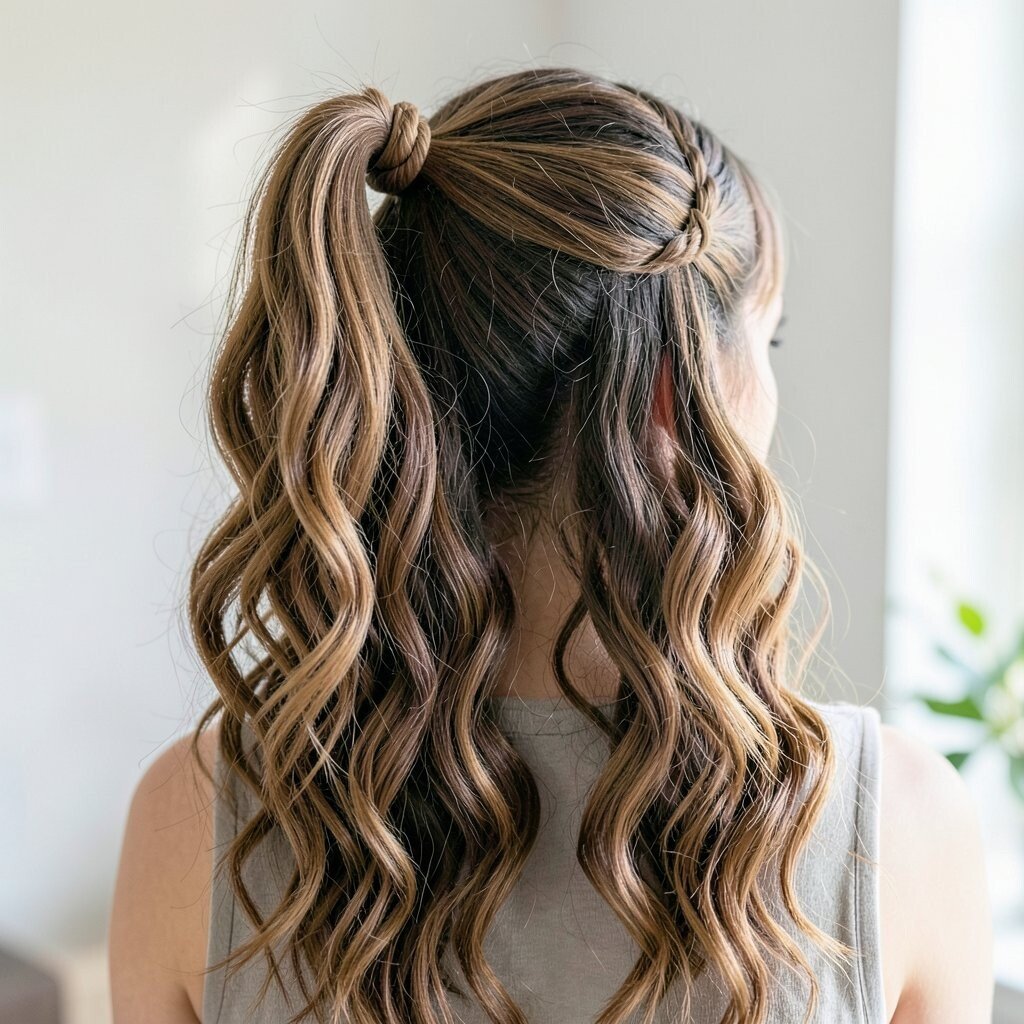
A wavy ponytail can look sporty and elegant when the top is styled with a little knot. The waves make the ponytail feel full, while the knot adds a cute, trendy shape.
Make your ponytail high or mid, then wrap a small section of hair around the tie and secure it with a pin. Before tying, curl the bottom for waves, then smooth the top with a light mist so the knot looks neat. This style helps manage thicker hair and keeps strands out of your face.
Try personalization by leaving a thin wave strand around each ear, which gives a flattering frame. For benefits that matter day to day, it also reduces tangling and keeps your hairstyle looking fresh longer. If you’re cost-conscious, reuse the same curling routine across days and focus your budget on a good heat protectant.
10. Waterfall Braid With Loose Wavy Finishing
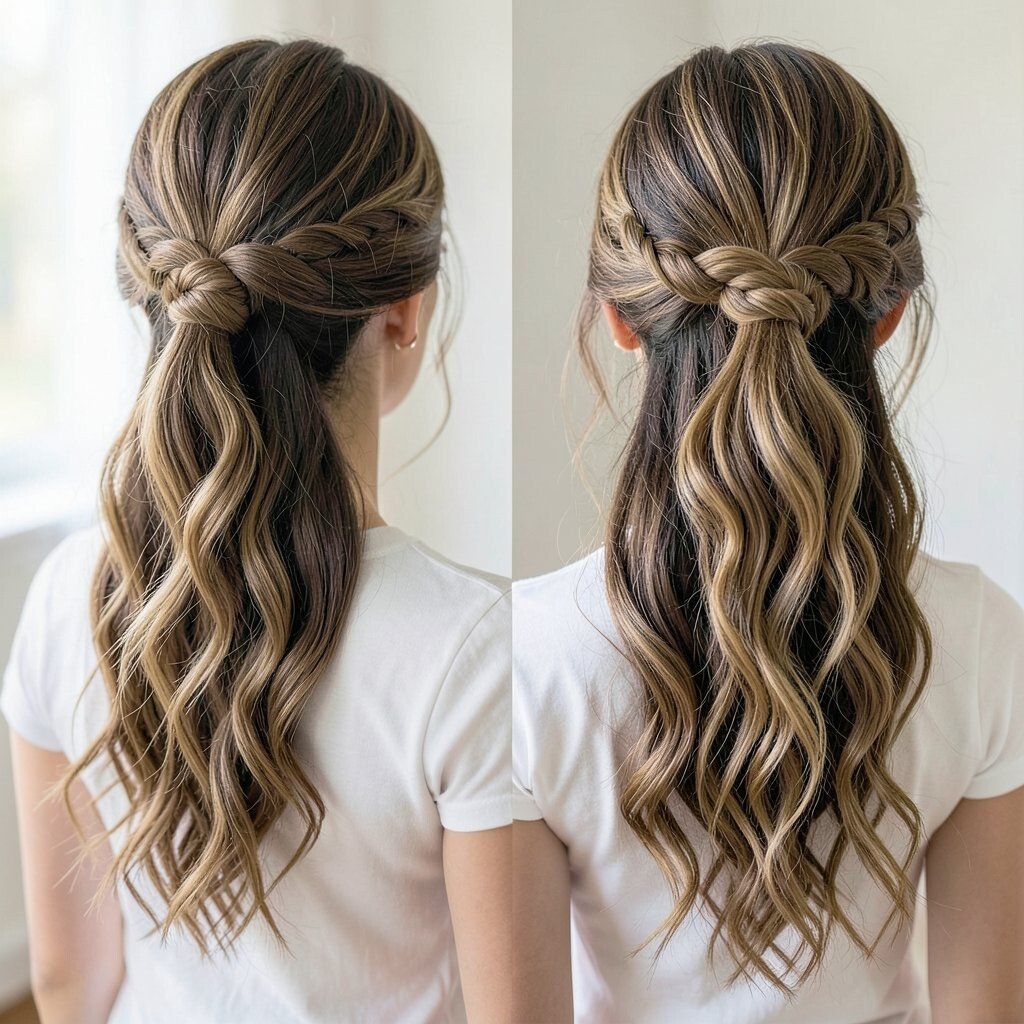
Picture a waterfall braid that looks delicate, then melts into loose waves at the end. It’s romantic, and it adds a special touch even on an ordinary day.
Start the braid on one side, letting a section drop down each time so it forms that waterfall effect. Once the braid reaches the back or lower area, curl the loose hair to blend it into soft waves. The benefit is that the braid acts like a framework, helping the waves look cohesive instead of random.
Personalize the look by adjusting the braid size, choosing smaller sections for a more intricate style. If your hair is shorter, stop the braid earlier and pin the end for a cute half style. For cost considerations, you’ll mainly need hair ties and pins, so you can get a high-impact look without expensive products.
11. Wavy Bubble Braids for Fun Texture
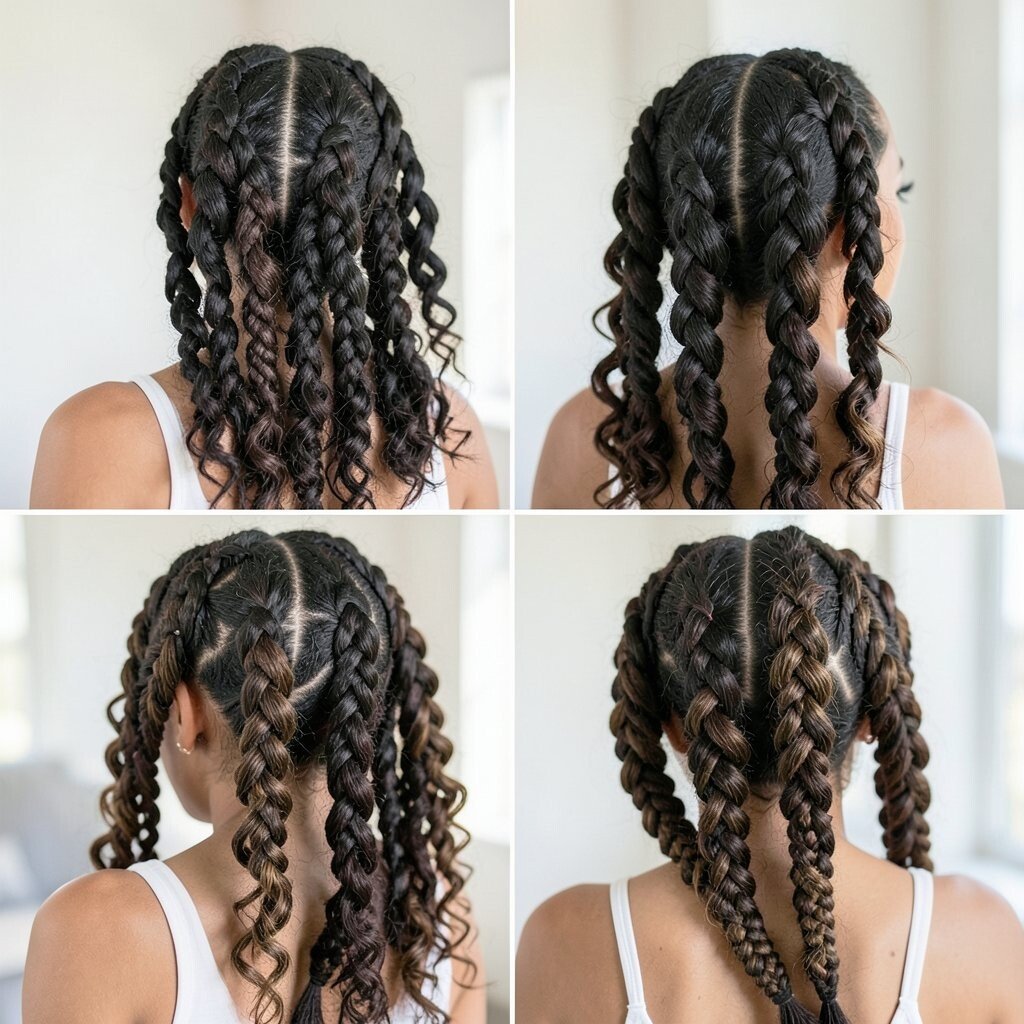
Bubble braids bring a playful texture that still looks pretty and polished. When paired with gentle waves, they feel modern and cute, like a hairstyle that smiles back.
Section the hair into a few parts, then tie small bands along each section to form bubble shapes. Before or after tying, add loose waves so the hair has movement instead of staying flat. This hairstyle helps distribute volume, which is great if you want your hair to look fuller without heavy styling.
For personalization, use different band sizes to create a unique pattern, or keep the bubbles larger for a bold look. If you want trends that feel current, bubble braids are popular because they’re Instagram-friendly and easy to style for events. Cost-wise, hair bands are inexpensive, and you can repeat the same method as often as you want.
12. Soft Wavy Bob With Tucked Ends
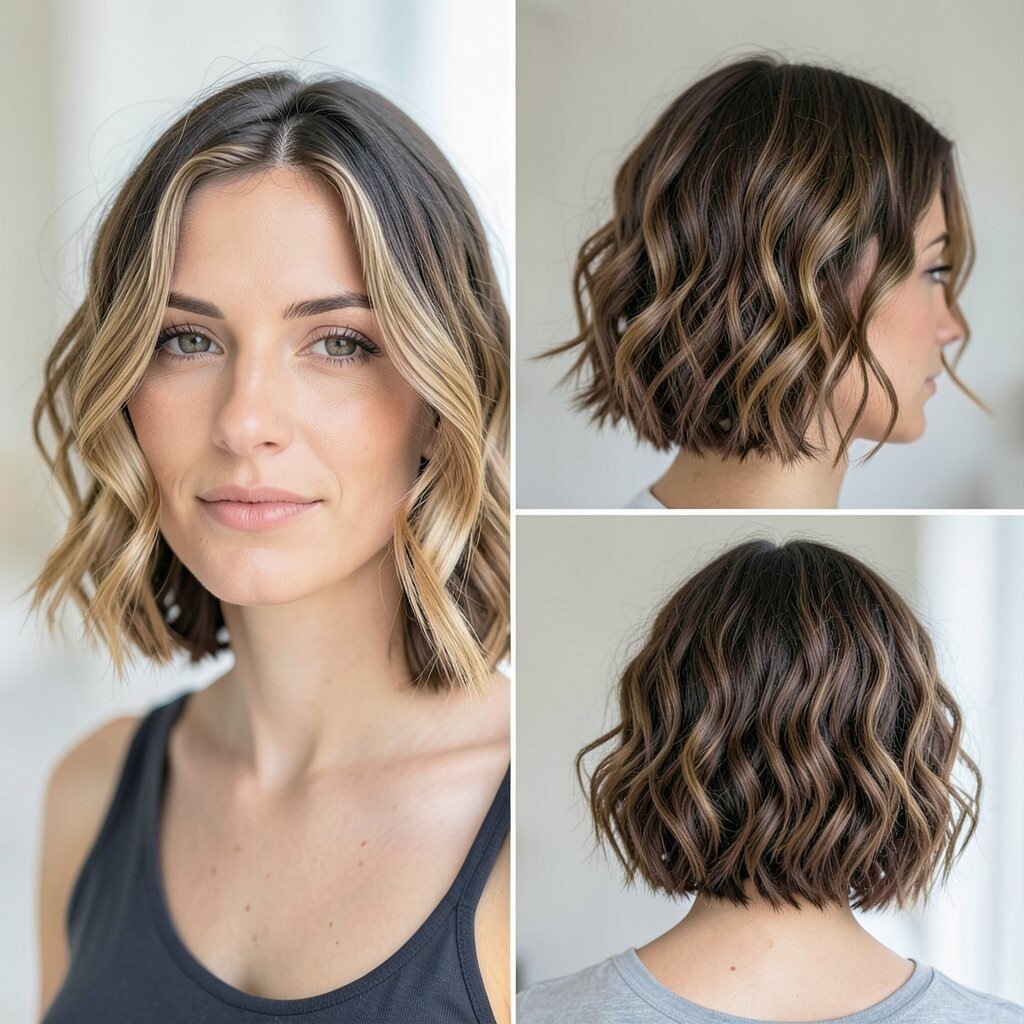
A soft wavy bob looks clean at the edges while still having dreamy waves underneath. When the ends are slightly tucked, it gives a sleek finish that feels effortless.
Style with a round brush at the roots for lift, then create gentle waves using a low heat setting. Tuck the ends inward with the brush or by lightly rolling them under, then finish with a light shine spray. The benefit is a shape that holds up for long days because the tuck gives structure.
Personalize it by keeping the waves more subtle if you want a natural look, or add a bit more bend for a rounder silhouette. If your hair is fine, use a volumizing mousse to avoid limp waves, and if it’s thick, focus on smoothing the surface first. For cost considerations, a good brush and a heat protectant can do most of the work without needing extra styling tools.